pip install "marimapper @ git+http://github.com/themariday/marimapper"
This will install the Marimapper library along with all the scripts needed below.
You can run the scripts anywhere by just typing them into a console, on windows append .exe to the script name.
You can append --help to any command to show you all argument options.
Run marimapper_check_camera to ensure your camera is compatible with MariMapper, or check the list below:
Working Cameras
- HP 4310 (settings may not revert)
- Logitech C920
- Dell Lattitude 5521 built-in
- HP Envy x360 built-in
- If your camera works, please drop me a line, so I can add it to the list!
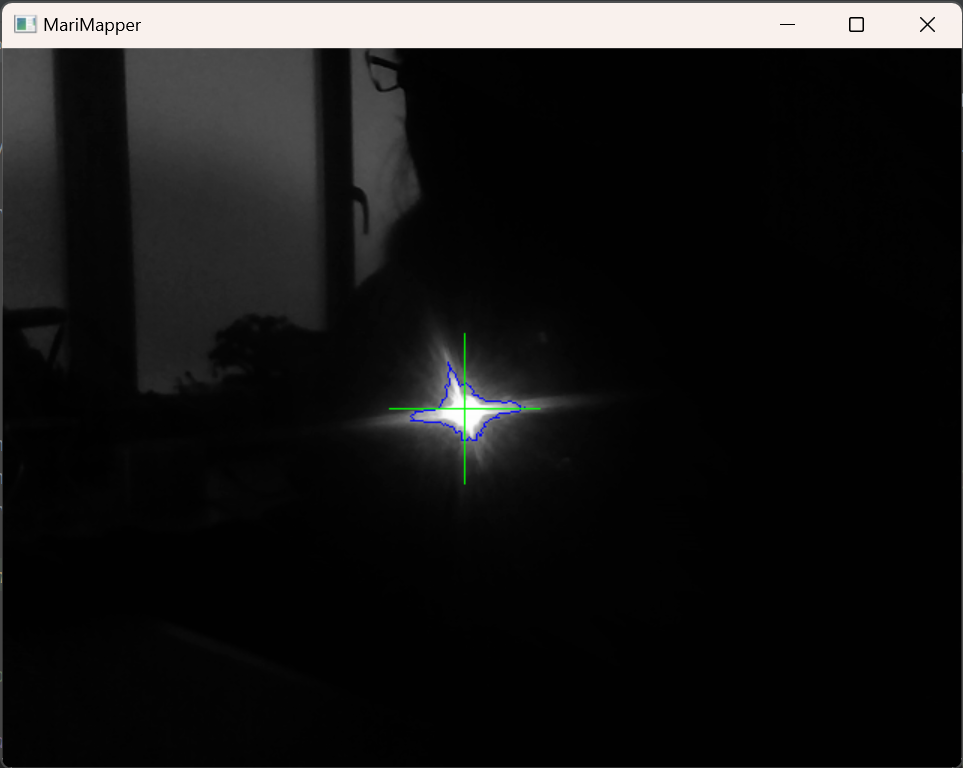
Test LED identification by turning down the lights and holding a torch or led up to the camera.
This should start with few warnings, no errors and produce a very dark image with a single crosshair on centered on your LED.
Tip
If your camera doesn't support exposure adjustment, or the image is still too bright, try dimming the lights and playing around with the --exposure and --threshold arguments
For the Marimapper to communicate with your leds, it requires a backend.
The following backends are built-in:
Fadecandy
To use the fadecandy backend, please ensure that you are running the fadecandy server A fork of the fadecandy repo can be found here
WLED
More info can be found here
FCMega
This is a custom driver I've written for the Teensy 4.1 to drive up to 9600 leds. Source code can be found here
PixelBlaze
Using Pixelblaze as a backend requires you to upload the marimapper.epe pattern to your pixelblaze before running Marimapper.
To install any of the above backends, run:
pip install "marimapper[backend_name] @ git+http://github.com/themariday/marimapper"
If your LED backend isn't supported, you need to write your own.
Open a new python file called my_backend.py and copy the below stub into it.
class Backend:

    def __init__(self):
        # connect to some device here!

    def get_led_count(self) -> int:
        # return the number of leds your system can control here

    def set_led(self, led_index: int, on: bool) -> None:
        # Write your code for controlling your LEDs here
        # It should turn on or off the led at the led_index depending on the "on" variable
        # For example:
        # if on:
        #     some_led_library.set_led(led_index, (255, 255, 255))
        # else:
        #     some_led_library.set_led(led_index, (0, 0, 0))
Fill out the blanks and check it by running marimapper_check_backend --backend my_backend.py
Step 3: It's time to thunderize!
Run marimapper my_scan --backend fadecandy
Change my_scan to the directory you want to save your scan
and fadecandy to whatever backend you're using
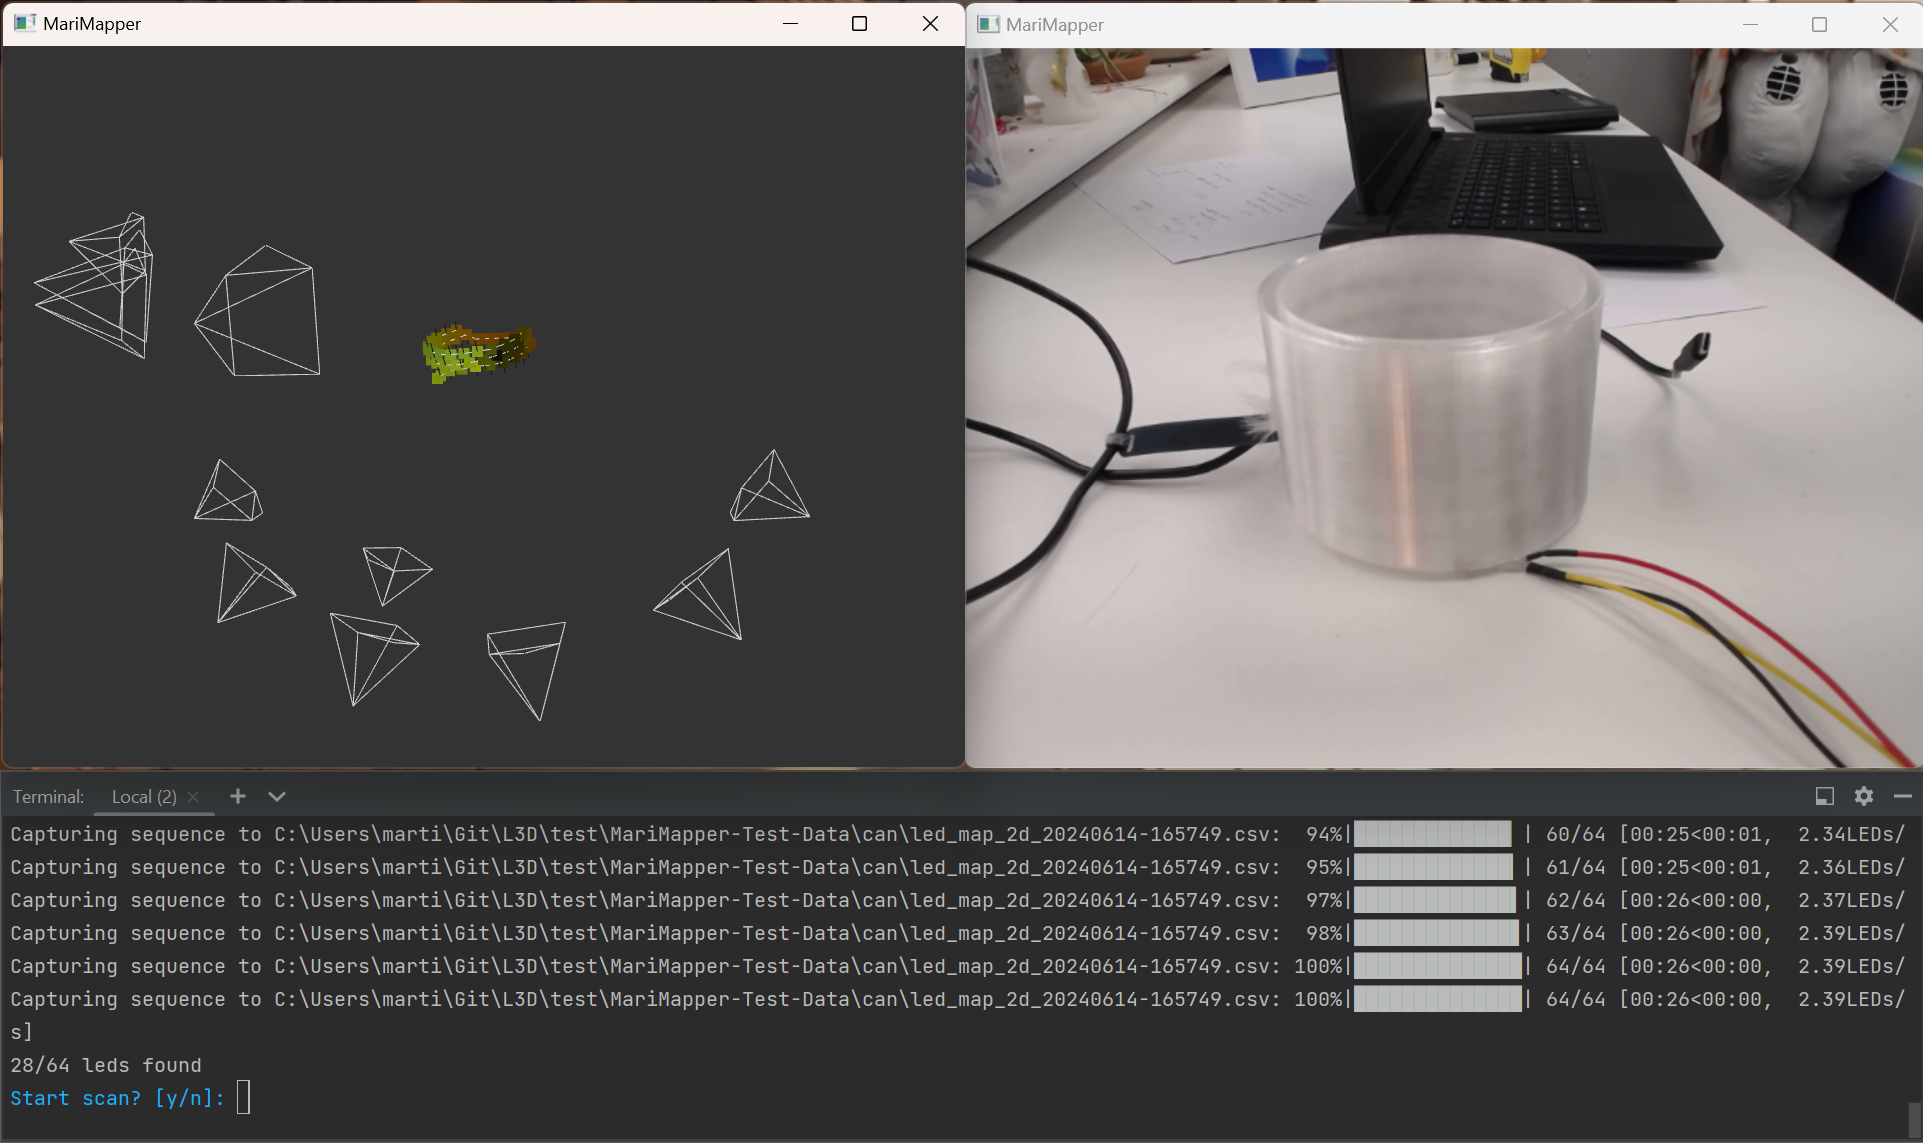
Set up your LEDs so most of them are in view and when you're ready, type y when prompted with Start scan? [y/n]
This will turn each LED on and off in turn, do not move the camera or leds during capture!
If you just want a 2D map, this is where you can stop!
Rotate your leds or move your webcam to a new position
Tip
As long as some of your leds are mostly in view, you can move your webcam to wherever you like! Try and get at least 3 views between 6° - 20° apart
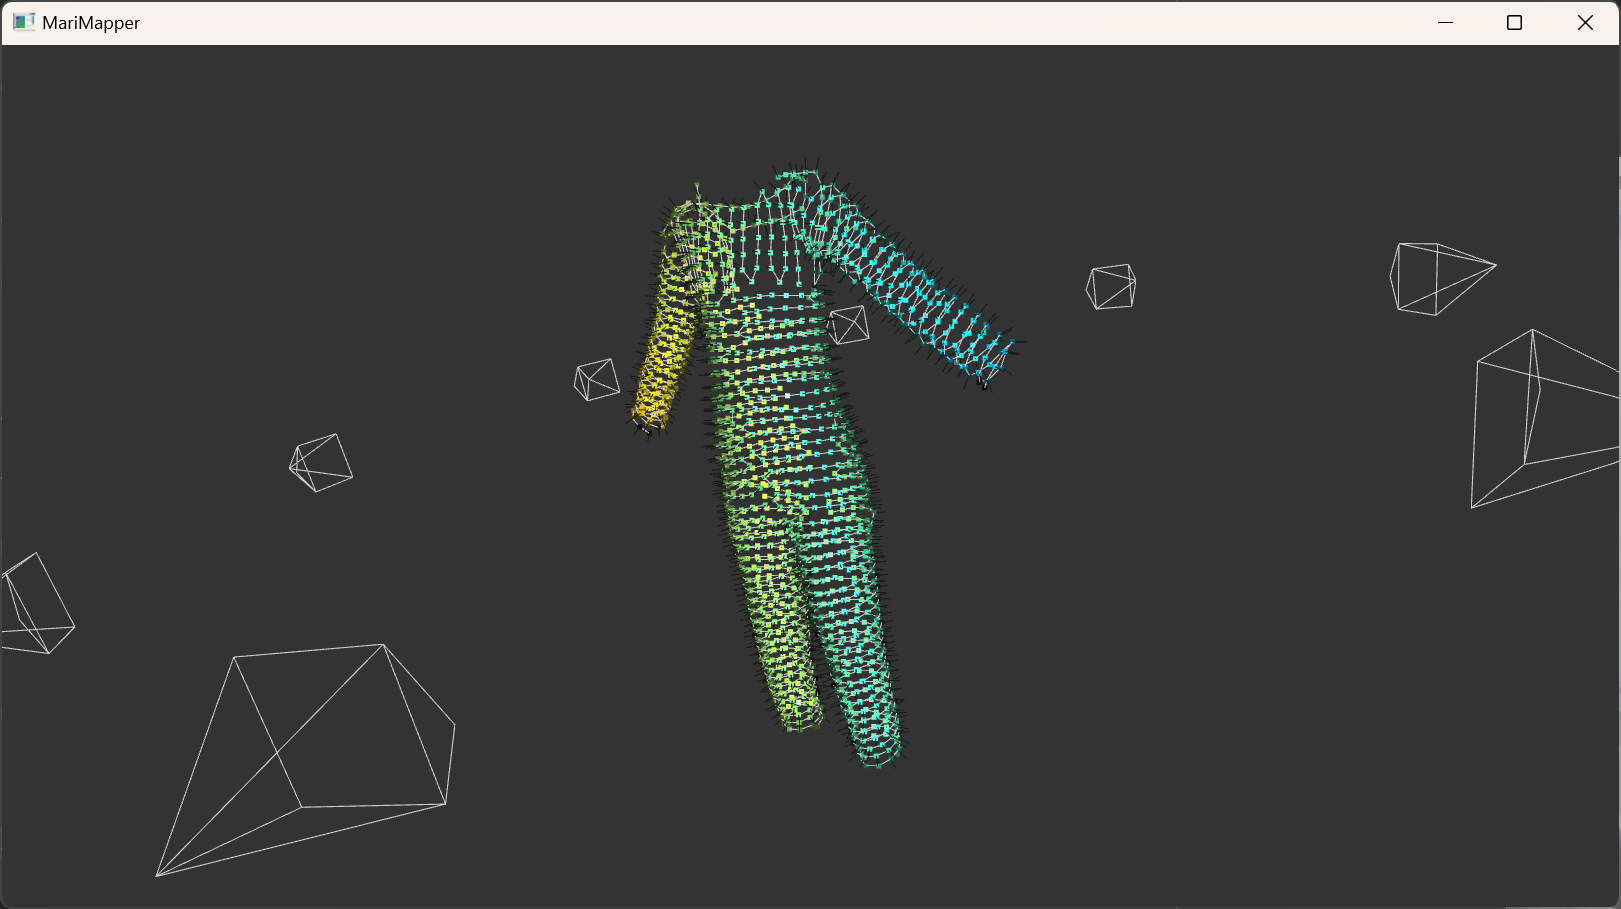
Once you have at least 2 2d maps, a new window will appear showing the reconstructed 3D positions of your LEDs.
If it doesn't look quite right, add some more scans!
Here is an example reconstruction of a test tube of LEDs I have
How to move the model around
- Click and drag to rotate the model around.
- Hold shift to roll the camera
- Use the scroll wheel to zoom in / out
- Use the
nkey to hide / show normals - Use the
+/-keys to increase / decrease point sizes - Use
1,2&3keys to change colour scheme
There's also a tool to turn your 3D scan into a 3D model, run it with marimapper_remesh my_3d_map.csv
You can visualise 2D scans with marimapper_view_2d_scan led_map_2d_0.csv
If you want to develop with MariMapper, you can use
pip install "marimapper[develop] @ git+http://github.com/themariday/marimapper"
to grab all the tools you need. Flake8, Black, etc.
When installing Marimapper, it will adjust your Python packages to the correct versions. If you don't want this, then run it inside a venv. If you're worried about library pollution then I assume you know how to use a venv.
I would really love to hear what you think and if you have any bugs or improvements, please raise them here or drop me a line on Telegram.
You can also raise issues on this repo's issues page
If you implement a backend that you think others might use, please raise a pull request or just drop me a message on Telegram!
The licensing on this is GPLv3.
The TLDR is you can do anything you like with this as long as it's open source


