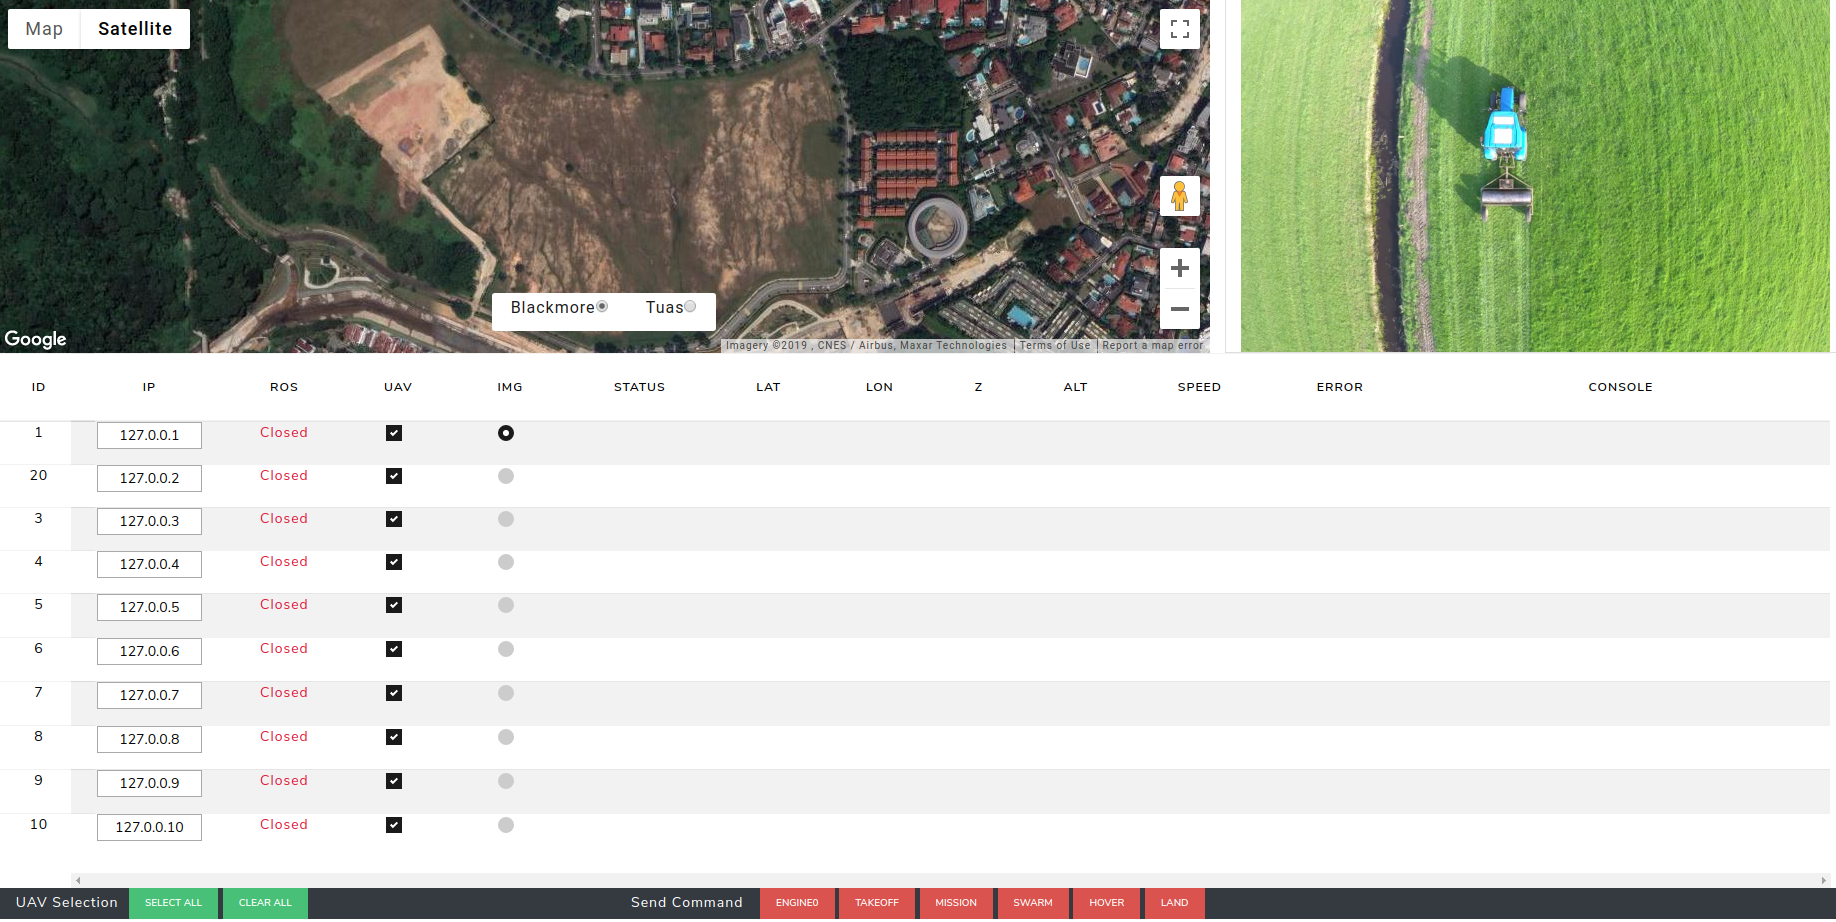
This package is for web-based UI shown as the image. It can connect to multiple drones by their IP address and show status of each drone, such as positon, image, healthy status etc. User can sent commands (takeoff, mission, swarm, hover, landing) to drone directly from the UI. Moreover, a Google map is inserted to show realtime location and trajectory of the drones.
You will have to deploy the web page to access it by IP address.
- nginx
$ sudo apt-get update
$ sudo apt-get install nginx
- Make sure the full path of your UI folder have 775 permission
$ chmod 775 folder_name Usually you will have to give SD card 775 permission if you put the UI inside it. - Config nginx
$ sudo gedit /etc/nginx/sites-enabled/default find the line: $ root /var/www/html; and change the value /var/www/html to the path to your UI folder. For example: root /media/nvidia/SD/catkin_ws/src/kerrigan_ui; - Restart Nginx:
$ sudo systemctl restart nginx
Try "Open Incognito Window" in your web browser and put 127.0.0.1, you will be able to see the UI if you set everything correctly. It can be accessed by IP adress of your PC from any other devices under the same network as well.
-
Google Map Change the "key=AIzaSyBZosUgHCrvo9AvwD0VMluJlghEn113jm0" in index.html file to your own API key if you want to use Google Map.
-
UAV id and ip address Change it from the kerriganlibjs/uav.json file.
-
others: Ping Yu(yu.nico.zhou@gmail.com)!
You are good to stop here if you want to use the UI only. Remember to check out to "kerrigan" branch if you used it for the project.
-
Bootstrap 4, Font awesome 4, Font Awesome 5 Free & Pro snippets.
This is the framework itself with couple of additional features which contain ready-to-use templates and other stuff useful while developing in bootstrap.
-
Live Server
To see your web UI changes in realtime
-
Prettier Code formatter
To keep your source code clean
-
vscode-icons
To make your workspace look good
- web_video_server
$ sudo apt-get install ros-kinetic-web-video-server It launches the server for streaming ROS image messages as video through the web. - rosbridge_server
$ sudo apt-get install ros-kinetic-rosbridge-suite It launches the web sockets to allow web apps to publish or subscribe ROS messages. - tf2-web-republisher
$ sudo apt-get install ros-kinetic-tf2-web-republisher
<!-- -->
<launch>
  <node pkg="web_video_server" type="web_video_server" name="web_video_server"/>
  <include file="$(find rosbridge_server)/launch/rosbridge_websocket.launch" />
  <node pkg="tf2_web_republisher" type="tf2_web_republisher" name="tf2_web_republisher" />
</launch>
- Run UI launch file on the onboard PC
$ roslaunch your_packages ui.launch
(e.g. $ roslaunch ddrone_task_manager ddrone_ui.launch)
-
Access UI web page on local ground station From Vscode
Open your workspace with Vscode; Right click index.html in your Vscode; Click "Open with Live Server" and then the web will show up in your browser
