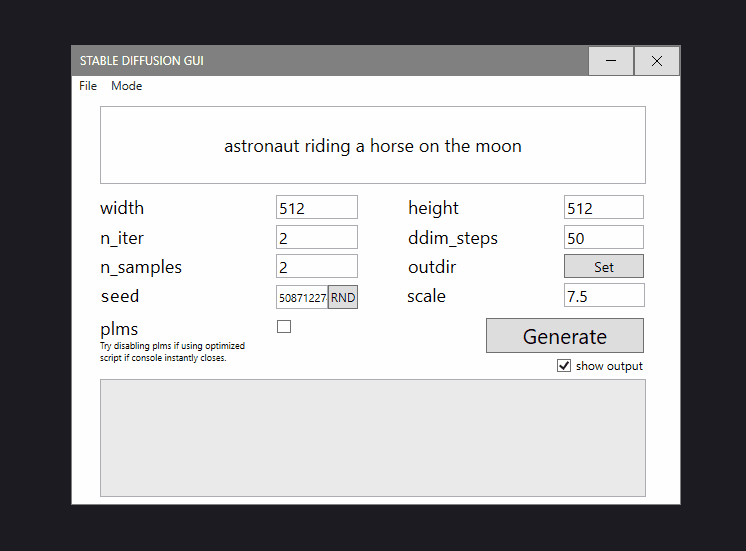
Windows UI for Stable Diffusion
- StableDiffusion and model weights locally (follow steps on official github)
- Anaconda installation or miniconda/conda - needed to activate conda environment using Anaconda prompt. Please, make sure you can run "python txt2img.py --help" from the Anaconda prompt and that you have ldm environment available (following the official guide in previous point).
- When using optimized script, put it into /scripts/ folder of archive downloaded from official Stable Diffusion repository.
- It is possible that optimized script does not support PLMS, disable it if Anaconda prompt closes immediately.
- img2img is now supported, but is an experimental feature.
- Download the pre-release package from github releases
- Open StableDiffusionGUI.exe
- (install NET Framework for desktop applications if prompted)
- Open File->Preferences and assign Anaconda+Txt2img.py file (Anaconda installation should point to "Anaconda" directory which contains bin,DLLs,condabin etc; txt2img file should be assigned from stable-diffusion-main/scripts)
- Run some prompts, tweak the values
To add new funcionalities or edit existing, only thing you need is Visual Studio with WPF (C#). Open the solution and everything should work out of the box. Nuget packages used: