
PackIt: A Virtual Environment for Geometric Planning
Ankit Goyal, Jia Deng
International Conference on Machine Learning (ICML), 2020
@inproceedings{goyal2020packit,
  title={PackIt: A Virtual Environment for Geometric Planning},
  author={Goyal, Ankit and Deng, Jia},
  booktitle={International Conference on Machine Learning},
  year={2020},
}
For reproducing the results of the paper and using our generated dataset, use the main repository. This repository contains code for generating more data. We recommend using the main repository first and only use this one if more data is required.
Getting Started
First download/clone the repository. We would refer to the directory containing the code as <packit_dir>.
git clone git@github.com:princeton-vl/PackIt_Extra.git
Requirements
The PackIt environment is build using Unity ML-agents version 0.4.0. We provide standlone Unity builds for Linux x86_64 platform. For creating the builds, we use Unity version 2017.4.3.
Download Data
Make sure you are in <packit_dir>. download.sh script downloads all the data, unzips them and, places them at correct locations. Note that symbolic links are created between the <packit_dir>/unity-build/StreamingAssets folder and appropriate locations inside the unity data directory. This is necessary so that the data is accessible from the build unity game.
chmod +x download.sh
./download.sh
Code Organization
-
<packit_dir>/unity-assets: Unity levels and C# scripts used for making unity builds from scratch. -
<packit_dir>/unity-build: Prebuild unity games and data for generating new packs.
Evolving new packs
- Make sure you have downloded everything before this step.
- To generate a new pack, use the
<packit_dir>/unity-build/generate.shscript. To generate 5 new packs for the training data firstcd unity-buildand the use the command./generate.sh --dataset tr --num_packs 5 --run 201. This would generate packs at<packit_dir>/unity-build/StreamingAssets/pack_tr/201_tr. For faster loading of data, we precompute some voxel features which would be generated in<packit_dir>/unity-build/StreamingAssets/pack_tr_precompute_<unity/python>/201_tr_<0/1/2/3/4>.
Code for making you own unity build
We provide standlone unity build. In case you want to create your own unity builds follow the following steps. We strongly recommend familiarizing oneself with Unity first. Follow the steps below before making any unity build.
-
Download and install Unity 3D. We recommend installing version 2017.4.3. Make sure you select the required
Build Supportwhile installing Unity. For example, selectLinux Build Supportif you want to make builds for Linux. -
Place the contents of
<packit_dir>/unity-assetsinside theAssetsfolder. TheAssetsfolder should look like the following: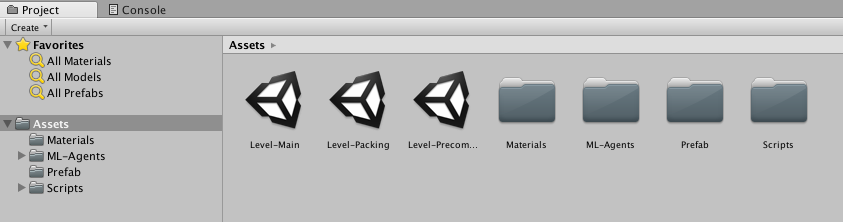
-
To set up ML-Agents inside Unity, go to Edit > Project Settings > Player. In (PC, Mac and Linux Standalone, iOS or Android), go to the Other Settings section. Then, select Scripting Runtime Version to Experimental (.NET 4.6 Equivalent) option.
-
(Optional) You can place the
<packit_dir>/unity-build/StreamingAssetsfolder insideAssets. This would allow running the environment inside the editor. -
Now follow the steps of the particular unity build you want to make:

-
Packing
This unity build, along with
Precomputeis used for generating packs. After runningdownload.sh, this build is placed at<packit_dir>/unity-build/packing<_Data/.x86_64>. Following are the steps to make this build:-
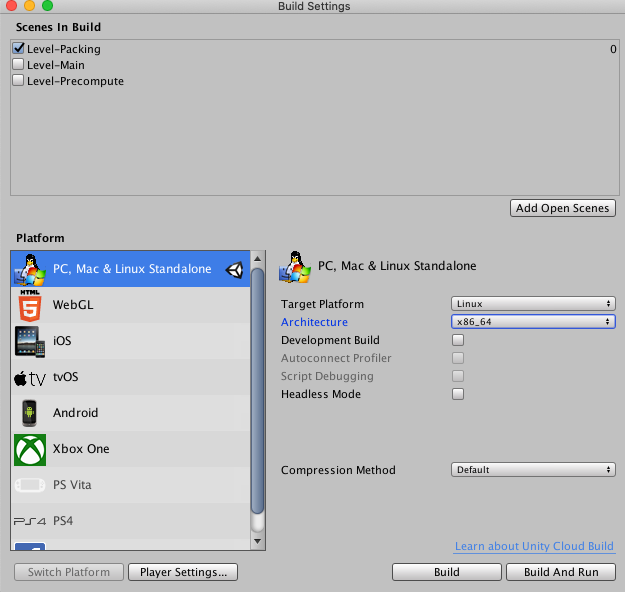
Go to File > Build Settings.
-
Select only the
Level-Packingin the Scenes In Build option. You might have to first openLevel-Packingand then clickAdd Open Scenes. -
Select the Target Platform and press Build. A sample image can be found below.
-
In case you didn't place the
<packit_dir>/unity-build/StreamingAssetsfolder insideAssets, you would have to create a symbolic link as done here for a Linux Build.
-
-
Precompute
This unity build, along with
Packingis used for generating packs. After runningdownload.sh, this build is placed at<packit_dir>/unity-build/precompute<_Data/.x86_64>. Following are the steps to make this build:- Go to File > Build Settings.
- Select only the Level-Precompute in the Scenes In Build option. You might have to first open Level-Precompute and then click Add Open Scenes.
- Select the Target Platform and press Build.
- In case you didn't place the
<packit_dir>/unity-build/StreamingAssetsfolder insideAssets, you would have to create a symbolic link as done here for a Linux Build.
-
PackIt Env
This unity build is used for the packit environment in the main repository. After running
download.shin the main repository, this build is placed at<packit_dir>/unity/envs/packit_<_Data/.x86_64>. Following are the steps to make this build:-
Update all the arguments in
Assets/Scripts/PackingEnv/PackingAgentfor unity agent. -
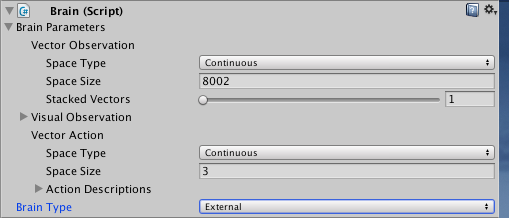
Open Level-Main and click Academy > Brain.
-
In the Brain Type option, select External. Save the Level-Main scene.
-
Go to File > Build Settings.
-
Select only the Level-Main in the Scenes In Build option. You might have to first open Level-Main and then click Add Open Scenes.
-
Select the Target Platform and press Build.
-
In case you didn't place the
<packit_dir>/unity-build/StreamingAssetsfolder insideAssets, you would have to create a symbolic link as done here for a Linux Build.
-
-
PackIt Viz Env
This unity build is used for the packit environment in the main repository. After running
download.shin the main repository, this build is placed at<packit_dir>/unity/envs/packit_viz<_Data/.x86_64/_mac.app>. Following are the steps to make this build:-
Update all the arguments in
Assets/Scripts/PackingEnv/PackingAgentfor visualizer. -
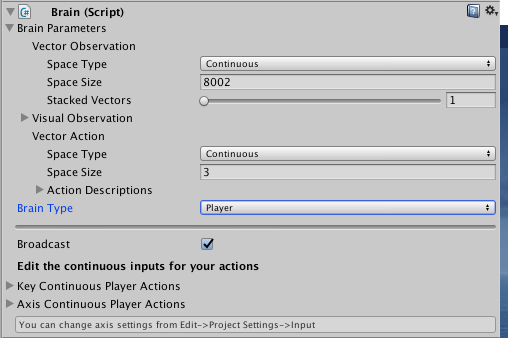
Open Level-Main and click Academy > Brain.
-
In the Brain Type option, select Player. Save the Level-Main scene.
-
(Optional) In case you moved the
StreamingAssetsfolder insiderAssets, you can check the visualizer inside the Unity Editor. On clicking Play, the game would look as follows. Pressato execute the next action.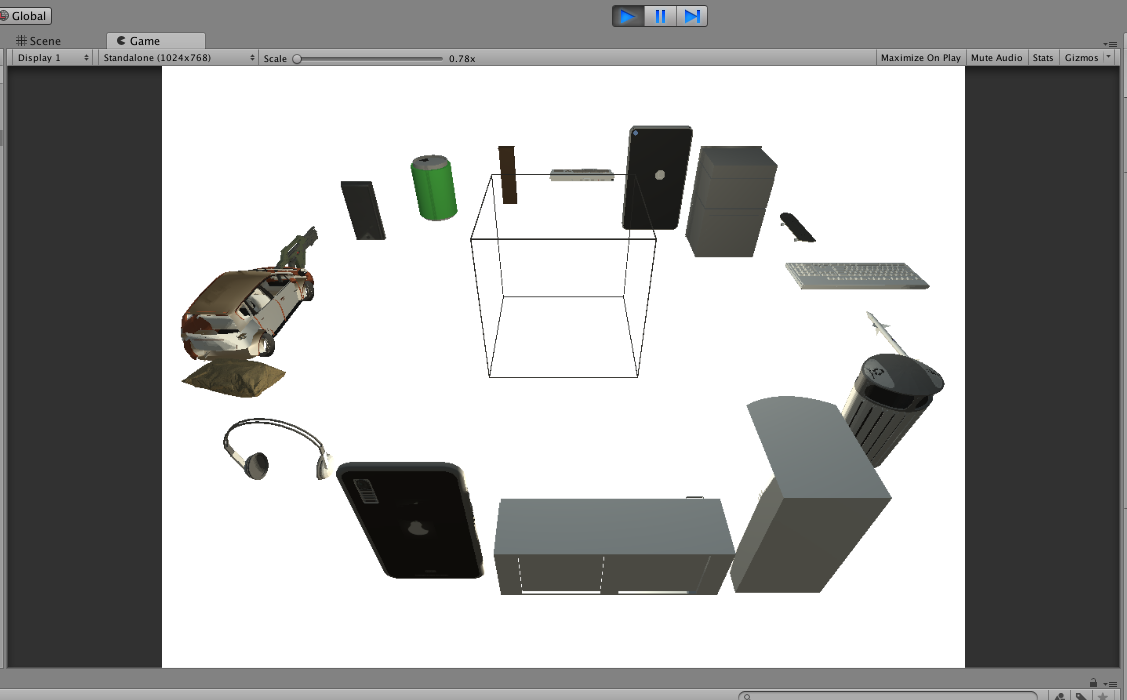
-
Go to File > Build Settings.
-
Select only the Level-Main in the Scenes In Build option. You might have to first open Level-Main and then click Add Open Scenes.
-
Select the Target Platform and press Build.
-
In case you didn't place the
<packit_dir>/unity-build/StreamingAssetsfolder insideAssets, you would have to create a symbolic link as done here for a Linux Build.
-


