This is a brief guide to checking out, building, and debugging FreeCAD on macOS tested on Apple Silicon using Visual Studio Code and Conda to provide a consistent development environment.
The video below is somewhat out of date as it:
- builds netgen manually, which is not necessary
- does not call
conda devenv ...to set up the environment's packages
-
Install mambaforge
-
Linux
curl -L -O "https://github.com/conda-forge/miniforge/releases/latest/download/Mambaforge-$(uname)-$(uname -m).sh" bash Mambaforge-$(uname)-$(uname -m).sh -
macOS
  brew install mambaforge
  conda init "$(basename "${SHELL}")"
  source ~/.zshrc
-
-
Clone FreeCAD
git clone https://github.com/FreeCAD/FreeCAD.git -
Install conda environment for FreeCAD
cd FreeCAD git submodule update --init conda env create -p .conda/freecad -f conda/conda-env.yaml conda config --add envs_dirs $CONDA_PREFIX/envs conda config --add envs_dirs $(pwd)/.conda conda config --set env_prompt '({name})' conda activate freecad conda devenv -f conda/environment.devenv.yml -
Open FreeCAD in VS Code
 cd ..
 code FreeCAD
First we need to select our toolchain. Use the CMake Kit button in the status bar or run the "CMake: Select a Kit" command to choose the "FreeCAD Clang" toolkit.
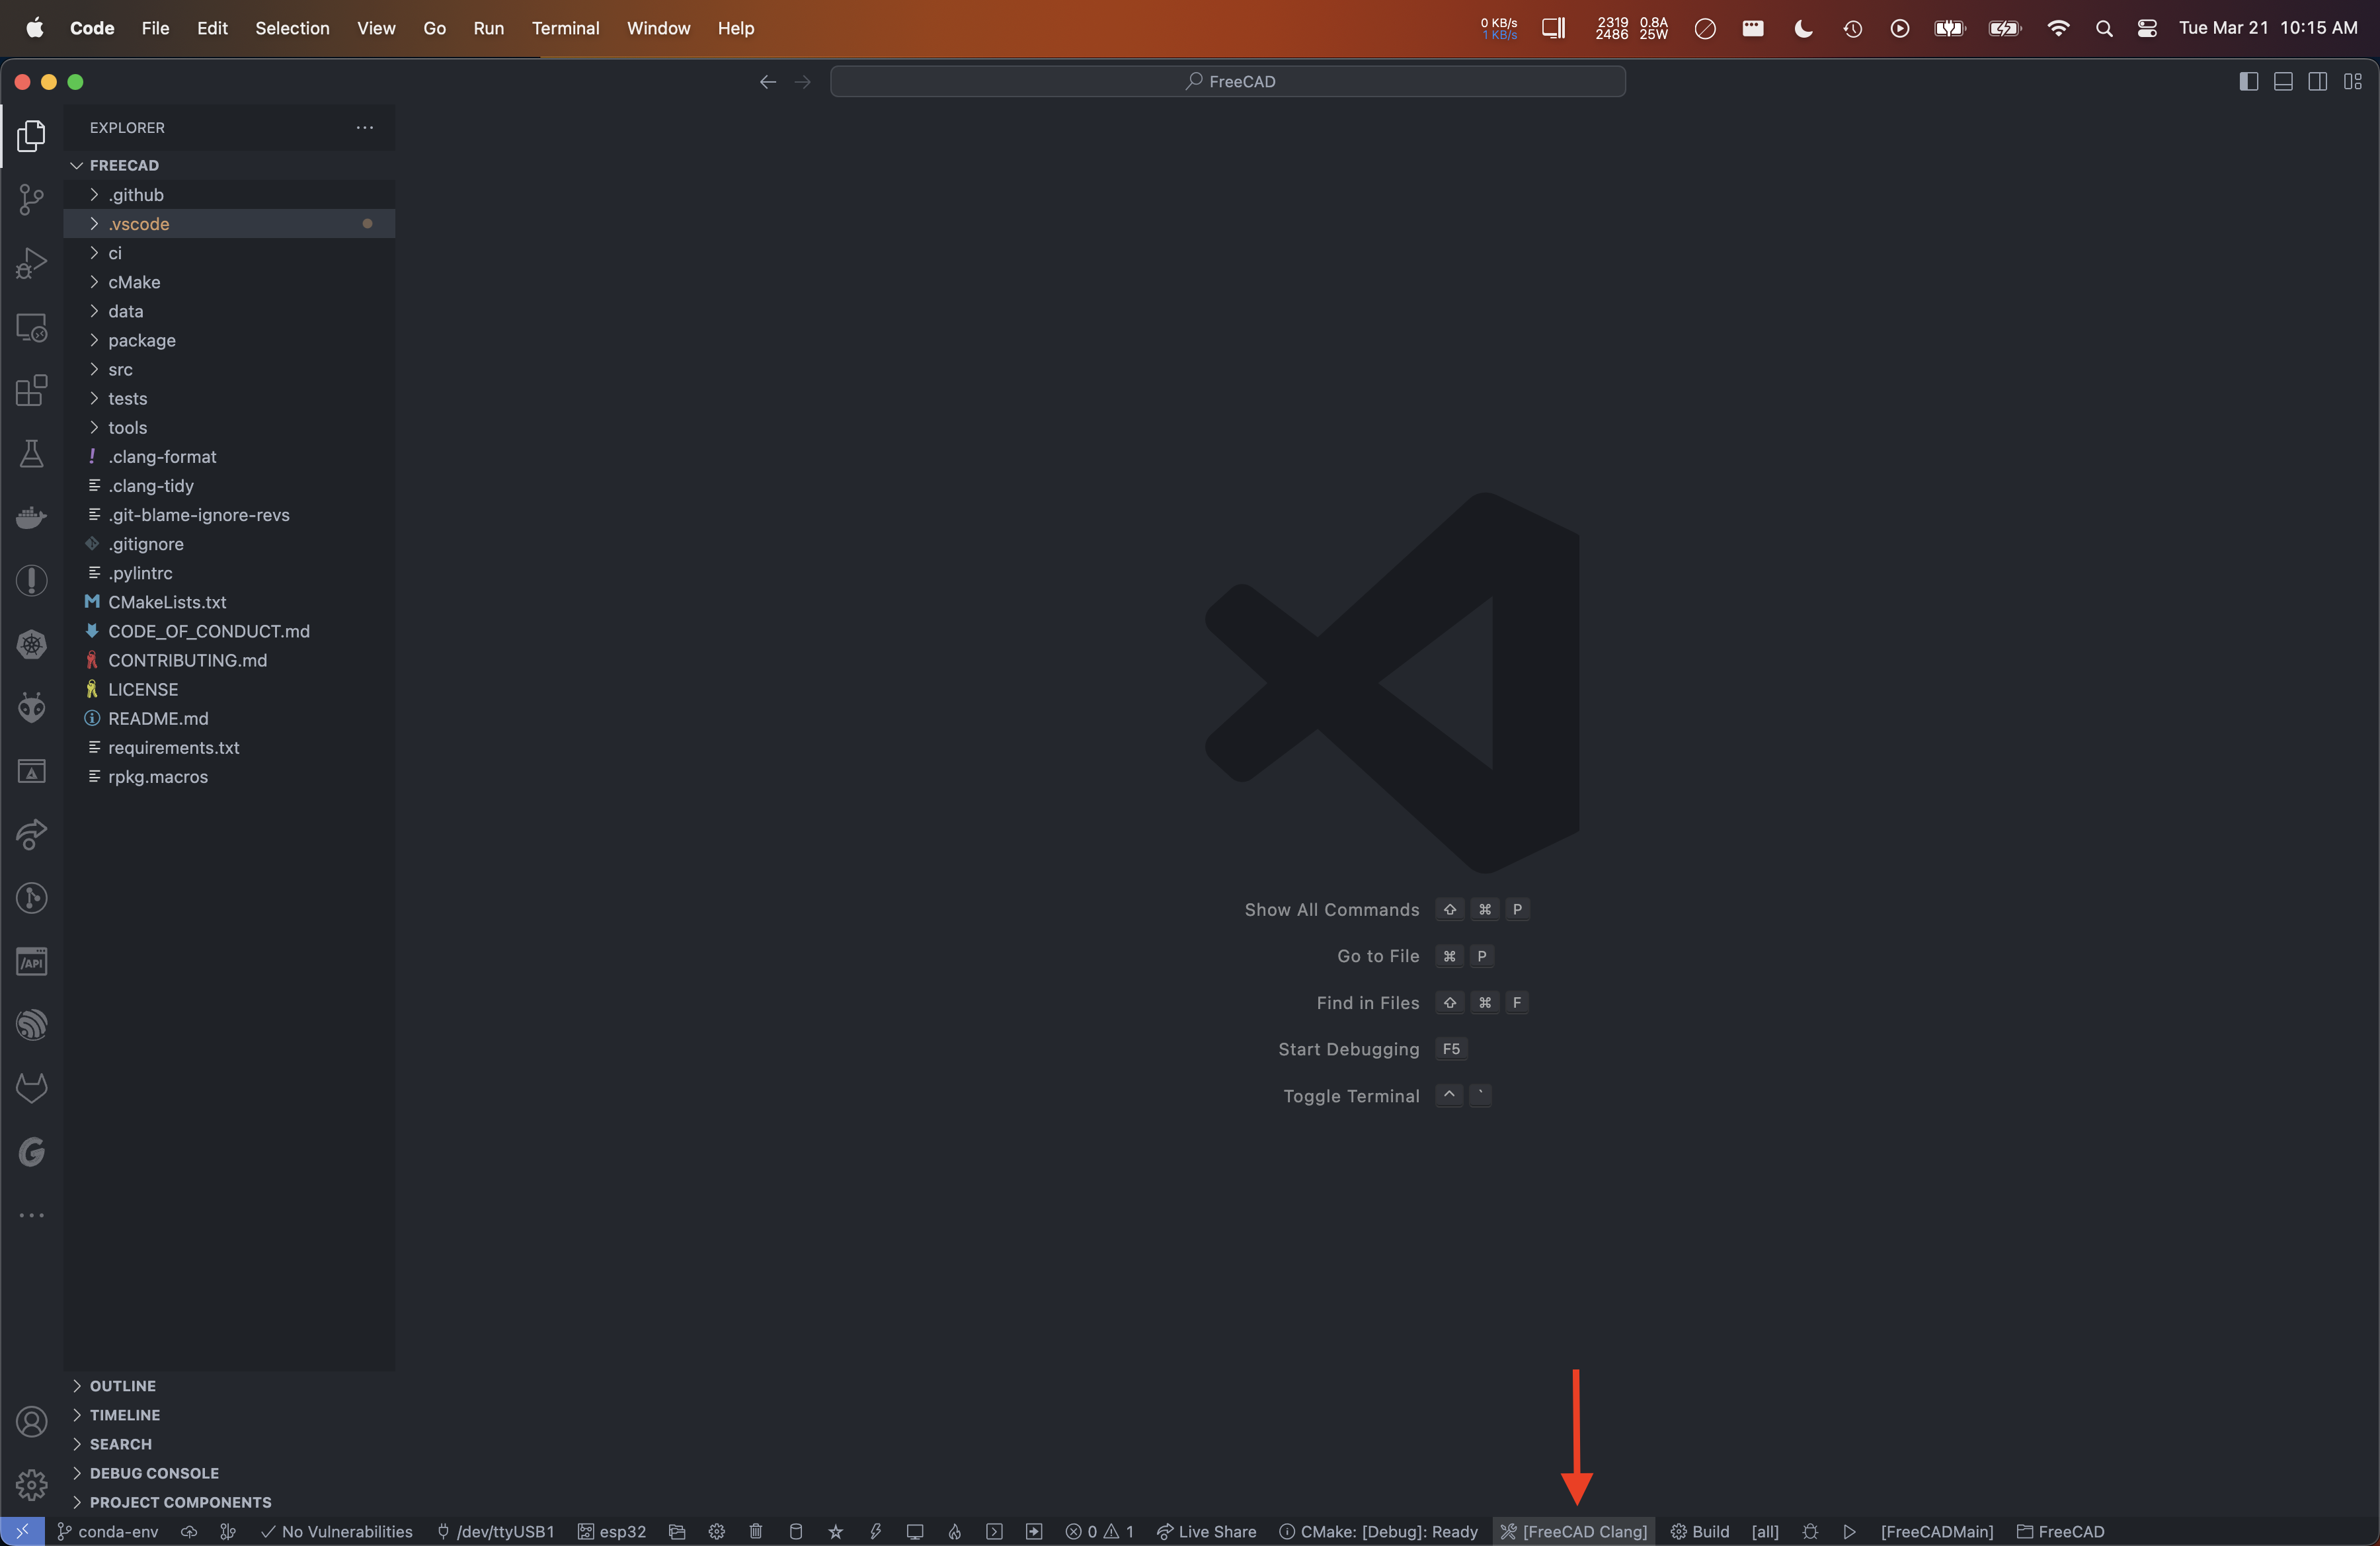
Next we will select the build variant. Use the CMake Variant button in the status bar or run the "CMake: Select Variant" command to choose "Debug".
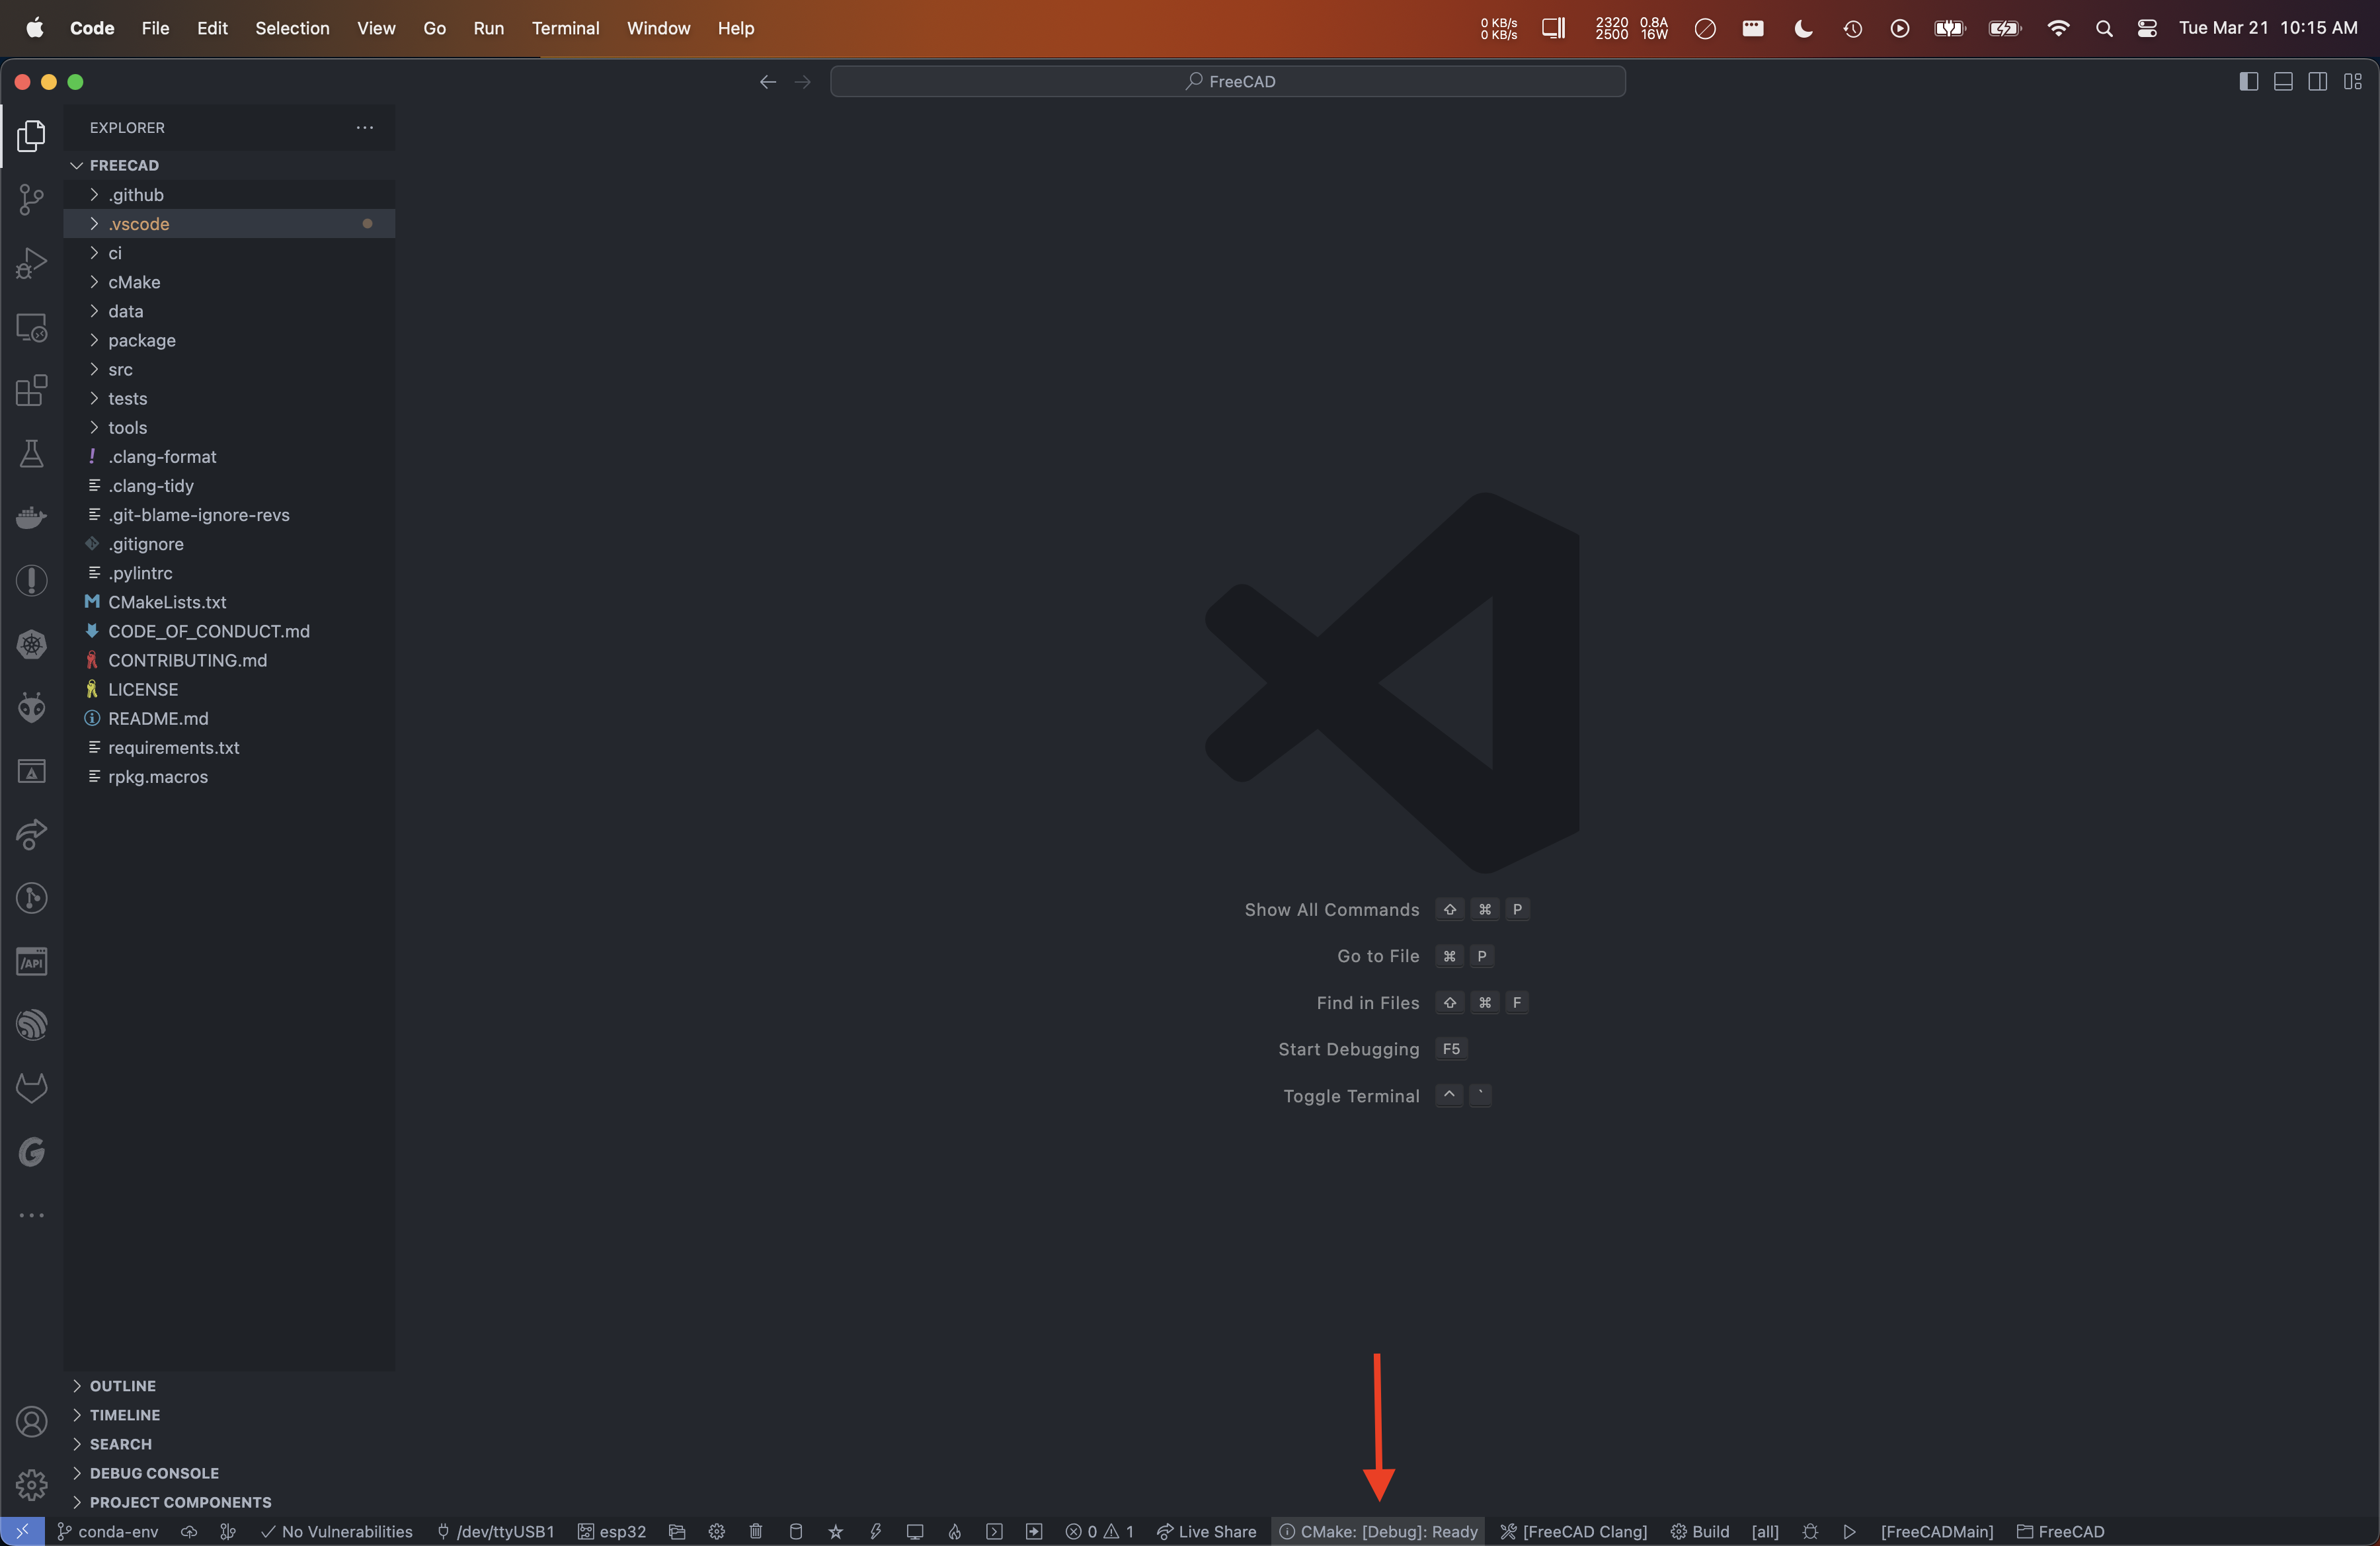
This should now configure CMake to build FreeCAD.
-
Build FreeCAD
Use the
F7key or run theCMake: Buildcommand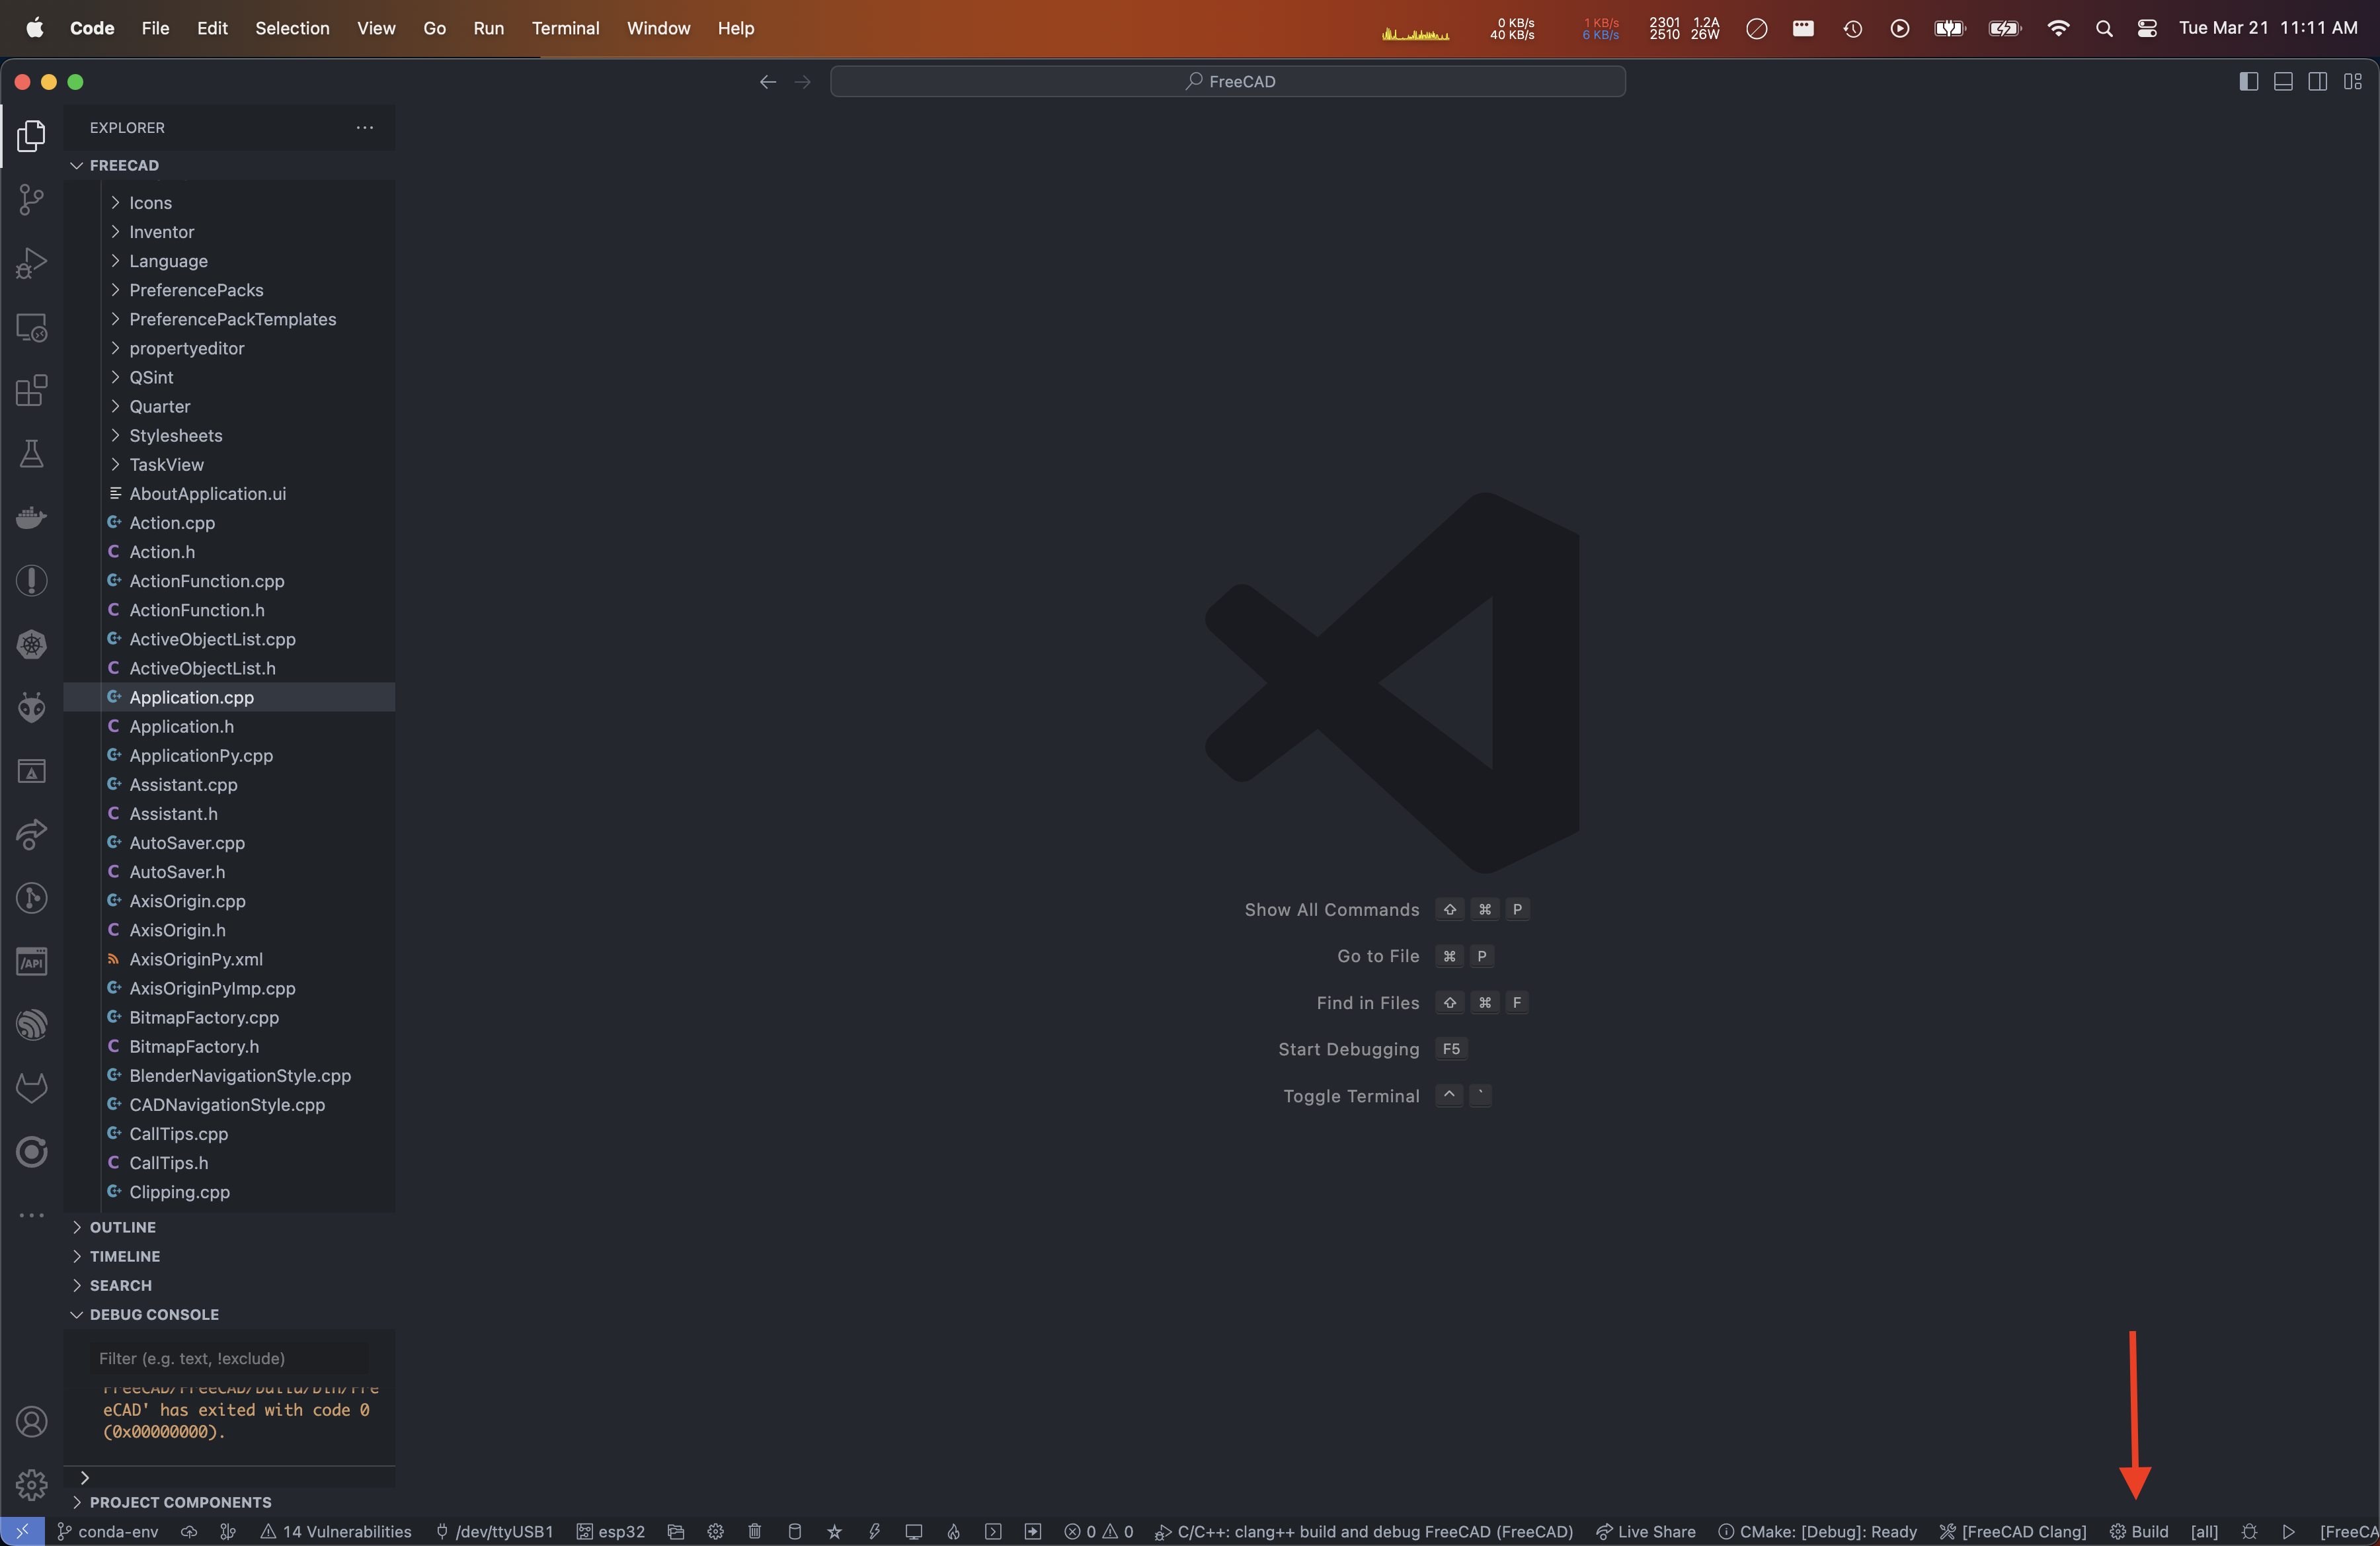


Visual Studio Code has been configured with three debug configurations:
C/C++: Linux: build and debug FreeCAD(uses gdb for Linux users)C/C++: macOS: build and debug FreeCAD(uses lldb for macOS users)Python: Remote Attach

The following keys and commands execute common debugging tasks:
F5:Debug: Start DebuggingCtrl-F5:CMake: Run Without DebuggingF11:Debug: Start Debugging and Stop on Entry
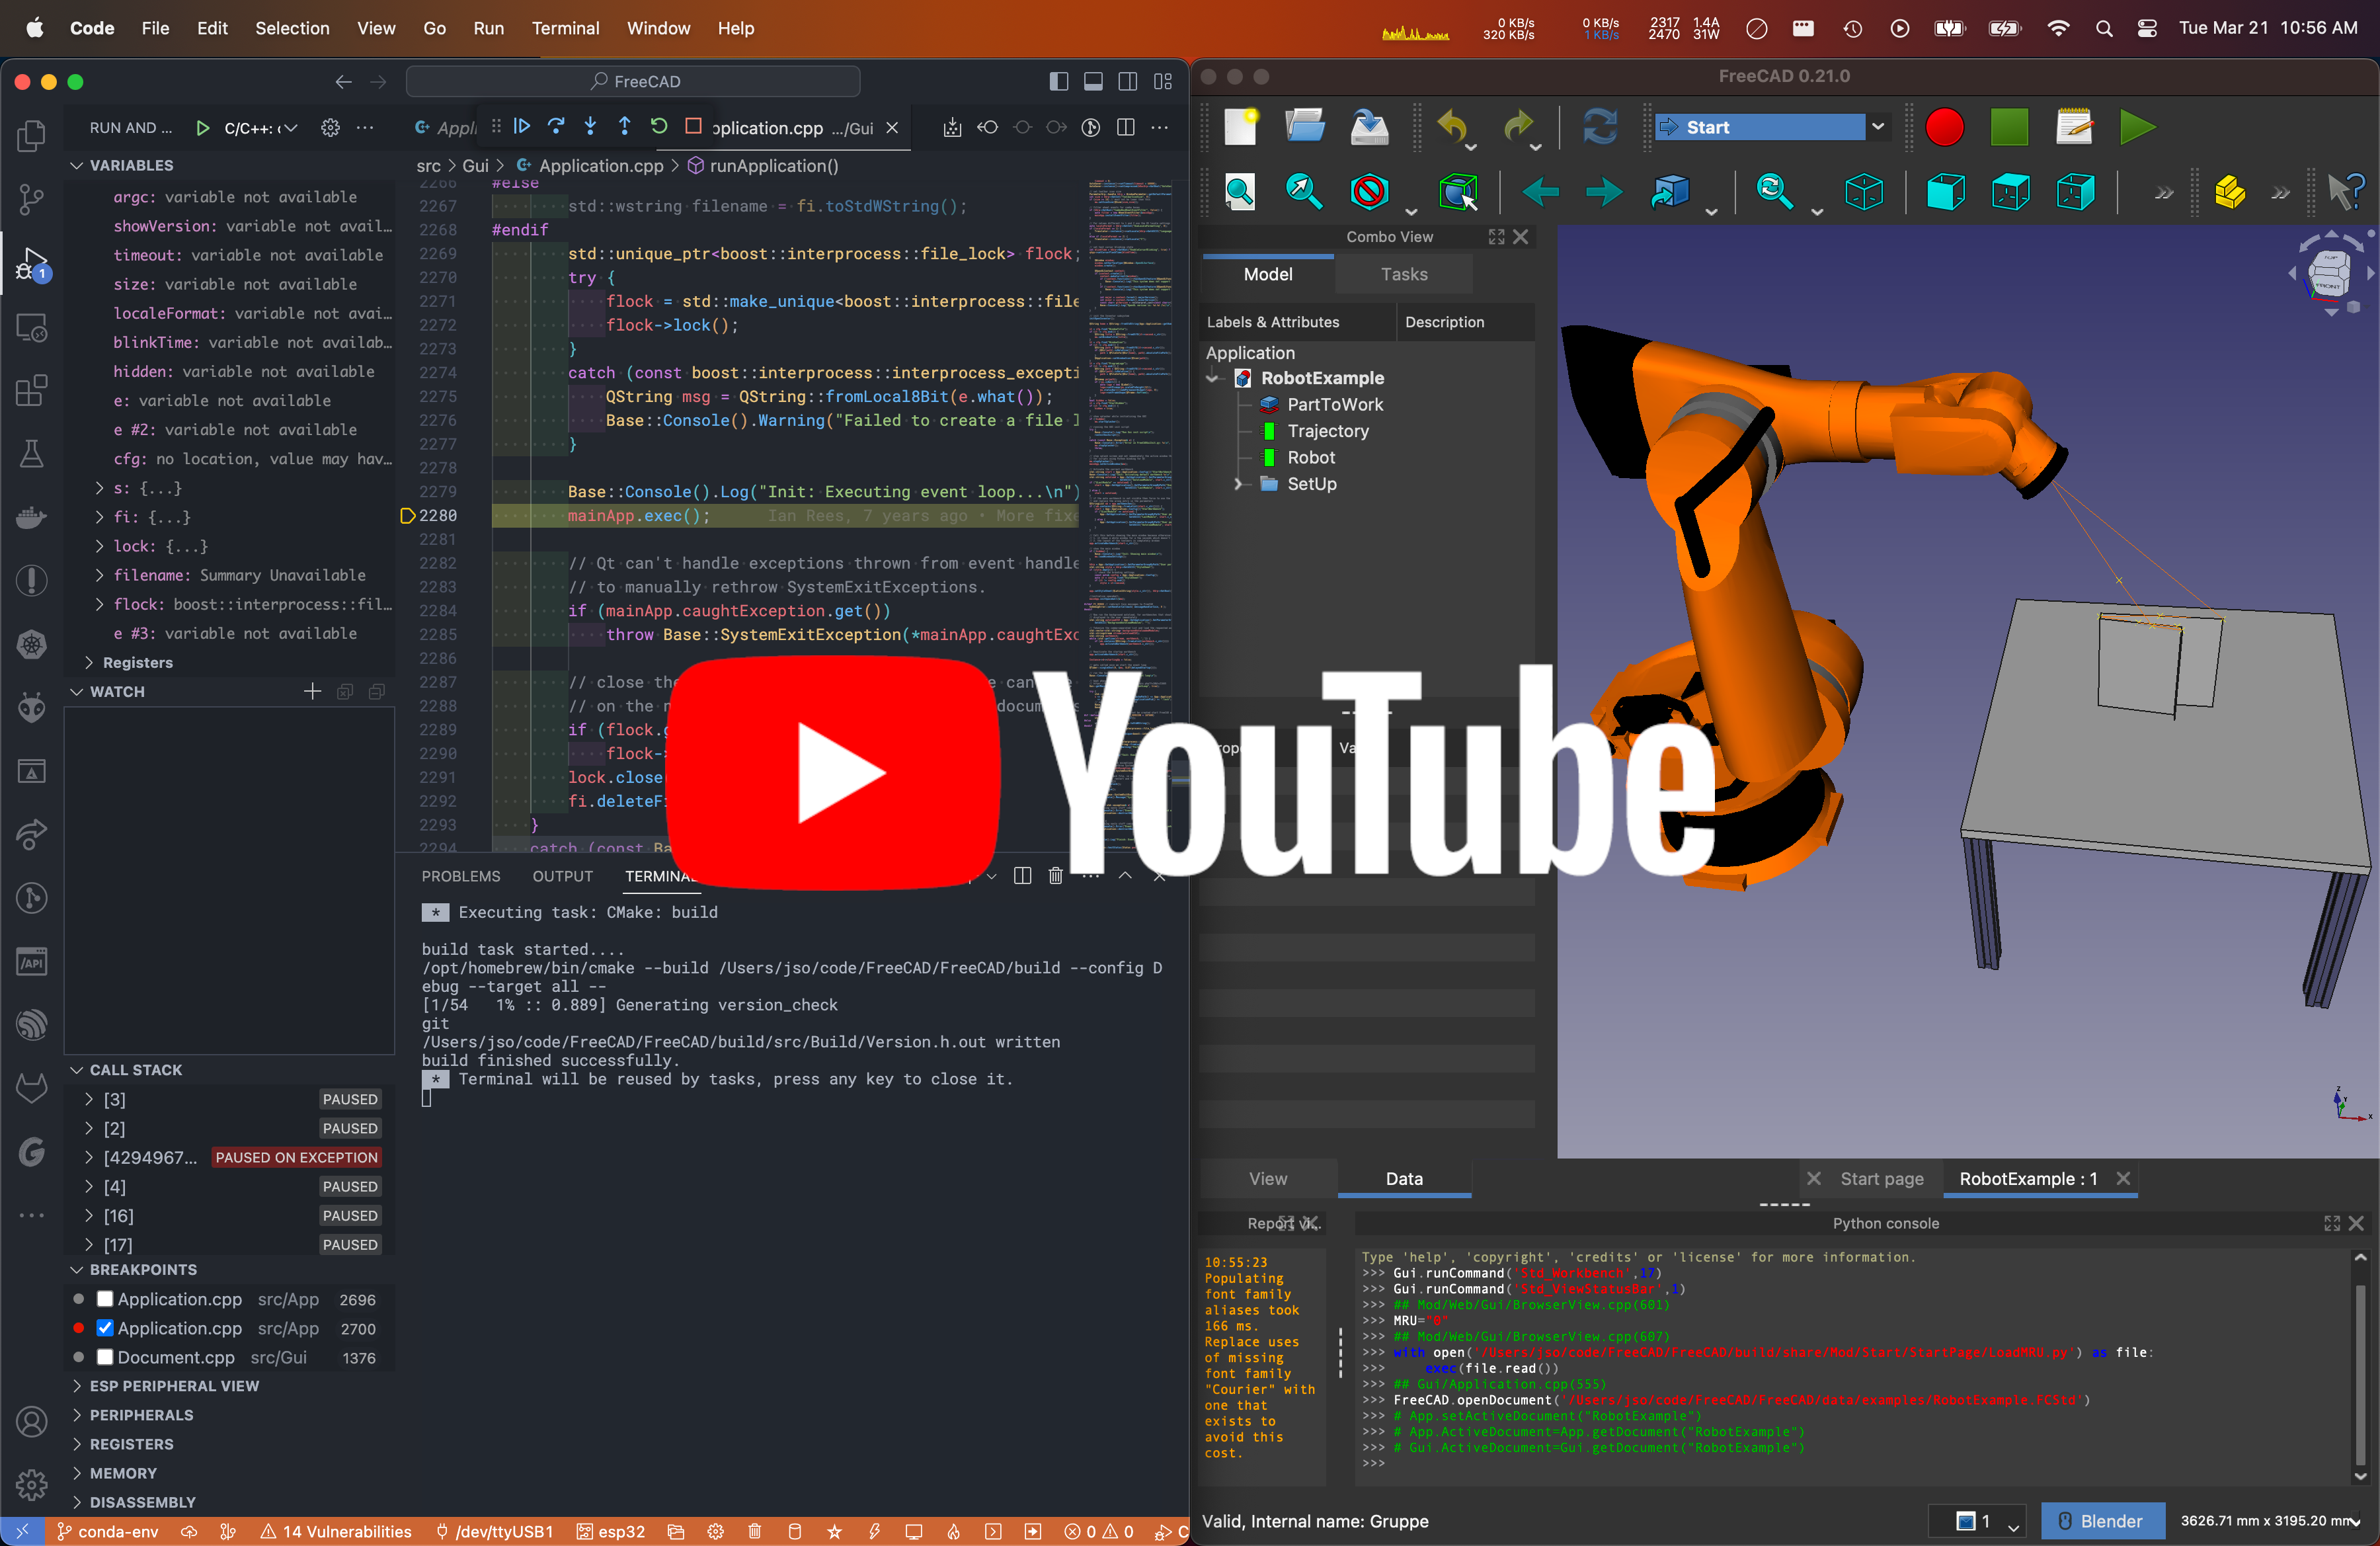
The C++ debug configuration proves useful for developing the core FreeCAD application as well as workbenches that may rely upon C++ libraries.
All debugging functionality including breakpoints, variable inspection, register inspection, watch expressions, and call stack investigation are fully operational.
One thing to note is that when one runs the Pause (F6) operation, there may be considerable delay before the debugger halts execution to permit inspection.

FreeCAD has integrated functionality to connect to a remote python debugger using the ptvsd tooling present within Visual Studio Code.
To debug python code:
-
Launch FreeCAD with either
Start Debugging(F5) orRun Without Debugging(Ctrl-F5) -
In FreeCAD's menu select
Macro->Attach to remote debugger...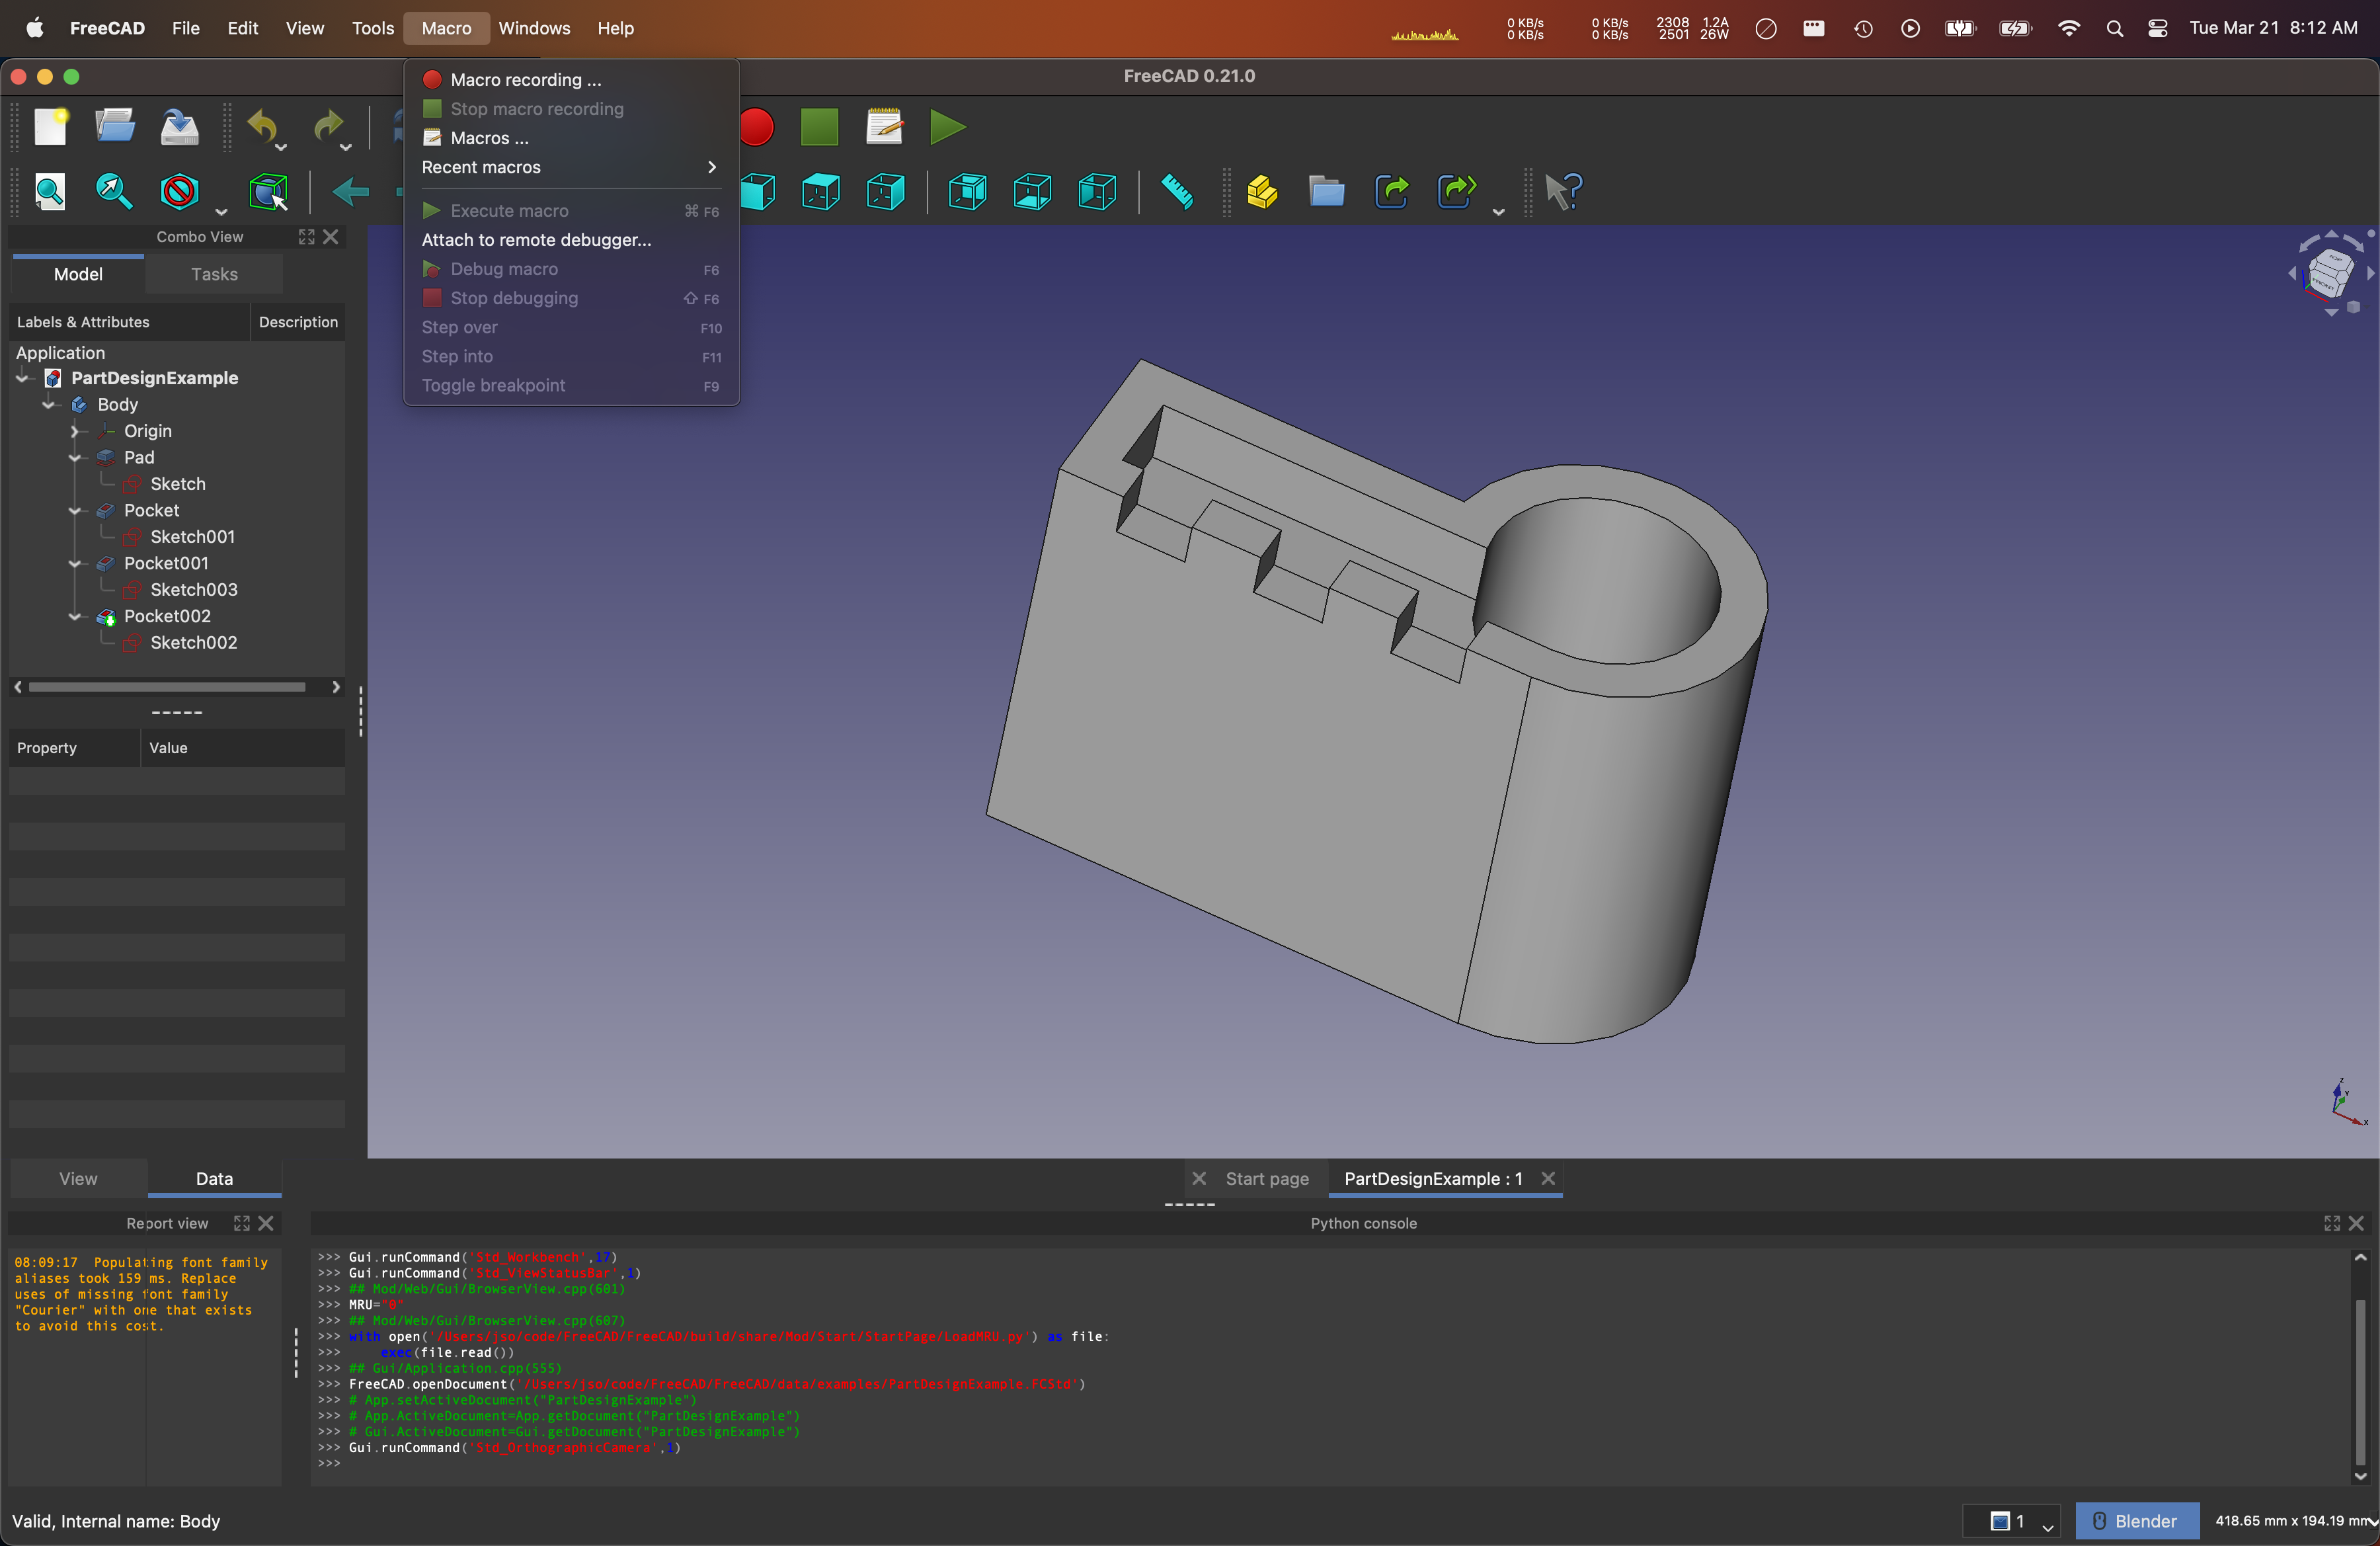
-
Select the tab
VS Codeand click theOKbutton.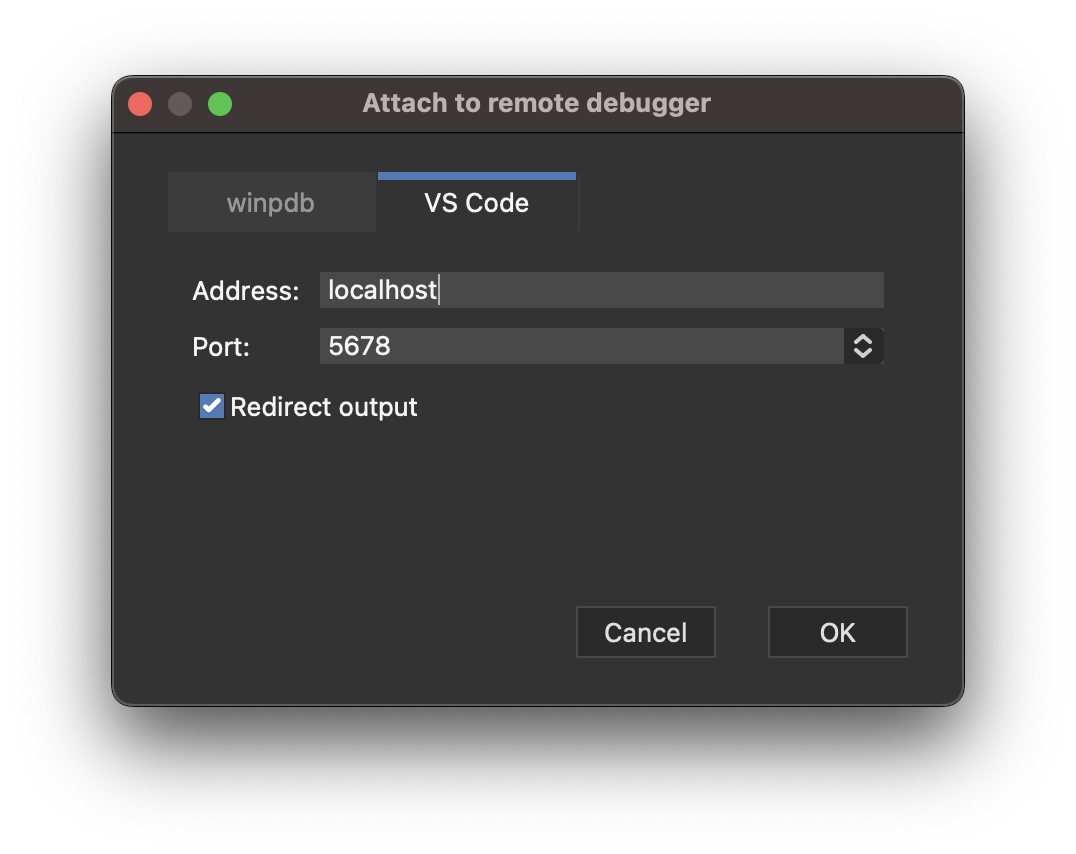
-
In VS Code's
Run and Debugpage, select thePython: Remote Attachconfiguration.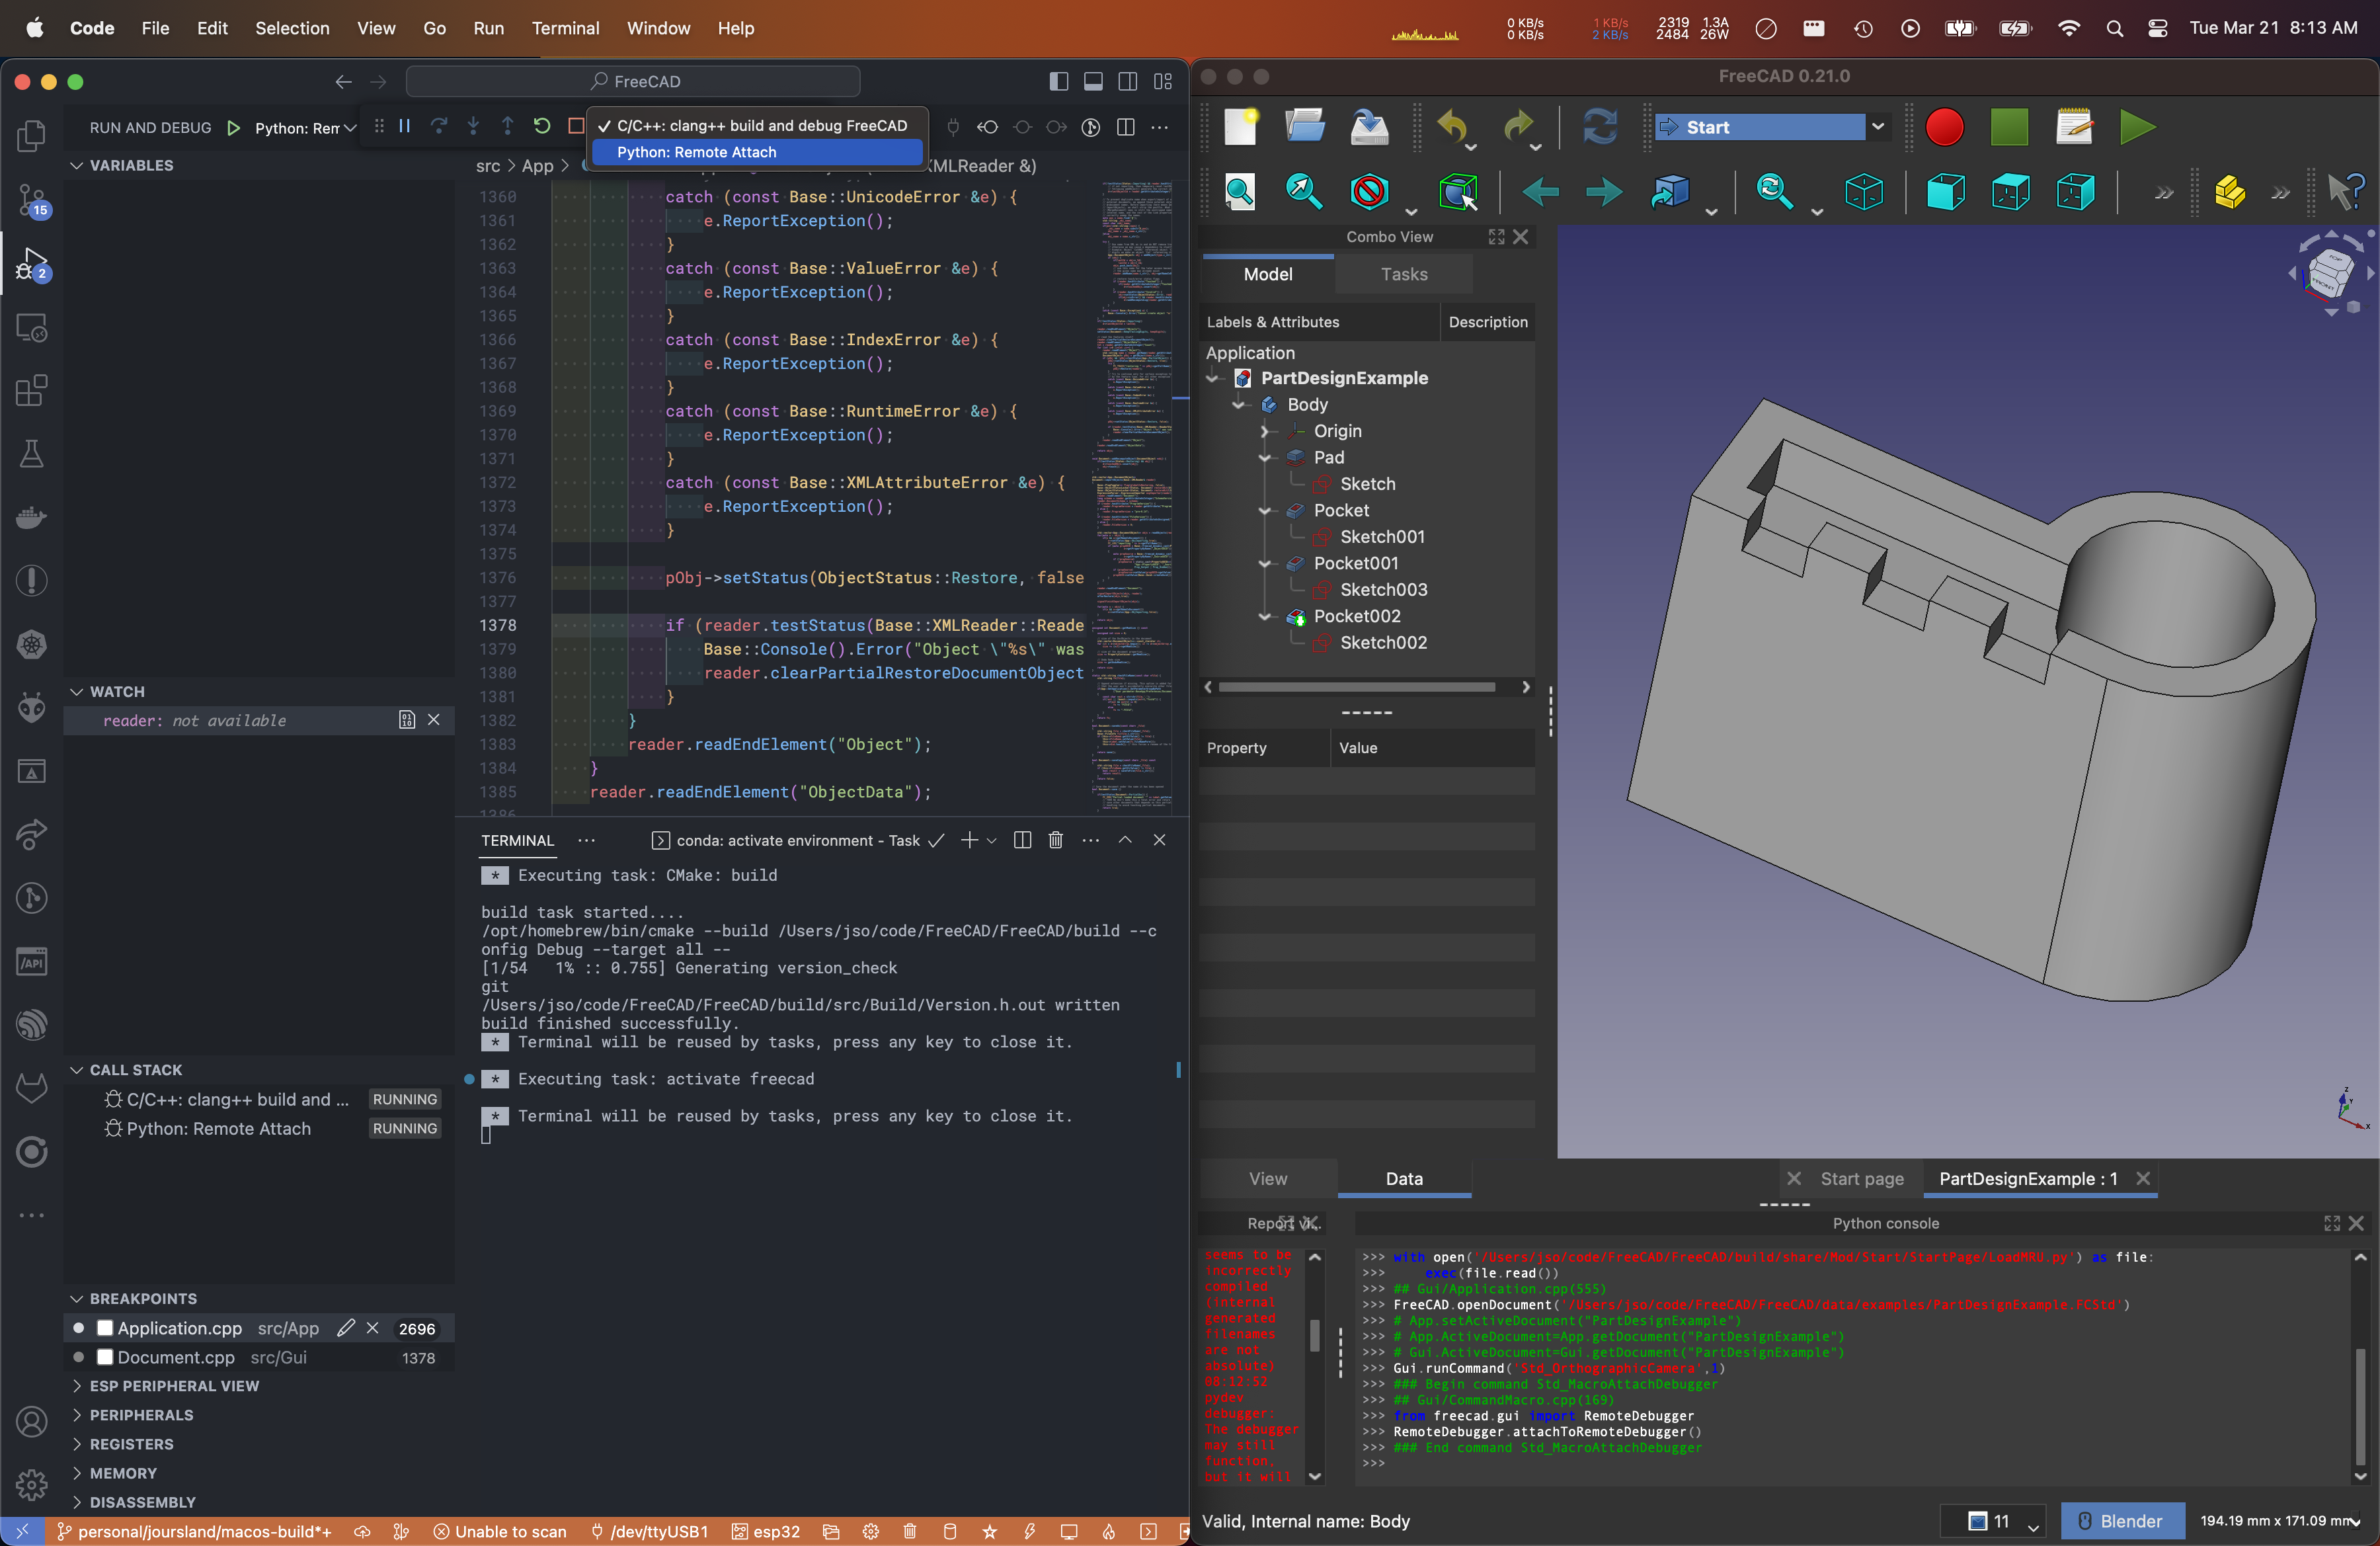
-
Click
Start Debugging(F5)


When launching from within VS Code and then debugging Python, you will end up with two debug contexts. In the floating debug bar, the context will be a drop-down box on the right. Be sure to select the correct context for the action you wish to execute.
When debugging python, a Pause (F6) operation will occur when the next Python code is executed. To trigger this, interact with an element in FreeCAD such as the workbench drop-down menu.
