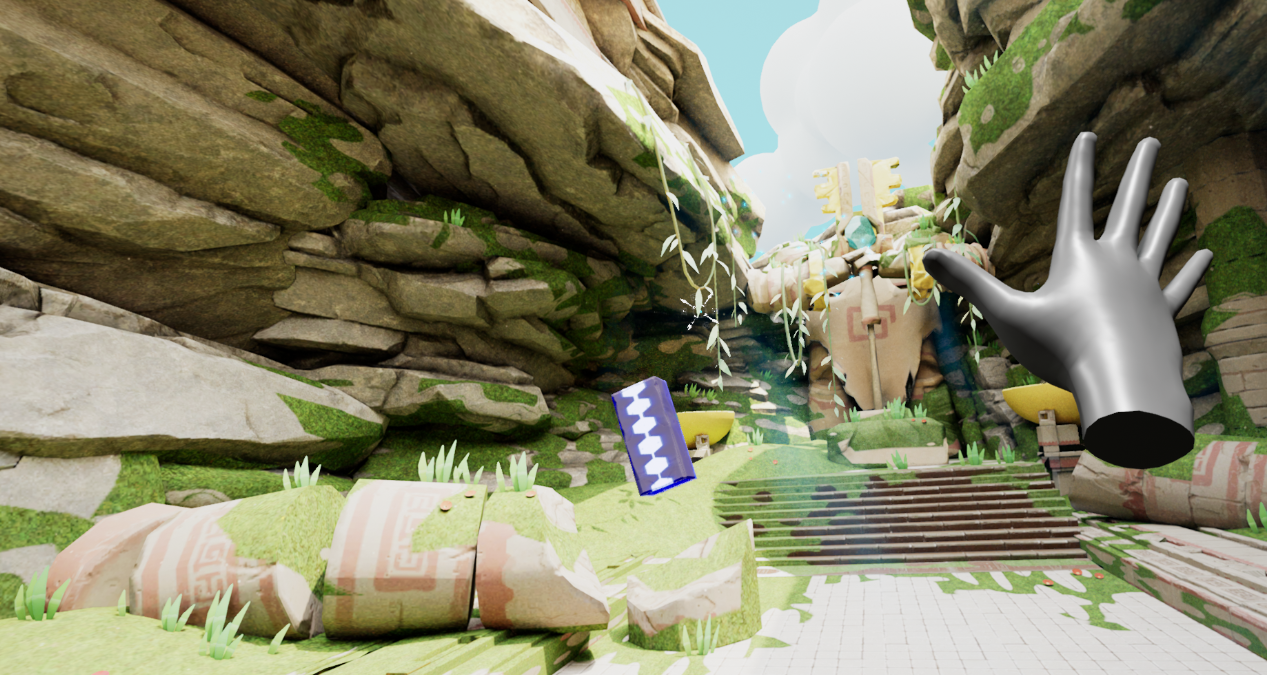
This Oculus DevTech showcase demonstrates how one can leverage the raw hand data provided by the Oculus Hands API to recognize hand poses and gestures in an Unreal Engine project. It comes complete with music, sound effects, visual effects, blueprints and C++ code to help you get started and, hopefully, inspire you to develop your own title for the Oculus platform.
To make the showcase relevant to actual development needs, we are bringing to UE4 the force grab and force throw hand gameplay mechanics from Tiny Castles, a demo written in C# for the Unity game engine by our Menlo Park Strike Team.
Your archaeological team is studying the mysterious magic that is active in this ancient hall.
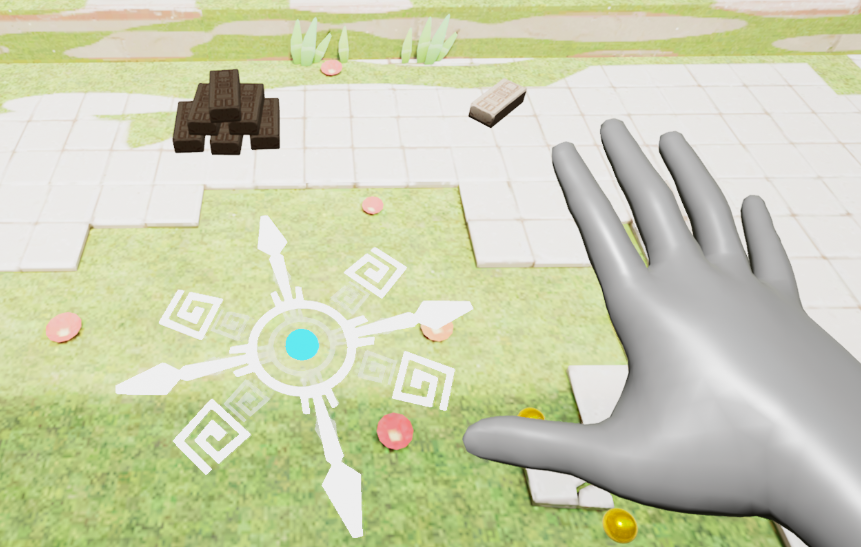
You have discovered that within these walls your right hand can project an aiming symbol in the direction of your open palm.
As you aim around, the symbol aligns itself to the surface normal. When your aim comes close to a selectable object (e.g. a brick), the aiming reticle disappears and is replaced by a beam of energy that jumps from the hand to the selected object. The object also glows with that energy which makes it easy to identify.
When you slightly close your hand, the beam disappears allowing you to reopen your palm to select another nearby object.
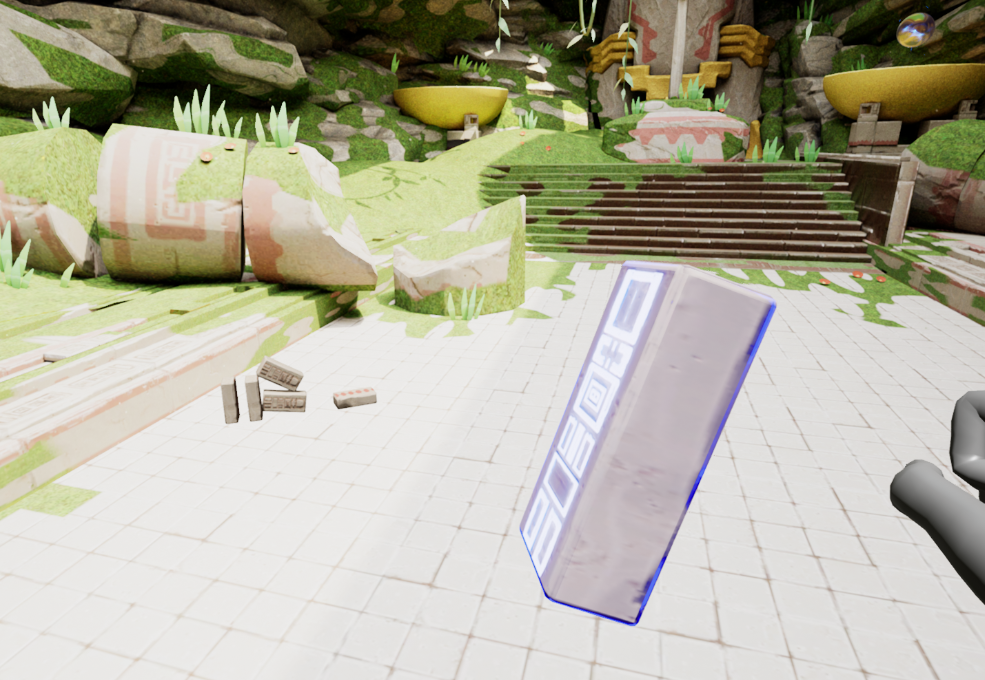
While you have an object selected, you can grab it by clenching your fist and the selected object flies to your hand.
A grabbed object will float next to your hand as long as your hand is clenched. The object is released when you open your hand, and will simply drop to the ground unless your hand is in motion at that time.
A special force throw effect is triggered when your hand releases the object above some speed. You know when that happens because it triggers both an audio and a visual effect, as can be seen below.
Beyond experiencing the magic of grabbing and throwing objects in VR, our archaeological site has an educational side. When you look to your right, you will see a projector and a screen.
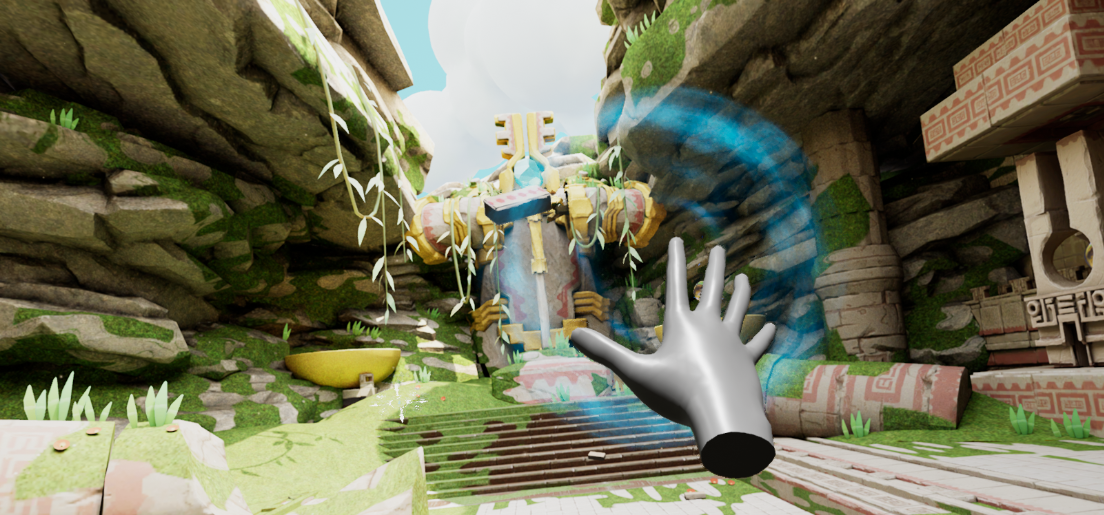
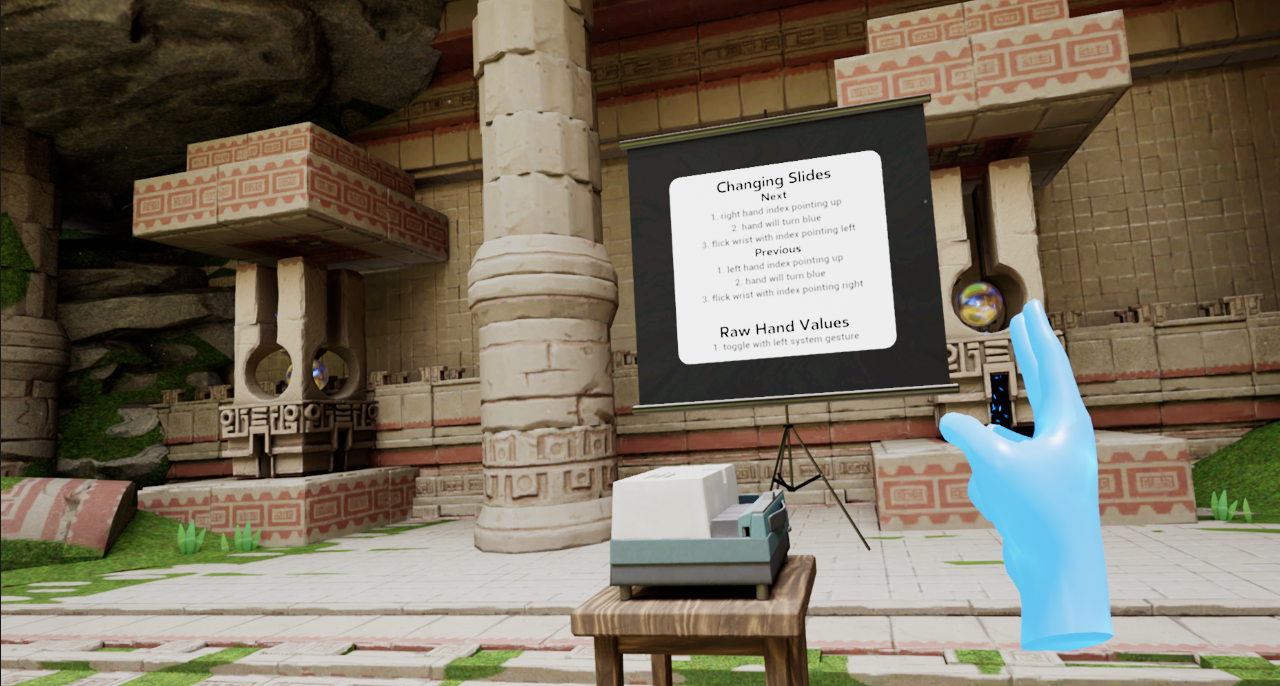
The first gesture that you will learn operates the projector. To go to the next slide, first point your right hand at the screen like this:
You hand will turn blue indicating that the hand initial position has been recognized. Note that you also need to be looking at the screen for this to work. To go to the next slide, just flick your hand like so:
The projector will react to your gesture and move to the next side. To go to the previous slide, do the same gesture using your left hand.
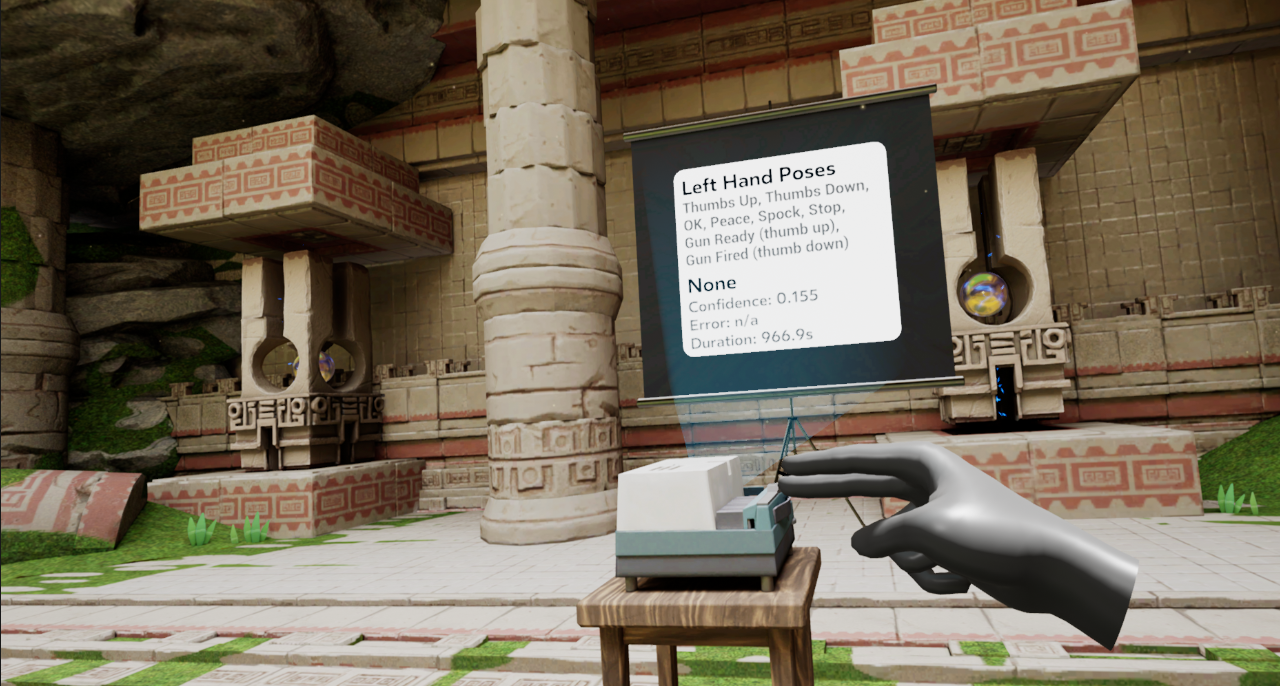
a. Left Hand Poses
The first slide is the only one tracking your left hand. It is comparing your left hand bone angles to a few classic reference poses.
Below the list of poses recognized, there are four lines: the recognized hand pose, the confidence level from 0.0 to 1.0, the raw error value and how long the pose has been held.
b. Right Hand American Sign Language Numbers
The second slide recognizes ASL numbers. There are no ambiguities and every number is easily distinguished from one another.
Interestingly, the slides look better on Quest than when running on a PC running the UE4 editor. This screenshot is from a PC.
c. Right Hand American Sign Language Letters
Next are the ASL letters. This example is meant to illustrate some of the limits of the hand bone tracking system, in particular self-occlusion: when fingers cannot be seen by the Quest cameras because they are hidden behind the hand or the other fingers.
As you play with this slide, you will appreciate the difficulty of distinguishing between some letters. The confidence level (and the raw error) will be useful here as it will help you understand how close your hand pose is to the reference pose recognized.
d. Right Hand Gun Gestures
The fourth slide is about gesture recognition, that is the recognition of a sequence of hand poses.
Two poses are recognized: the Gun pose, with the thumb up, and the Gun Shot with the thumb down. The transition from Gun to Gun Shot is the Gun Fired gesture, while the reverse transition is the Gun Cocked gesture.
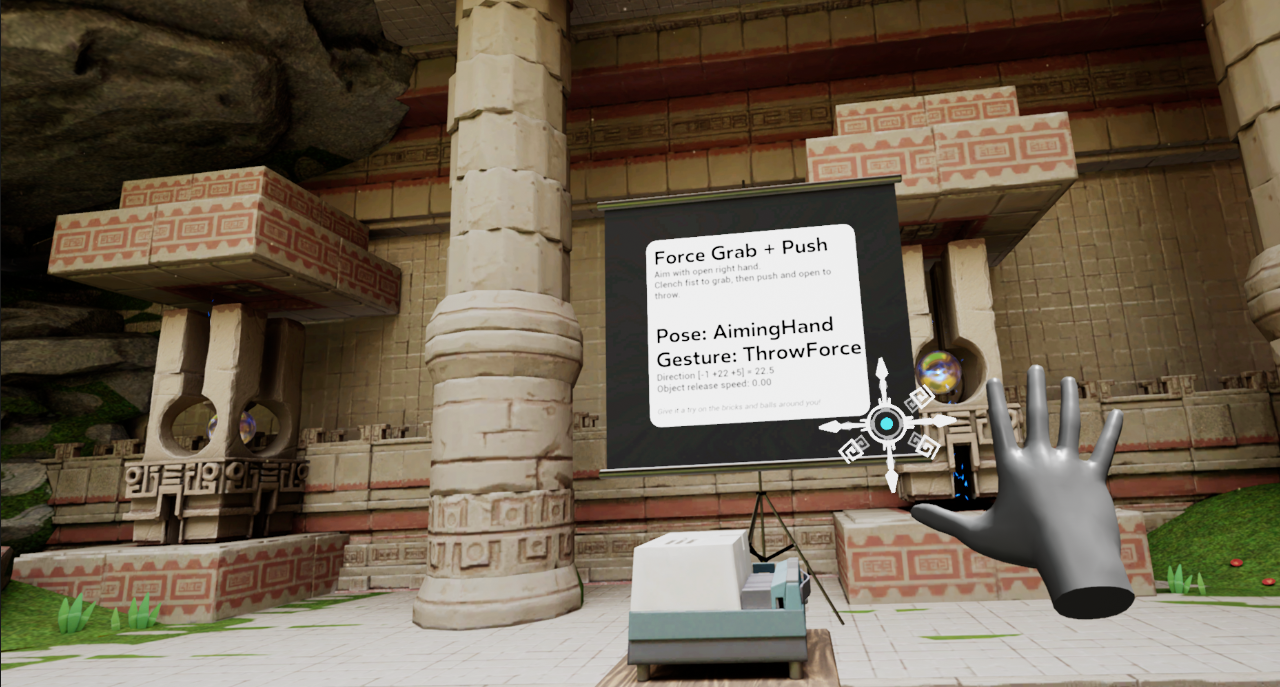
e. Right Hand Force Grab + Push
Finally, the fifth slide is hooked to the force grab and force throw gestures.
The slide not only shows the poses and gestures recognized, but also the amplitude of the gesture as a displacement vector.
The following sections describe the key blueprints that bring the Hand Pose Showcase to life.
Most of them depend on the OculusHandTools plugin that is documented here. It is recommended that you have at least a cursory understanding of the plugin before reading further.
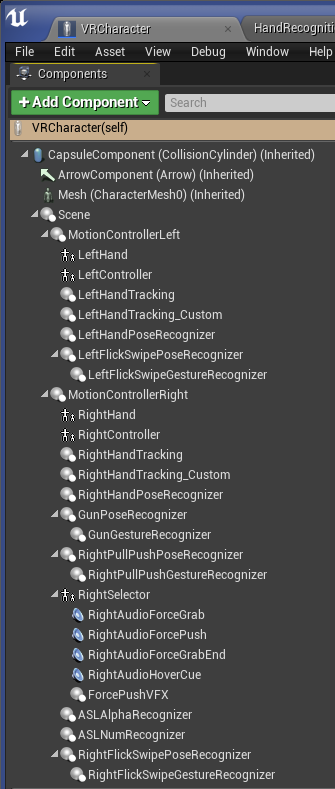
VRCharacter represents the player. Its main components that are of interest to us are the MotionControllerLeft and MotionControllerRight. They represent our hands in VR.
Attached to each hand you will find various pose recognizers, and attached to some of them gesture recognizers. Please look at the OculusHandTools plugin documentation to understand how those are configured.
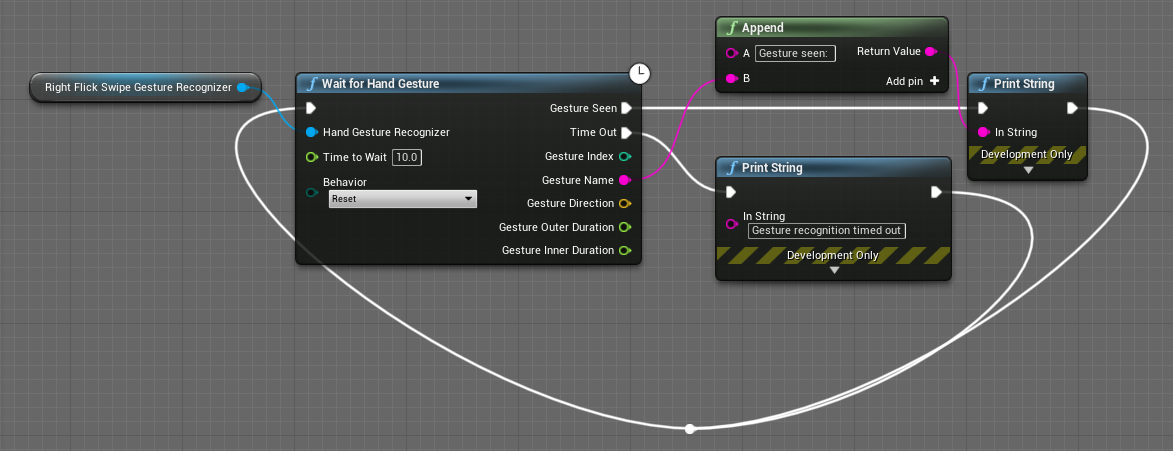
Let's look at how these hand pose and gesture recognizers can be used. If we look at the gesture that allows one to change slides, one option is to use the Wait for Gesture node:
This section of the VRCharacter blueprint is not active, since there are no incoming execution paths, but is shown as one way to wait for a gesture to be recognized. Instead of this, we are explicitly inspecting the state of recognition of the Next Slide gesture so that we can have the hand turn blue when the gesture is in progress:
In a different part of the VRCharacter's blueprint, you will see how we handle the slide changing gestures when they are recognized by calling events on the projector screen:
Arguably the most complex section of the VRCharacter's blueprint is how we handle Force Grab and Force Throw. We encourage you to explore that part of the blueprint directly as it is large and cannot fit in a readable way in this document. One way to help your understanding of what is going on is to look for the places where the three custom Interactable events are called: Interaction1 is called when the object is initially grabbed but has not yet traveled to the player's hand, Interaction2 is called when the object has reached the player's hand, and Interaction3 is called when the object is released.
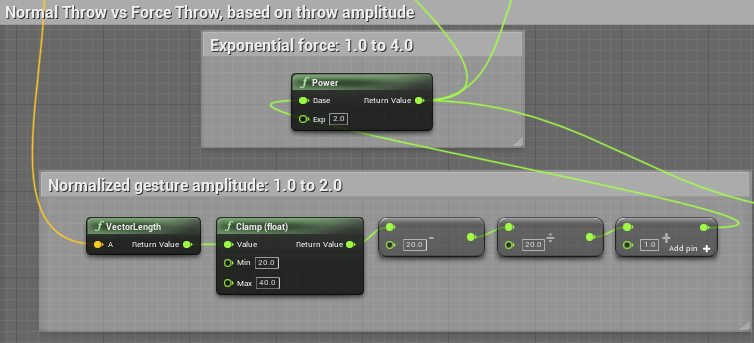
When you look at the throwing section of the blueprint, you will see how we generate additional impulse force on objects based on the velocity of the gesture:
The gesture vector is measured from a point near the end of your clenched fist and a point near the beginning of your hand letting go of the object. Through testing we have determined that when that vector is shorter than 20cm, that we are dealing with a normal throw and the impulse is done with a basic force multiplier of 1.0. When your gesture goes above 20cm and up to 40cm, we have an exponential increase of force that goes from 1.0 to a maximum of 4.0.
We encourage you to experiment with different thresholds and multipliers!
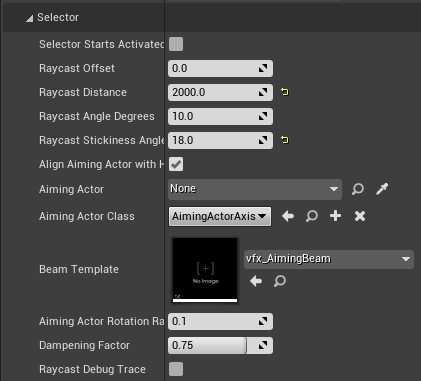
In the showcase, we have attached one far-field selector to the right hand of the VRCharacter. The aiming of that selector has been adjusted manually relative to hand it is attached to.
Looking at its configuration, we have configured this instance with a game-specific aiming actor and a custom aiming beam visual effect.
The showcase has 3 interactable object types. They are typically made of one mesh component that emits overlap events for the Interactable trace channel and a few audio and visual effect components.
They are meant to be thrown around and bounce of surfaces. Part of their blueprints handles hit events to produce collision sounds and visuals.
The other half of their behavior handles Interactable events. Begin Interaction and End Interaction are generated by the far-field selector itself and are considered system events. The other three events (Interaction1, Interaction2 and Interaction3) are generated by the VRCharacter's blueprint and are considered user events.
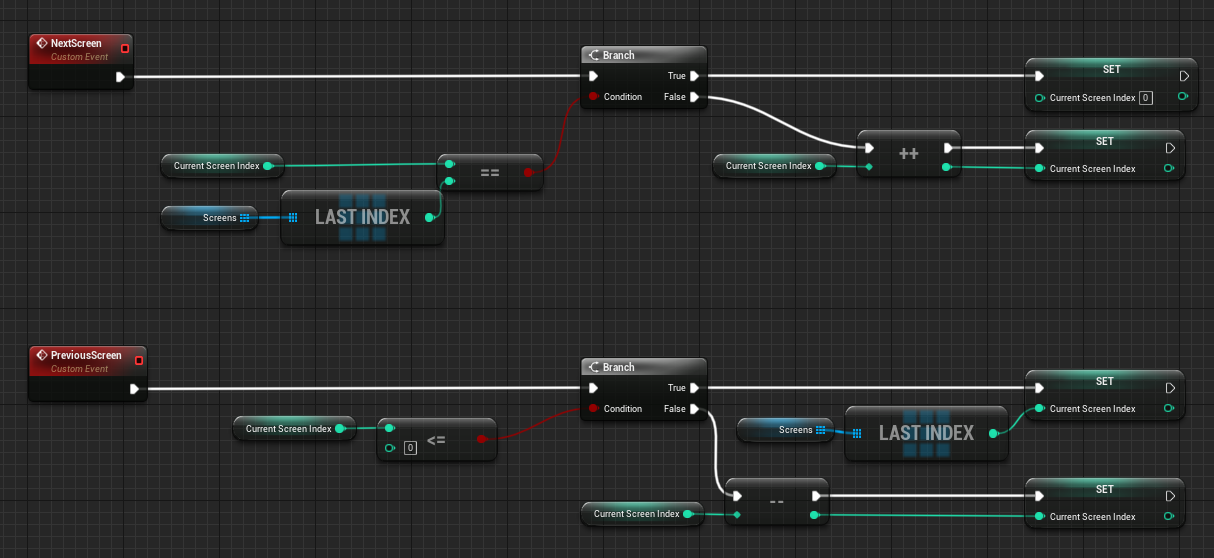
The projector screen defines two events for moving to the next or the previous slide. this part of the code only changes the index of the slide that should be currently shown.
The screen is regularly updated through events. As an example, here's the projector blueprint section for the first screen:
It simply checks for the index of the currently displayed slide and updates the corresponding UI variables.
To visualize the raw values returned the by Oculus Hands API, we have placed a HandDebugActor in the level. It is hidden by default and can be activated with the standard left hand system gesture: look at the palm of your left while you pinch your thumb and index together.
This screen is a stereo layer in screen space, so it will stay in the center of your field of view.
At the top, next to each hand, you will either see high or low confidence. The highlighted hand is the dominant one. The finger values left and right of the Oculus logo are the pinch strengths for each finger.
The rest of that screen shows the bone angles in pitch/yaw/roll values. As you can see, the wrist and forearm angles are null, which explains why we get them from the controller we the pose recognizer is attached to.
The Quest 2 has the capability to double the standard hand tracking frequency from 30Hz to 60Hz. At the time of this writing, this can be enabled in your project settings under Plugins - OculusVR - Mobile - Hand Tracking Frequency.
It's up to you! We hope that this showcase will inspire your own work and that you will come up with compelling new pose and gesture VR experiences.
Please look at our plugin documentation and explore our code. You are free to reuse any part of the showcase in your own projects and feel especially free to reuse our plugin code as is or adapt it for your own purposes!
Clone this repo using the "Code" button above, or this command:
git clone https://github.com/oculus-samples/Unreal-HandPoseShowcaseThe easiest way to get started is to use the prebuilt Unreal Engine from the Epic Games Launcher, with MetaXR plugin.
- Install the Epic Games Launcher
- In the launcher, install UE5 (recommended).
- Download and install the MetaXR plugin from the Unreal Engine 5 Integration download page.
- Launch the Unreal Editor
- From "Recent Projects", click "Browse" and select
HandPoseShowcase.uproject
The Meta fork of Epic’s Unreal Engine will give you the most up to date integration of Oculus features. However, you must build the editor from its source.
Follow the instructions on Accessing Unreal Engine source code on GitHub to obtain:
- an Epic account
- a GitHub account
- authorization to access the Unreal Engine source repository Disregard instructions on downloading Epic’s Unreal Engine source code as you will be building the Meta fork of Epic’s Unreal Engine source.
Make sure you have Visual Studio installed properly:
- Launch the Visual Studio Installer and click Modify for the Visual Studio version you want to use.
- Under the Workloads tab, click Game development with C++ if it isn’t checked and then click Modify.
- Download the source code from the Meta fork of Epic’s Unreal Engine on GitHub.
- Open a command prompt in the root of the Unreal, then run this command:
.\GenerateProjectFiles.bat -Game HandPoseShowcase -Engine <full path to Unreal-HandPoseShowcase directory>\HandPoseShowcase.uproject- Open the
HandPoseShowcase.slnfile that has been generated in theUnreal-HandPoseShowcasedirectory. - Set
HandPoseShowcaseas the start-up project andDevelopment Editoras the configuration. - Hit
F5to build and debug the project (and the engine).- Depending on your machine, the build may take awhile to complete.
The Meta License applies to the SDK and supporting material. The MIT License applies to only certain, clearly marked documents. If an individual file does not indicate which license it is subject to, then the Meta License applies.
