Tiling Window Management for Windows.


- About
- Charitable Donations
- GitHub Sponsors
- Demonstrations
- Description
- Design
- Getting Started
- Development
- Logs and Debugging
- Window Manager State and Integrations
- Window Manager Event Subscriptions
- Appreciations
komorebi is a tiling window manager that works as an extension to Microsoft's Desktop Window Manager in Windows 10 and above.
komorebi allows you to control application windows, virtual workspaces and display monitors with a CLI which can be used with third-party software such as AutoHotKey to set user-defined keyboard shortcuts.
komorebi aims to make as few modifications as possible to the operating system and desktop environment by default. Users are free to make such modifications in their own configuration files for komorebi, but these will remain opt-in and off-by-default for the foreseeable future.
Translations of this document can be found in the project wiki:
There is a Discord server available for komorebi-related discussion, help, troubleshooting etc. If you have any specific feature requests or bugs to report, please create an issue in this repository.
There is a YouTube channel where I livestream development on komorebi. If you would like to be notified of upcoming livestreams please subscribe and turn on notifications. Videos of previous livestreams are also made available in a dedicated playlist.
Articles, blog posts, demos, and videos about komorebi can be added to this list by PR:
komorebi is a free and open-source project, and one that encourages you to make charitable donations if you find the software to be useful and have the financial means.
I encourage you to make a charitable donation to Fresh Start Refugee before you consider sponsoring me on GitHub.
GitHub Sponsors is enabled for this project. Users who sponsor my work
on komorebi at any of the predefined monthly tiers will be given access to a private fork of this repository where I
push features-in-progress that are not yet quite ready to be pushed on the main repository.
There will never be any feature of komorebi that is gated behind sponsorship; every new feature will always be
available for free in the public repository once it meets the requisite level of code quality and completion.
Features-in-progress that are available in early access will be tagged in the issues with an "early access" label.
@haxibami showing komorebi running on Windows 11 with a terminal emulator, a web browser and a code editor. The original video can be viewed here.
0vadqFOyIJHglPRY.mp4
@aik2mlj showing komorebi running on Windows 11 with multiple workspaces, terminal emulators, a web browser, and the yasb status bar with the komorebi workspace widget enabled. The original video can be viewed here.
0e0dd7fc-7115-11ec-a064-42a1fbc2e1e9-v4_t10000011-wbjnuX5De6.mp4
komorebi only responds to WinEvents and the messages it receives on a dedicated socket.
komorebic is a CLI that writes messages on komorebi's socket.
komorebi doesn't handle any keyboard or mouse inputs; a third party program (e.g. whkd) is needed in order to translate keyboard and mouse events to komorebic commands.
This architecture, popularised by bspwm on Linux and yabai on macOS, is outlined as follows:
          PROCESS                SOCKET
whkd/ahk  -------->  komorebic  <------>  komorebi
komorebi holds a list of physical monitors.
A monitor is just a rectangle of the available work area which contains one or more virtual workspaces.
A workspace holds a list of containers.
A container is just a rectangle where one or more application windows can be displayed.
This means that:
- Every monitor has its own collection of virtual workspaces
- Workspaces only know about containers and their dimensions, not about individual application windows
- Every application window must belong to a container, even if that container only contains one application window
- Many application windows can be stacked and cycled through in the same container within a workspace
Make sure that you have either the Scoop Package Manager or WinGet installed, then run the following commands at a PowerShell prompt.
# if using scoop
scoop bucket add extras
scoop install whkd
scoop install komorebi

# if using winget
winget install LGUG2Z.whkd
winget install LGUG2Z.komorebi

# save the latest generated app-specific config tweaks and fixes to ~/komorebi.generated.ps1
iwr https://raw.githubusercontent.com/LGUG2Z/komorebi/master/komorebi.generated.ps1 -OutFile $Env:USERPROFILE\komorebi.generated.ps1

# save the sample komorebi configuration file to ~/komorebi.ps1
iwr https://raw.githubusercontent.com/LGUG2Z/komorebi/master/komorebi.sample.ps1 -OutFile $Env:USERPROFILE\komorebi.ps1

# ensure the ~/.config folder exists
mkdir $Env:USERPROFILE\.config -ea 0

# save the sample whkdrc file with key bindings to ~/.config/whkdrc
iwr https://raw.githubusercontent.com/LGUG2Z/komorebi/master/whkdrc.sample -OutFile $Env:USERPROFILE\.config\whkdrc

# start komorebi
komorebic start --await-configuration
Thanks to @sitiom for getting komorebi added to both the popular Scoop Extras bucket and to WinGet.
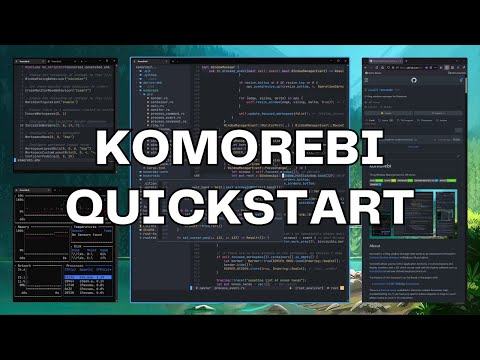
You can watch a walkthrough video of this quickstart below on YouTube.
Prebuilt binaries are available on the releases page in a zip archive.
Once downloaded, you will need to move the komorebi.exe and komorebic.exe binaries to a directory in your Path (
you can see these directories by running $Env:Path.split(";") at a PowerShell prompt).
If you prefer to compile komorebi from source, you will need
a working Rust development environment on Windows 10/11. The x86_64-pc-windows-msvc toolchain is
required, so make sure you have also installed
the Build Tools for Visual Studio 2019.
You can then clone this repo and compile the source code to install the binaries for komorebi and komorebic:
cargo install --path komorebi --locked
cargo install --path komorebic --lockedRun komorebic start --await-configuration at a Powershell prompt, and you will see the following output:
Start-Process komorebi.exe -ArgumentList '--await-configuration' -WindowStyle hidden
Waiting for komorebi.exe to start...Started!
This means that komorebi is now running in the background, tiling all your windows, and listening for commands sent to
it by komorebic. You can similarly stop the process by running komorebic stop.
If you followed the quickstart, komorebi will find the sample komorebi.ps1 file in your $Env:USERPROFILE directory
and automatically load it. This file also starts whkd using the sample whkrc file in your $Env:USERPROFILE\.config
directory.
Alternatively, if you have AutoHotKey installed and a komorebi.ahk file in $Env:UserProfile directory, komorebi
will automatically try to load it when starting.
As previously mentioned, this project does not handle anything related to keybindings and shortcuts directly. I
personally use whkd to manage my window management shortcuts, and have provided a
sample whkdrc configuration that you can use as a starting point for your own.
You can run komorebic.exe to get a full list of the commands that you can use to customise komorebi and create
keybindings with. You can run komorebic.exe <COMMAND> --help to get a full explanation of the arguments required for
each command.
You can run any configuration command in the komorebi.ps1 file, and you can bind any action command to your desired
key combinations in the whkdrc file.
❗️NOTE: This section is only relevant for people who wish to use AutoHotKey instead of whkd.
❗️NOTE: This helper library is only compatible with AutoHotKey v1.1, not with AutoHotKey v2.
Additionally, you may run komorebic.exe ahk-library to generate a helper library for AutoHotKey which wraps
every komorebic command in a native AHK function.
If you include the generated library at the top of your ~/komorebi.ahk configuration file, you will be able to call
any of the functions that it contains.
❗️NOTE: This section is only relevant for people who wish to use AutoHotKey instead of whkd.
The generated helper library for AutoHotKey currently only supports AutoHotKey v1.1.
The preferred way to install AutoHotKey for use with komorebi is to install it via scoop:
scoop bucket add versions
scoop install autohotkey1.1
If you install AutoHotKey using a different method, the name of the executable file may differ from the name given by
scoop, and thus what is expected by default in komorebi.
You may override the executable that komorebi looks for to launch and reload komorebi.ahk configuration files by
setting the $Env:KOMOREBI_AHK_EXE environment variable.
Please keep in mind that even when setting a custom executable name using these environment variables, the executables
are still required to be in your Path.
If you do not want to keep komorebi-related files in your $Env:USERPROFILE directory, you can specify a custom directory
by setting the $Env:KOMOREBI_CONFIG_HOME environment variable.
For example, to use the ~/.config/komorebi directory:
# Run this command to make sure that the directory has been created
mkdir -p ~/.config/komorebi

# Run this command to open up your PowerShell profile configuration in Notepad
notepad $PROFILE

# Add this line (with your login user!) to the bottom of your PowerShell profile configuration
$Env:KOMOREBI_CONFIG_HOME = 'C:\Users\LGUG2Z\.config\komorebi'

# Save the changes and then reload the PowerShell profile
. $PROFILE
If you already have configuration files that you wish to keep, move them to the ~/.config/komorebi directory.
The next time you run komorebic start, any files created by or loaded by komorebi will be placed or expected to
exist in this folder.
A curated selection of application-specific configurations can be generated to
help ease the setup for first-time users.
komorebi-application-specific-configuration
contains YAML definitions of settings that are known to make tricky
applications behave as expected. These YAML definitions can be used to generate
a ps1 or an ahk file which you can import at the start of your own komorebi.ps1 or komorebi.ahk files,
leaving you to focus primarily on your desired keybindings and workspace
configurations.
If you have settings for an application that you think should be part of this curated selection, please open a PR on the configuration repository.
In the event that your PR is not accepted, or if you find there are any settings that you wish to override, this can easily be done using an override file.
# Clone and enter the repository
git clone https://github.com/LGUG2Z/komorebi-application-specific-configuration.git
cd komorebi-application-specific-configuration

# Use komorebic to generate a ps1 file
komorebic.exe pwsh-app-specific-configuration applications.yaml

# Application-specific generated configuration written to C:\Users\LGUG2Z\.config\komorebi\komorebi.generated.ps1

# Or use komorebic to generate an ahk file
komorebic.exe ahk-app-specific-configuration applications.yaml

# Application-specific generated configuration written to C:\Users\LGUG2Z\.config\komorebi\komorebi.generated.ahk
#
# You can include the generated configuration at the top of your komorebi.ahk config with this line:
#
# #Include %A_ScriptDir%\komorebi.generated.ahk

# Optionally, provide an override file that follows the same schema as the second argument
komorebic.exe pwsh-app-specific-configuration applications.yaml overrides.yamlIf you would like to add a visual border around the currently focused window, two commands are available:
komorebic.exe active-window-border [enable|disable]
komorebic.exe active-window-border-colour [R G B] --window-kind single

# optionally, if you want a different colour for stacks of windows
komorebic.exe active-window-border-colour [R G B] --window-kind stack

# optionally, if you want a different colour for windows in monocle mode
komorebic.exe active-window-border-colour [R G B] --window-kind monocle
It is important to note that the active window border will only apply to windows managed by komorebi.
If you would like to remove all gaps from a given workspace, both between windows themselves, and between the monitor edges and the windows, you can set the following two configuration options to 0 for the desired monitors and workspaces:
komorebic.exe container-padding <MONITOR_INDEX> <WORKSPACE_INDEX> 0
komorebic.exe workspace-padding <MONITOR_INDEX> <WORKSPACE_INDEX> 0❗️NOTE: If you followed the quickstart and are using the sample configurations, this is already the default behaviour.
Depending on what is in your configuration, when komorebi is started, you may experience the layout rapidly being adjusted
with many retile events.
If you would like to avoid this, you can start komorebi with a flag which tells komorebi to wait until all configuration
has been loaded before listening to and responding to window manager events: komorebic start --await-configuration.
If you start komorebi with the --await-configuration flag, you must send the komorebic complete-configuration
command at the end of the configuration section of your komorebi.ps1 (or komorebi.ahk config, before you start
defining the key bindings). The layout will not be updated and komorebi will not respond to komorebic commands until
this command has been received.
❗️NOTE: A significant number of floating window rules for the most common applications are already generated for you
Sometimes you will want a specific application to never be tiled, and instead float all the time. You can add rules to enforce this behaviour:
komorebic.exe float-rule title "Control Panel"
# komorebic.exe float-rule exe [EXE NAME]
# komorebic.exe float-rule class [CLASS NAME]❗️NOTE: A significant number of force-manage window rules for the most common applications are already generated for you
In some rare cases, a window may not automatically be registered to be managed by komorebi. When this happens, you can
manually add a rule to force komorebi to manage it:
komorebic.exe manage-rule exe TIM.exe
# komorebic.exe manage-rule class [CLASS NAME]
# komorebic.exe manage-rule title [TITLE]❗️NOTE: A significant number of tray application rules for the most common applications are already generated for you
If you are experiencing behaviour where closing a window leaves a blank tile, but minimizing the same window does not , you have probably enabled a 'close/minimize to tray' option for that application. You can tell komorebi to handle this application appropriately by identifying it via the executable name or the window class:
komorebic.exe identify-tray-application exe Discord.exe
# komorebic.exe identify-tray-application class [CLASS NAME]
# komorebic.exe identify-tray-application title [TITLE]❗️NOTE: Microsoft Office-specific application rules are already generated for you
Microsoft Office applications such as Word and Excel require certain configuration options to be set in order to be managed correctly. Below is an example of configuring Microsoft Word to be managed correctly by komorebi.
# This only needs to be added once
komorebic.exe float-rule class _WwB

# Repeat these for other office applications such as EXCEL.EXE etc
# Note that the capitalised EXE is important here- double check the
# exact case for the name and the file extension in Task Manager or
# the AHK Window Spy

komorebic.exe identify-layered-application exe WINWORD.EXE
komorebic.exe identify-border-overflow-application exe WINWORD.EXEkomorebi supports two focus-follows-mouse implementations; the native Windows Xmouse implementation, which treats the
desktop, the task bar, and the system tray as windows and switches focus to them eagerly, and a custom komorebi
implementation, which only considers windows managed by komorebi as valid targets to switch focus to when moving the
mouse.
To enable the komorebi implementation you must start the process with the --ffm flag to explicitly enable the feature.
This is because the mouse tracking required for this feature significantly increases the CPU usage of the process (on my
machine, it jumps from <1% to 4), and this CPU increase persists regardless of whether focus-follows-mouse is enabled
or disabled at any given time via komorebic's configuration commands.
When calling any of the komorebic commands related to focus-follows-mouse functionality, the windows
implementation will be chosen as the default implementation. You can optionally specify the komorebi implementation by
passing it as an argument to the --implementation flag:
komorebic.exe toggle-focus-follows-mouse --implementation komorebiBy default, the mouse will move to the center of the window when the focus is changed in a given direction. This behaviour is know is 'mouse follows focus'. To disable this behaviour across all workspaces, add the following command to your configuration file:
Run, komorebic.exe toggle-mouse-follows-focus, , HideIf you create a BSP layout through various resize adjustments that you want to be able to restore easily in the future, it is possible to "quicksave" that layout to the system's temporary folder and load it later in the same session, or alternatively, you may save it to a specific file to be loaded again at any point in the future.
komorebic.exe quick-save # saves the focused workspace to $Env:TEMP\komorebi.quicksave.json
komorebic.exe quick-load # loads $Env:TEMP\komorebi.quicksave.json on the focused workspace

komorebic.exe save ~/layouts/primary.json # saves the focused workspace to $Env:USERPROFILE\layouts\primary.json
komorebic.exe load ~/layouts/secondary.json # loads $Env:USERPROFILE\layouts\secondary.json on the focused workspace
These layouts can be applied to arbitrary collections of windows on any workspace, as they only track the layout dimensions and are not coupled to the applications that were running at the time of saving.
When layouts that expect more or less windows than the number currently on the focused workspace are loaded, komorebi
will automatically reconcile the difference.
Particularly for users of ultrawide monitors, traditional tiling layouts may not seem like the most efficient use of screen space. If you feel this is the case with any of the default layouts, you are also welcome to create your own custom layouts and save them as JSON or YAML.
If you're not comfortable writing the layouts directly in JSON or YAML, you can use the komorebi Custom Layout Generator to interactively define a custom layout, and then copy the generated JSON content.
Custom layouts can be loaded on the current workspace or configured for a specific workspace with the following commands:
komorebic.exe load-custom-layout ~/custom.yaml
komorebic.exe workspace-custom-layout 0 0 ~/custom.yaml
The fundamental building block of a custom komorebi layout is the Column.
Columns come in three variants:
- Primary: This is where your primary focus will be on the screen most of the time. There must be exactly one Primary Column in any custom layout. Optionally, you can specify the percentage of the screen width that you want the Primary Column to occupy.
- Secondary: This is an optional column that can either be full height of split horizontally into a fixed number of maximum rows. There can be any number of Secondary Columns in a custom layout.
- Tertiary: This is the final column where any remaining windows will be split horizontally into rows as they get added.
If there is only one window on the screen when a custom layout is selected, that window will take up the full work area of the screen.
If the number of windows is equal to or less than the total number of columns defined in a custom layout, the windows will be arranged in an equal-width columns.
When the number of windows is greater than the number of columns defined in the custom layout, the windows will begin to be arranged according to the constraints set on the Primary and Secondary columns of the layout.
Here is an example custom layout that can be used as a starting point for your own:
YAML
- column: Secondary
  configuration: !Horizontal 2 # max number of rows
- column: Primary
  configuration: !WidthPercentage 50 # percentage of screen
- column: Tertiary
configuration: HorizontalWith komorebi it is possible to define rules to automatically change the layout on a specified workspace when a
threshold of window containers is met.
# On the first workspace of the first monitor (0 0)
# When there are one or more window containers visible on the screen (1)
# Use the bsp layout (bsp)
komorebic workspace-layout-rule 0 0 1 bsp

# On the first workspace of the first monitor (0 0)
# When there are five or more window containers visible on the screen (five)
# Use the custom layout stored in the home directory (~/custom.yaml)
komorebic workspace-custom-layout-rule 0 0 5 ~/custom.yaml
However, if you add workspace layout rules, you will not be able to manually change the layout of a workspace until all layout rules for that workspace have been cleared.
# If you decide that workspace layout rules are not for you, you can remove them from that same workspace like this
komorebic clear-workspace-layout-rules 0 0If you would like to contribute code to this repository, there are a few requests that I have to ensure a foundation of code quality, consistency and commit hygiene:
- Flatten all
usestatements - Run
cargo +nightly clippyand ensure that all lints and suggestions have been addressed before committing - Run
cargo +nightly fmt --allto ensure consistent formatting before committing - Use
git czwith the Commitizen CLI to prepare commit messages - Provide at least one short sentence or paragraph in your commit message body to describe your thought process for the changes being committed
If you use IntelliJ, you should enable the following settings to ensure that code generated by macros is recognised by the IDE for completions and navigation:
- Set
Expand declarative macrostoUse new engineunder "Settings > Langauges & Frameworks > Rust" - Enable the following experimental features:
org.rust.cargo.evaluate.build.scriptsorg.rust.macros.proc
Logs from komorebi will be appended to %LOCALAPPDATA%/komorebi/komorebi.log; this file is never rotated or overwritten, so it will keep
growing until it is deleted by the user.
Whenever running the komorebic stop command or sending a Ctrl-C signal to komorebi directly, the komorebi process
ensures that all hidden windows are restored before termination.
If however, you ever end up with windows that are hidden and cannot be restored, a list of window handles known
to komorebi are stored and continuously updated in %LOCALAPPDATA%/komorebi//komorebi.hwnd.json.
Running komorebic restore-windows will read the list of window handles and forcibly restore them, regardless of
whether the main komorebi process is running.
If komorebi ever stops responding, it is most likely either due to either a panic or a deadlock. In the case of a
panic, this will be reported in the log. In the case of a deadlock, there will not be any errors in the log, but the
process and the log will appear frozen.
If you believe you have encountered a deadlock, you can compile komorebi with --features deadlock_detection and try
reproducing the deadlock again. This will check for deadlocks every 5 seconds in the background, and if a deadlock is
found, information about it will appear in the log which can be shared when opening an issue.
The current state of the window manager can be queried using the komorebic state command, which returns a JSON
representation of the State struct, which includes the current state of WindowManager.
This may also be polled to build further integrations and widgets on top of (if you ever wanted to build something like Stackline for Windows, you could do it by polling this command).
It is also possible to subscribe to notifications of every WindowManagerEvent and SocketMessage handled
by komorebi using Named Pipes.
First, your application must create a named pipe. Once the named pipe has been created, run the following command:
komorebic.exe subscribe <your pipe name>Note that you do not have to include the full path of the named pipe, just the name.
If the named pipe exists, komorebi will start pushing JSON data of successfully handled events and messages:
{"event":{"type":"AddSubscriber","content":"yasb"},"state":{}}
{"event":{"type":"FocusWindow","content":"Left"},"state":{}}
{"event":{"type":"FocusChange","content":["SystemForeground",{"hwnd":131444,"title":"komorebi – README.md","exe":"idea64.exe","class":"SunAwtFrame","rect":{"left":13,"top":60,"right":1520,"bottom":1655}}]},"state":{}}
{"event":{"type":"MonitorPoll","content":["ObjectCreate",{"hwnd":5572450,"title":"OLEChannelWnd","exe":"explorer.exe","class":"OleMainThreadWndClass","rect":{"left":0,"top":0,"right":0,"bottom":0}}]},"state":{}}
{"event":{"type":"FocusWindow","content":"Right"},"state":{}}
{"event":{"type":"FocusChange","content":["SystemForeground",{"hwnd":132968,"title":"Windows PowerShell","exe":"WindowsTerminal.exe","class":"CASCADIA_HOSTING_WINDOW_CLASS","rect":{"left":1539,"top":60,"right":1520,"bottom":821}}]},"state":{}}
{"event":{"type":"FocusWindow","content":"Down"},"state":{}}
{"event":{"type":"FocusChange","content":["SystemForeground",{"hwnd":329264,"title":"den — Mozilla Firefox","exe":"firefox.exe","class":"MozillaWindowClass","rect":{"left":1539,"top":894,"right":1520,"bottom":821}}]},"state":{}}
{"event":{"type":"FocusWindow","content":"Up"},"state":{}}
{"event":{"type":"FocusChange","content":["SystemForeground",{"hwnd":132968,"title":"Windows PowerShell","exe":"WindowsTerminal.exe","class":"CASCADIA_HOSTING_WINDOW_CLASS","rect":{"left":1539,"top":60,"right":1520,"bottom":821}}]},"state":{}}
You may then filter on the type key to listen to the events that you are interested in. For a full list of possible
notification types, refer to the enum variants of WindowManagerEvent in komorebi and SocketMessage
in komorebi-core.
An example of how to create a named pipe and a subscription to komorebi's handled events in Python
by @denBot can be
found here.
An example of how to create a named pipe and a subscription to komorebi's handled events in Rust can also be found
in the komokana repository.
A JSON Schema of the event notifications emitted to subscribers can be generated with
the komorebic notification-schema command. The output of this command can be redirected to the clipboard or a file,
which can be used with services such as Quicktype to generate type definitions in different
programming languages.
A TCP listener can optionally be exposed on a port of your choosing with the --tcp-port=N flag. If this flag is not
provided to komorebi or komorebic start, no TCP listener will be created.
Once created, your client may send
any SocketMessage to komorebi in the
same way that komorebic would.
This can be used if you would like to create your own alternative to komorebic which incorporates scripting and
various middleware layers, and similarly it can be used if you would like to integrate komorebi with
a custom input handler.
If a client sends an unrecognized message, it will be disconnected and have to reconnect before trying to communicate again.
A JSON Schema of socket messages used to send instructions to komorebi can be generated
with the komorebic socket-schema command. The output of this command can be redirected to the clipboard or a file,
which can be used with services such as Quicktype to generate type definitions in different
programming languages.
-
First and foremost, thank you to my wife, both for naming this project and for her patience throughout its never-ending development
-
Thank you to @sitiom for being an exemplary open source community leader
-
Thank you to the developers of nog who came before me and whose work taught me more than I can ever hope to repay
-
Thank you to the developers of GlazeWM for pushing the boundaries of tiling window management on Windows with me and having an excellent spirit of collaboration
-
Thank you to @Ciantic for helping me bring the hidden Virtual Desktops cloaking function to
komorebi