A shopping bot which can detect direction, follow path (between walls), detect items, pick and deliver items.
A robot takes in the list of items to buy from the user using an Android Application. Processes the information and uses Aruco Markers for finding the direction and path to follow. Locates the item to be picked using the unique Arcuco Markers. Then, picks the item needed and deliver it to starting location.
- Raspberry PI 3
- Atmega2560
- Arduino Uno
- Cameras
- IR Sensors
- Ultrasonic Sensors
- Magnetometer
- Servo Motors
- DC Motors
- Motor Driver IC
- Batteries
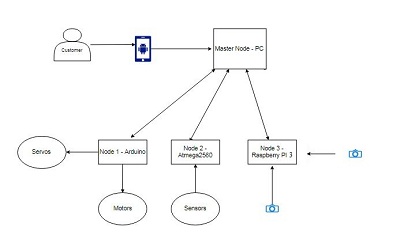
The block digram of the entire process can be seen below:
- Android Application
- Aruco Markers
- Sensor Measurement
- Navigation
- Arm Control
- Item Detection
- Item Picking
- Item Delivery
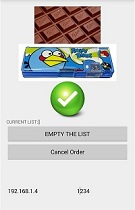
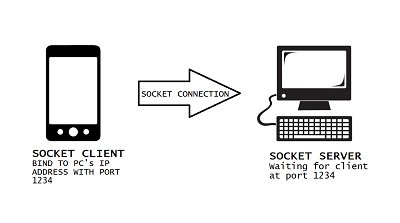
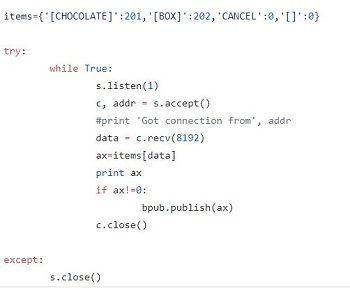
An android app is used to select the items to get and provide the item ids to the PC via Socket connection.
The socket connection to the PC with the snippet for receiving,
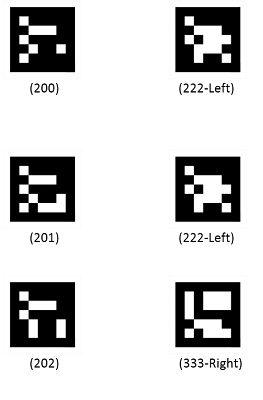
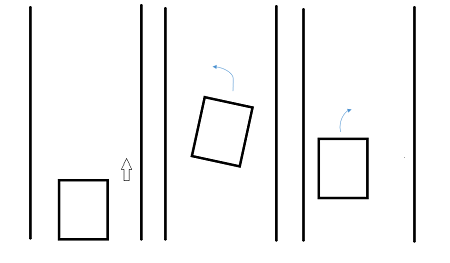
Aruco Marks are used for finding the direction and the items.
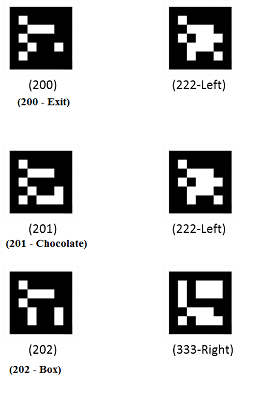
Here, an example of direction detection is given. If the item we ordered is Chocolate the robot goes to the left, if it’s box then the robot goes to the right. This is done throughout the shop for direction detection.
The detection of aruco is done using the code available in Aruco Detection.
The sensors used are listed below:
- Ultrasonic Sensor (HC-SR04)
- Magnetometer Sensor (HMC5883L)
- IR Sensor
- Ultrasonic Sensor is used in Path following during navigation.(to find the distance from the walls)
- Magnetometer Sensor is used for turning the robot to the desired angle.
- IR Sensors is used to detect the presence of an item (each item consist of a black line to indicate its presence)
The Measurement is done using Atmega2560 using standard libraries for each sensors and the values are published to ROS master in topic /dist.
Four Servo Motors are used for building the arm. It can be as
- The Base - turning clockwise and anticlockwise
- The Wrist - for making angular/altitudinal changes.
- The Grip - to hold the item.
It has a single Servo Motor for turing the arm both in anticlockwise and clockwise direction.
It has two Servo Motor for changing the height and position of The Grip.
A gripper with Servo Motors is used to hold the items
Autonomous Navigation involves the use of camera and sensors(Ultrasonic). It involves:
- Path following – uses Ultrasonic Sensors
- Direction Identification – uses Camera
- Ultrasonic Sensor attached to the bot on both sides(right and left) gives us distance from the walls of the shop.
- The bot follows the path using the distances by maintaining a particular distance(threshold value) from the wall. We adjust the speed for controlling the robot.
- The snippet used is shown:
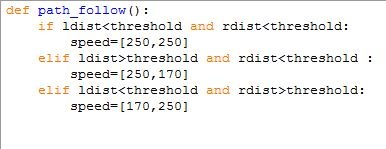
- In case if the distance of separation between is decreased, it compensates by moving (by velocity changing) in the opposite direction such the separation becomes the threshold distance.
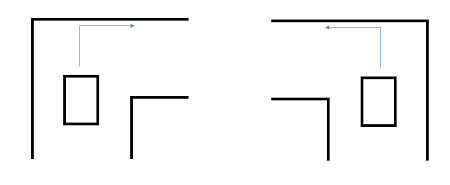
- In case a corner is encountered, it uses the ultrasonic sensor to find which has more distance and turn in that particular direction.
- While traversing the shop, there would be confusion on which direction to go in case of a junction being encountered.
- We have used Aruco based sign boards.
- Each item(can be modified to category in future) is assigned an id and its’ Aruco Marker is used.
- The direction of the particular item is also encoded in different Aruco Marker.
- These two Markers are placed aside to indicate the items’ direction. sign_board = {item_i_1 : direction, item_id_2 : direction, . . . , item_id_n : direction}
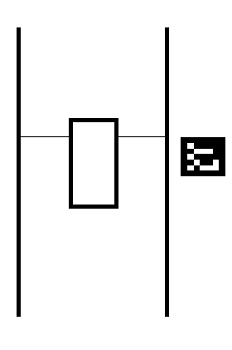
- Here as stated a Aruco markers is assigned for every item and they are pasted these markers below the items. A Black line is placed on the floor for each items.
- Using IR Sensors these black lines are detected and the bot is then stopped.
- Then we perform Aruco detection using the Side camera/cameras.
- If the Marker Id matches with our needed marked id, we pick the item, else we just move on.
Once the Item has been picked, the marker id changes to the exit marker id(here #200) and the robot goes to the exit and drops the item.
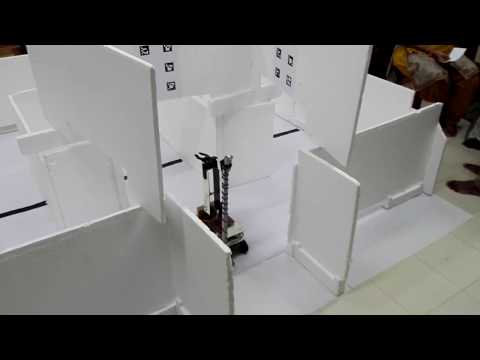
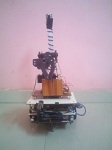
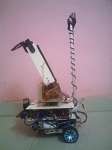
The final output robot is shown below
The Youtube Video showing the demo can be seen below: