

Swiss army knife of GLSL Shaders. Loads frag/vertex shaders, images and geometries. Will reload automatically on changes. Support for multi buffers, background and postprocessing passes. Can render headlessly and into a file. Use POSIX STANDARD CONSOLE IN/OUT to communicate (uniforms, camera position, scene description and commands) to and with other programs. Compatible with Linux and MacOS, runs from command line with out X11 environment on RaspberryPi devices.
Install the GLFW 3 library and other dependencies:
sudo apt-get update
sudo apt-get upgrade
sudo apt-get install libglfw3-dev git-core
Download the glslViewer code, compile and install:
git clone http://github.com/patriciogonzalezvivo/glslViewer
cd glslViewer
make
sudo make install
This was tested with Ubuntu 16.04.
** Important Note ** : Glfw3 library in Ubuntu 18.04 is causing troubles. For that you need to compile glfw3 from source (next paragraph)
These instructions may not work for all users. For example, it seems that libglfw3-dev conflicts with the older libglfw-dev. The previous Ubuntu install instructions direct you to download and compile glfw3 manually:
sudo apt-get update
sudo apt-get upgrade
sudo apt-get install git-core cmake xorg-dev libglu1-mesa-dev
cd ~
git clone https://github.com/glfw/glfw.git
cd glfw
cmake .
make
sudo make installInstall the GLFW 3 library, build tools, and other dependencies:
sudo apt-get update
sudo apt-get upgrade
sudo apt-get install libglfw3-dev xorg-dev libglu1-mesa-dev git-core dh-make fakeroot build-essential
Download the glslViewer code, compile and install. These instructions use deb-helper to build a native debian package, to build a simple binary, follow the Ubuntu instructions above.
git clone https://github.com/patriciogonzalezvivo/glslViewer.git
cd glslViewer
fakeroot dh binary
cd ..
sudo dpkg -i glslviewer_1.5_amd64.deb
(The arch part of the .deb filename will differ on other cpu architectures.)
This was tested with the Debian testing distribution on January 28th 2018.
Install the GLFW 3 library, build tools are already included in the base install.
sudo dnf install mesa-libGLU-devel glfw-devel libXi-develDownload the glslViewer code, compile and install:
git clone http://github.com/patriciogonzalezvivo/glslViewer
cd glslViewer
make
sudo make install
This was tested on Fedora 28.
Get Raspbian, a Debian-based Linux distribution made for Raspberry Pi and then do:
sudo apt-get install glslviewer** Important Note ** : pushing versions on the official Raspbian distribution takes time. If you are searching for the last features please compile from source (next paragraph).
Or, if you want to compile the code yourself:
cd ~
git clone http://github.com/patriciogonzalezvivo/glslViewer
cd glslViewer
make
sudo make installsudo pacman -S glu glfw-x11
git clone http://github.com/patriciogonzalezvivo/glslViewer
cd glslViewer
make
sudo make installOr simply install the AUR package glslviewer-git with an AUR helper.
Use Homebrew to install glslViewer and its dependencies:
brew update
brew upgrade
brew install glslviewer
** Important Note ** : brew not always have the last version of GlslViewer. If you are searching for the last features please compile from source (next paragraph).
If you prefer to compile from source directly from this repository you need to install GLFW, pkg-config first and then download the code, compile and install.
brew update
brew upgrade
brew tap homebrew/versions
brew install glfw3 pkg-config
cd ~
git clone http://github.com/patriciogonzalezvivo/glslViewer
cd glslViewer
make
make install
If glfw3 was installed before, after running the code above, remove glfw3 and try:
brew install glfw3 pkg-config
export PKG_CONFIG_PATH=/usr/local/lib/pkgconfig
make
make install
** Note if you are using MOJAVE ** : there are some issues if you are using MacOS Mojave if you experiencing black screens please recompile GLFW3 from source ('mojave-fixes' branch) and then recompile GlslViewerfollowing this instructions.
git clone https://github.com/glfw/glfw.git
cd glfw
git checkout mojave-fixes
cmake .
make
sudo make install
cd ..
git clone http://github.com/patriciogonzalezvivo/glslViewer
cd glslViewer
make
make installGlslViewer now ships with a Python package. It's essentially a wrapper that allows to compile, benchmark and render shaders from a Python script.
- First make sure you have the setup tools
sudo apt install python-setuptools- Once you compile the binaries do
sudo make install_python
In the most simple scenario you just want to load a fragment shader. For that you need to:
- Run the app passing the shader as an argument
cd examples
glslViewer test.frag- Then edit the shader with your favorite text editor.
vim test.fragNote: In RaspberryPi you can avoid taking over the screen by using the -l flags so you can see the console. Also you can edit the shader file through ssh/sftp.
Note: On Linux and macOS you may used to edit your shaders with Sublime Text, if that's your case you should try this Sublime Text 2 plugin that launch glslViewer every time you open a shader.

You can also load both fragments and vertex shaders. Of course modifying a vertex shader makes no sense unless you load an interesting geometry. That's why glslViewer can load .ply files. Try doing:
glslViewer examples/head.frag examples/head.vert examples/head.plyYou can load PNGs and JPEGs images to a shader. They will be automatically loaded and assigned to a uniform name according to the order they are passed as arguments: ex. u_tex0, u_tex1, etc. Also the resolution will be assigned to vec2 uniform according to the texture uniform's name: ex. u_tex0Resolution, u_tex1Resolution, etc.
glslViewer examples/test.frag examples/test.pngIn case you want to assign custom names to your textures uniforms you must specify the name with a flag before the texture file. For example to pass the following uniforms uniform sampled2D imageExample; and uniform vec2 imageExampleResolution; is defined in this way:
glslViewer shader.frag -imageExample image.pngBeside for texture uniforms other arguments can be add to glslViewer:
-
-x <pixels>set the X position of the billboard on the screen -
-y <pixels>set the Y position of the billboard on the screen -
-w <pixels>or--width <pixels>set the width of the billboard -
-h <pixels>or--height <pixels>set the height of the billboard -
-s <seconds>exit app after a specific amount of seconds -
-o <image.png>save the viewport to an image file before -
-e <command>execute command when start. Multiple-eflags can be chained -
-E <command>execute command then exit -
-lin the RaspberryPi will draw the viewport in a 500x500 billboard on the top right corner of the screen that let you see the code and the shader at the same time. While in MacOS and Linux will display the windows always-on-top (this requires GLFW 3.2). -
--cursorshow cursor. -
--headlessheadless rendering. Very useful for making images or benchmarking. -
-I<include_folder>add an include folder to default for#includefiles -
-D<KEYWORD>add system#defines directly from the console argument -
-<texture_uniform_name> <texture>.(png|jpg|hdr): add textures associated with differentuniform sampler2Dnames -
-c <environmental_map>.(png/jpg/hdr): load a environmental map (cubemap or sphericalmap) -
-vFlipall textures after will be flipped vertically -
-vor--versionreturn glslViewer version -
--verboseturn verbose outputs on -
--helpdisplay the available command line options
Once glslViewer is running the CIN is listening for some commands, so you can pass data through regular *nix pipes.
[uniform_name],[int|float][,float][,float][,float][,float]: uniforms (int,floats,vec2,vec3andvec4) can be pass as comma separated values (CVS), where the first column is for the name of the uniform and the rest for the numbers of values. Values are strong typed (1is not the same as1.0). Ex:
u_myInt,13
u_myfloat,0.5
u_myVec2,1.0,0.1
u_myVec3,0.0,0.5,0.0
...
Note that there is a distinction between intand floatso remember to put . (floating points) to your values.
-
help[,<command>]print help for one or all command -
versionreturn glslViewer version. -
debug,[on|off]turn debug mode on or off. -
window_widthreturn the width of the windows. -
window_heightreturn the height of the windows. -
pixel_densityreturn the pixel density. -
screen_sizereturn the screen size. -
viewportreturn the viewport size. -
mousereturn the mouse position. -
fpsreturnu_fps, the number of frames per second. -
deltareturnu_delta, the secs between frames. -
timereturnu_time, the elapsed time. -
datereturnu_dateas YYYY, M, D and Secs. -
frag[,<line_number>|<filename>]returns a line or save the entire fragment shader source code. -
vert[,<line_number>|<filename>]returns a line or save the entire vertex shader source code. -
dependencies[,vert|frag]returns a list of all the dependencies of the vertex o fragment shader or both. -
filesreturn a list of files. -
buffersreturn a list of buffers as their uniform name. -
definesreturn a list of active defines -
define,<KEYWORD>add a define to the shader -
undefine,<KEYWORD>remove a define on the shader -
uniforms[,all|active]return a list of all uniforms and their values or just the one active (default). -
texturesreturn a list of textures as their uniform name and path. -
camera_distance[,<dist>]get or set the camera distance to the target. -
camera_position[,<x>,<y>,<z>]get or set the camera position. -
screenshot[,<filename>]saves a screenshot to a filename. -
sequence,<A_sec>,<B_sec>saves a sequence of images from A to B second. -
q,quitorexit: close glslViewer
-
uniform sampler2D u_tex[number]: default textures names -
uniform float u_time;: shader playback time (in seconds) -
uniform float u_delta;: delta time between frames (in seconds) -
uniform vec4 u_date;: year, month, day and seconds -
uniform vec2 u_resolution;: viewport resolution (in pixels) -
uniform vec2 u_mouse;: mouse pixel coords -
varying vec2 v_texcoord: UV of the billboard ( normalized ) -
uniform vec3 u_camera: Position of the camera -
uniform float u_cameraFarClip: far clipping -
uniform float u_cameraNearClip: near clipping -
uniform float u_cameraDistance: camera distance to target (0,0,0) -
uniform mat3 u_normalMatrix: Normal Matrix -
uniform mat4 u_modelMatrix: Model Matrix -
uniform mat4 u_viewMatrix: View Matrix -
uniform mat4 u_projectionMatrix: Projection Matrix -
uniform mat4 u_modelViewProjectionMatrix: Model + View + Projection Matrix -
uniform vec3 u_light: Position of the light -
uniform vec3 u_lightColor: Color of the light -
uniform mat4 u_lightMatrix: Light Matrix for reprojecting shadows -
uniform sampler2DShadow u_ligthShadowMap: Shadow map -
uniform samplerCube u_cubeMap: loaded cubemap -
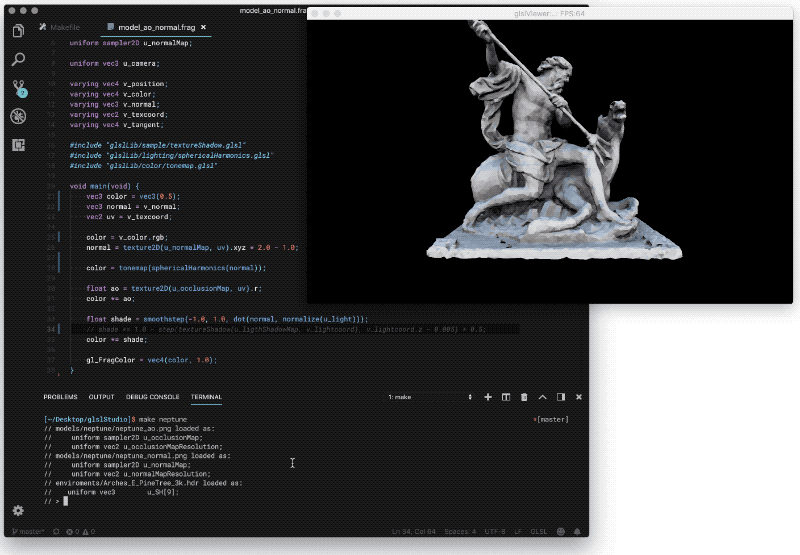
uniform vec3 u_SH[9]: Pre computed Spherical Harmonics of the loaded cubemap
You can include other GLSL code using a traditional #include "file.glsl" macro.
Note: included files are not under watch so changes will not take effect until the main file is saved.
Beside the defines you can pass as an argument using -D[define] you can relay on the following native defines automatically generated for you.
GLSLVIEWER: you can use it to tell your shader it's being render in GlslViewer.
Depending on the platform
-
PLATFORM_OSX: added only on MacOS/OSX platforms. -
PLATFORM_RPI: added only only on RaspberryPi devices. -
PLATFORM_LINUX: added only in i86 and 64bit Linux platforms.
Depending on the geometry:
-
MODEL_HAS_TEXCOORDS -
MODEL_HAS_NORMALS -
MODEL_HAS_COLORS -
MODEL_HAS_TANGENTS
The following defines fork and reuse the same shader program in different passes
-
BUFFER_[NUMBER]: added extra buffer passes trough branching subshader. Each one renders touniform sampler2D u_buffer[NUMBER];. (Read more about it in the next section) -
BACKGROUND: added a background subshader when rendering a 3D geometry. -
POSTPROCESSING: added a post-processing pass where the main scene have been render touniform sampler2D u_scene;.
You can use multiple buffers by forking the code using #ifdef BUFFER_[number], #if defined (BUFFER_[number]) and/or #elif defined (BUFFER_[number]). Then you can fetch the content of those buffers by using the uniform sampler2D u_buffer[number] texture. Ex.:
    uniform sampler2D   u_buffer0;
    uniform sampler2D   u_buffer1;

    varying vec2        v_texcoord;

    void main() {
        vec3 color = vec3(0.0);
        vec2 st = v_texcoord;

    #ifdef BUFFER_0
        color.g = abs(sin(u_time));

    #elif defined( BUFFER_1 )
        color.r = abs(sin(u_time));

    #else
        color.b = abs(sin(u_time));

        color = mix(color,
                    mix(texture2D(u_buffer0, st).rgb,
                        texture2D(u_buffer1, st).rgb,
                        step(0.5, st.x) ),
                    step(0.5, st.y));
    #endif

        gl_FragColor = vec4(color, 1.0);
    }
There is an extended example on examples/test_multibuffer.frag and examples/grayscott.frag.
If you load a 3D model or set a shader without opacity you will notice the background is black by default (actually transparent in RaspberryPi).
It's possible to set a background by adding a #ifdef BACKGROUND check and adding your code there. Check the example examples/model_background.frag
uniform vec2 u_resolution;
uniform float u_time;

varying vec4 v_color;
varying vec3 v_normal;

float stroke(float x, float size, float w) {
    float d = step(size, x+w*.5) - step(size, x-w*.5);
    return clamp(d, 0., 1.);
}

vec2 ratio(in vec2 st, in vec2 s) {
    return mix( vec2((st.x*s.x/s.y)-(s.x*.5-s.y*.5)/s.y,st.y),
                vec2(st.x,st.y*(s.y/s.x)-(s.y*.5-s.x*.5)/s.x),
                step(s.x,s.y));
}

float rectSDF(vec2 st, vec2 s) {
    st = st*2.-1.;
    return max( abs(st.x/s.x),
                abs(st.y/s.y) );
}

void main(void) {
   vec4 color = vec4(1.0);
   vec2 st = gl_FragCoord.xy/u_resolution.xy;
   vec2 pixel = 1./u_resolution.xy;

#ifdef BACKGROUND
    st = ratio(st, u_resolution);

    color.rgb *= vec3(0.75, 0.0, 0.0) * step(0.5, fract((st.x - st.y - u_time * 0.1) * 20.));

    float sdf = rectSDF(st, vec2(1.0));
    color.rgb *= step(sdf, 0.7);
    color.rgb += vec3(1.0, 0.0, 0.0) * stroke(sdf, 0.75, 0.01);
#else
    color.rgb = v_color.rgb;
    float shade = dot(v_normal, normalize(vec3(0.0, 0.75, 0.75)));
    color.rgb *= smoothstep(-1.0, 1.0, shade);
#endif

    gl_FragColor = color;
}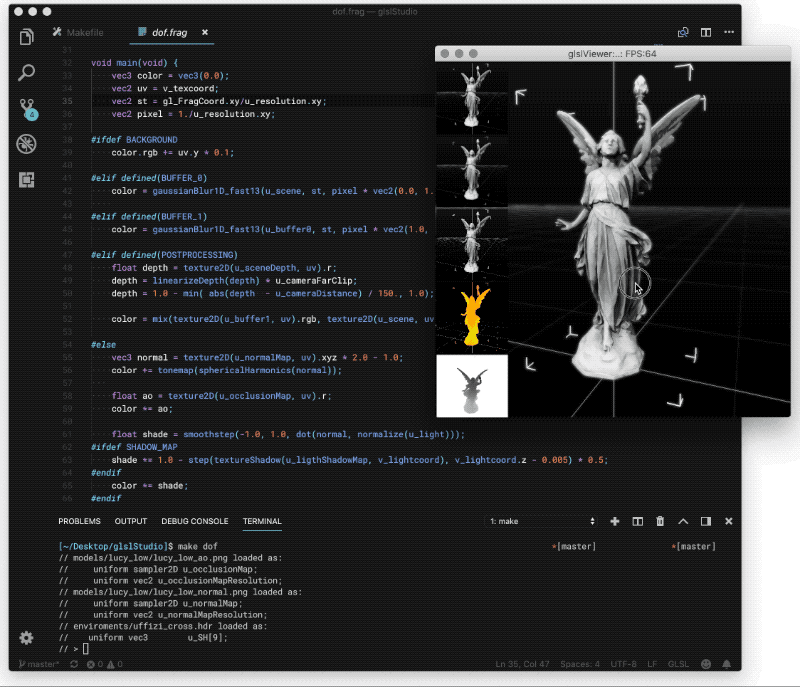
Also when loading 3D models it's possible to add a postprocessing layer adding a #ifdef POSTPROCESSING to branch the logic of the shader. To apply a postprocessing layer you need to read the scene as a texture, this is saved on the uniform sampler2D u_scene; texture together with a depth render pass of the scene located in uniform sampler2D u_scene_depth;. Here is an example of a cheap DoF at examples/model_postprocessing.frag
uniform sampler2D u_scene;          // Scene RGB
uniform sampler2D u_scene_depth;    // Scene Depth

uniform vec2 u_resolution;
uniform float u_time;

varying vec4 v_position;
varying vec4 v_color;
varying vec3 v_normal;
varying vec2 v_texcoord;

float stroke(float x, float size, float w) {
    float d = step(size, x+w*.5) - step(size, x-w*.5);
    return clamp(d, 0., 1.);
}

vec2 ratio(in vec2 st, in vec2 s) {
    return mix( vec2((st.x*s.x/s.y)-(s.x*.5-s.y*.5)/s.y,st.y),
                vec2(st.x,st.y*(s.y/s.x)-(s.y*.5-s.x*.5)/s.x),
                step(s.x,s.y));
}

float rectSDF(vec2 st, vec2 s) {
    st = st*2.-1.;
    return max( abs(st.x/s.x),
                abs(st.y/s.y) );
}

float LinearizeDepth(float zoverw) {
	float n = 1.0; //
	float f = 20000.0;
	return (2.0 * n) / (f + n - zoverw * (f - n));
}

void main(void) {
   vec4 color = vec4(1.0);
   vec2 st = gl_FragCoord.xy/u_resolution.xy;
   vec2 pixel = 1./u_resolution.xy;

#ifdef BACKGROUND
    // Background pattern
    st = ratio(st, u_resolution);

    color.rgb *= vec3(0.75, 0.0, 0.0) * step(0.5, fract((st.x - st.y - u_time * 0.1) * 20.));

    float sdf = rectSDF(st, vec2(1.0));
    color.rgb *= step(sdf, 0.7);
    color.rgb += vec3(1.0, 0.0, 0.0) * stroke(sdf, 0.75, 0.01);

#elif defined(POSTPROCESSING)

    // Get depth
    float depth = texture2D(u_scene_depth, st).r;
    depth = LinearizeDepth(depth) * 200.0;

    // Define focal point
    float focalDistance = 100.0;
    float focalRange = 50.0;
    depth = min( abs(depth  - focalDistance) / focalRange, 1.0);

    // Cheap box blur
    pixel *= 4.;
    color.rgb = texture2D(u_scene, st + vec2(pixel.x, 0.0)).rgb;
    color.rgb += texture2D(u_scene, st + vec2(0.0, pixel.y)).rgb;
    color.rgb += texture2D(u_scene, st + vec2(-pixel.x, 0.0)).rgb;
    color.rgb += texture2D(u_scene, st + vec2(0.0, -pixel.y)).rgb;
    color.rgb *= 0.25;

    // Mix blur and crisp scene images based on depth
    color.rgb = mix(color.rgb, texture2D(u_scene, st).rgb, 1.0 - depth);

    // Debug Depth
    // color.rgb = vec3(1.) * depth;
#else

    // Material of model
    color.rgb = v_color.rgb;
    float shade = dot(v_normal, normalize(vec3(0.0, 0.75, 0.75)));
    color.rgb *= smoothstep(-1.0, 1.0, shade);
#endif

    gl_FragColor = color;
}
- Open a Fragment shader:
$ glslViewer examples/test.frag- Open a Fragment shader with an image:
$ glslViewer examples/test.frag examples/test.png- Open a Fragment and Vertex shader with a geometry:
$ glslViewer examples/head.frag examples/head.vert examples/head.ply- Open a Fragment, Geometry and CubeMap with precomputed Spherical Harmonics:
glslViewer examples/head.ply examples/spherical_harmonics.frag -c examples/uffizi_cross.hdr- Open a Fragment that use two buffers as a Ping-Pong to do a reaction diffusion example:
$ glslViewer examples/grayscott.frag- Open a Fragment that use OS defines to know what platform is running on:
$ glslViewer examples/test_platform.frag- Make an image sequence of 500x500 pixel each from an animating shader from second 0 to second 1
$ glslViewer examples/cross.frag -w 500 -h 500
// > secuence,0,1
// > exit- Change the value of a uniform by passing CSV on the console IN:
$ glslViewer examples/temp.frag
// > u_temp,30.
// > u_temp,40.
// > u_temp,50.
// > u_temp,60.
// > u_temp,70.- Animate the value of a uniform by piping the output of a script that fetch the CPU temperature of your Raspberry PI:
$ examples/temp.sh | glslViewer examples/temp.frag- Run a headless instance of glslViewer that exits after 1 second outputting a high resolution PNG image:
$ glslViewer examples/mandelbrot.frag -w 2048 -h 2048 --headless -s 1 -o mandelbrot.png- Make an SVG from a shader using potrace and ImageMagic:
$ glslViewer examples/cross.frag --headless -s 1 -o cross.png
$ convert cross.png cross.pnm
$ potrace cross.pnm -s -o cross.svg- Load a OBJ or PLY file directly on GlslViewer. It will automatically generated a vertex and fragment shader based on the attributes. On the command line you can visualize or save it to a file.
$ glslViewer examples/head.ply
// > vert
// > frag
// > frag,head_default.frag
// > exit
$ glslViewer example/head.ply head_default.frag- Load a OBJ or PLY file and a cubemap for it. Here an example of a beautiful Fresnel effect by Karim’s Naaki
$ glslViewer examples/head.ply examples/fresnel.vert examples/fresnel.frag -c uffizi_cross.hdr- Load a PLY file and mix it with a Iq's RayMarching scene. Note the model position is set to 0,0,0 so it match the model matrix on the scene
$ glslViewer examples/head.ply examples/raymarch.frag -e model_position,0,0,0 - Load a PLY and use the shadowmap buffer and light position and matrix to cast a shadow.
$ glslViewer examples/shadow.frag examples/head.ply -e light_position,-10,20,10
- Load a PLY and apply a SSAO on the postprocessing shader
$ glslViewer examples/head.ply examples/ssao.frag
glslLoader is a python script that is installed together with glslViewer binary which let you download any shader made with The book of shaders editor (editor.thebookofshaders.com) . Just pass as argument the log number
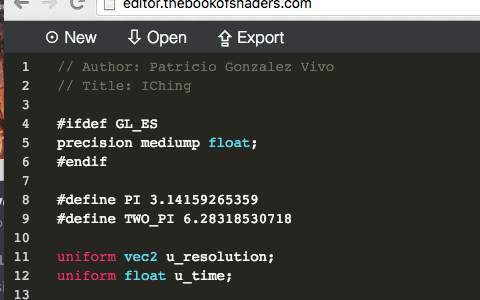
glslLoader 170208142327Patricio Gonzalez Vivo: github | twitter | website
Thanks to:
-
Karim’s Naaki lot of concept and code was inspired by this two projects: fragTool and hdreffects
-
Doug Moen he help to add the compatibility to ShaderToy shaders and some RayMarching features were added for his integration with his project: curv.
-
Yvan Sraka for putting the code in shape and setting it up for TravisCI.
-
Andsz for Spherical Harmonics code from Spherical Harmonics Playground
-
Philip Rideout and Romain Guy general generosity to share their code and experience