CNOS: A Strong Baseline for CAD-based Novel Object Segmentation
Van Nguyen Nguyen Thibault Groueix
Georgy Ponimatkin
Vincent Lepetit
Tomáš Hodaň

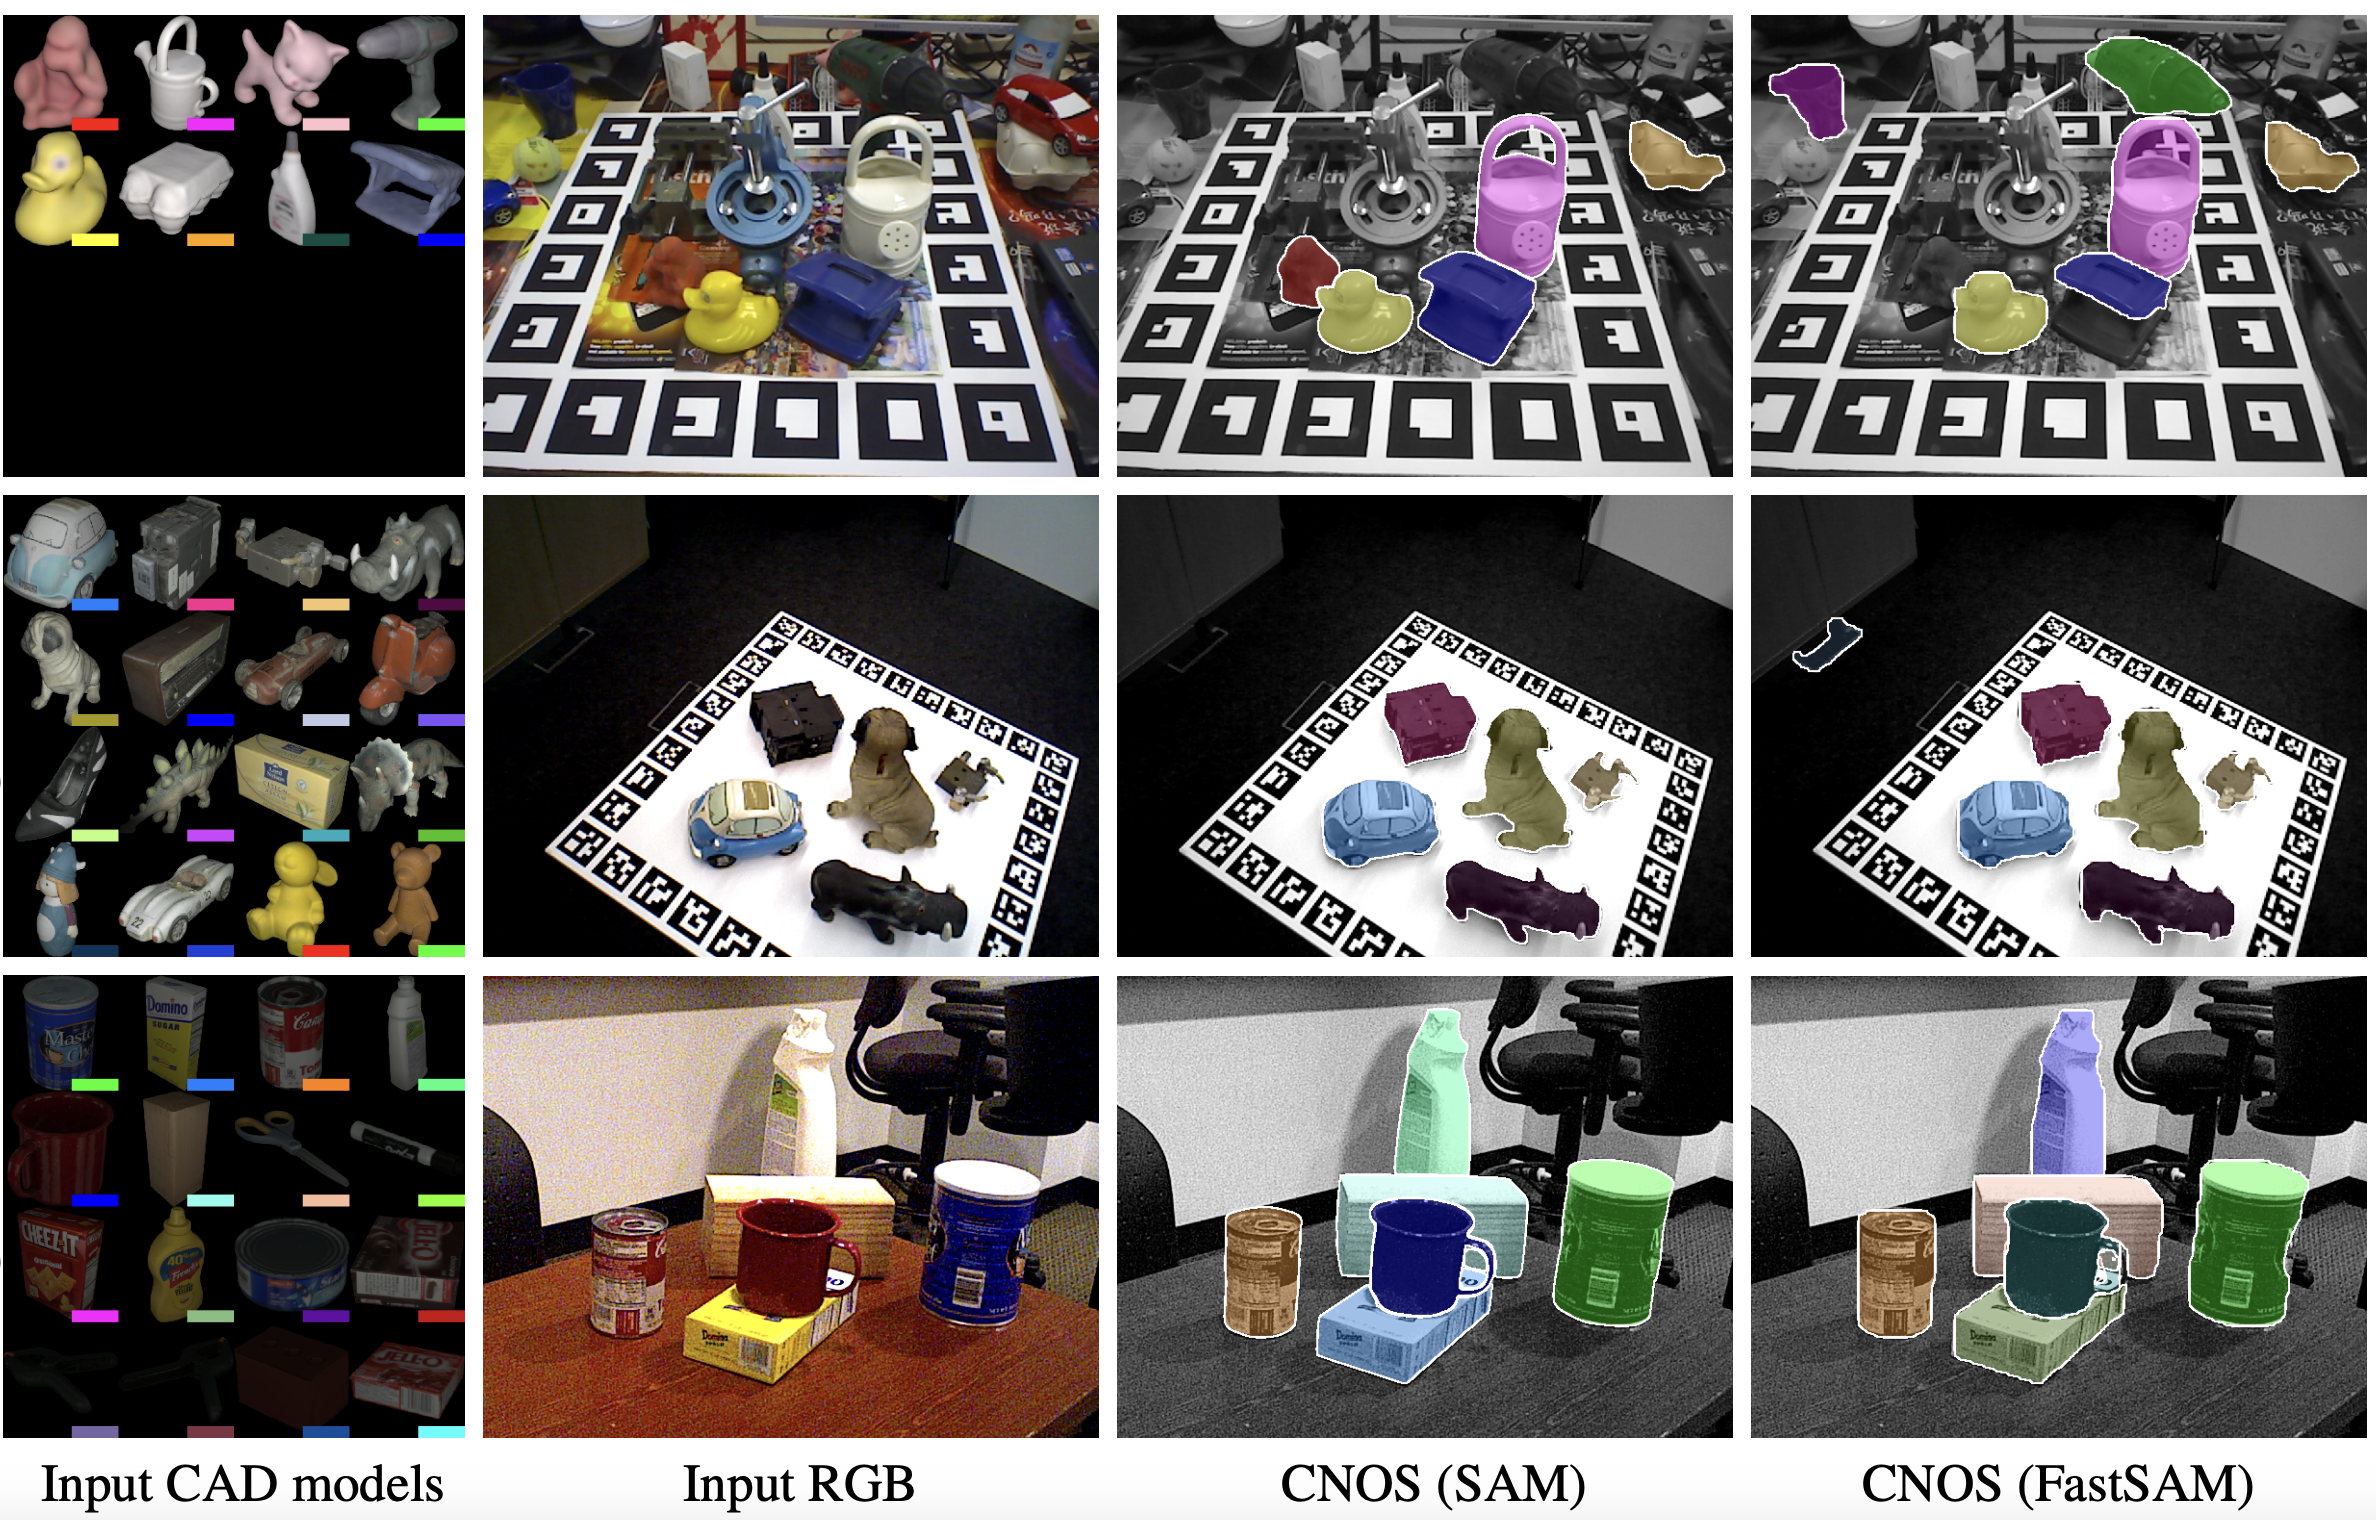
CNOS is a simple three-stage approach for CAD-based novel object segmentation. It is based on Segmenting Anything, DINOv2 and can be used for any objects without retraining. CNOS outperforms the supervised MaskRCNN (in CosyPose) which was trained on target objects. CNOS has been used as the baseline for Task 5 and Task 6 in BOP challenge 2023!
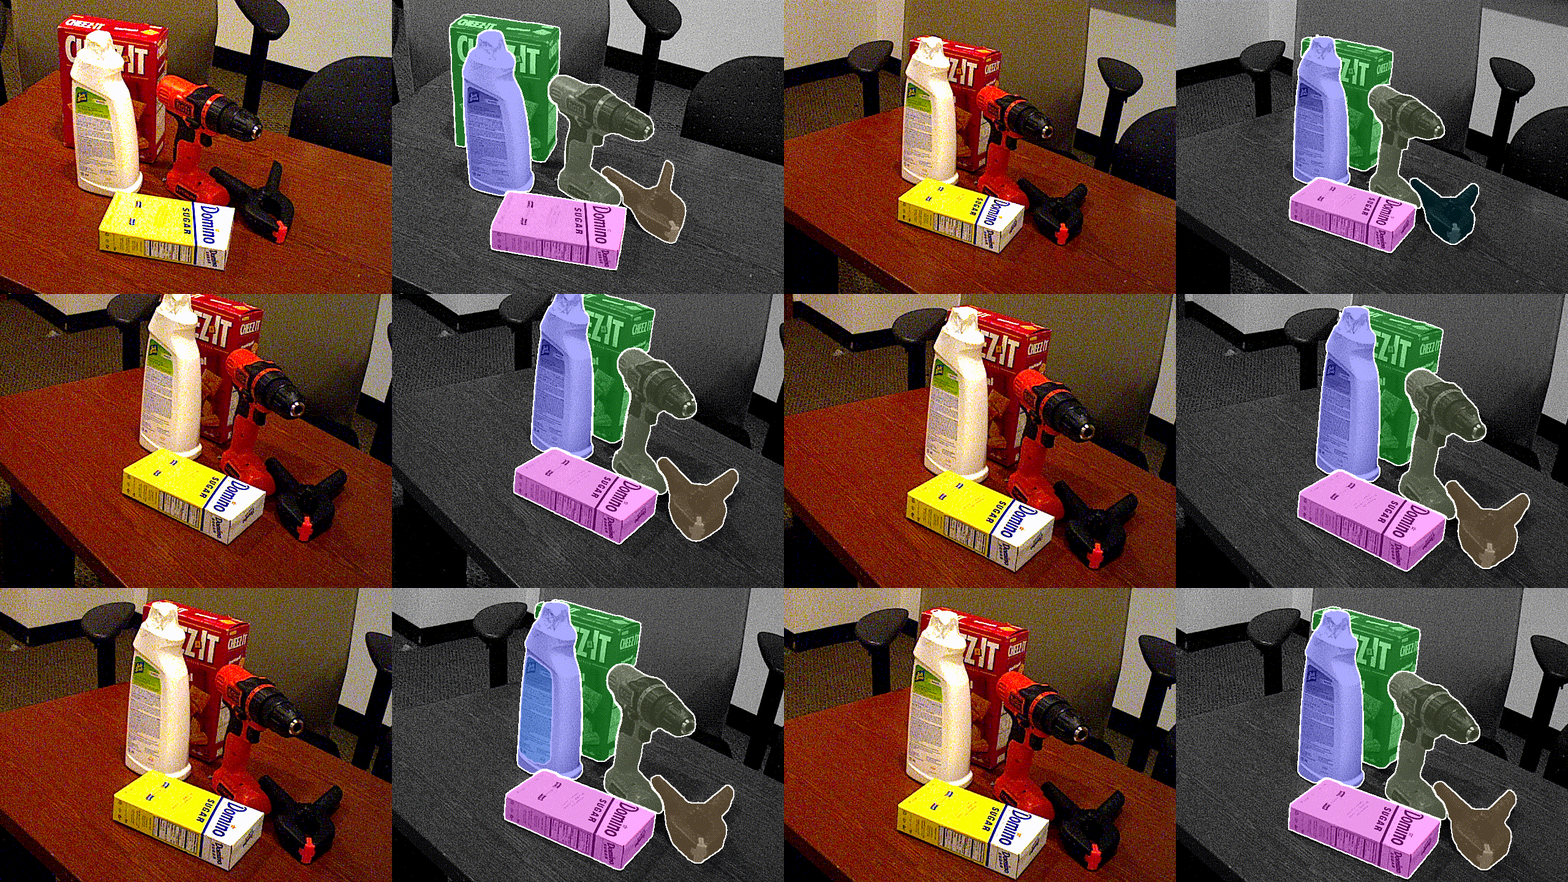
Here are some qualitative results of CNOS on the YCBV dataset. We are displaying only detections with a confidence score greater than 0.5 for better visibility.
 If our project is helpful for your research, please consider citing :
@article{nguyen2023cnos,
title={CNOS: A Strong Baseline for CAD-based Novel Object Segmentation},
author={Nguyen, Van Nguyen and Hodan, Tomas and Ponimatkin, Georgy and Groueix, Thibault and Lepetit, Vincent},
journal={arXiv preprint arXiv:2307.11067},
year={2023}}
You can also put a star ⭐, if the code is useful to you.
If you like this project, check out related works from our group:
- NOPE: Novel Object Pose Estimation from a Single Image (arXiv 2023)
- Templates for 3D Object Pose Estimation Revisited: Generalization to New objects and Robustness to Occlusions (CVPR 2022)
- PIZZA: A Powerful Image-only Zero-Shot Zero-CAD Approach to 6DoF Tracking (3DV 2022)
- BOP visualization toolkit
Updates:
- Adding tutorial to run CNOS on custom datasets
Installation 👷
Click to expand
Please make sure that you update this user's configuration before conducting any experiments.
1. Create conda environment
conda env create -f environment.yml
conda activate cnos

# for using SAM
pip install git+https://github.com/facebookresearch/segment-anything.git

# for using fastSAM
pip install ultralytics
2. Datasets and model weights
2.1. Download datasets from BOP challenge:
python -m src.scripts.download_bop
2.2. Rendering templates with Pyrender:
This rendering is fast. For example, using a single V100 GPU, it can be done within 10 minutes. Alternatively, you can access the rendered output through this Google Drive link (4.64GB) and unzip it into $ROOT_DIR.
python -m src.scripts.render_template_with_pyrender
2.3. Download model weights of Segmenting Anything:
python -m src.scripts.download_sam
2.4. Download model weights of Fast Segmenting Anything:
python -m src.scripts.download_fastsam
2.5. Download BlenderProc4BOP set:
This is only required when you want to use realistic rendering with BlenderProc for seven core datasets of BOP challenge.
python -m src.scripts.download_train_pbr
Testing on BOP datasets 🚀
We provide CNOS's predictions for seven core dataset of BOP challenge with both SAM and FastSAM models in this link.
Click to expand
- Run CNOS to get predictions:
export DATASET_NAME=lmo
# adding CUDA_VISIBLE_DEVICES=$GPU_IDS if you want to use a specific GPU

# with FastSAM + PBR
python run_inference.py dataset_name=$DATASET_NAME model=cnos_fast

# with FastSAM + PBR + denser viewpoints
python run_inference.py dataset_name=$DATASET_NAME model=cnos_fast model.onboarding_config.level_templates=1

# with FastSAM + PyRender
python run_inference.py dataset_name=$DATASET_NAME model=cnos_fast model.onboarding_config.rendering_type=pyrender

# with SAM + PyRender
python run_inference.py dataset_name=$DATASET_NAME model.onboarding_config.rendering_type=pyrender

# with SAM + PBR
python run_inference.py dataset_name=$DATASET_NAME
After running this script, CNOS will output a prediction file at this dir. You can then evaluate this prediction on BOP challenge website.
- Visualize the predictions:
There are two options:
2.a. Using our custom visualization without Detectron2 (display only masks)
python -m src.scripts.visualize dataset_name=$DATASET_NAME input_file=$INPUT_FILE output_dir=$OUTPUT_DIR
2.b. Using Detectron2 (display both masks, objectID, scores)
python -m pip install 'git+https://github.com/facebookresearch/detectron2.git'
python -m src.scripts.visualize_detectron2 dataset_name=$DATASET_NAME input_file=$INPUT_FILE output_dir=$OUTPUT_DIR
Testing on custom datasets 🚀
You can run CNOS on your custom dataset given a RGB image and the CAD model of the target object. We provide an example of running CNOS on "BBQ sauce" sample taken from MegaPose.
Click to expand
There are two steps to test CNOS on your own dataset:
- Define the path to your dataset:
export CAD_PATH=./media/demo/hope_000002.ply
export RGB_PATH=./media/demo/bba_sauce_rgb.png
export OUTPUT_DIR=./tmp/custom_dataset
- Render the template from CAD models:
bash ./src/scripts/render_custom.sh
If the quality of rendering is not good, you can try to ajust the lightning conditions and distance between the camera and the object in this script.
- Run CNOS and visualize the results:
bash ./src/scripts/run_inference_custom.sh
The detections will be saved at $OUTPUT_DIR/cnos_results. This script is used by default for single-CAD object segmentation. If you want to segment multiple objects, please make few adaptations this script.
Tricks and tips to improve results when running on custom objects with the sample taken from jakob-ropers-snkeos.
Click to expand
Please note that SAM or FastSAM can perform exceptionally well, even on very small objects. However, certain parameters from the original implementation require adjustments to achieve optimal results. For example, it is recommended to reduce the default stability_score_thresh value of 0.97 to smaller settings, like 0.5 (applied after step 1 of rendering).
python -m src.scripts.inference_custom --template_dir $OUTPUT_DIR --rgb_path $RGB_PATH --stability_score_thresh 0.5
Acknowledgement
The code is adapted from Nope, Segmenting Anything, DINOv2.
Contact
If you have any question, feel free to create an issue or contact the first author at van-nguyen.nguyen@enpc.fr


