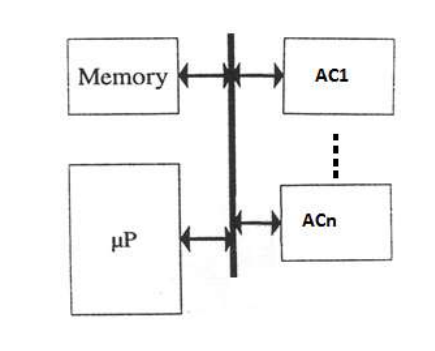
simulating connection of micro processor and accelerator on a bus context with systemc language
- @ASCK-TEAM
This repository exposed here, is actually a university project of the course hardware software co-design
And implemented with SystemC language.
-
-
SystemC is a set of C++ classes and macros which provide an event-driven simulation interface.
You can see the SystemC installation documentation for each one:
- linux
- mac()
- windows()
-
Gtkwave is a software for displaying signals simulation in a wave figure.
You can produce a .vcd output file via systemc Then you can open it via gtkwave software and watch the simulation.
Download gtkwave in Ubuntu by using:
sudo apt install gtkwave
-
-
-
You can figure it out what the project exactly is about here: project description
-
You can see the design, architecture and the datapath of this project here: project-design
-
The datapath of the hardware consists of:
- PC (program counter)
- IR (instruction memory)
- IF (instruction fetch phase middle register - for pipelining)
- RegFile (register file)
- ID (instruction decode phase middle register - for piplining)
- ALU (arithmetic/logic unit)
- EXE (instruction execution phase middle register - for piplining)
- MEM (share memory between micro and accelerator)
- WB (instruction write back phase middle register - for piplinig)
- Mux3 (multiplexer with 3 bits data and 1 bit selector)
- Mux8 (multiplexer with 8 bits data and 1 bit selector)
THIS PROJECT IS ABOUT ARCHITECTING A HARDWARE-SOFTWARE ARCHITECTURE USING SYSTEMC
The version of SystemC which is used in this project is 2.3.1
The hierarchy display of the modules is demonstrated here:
----System
-----------|
-----------Micro
------------------|
------------------PC //program counter
------------------IR //Instruction Memory
------------------IF //Instruction Fetch Register (for pipeline)
------------------RegFile //Register File
------------------ID //Instruction Decode Register (for pipeline)
------------------ALU //Arithmetic/Logic Unit
------------------Mux3 //Multiplexer 2 inputs with 3 bits
------------------Mux8 //Multiplexer 2 inputs with 8 bits
------------------EXE //Instruction Execution Register (for pipeline)
------------------WB //Instruction WriteBack Register (for pipeline)
-----------Bus
-----------Memory
-----------Acc
----/
NOTES
Note that Micro is a micro processor with synch clk which its rate is a quarter of bus-clk
Note that the accelerator is a separate component helping the main micro in computing
Note that the accelerator works asynchronous so that we need events for using wait/notify
Note that the System works with bus-clk (clk_bus) which is faster than the micro clk (clk)
Note that there is two subfoler in this repository named instructions and test
- test folder : all testbenches for all components (some of these files are empty -> you can fill it yourself)
- instructions folder: there are files you can see the binary micro-processor instructions you can put them into IR.cpp file.
Note That the main testbench is named main.cpp, tests the System.cpp module
Note that some couple of the opselect values for ALU are the same, so we get help from the main opcode and recognize the aluop
Note that some needed signals like controlling bits and immediate value (also known as offset) are propagated through the middle registers (IF, ID, EXE, WB)
Note that these modules work with micro-clk:
- Micro
- PC
- IF
- ID
- EXE
- WB
Note that these modules work with bus-clk:
- Bus
- System
Note that these modules works with no clk at all:
- IR
- Controller
- Mux3
- Mux8
- RegFile
- ALU
- MEM
Note that these modules work with SC_THREAD simulation:
- Micro
- IF
- ID
- EXE
- WB
To display the wave form results, you must compile the main.cpp file via systemc compilation command, you can use this documentation
When compilation finished, a .vcd file will be created, named project.vcd in the root path of repository.
You can open this file via gtkwave software.
In Ubuntu go to the primary folder in which project.vcd file is created and run this command:
gtkvawe project.vcd
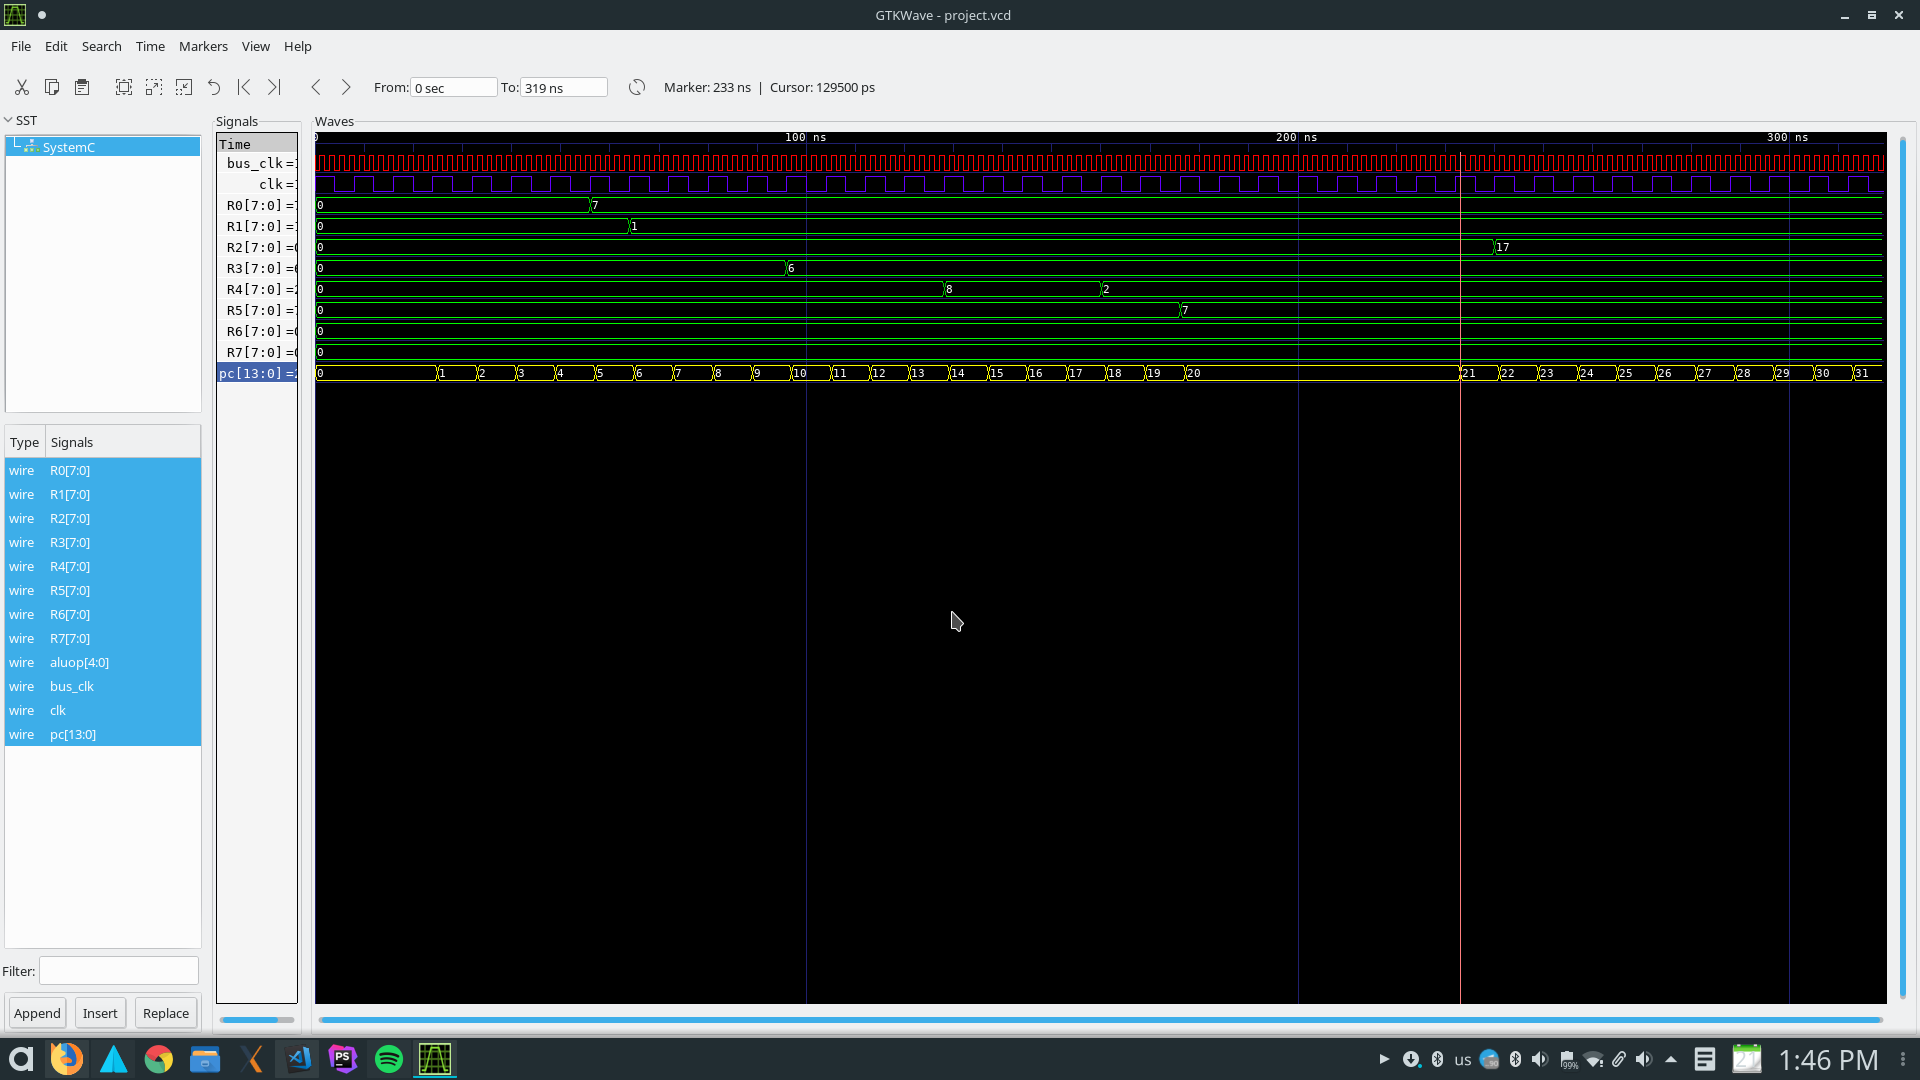
A window will be opened by gtkwave. now you need to select SystemC branch in the left sub window. the input and output signals which were declared in main.cpp will be shown beneath the sub window.
You can drag each signal and drop them to the Signals sub window for displaying the wave.
If everything goes correct, your output would be like this:
Don't remember to zoom out the waves sub window!
- Alireza Kavian ( @alirezakay )
- Soheil Changizi ( @cocolico14 )
- ASCK TEAM
This project is licensed under the MIT License - see the LICENSE file for details

