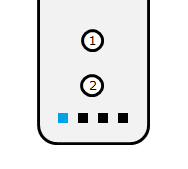
ESP32Wiimote is a Arduino library that connects with a Wii remote.
- ESP32 dev board
- Arduino IDE (Version: 1.8.5)
- Wii Remote (RVL-CNT-01)
- Download the zip file.
- Move the zip file to your libraries directory.
- In the Arduino IDE, navigate to Sketch > Include Library > Add .ZIP Library.
- Select the zip file.
#include "ESP32Wiimote.h"

ESP32Wiimote wiimote;

void setup()
{
    Serial.begin(115200);
    wiimote.init();
}

void loop()
{
  wiimote.task();
  if (wiimote.available() > 0) {
      uint16_t button = wiimote.getButtonState();
      Serial.printf("%04x\n", button);
      if (button == ESP32Wiimote::BUTTON_A) {
        Serial.println("A button");
      }
  }
  delay(10);
}
#include "ESP32Wiimote.h"

ESP32Wiimote wiimote;

void setup()
{
    Serial.begin(115200);
    wiimote.init();
    wiimote.addFilter(ACTION_IGNORE, FILTER_NUNCHUK_ACCEL);
}

void loop()
{
  wiimote.task();
  if (wiimote.available() > 0) {
      uint16_t button = wiimote.getButtonState();
      Serial.printf("%04x\n", button);

      NunchukState nunchuk = wiimote.getNunchukState();
      Serial.printf("nunchuk:");
      Serial.printf(" X-Stick: %d", nunchuk.xStick);
      Serial.printf(" Y-Stick: %d", nunchuk.yStick);
      Serial.printf(" X-Axis: %d", nunchuk.xAxis);
      Serial.printf(" Y-Axis: %d", nunchuk.yAxis);
      Serial.printf(" Z-Axis: %d", nunchuk.zAxis);
      Serial.printf(" C-Button: %02x", nunchuk.cBtn);
      Serial.printf(" Z-Button: %02x", nunchuk.zBtn);
      Serial.printf("\n");
  }
  delay(10);
}
- Caution: Nunchuck keeps outputting a lot of data for acceleration sensing
- You can Ignore changes with 'add filter(ACTION_IGNORE,...)'
'button' is expressed as OR of bits:
  BUTTON_LEFT       = 0x0800,
  BUTTON_RIGHT      = 0x0400,
  BUTTON_UP         = 0x0200,
  BUTTON_DOWN       = 0x0100,
  BUTTON_A          = 0x0008,
  BUTTON_B          = 0x0004,
  BUTTON_PLUS       = 0x1000,
  BUTTON_HOME       = 0x0080,
  BUTTON_MINUS      = 0x0010,
  BUTTON_ONE        = 0x0002,
  BUTTON_TWO        = 0x0001
-
To connect, press the 1 and 2 buttons on Wii Remote
-
The LED1 will be on when they have finished connecting
see LICENSE.md
