-
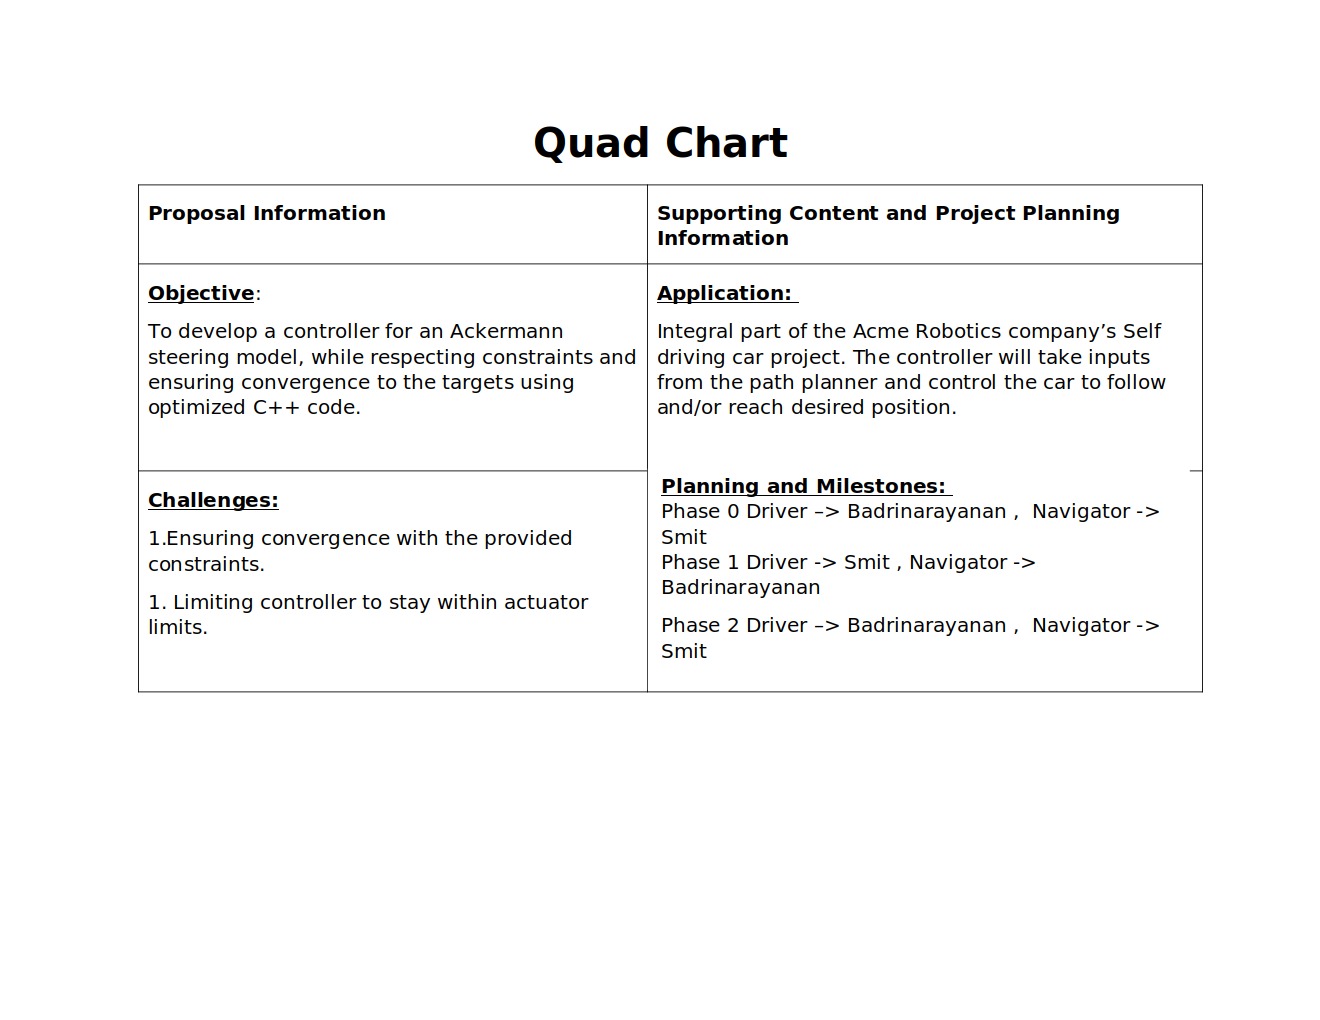
Driver for Phase 0 - Badrinaryanan Raghunathan Srikumar
-
Navigator for Phase 0 - Smit Dumore
-
Driver for Phase 1 - Smit Dumore
-
Navigator for Phase 1 - Badrinaryanan Raghunathan Srikumar
-
Driver for Phase 2 - Badrinarayanan Raghunathan Srikumar
-
Navigator for Phase 2 - Smit Dumore
The objective of this project is to design and implement a controller for an Ackermann kinematic model for the Acme Robotics company. This controller can possibly be a component of a self driving car software stack. It can take inputs such as a goal location and goal heading from a path planning module and apply the appropriate control input to the motors of the vehicle. The input for our Ackermann controller is a target heading angle and velocity. The output will be the steering angles and angular velocities for each of the front wheel. We assume that the ideal steering angle for a given set of inputs is unique.
- Ackermann steering geometry is a geometric arrangement of linkages in the steering of a car or other vehicle designed to solve the problem of wheel slippage while executing a turn. The model has independent steerable wheels, to execute a turn, the inner and outer wheels have to trace out concentric circles of different radii. This ensures that the wheels do not slip.
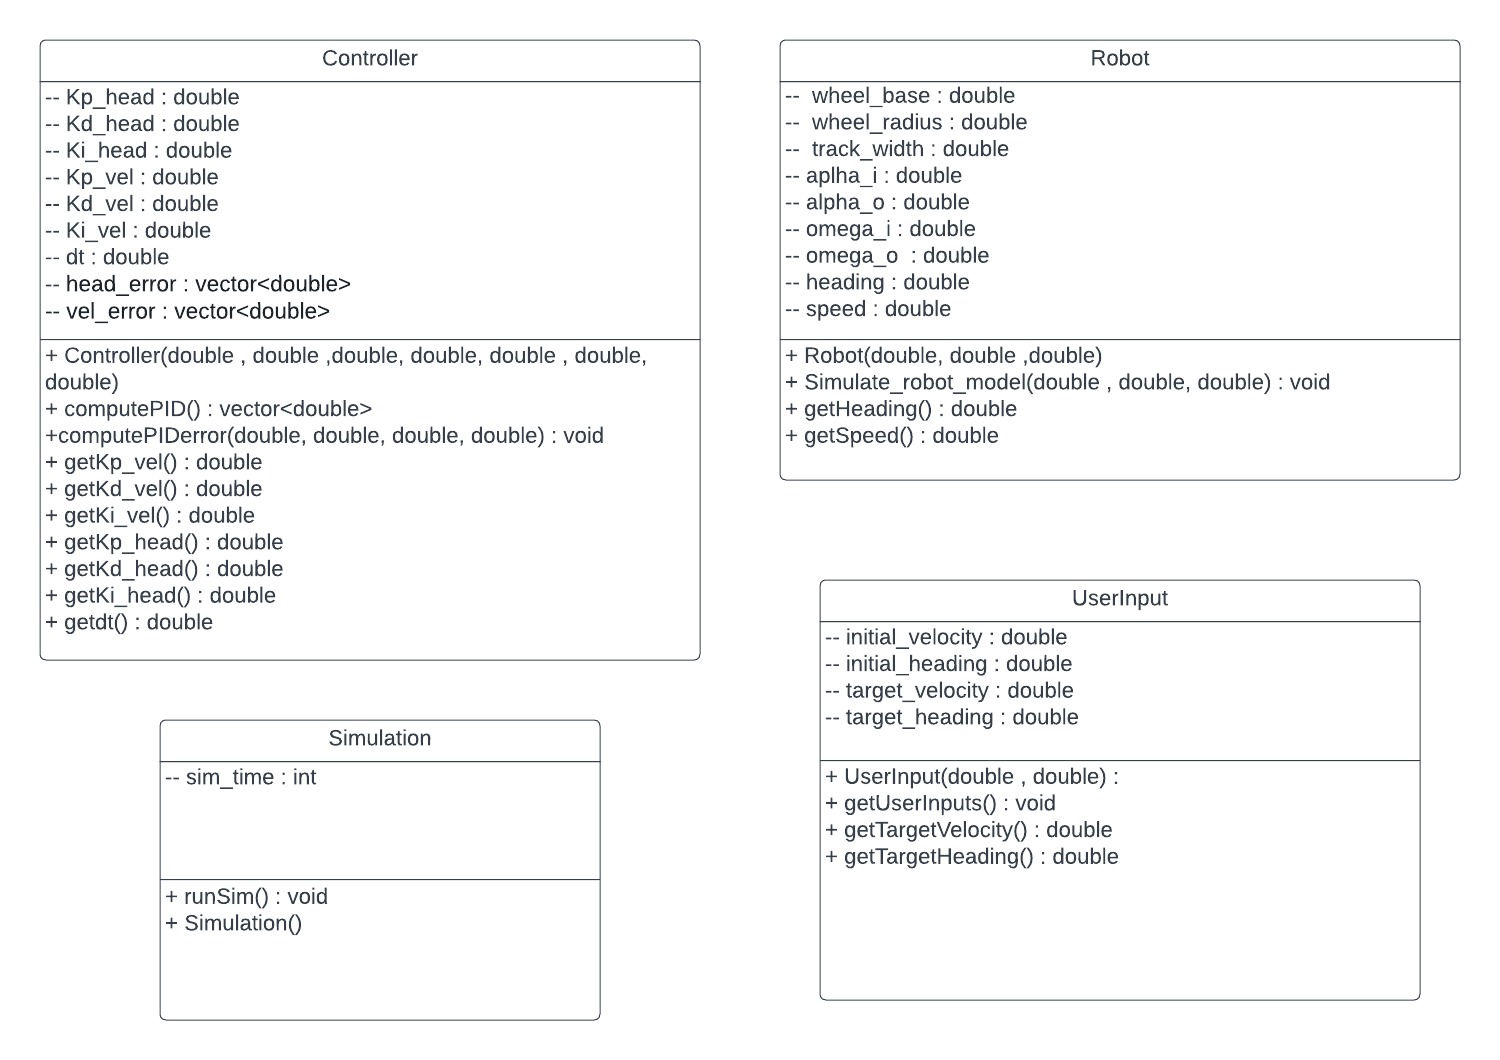
- The kinematic equations for this controller can be derived with basic trigonometry. These equations will be implemeted in C++ , because of its performance in real time systems. OOP practices will be used to make the code scalable.
- The controller will use a PID control algorithm for calculating the ideal inputs to the system at every time step. The PID control has many advantages, the major advantage being its simplicity. But, the biggest disadvantage of PID is that we cannot add any constraints to the output signals and sometimes it can reach very high values, which may not be possible to attain in physical systems.
- Here one of our constraints is that maximum steering angle constraint < 45 degrees.
We followed Agile Iterative process throughout the develpment this project including pair programming , switching between Driver and Navigator roles in phase 0 and 1. The Product Backlog, Iteration Backlog and Work Log and sprint planning sheets can be found below:
- https://docs.google.com/spreadsheets/d/15MsHHnaPDYa6_ac9_E7A4tZtzg4NLevfynDoTfalXG4/edit#gid=0
- https://docs.google.com/document/d/1Jcqsh3hmOmNMl5sPOOUJDDctLigFcafv_c4tUjaEYhQ/edit
-Phase 0 : -https://youtu.be/P2H2bpZX4jc -Phase 1 : -https://youtu.be/Pn1aeKCDAUI -Phase 2 : -https://youtu.be/IUpdU9HZyIg
Doxygen is the de facto standard tool for generating documentation from annotated C++ sources. It can generate an on-line documentation browser (in HTML).
Command to install doxygen, in command line type
sudo apt install doxygen
To generate doxygen documentation after installation, type
doxygen -g
where is the name of the configuration file that you want to create. In this file edit the input and output directories, and the files that have to be included or excluded while generating the Doxygen comments. Finally, after generating the config file, type
doxygen
This will generate a HTML and LATEX output of the Doxygen comments inside the output directory mentioned in the configuration file.
git clone --recursive https://github.com/smitdumore/ENPM808X-Midterm.git
cd <path to repository>
mkdir build
cd build
cmake ..
make
Run programme: ./app/shell-app
Enter target heading in degrees
Enter target speed in m/s

Run test: ./test/cpp-test
sudo apt-get install lcov
cmake -D COVERAGE=ON -D CMAKE_BUILD_TYPE=Debug ../
make
make code_coverage
This generates a index.html page in the build/coverage sub-directory that can be viewed locally in a web browser.
In your Eclipse workspace directory (or create a new one), checkout the repo (and submodules)
mkdir -p ~/workspace
cd ~/workspace
git clone --recursive https://github.com/dpiet/cpp-boilerplate
In your work directory, use cmake to create an Eclipse project for an [out-of-source build] of cpp-boilerplate
cd ~/workspace
mkdir -p boilerplate-eclipse
cd boilerplate-eclipse
cmake -G "Eclipse CDT4 - Unix Makefiles" -D CMAKE_BUILD_TYPE=Debug -D CMAKE_ECLIPSE_VERSION=4.7.0 -D CMAKE_CXX_COMPILER_ARG1=-std=c++14 ../cpp-boilerplate/
Open Eclipse, go to File -> Import -> General -> Existing Projects into Workspace -> Select "boilerplate-eclipse" directory created previously as root directory -> Finish
Source files may be edited under the "[Source Directory]" label in the Project Explorer.
To build the project, in Eclipse, unfold boilerplate-eclipse project in Project Explorer, unfold Build Targets, double click on "all" to build all projects.
-
In Eclipse, right click on the boilerplate-eclipse in Project Explorer, select Run As -> Local C/C++ Application
-
Choose the binaries to run (e.g. shell-app, cpp-test for unit testing)
-
Set breakpoint in source file (i.e. double click in the left margin on the line you want the program to break).
-
In Eclipse, right click on the boilerplate-eclipse in Project Explorer, select Debug As -> Local C/C++ Application, choose the binaries to run (e.g. shell-app).
-
If prompt to "Confirm Perspective Switch", select yes.
-
Program will break at the breakpoint you set.
-
Press Step Into (F5), Step Over (F6), Step Return (F7) to step/debug your program.
-
Right click on the variable in editor to add watch expression to watch the variable in debugger window.
-
Press Terminate icon to terminate debugging and press C/C++ icon to switch back to C/C++ perspetive view (or Windows->Perspective->Open Perspective->C/C++).
-
CppChEclipse
To install and run cppcheck in Eclipse
-
In Eclipse, go to Window -> Preferences -> C/C++ -> cppcheclipse. Set cppcheck binary path to "/usr/bin/cppcheck".
-
To run CPPCheck on a project, right click on the project name in the Project Explorer and choose cppcheck -> Run cppcheck.
-
-
Google C++ Sytle
To include and use Google C++ Style formatter in Eclipse
-
In Eclipse, go to Window -> Preferences -> C/C++ -> Code Style -> Formatter. Import eclipse-cpp-google-style and apply.
-
To use Google C++ style formatter, right click on the source code or folder in Project Explorer and choose Source -> Format
-
-
Git
It is possible to manage version control through Eclipse and the git plugin, but it typically requires creating another project. If you're interested in this, try it out yourself and contact me on Canvas.


