The deep contact estimator takes in proprioceptive measurements from a quadruped robot and estimates the current contact state of the robot.
- We created contact data sets using an MIT mini cheetah robot on 8 different terrains.
- The contact data sets can be downloaded here.
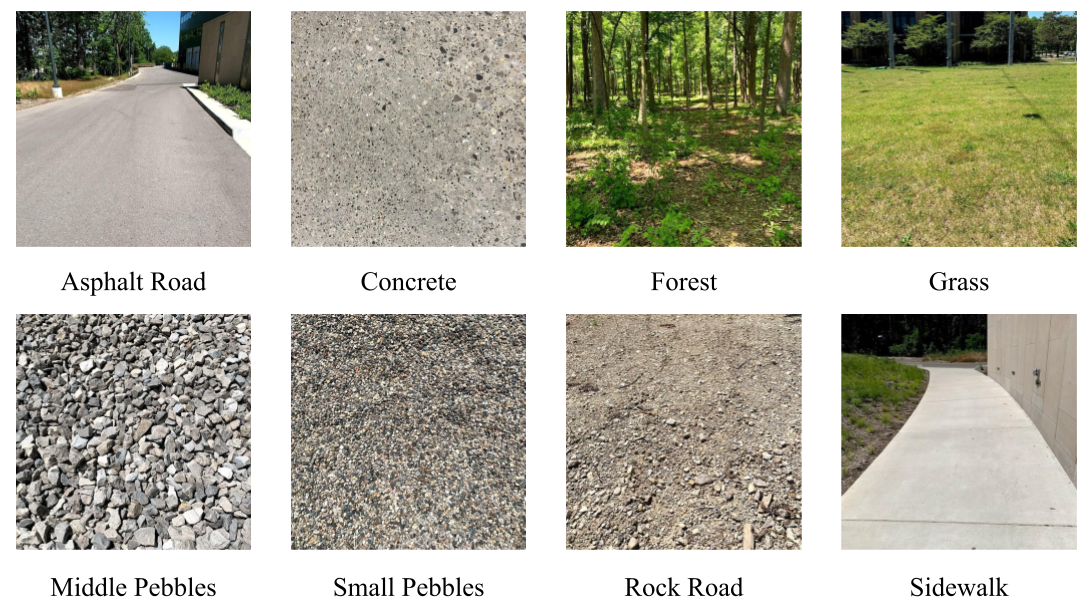
- The 8 different terrains in the data sets:

-
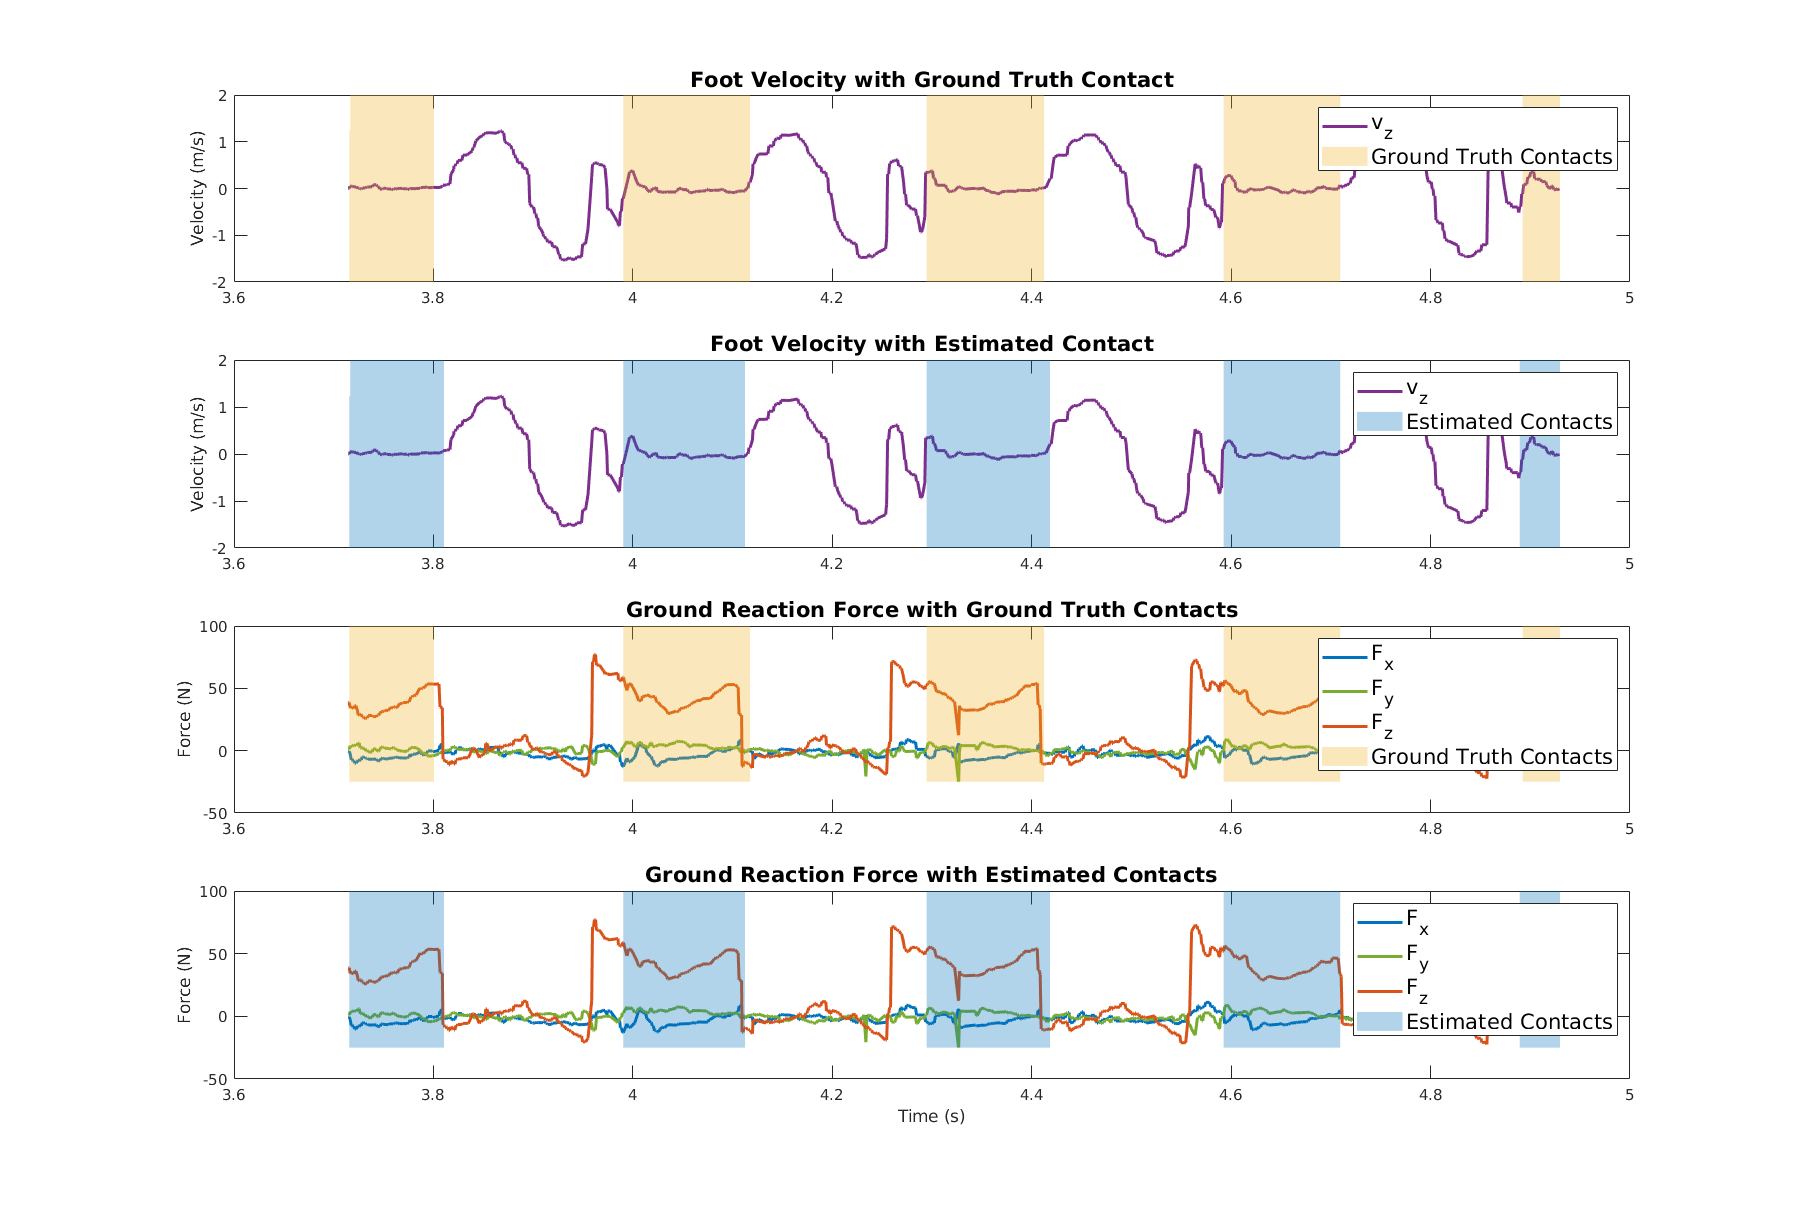
Estimated ground reaction force and foot velocity overlapped with estimated contacts and ground truth contacts of one leg in the forest data set.

-
The estimated contacts were used in a contact-aided invariant extended kalman filtering to estimate the pose and velocity of a mini cheetah.
-
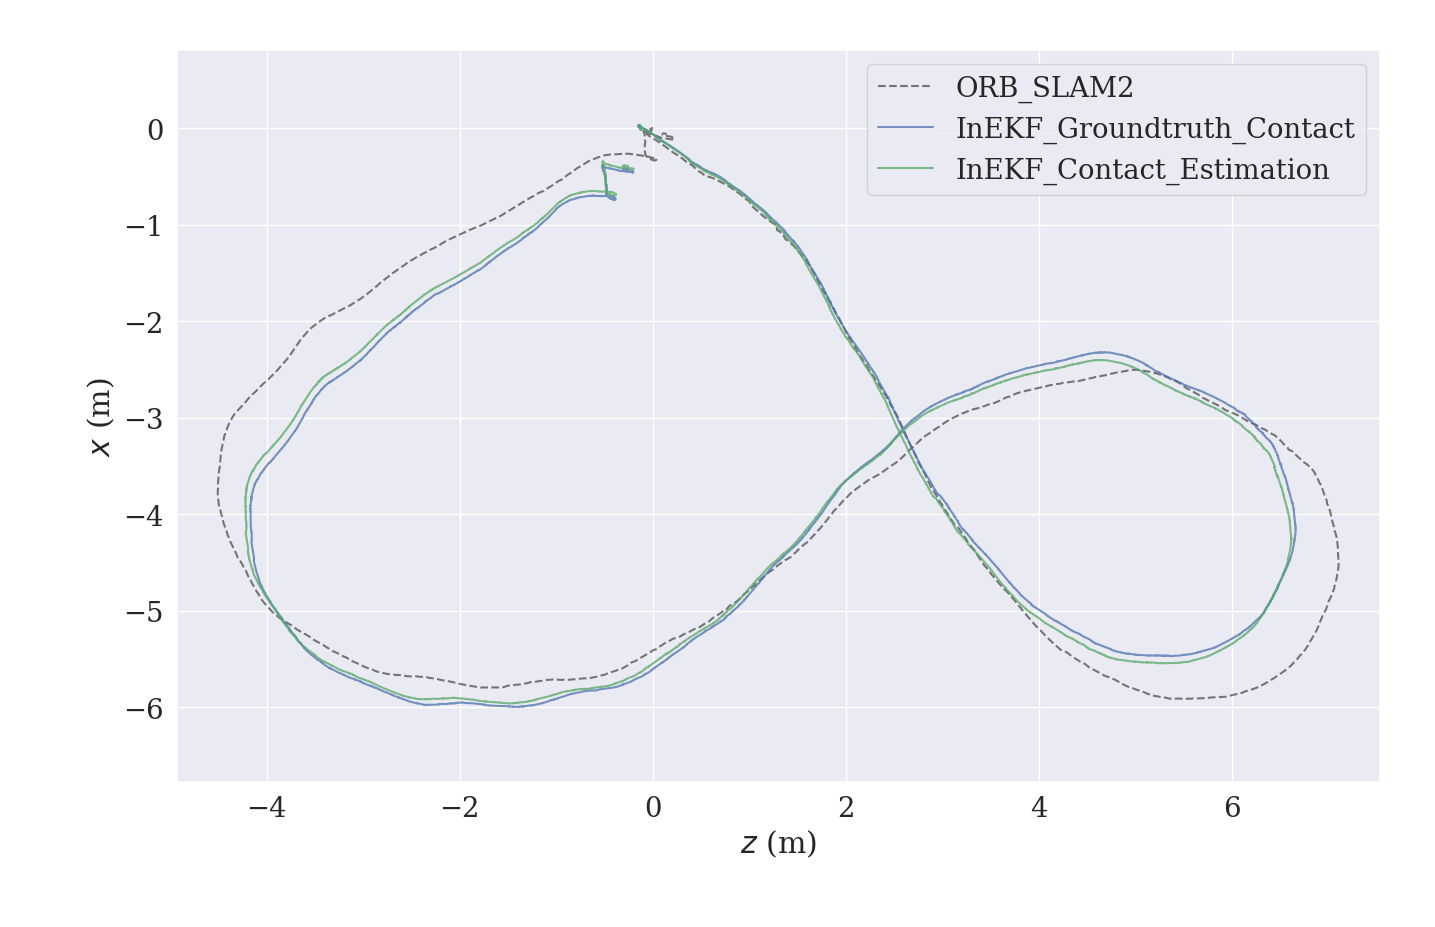
Below plot shows the trajectory of the inEKF with this contact estimator in a concrete sequence from the data sets.

- Python3
- PyTorch
- SciPy
- Tensorboard
- scikit-learn
- Lightweight Communications and Marshalling (LCM)
- We provide docker files for cuda 10.1 and 11.1 in
docker/. - Detailed tutorial on how to build the docker container can be found in the README in each docker folder.
- The network takes numpy data as input. To generate training data, first download the contact data sets from here.
- Collect all the
.matfile from each terrain into a folder. (You can also reserve some sequences for testing only.) - Change
mat_folderinconfig/mat2numpy_config.yamlto the above folder. - Change
save_pathto a desired path. - Change
modetotrainand adjusttrain_ratioandval_ratioto desired values. - Run
python3 utils/mat2numpy.py. The program should automatically concatenate all data and separate it into train, validation, and test in numpy.
- If you would like to generate a complete test sequence without splitting into train, validation and test sets, all you need to do is to change
modetoinferenceand repeat the above process. - However, instead of putting all training data into the
matfolder, you should only put the reserved test sequence in the folder.
- To train the network, first you need to modify the params in
config/network_params.yaml. - Run
python3 src/train.py. - The log will be saved as Tensorboard format in
log_writer_pathyou defined.
- If you just want to evaluate the result, we also provide pretrained models, which can be found here.
- Modify
config/test_params.yaml. - Run
python3 src/test.py. test.pywill compute the accuracy, precision, and jaccard index for the test sets.
- Generate a complete test sequence following the steps in Process Test Sequence.
- Modify
config/inference_one_seq_params.yaml. - Set
calculate_accuracytoTrueif you wish to also compute the accuracy of the sequence. (Note: This requires ground truth labels and will slow down the inference process.) - Set
save_mattoTrueif you would like the result to be generated in.matfile for MATLAB. - Set
save_lcmtoTrueif you wish to generate results as a LCM log. - Run
python3 src/inference_one_seq.py. - The saved LCM log can be used in cheetah_inekf_ros for mini cheetah state estimation.
- Switch to
real-time_jetsonbranch, follow the wiki_page to convert models and install TensorRT if it haven't been installed already - Save your ONNX model in '/weights' folder and save an input matrix inside '/data' folder as '*.bin'
- Change the
interface.yamlaccording - Enter the program folder and build the program by the following commands:
mkdir build cd build cmake .. make -j8 - Serialize an engine by using command
./utils/serialize_enginein${PROGRAM_PATH}/build/directory. This command will read the model (.onnx) and serialize the output engine (.trt) on your disk Remark: The saved engine is not portable between different machines - Run the program by using command
./src/run_contact_estimatorin${PROGRAM_PATH}/build/directory - Once you see the print out message
started thread, the interface starts. You can feed input either through the robot, or using a pre-recorded.lcmlog file. You can check the frequency by using lcm-spy - The output of the program is a synchronized lcm message that contains
leg_control_data,microstrain,timestampandcontact_estimates - You can enable the debug_flag to save some files that is helpful for you to visualize the result. E.g.
leg_p.csvandcontact_lcm_est.csv
This work is published in 2021 Conference on Robot Learning:
- Tzu-Yuan Lin, Ray Zhang, Justin Yu, and Maani Ghaffari. "Legged Robot State Estimation using Invariant Kalman Filtering and Learned Contact Events." In Conference on robot learning. PMLR, 2021
@inproceedings{
   lin2021legged,
   title={Legged Robot State Estimation using Invariant Kalman Filtering and Learned Contact Events},
   author={Tzu-Yuan Lin and Ray Zhang and Justin Yu and Maani Ghaffari},
   booktitle={5th Annual Conference on Robot Learning },
   year={2021},
   url={https://openreview.net/forum?id=yt3tDB67lc5}
}
