-
Project Name: The Assisted-Driving System
-
Project Aim: This system would help a running 'car' to detect the specific type of an obstacle and then take different approaches according to the 'type' detected by multi-sensor fusion and CV.
-
Environment:
| Name | Edition |
|---|---|
| CPU | i7-8565u |
| GPU | GeForce MX150 |
| Operation System | Windows 10 Home 64bit |
| CUDA | 10.2 |
| CUDNN | 7.6.4 |
| OpenCV | 3.2 |
| Microsoft Visual studio 2019 | 16.4.1 |
User Application Overview:
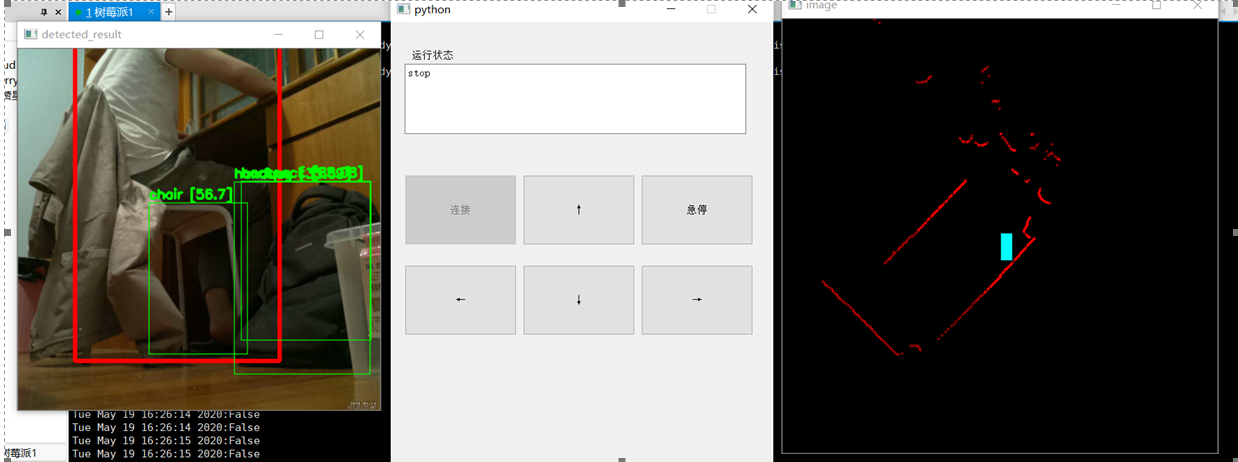
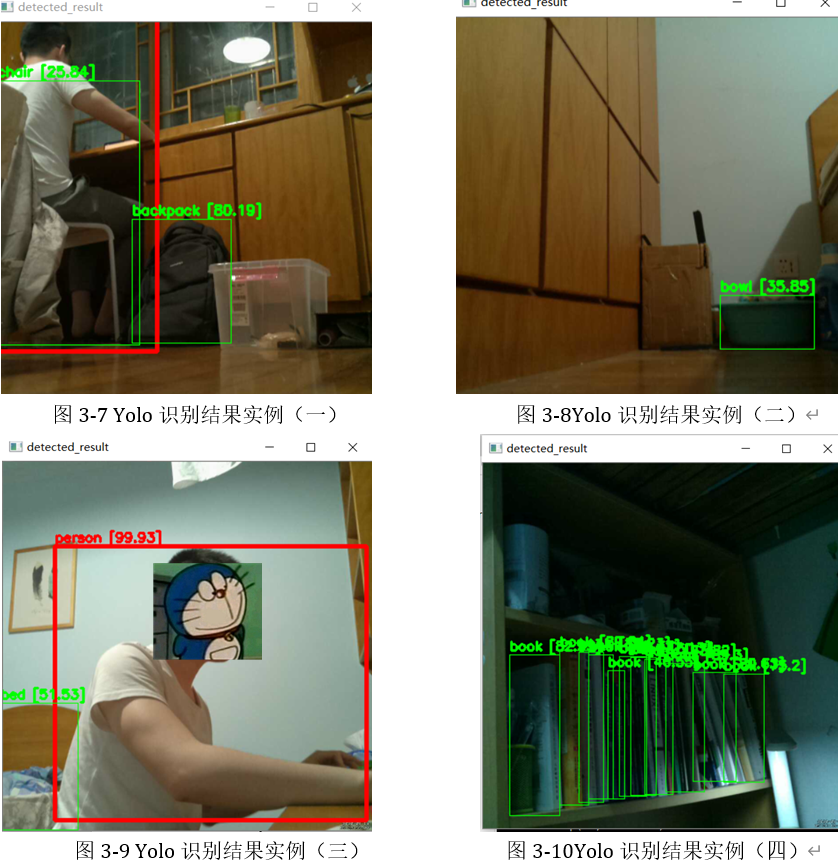
Detection Results:
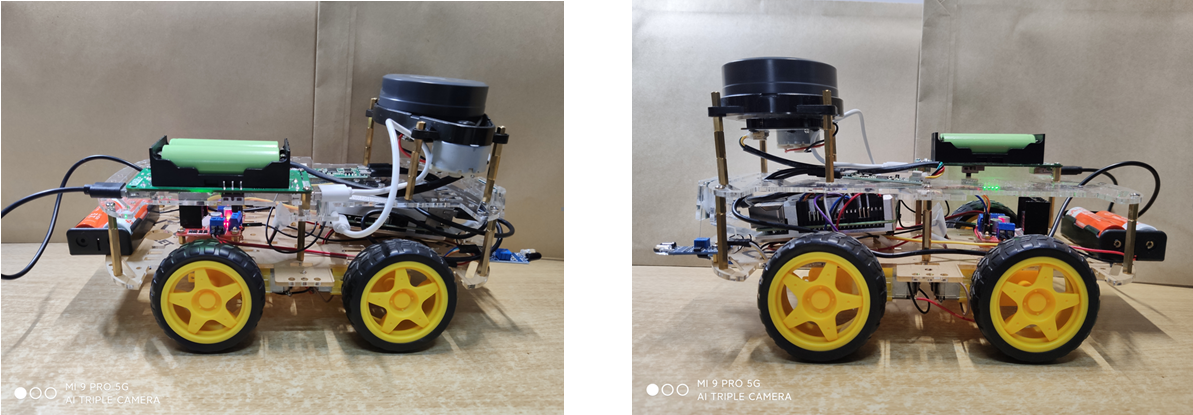
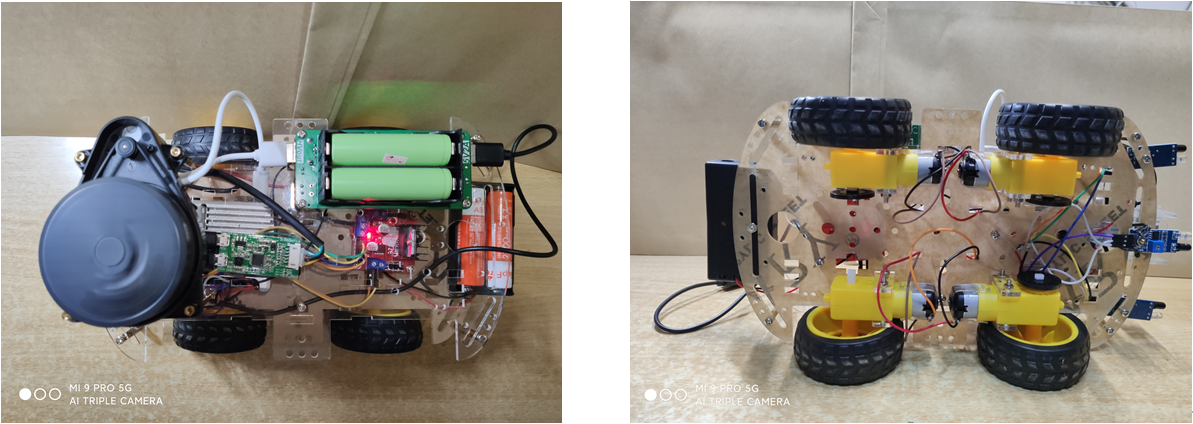
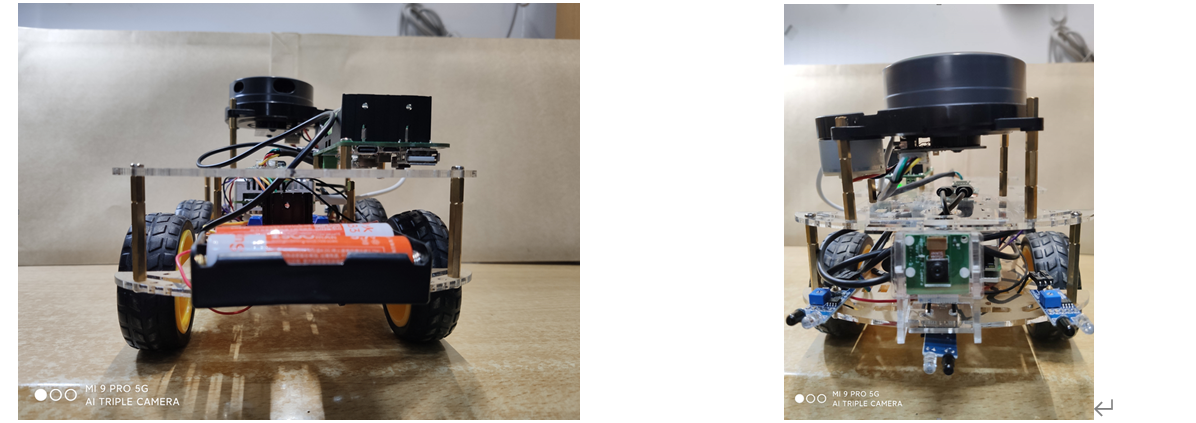
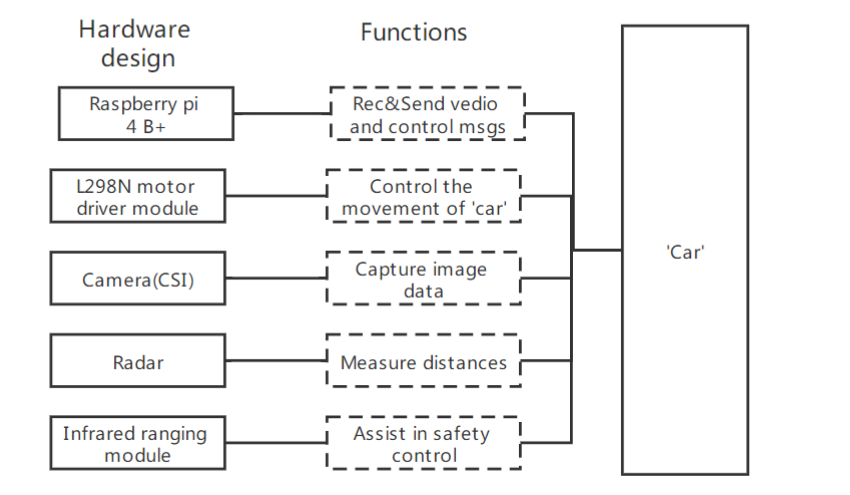
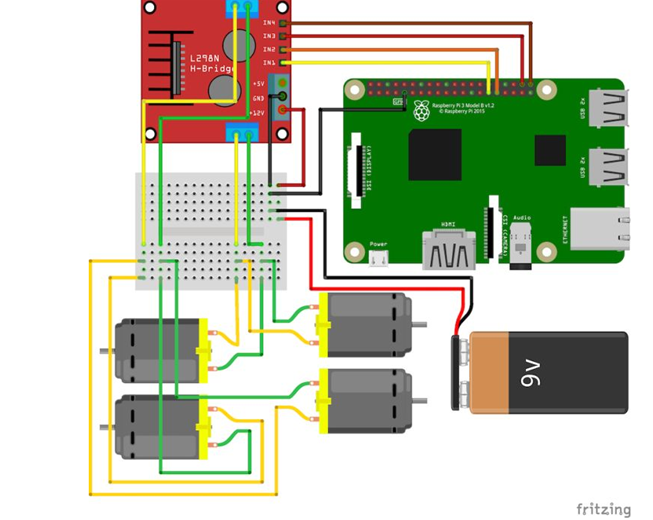
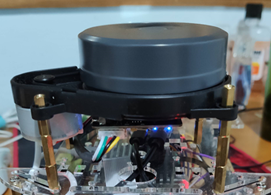
This system used raspberry pi 4 B+ ,L298N motor driver module,CSI camera,Radar,Infrared ranging module. It is convenient for you to add additional approaches(e.g. more sensors) to detect obstacles.
The whole system could be divided into 3 parts as shown in the figure below:
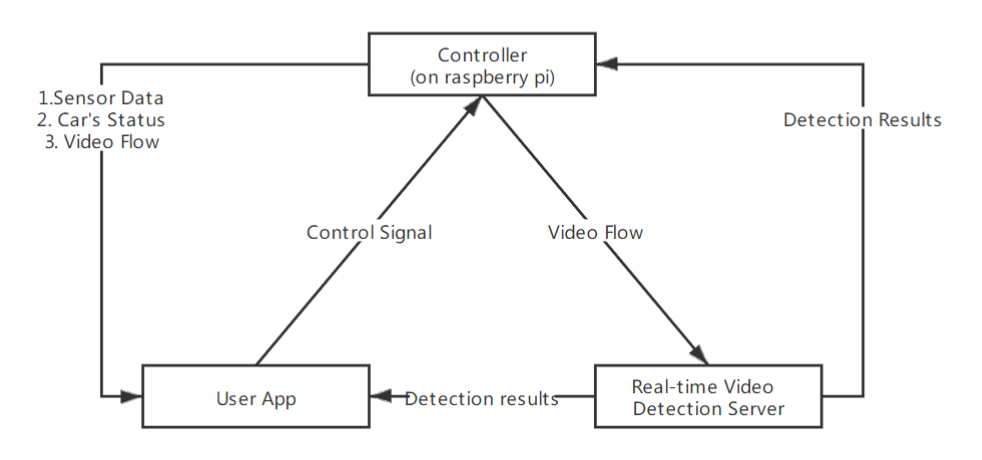
Reasons for designing the Real-time Video Detection Server: (1) Insufficient hardware performance (2) The distribution of the entire system is more flexible(Could set the detection server anywhere you want)
Parameters of 2D Rader
| Name | Value |
|---|---|
| Bit Rate | 230400 |
| Operation mode | 8-bit data, 1 stop bit, no parity bit |
| High level output (V) | 2.9 ~ 3.5 |
| Low level output (V) | < 0.4 |
Measurement
| Measurements | Precision | Range | Unit |
|---|---|---|---|
| Current angle (compared to initial point) | 0.01 | 0~36000 | degree |
| Relative distance (compared to radar center) | 0.025 | 0~32,000,000 | mm |
All Related Files to Detection Server:
./code/darknet/x64/darknet_video.py # video detection
./code/darknet/x64/xbai_darknet_setting.ini # configuration file, more details follow
./code/darknet/x64/XBai_raspberry_remote_control_client.py # Remote Control
./code/darknet/x64/MyAPP.py # Client APP (UI)
./code/darknet/x64/MyAPP.ui # File used to generate User Interface by python
./code/darknet/x64/mqtt_rec.py # receive data by mqtt(This edition chooses Socket)
./code/darknet/x64/RadarData.py# filter and transfer radar data
./code/darknet/x64/try_com.py # test camera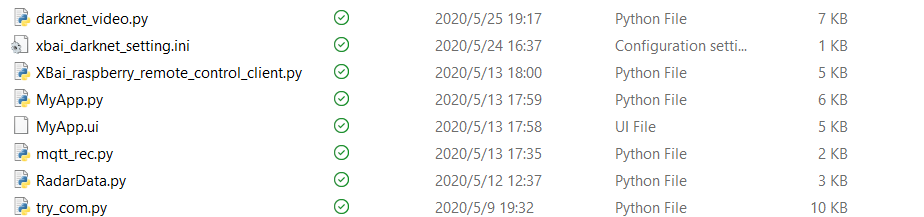
All Related Files to Raspberry Pi:
./code/raspberry/ConnectSerial.py # Connect to Radar
./code/raspberry/Main.py # run 3 process
./code/raspberry/MotionModle.py # control signal
./code/raspberry/RaspberryServer.py # receive and send message
./code/raspberry/SmartDriving.py # Driving Assistance
./code/raspberry/try.py # test for connection and camera
./code/raspberry/xbai_raspberry_setting.ini # configuration file
./code/darknet/x64/xbai_darknet_setting.ini:
[darknet_video_setting]
configPath=./cfg/yolov3.cfg
weightPath=./yolov3.weights
# Choose the approriate weights and cfg for your project
# You could also choose yolov3-tiny
;configPath = ./cfg/yolov3-tiny.cfg
;weightPath = ./yolov3-tiny.weights
metaPath = ./cfg/coco.data

# Set the address of the online video camera
# Remember to add the port number ":8081"
raspberry_video_address = http://192.168.2.100:8081/
# Set the width and height of the video flow
raspberry_video_width = 832
raspberry_video_height = 832

# Set the port of raspberry to receive the detected result
detected_result_to_raspberry_host = 192.168.2.103
detected_result_to_raspberry_port = 12345
#@running_mode: 1.both(run detected and web both) 2.detected 3. web
running_mode = web

[control_signal_setting]
# Set the port of raspberry to receive control signal
control_signal_to_raspberry_host = 192.168.2.103
control_signal_to_raspberry_port = 12344

# Set which port the data of radar will be sent from raspberry
[radar_setting]
raspberry_server_radar_host = 192.168.2.103
raspberry_server_radar_port = 12343./code/raspberry/xbai_raspberry_setting.ini:
[raspberry_server_setting]
# The address of detection server
computer_server_detected_result_host = 192.168.2.103
#the port of computer(not raspberry)
computer_server_detected_result_port = 12345

# The ip address of the controller
computer_server_control_signal_host = 192.168.2.103
computer_server_control_signal_port = 12344

# The ip address of detection server
raspberry_server_radar_host = 192.168.2.103
# The port for radar data
raspberry_server_radar_port = 12343To run this system, it is necessary to install the following or later edition:
- CUDA: 10.2
- CUDNN: 7.6.4
- OpenCV: 3.2
For more information about how to run YOLOv3 on your computer, you could visit another description on my blog here (Sorry for currently it is in Chinese, I will update English edition later).
For some experiences about how to create a suitable developing environment for raspberry pi and YOLOv3, you could also visit here on my blog.
You should run darknet_video.py on detection server and Main.py on your raspberry pi. Notice: try to ensure these two process run at the same time. Or it would exceed the maximum time limitation of Socket
Author: @ Wenjie Fan & @ Jianan Xu
Date: 10 June 2020