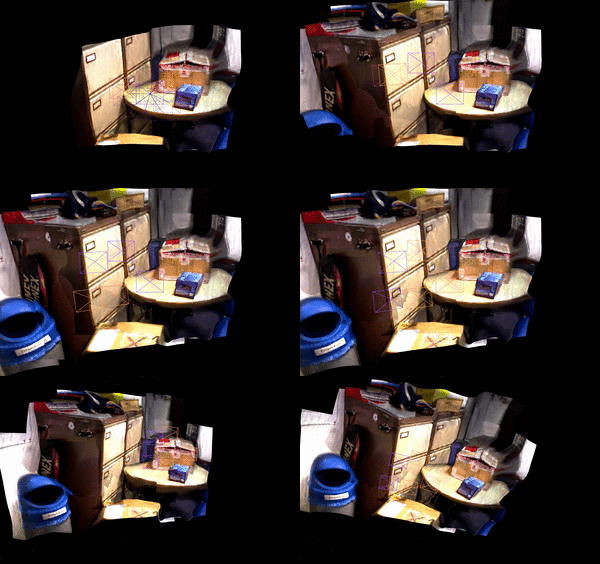
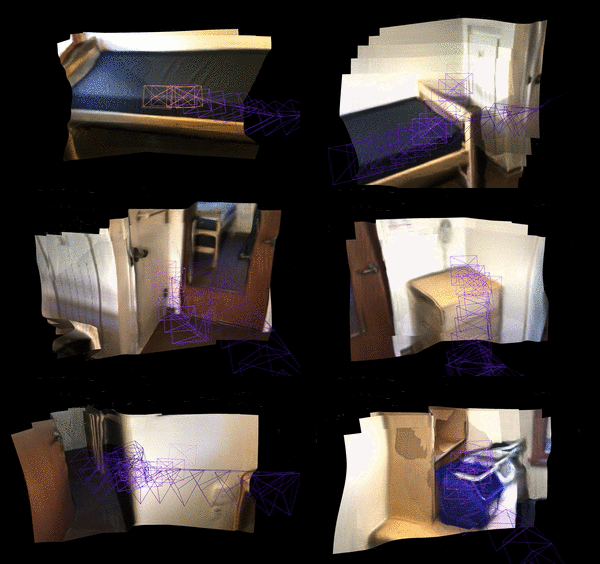
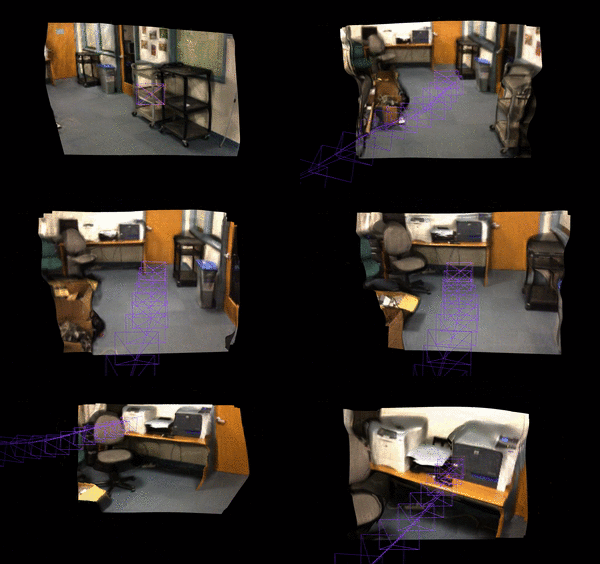
DeepFactors is a Dense Monocular SLAM system that takes in a stream of RGB images from a single camera and produces a dense geometric reconstruction in the form of a keyframe map. You can see the system in action in this YouTube video. The key features of this work include:
- Joint, interactive real-time probabilistic inference on dense geometry
- Natural integration of learned priors and classical geometry
- Easy to extend with additional sensors, due to the use of GTSAM as the mapping backend
- Trivial initialisation: just point the camera and press a button!
The method has been described in the paper DeepFactors: Real-Time Probabilistic Dense Monocular SLAM
Please bear in mind that this repository contains research code, which is not perfect and elegant due to the experimental nature of the project and time constraints. While we have tried to keep things reasonably clean, the PhD programme did not grant us the liberty of refactoring the code. DeepFactors is also an experimental monocular dense system, which naturally performs worse than its RGB-D counterparts, and is not meant to be an out-of-the-box SLAM solution that can be used in a product.
The network provided along this system release has been trained on the ScanNet dataset and therefore will work best on similar sequences. If you want to increase performance in your specific domain, please consider training a network on your data. We currently do not provide training code, but might release it later.
- C++17
- CMake >= 3.7
unzipandwget- An NVIDIA GPU with CUDA
Core library dependencies:
- Boost
- CUDA
- Gflags
- Glog
- Jsoncpp
- OpenCV
- OpenNI2
- GLEW
- TensorFlow C API
The following dependencies are included and build together with the project:
- Brisk
- CameraDrivers
- DBoW2
- Eigen
- GTSAM
- OpenGV
- Pangolin (we use our own fork)
- Sophus
- VisionCore
Clone the repository with all submodules:
git clone --recursive <url>
If you forgot to clone with --recursive then run:
git submodule update --init --recursive
Depending on your linux distribution, you might need to perform different steps to install required dependencies. Below you can find some hints on how to do this. We have tested these instructions on fresh installs of Arch Linux and Ubuntu 18.04.
Install the required packages with apt:
sudo apt install cmake libboost-all-dev libglew-dev libgoogle-glog-dev \
      libjsoncpp-dev libopencv-dev libopenni2-dev unzip wget
You will also need to install the TensorFlow C API. If you have CUDA 10.0 and cuDNN 7.5, you can simply download the pre-built binaries by following these instructions. When using a different version of CUDA or cuDNN, pre-compiled TensorFlow C API will not work and you have to compile it from source.
Install the following official packages:
boost cuda gflags glew google-glog jsoncpp opencv tensorflow-cuda
You will also need the openni2 AUR package.
Build the vendorized dependencies with:
./thirdparty/makedeps.sh
This will build all CMake dependencies. You can speed up compilation with the --threads option, but it might cause your PC to run out of memory in some cases:
./thirdparty/makedeps.sh --threads 5
Configure project with CMake and start the build. For example:
mkdir build
cd build
cmake ..
make
You can speed up the compilation by using multiple threads e.g. make -j5.
First, download the example network trained by the authors:
bash scripts/download_network.bash
In order to run the demonstration you will need to request access to the ScanNet dataset by following instructions on the authors's website, which involve sending a signed TOS agreement via email. You should receive an email giving you access to the download-scannet.py script. Please place it in the scripts subdirectory of this repository as such: scripts/download-scannet.py. You can then run a quick demo of the system with:
bash scripts/run_scannet.bash
The script will download, unpack and preprocess a sample ScanNet scene and run DeepFactors on it. You can also run the system on a different scene by specifying it on the command line:
bash scripts/run_scannet.bash --scene_id <scene_id>
Here are some example scenes: scene0565_00, scene0334_01, scene0084_00.
On a successful system start, you should see the following window:
To run the system in the odometry configuration on a live OpenNI device such as Asus Xtion:
build/bin/df_demo --flagfile=data/flags/live_odom.flags --source_url=openni://<camera_id>
where <camera_id> is the index your camera. This can be set to 0 to open the first camera connected to the PC. The local refinement mode can be started with:
build/bin/df_demo --flagfile=data/flags/live_refine.flags --source_url=openni://<camera_id>
The system also supports the flycap source that allows you to use a PointGrey camera using the FlyCapture API. This feature needs to be enabled during compilation with DF_WITH_FLYCAP=ON.
The following keys can be used to control the system:
rresets the slam systemspaceinitializes the system and later allows adding new views to refine current keyframeppauses camera input. Allows for a break to rotate the reconstructed modelnspawns a new keyframe
Download selected sequences from the dataset website and put them into some directory. You also need to download the associate.py script and use it to associate the RGB and depth images based on their timestamps:
python associate.py <seqdir>/rgb.txt <seqdir>/depth.txt > <seqdir>/associate.txt
where <seqdir> is the path to the downloaded TUM sequence. This step needs to be repeated for each sequence you want to run DeepFactors on. To run the system on a preprocessed sequence:
build/bin/df_demo --flagfile=data/flags/dataset_odom.flags --source_url=tum://<seqdir>
We provide several tools which can be built using the DF_BUILD_TOOLS cmake option. The resulting binaries are located in <build_dir>/bin:
-
decode_image Loads a specified input image and displays the decoded zero-code and explicitly predicted code for it, producing an initial depth (proximity) prediction. This allows to test the network and compare zero code prediction with explicit code prediction. The program also provides timing information.
-
kernel_benchmark Allows to tune the number of blocks and threads used in the core CUDA kernels by grid search and benchmarking. These parameters can be specified with the following command line options:
--sfm_step_blocks= --sfm_step_threads= --sfm_eval_blocks= --sfm_eval_threads= -
result_viewer Reads in a trajectory from a dataset and displays reprojected ground-truth depth and the ground-truth trajectory optionally along with an estimated trajectory (typically the result of running DeepFactors on the same sequence). Allows for qualitative evaluation of results and converting dataset trajectories to TUM format.
-
test_matching Loads in two images and runs our feature matching algorithm on them. Used to test our feature matching and to tune its parameters
-
voc_builder Builds a BRISK feature vocabulary for DBoW2 based on selected TUM dataset sequences.
-
voc_test Allows to test a vocabulary on a set of images by calculating similarity among them and the confusion matrix
To save results, specify the option -run_log_dir=results. This will save each
system run in a timestamped folder under results. That folder will include
the estimated trajectory in the TUM format, saved keyframes, debug images and
parameters used to run the system.
Codebase:
Paper authors:
Testing/Bug Fixes for the open source release:
If you find DeepFactors useful for your research, please cite the paper as:
@article{Czarnowski:2020:10.1109/lra.2020.2965415,
   author = {Czarnowski, J and Laidlow, T and Clark, R and Davison, AJ},
   doi = {10.1109/lra.2020.2965415},
   journal = {IEEE Robotics and Automation Letters},
   pages = {721--728},
   title = {DeepFactors: Real-time probabilistic dense monocular SLAM},
   url = {http://dx.doi.org/10.1109/lra.2020.2965415},
   volume = {5},
   year = {2020}
}


