Britshort Wiki
ABOUT THIS DOCUMENT
This document is to help you setting up Britshort and applying your own algorithm.
OVERVIEW OF COMPONENTS
Britshort contains two parts:
-
Hardware:
- TurtleBot
- GPU
- Kinect
- RPLIDAR
- USB Camera
- Xbox One Controller
-
Software:
- 2-hour driving dataset
- runner.py
- SteeringNode.py
- model.py
- rocord_data.py
- utils.py
- Self-Driving Car Simulator
HOW TO USE
IMPORTANT: Make sure you can access those 404-not-found websites in terminal.
Prepare Your Environments
Operating System
Ubuntu 14.04 LTS is recommended. Either in VM or physical machine is fine.
Quick Guide of Installing Ubuntu from a USB memory stick
sudo apt-get update
sudo apt-get upgrade
sudo apt-get install build-essential cmake g++ gfortran git vim pkg-config python-dev software-properties-common wget
sudo apt-get autoremove
sudo rm -rf /var/lib/apt/lists/*
From the terminal, run the following commands to update packages and install some essential software:
Set Up Robot Operating System (ROS)
Install ROS
To play with our robots, ROS Indigo Igloo will be your best partner. Install ROS Indigo on your machine. See installation instructions here.
Besides, prepare your self with basic knowledge of ROS, the Beginner Level of Core ROS Tutorials is a good start.
Set Up Turtlebot Software
After installing the ros-indigo-desktop-full, you'll need to install the following debs for TurtleBot.
sudo apt-get install ros-indigo-turtlebot ros-indigo-turtlebot-apps ros-indigo-turtlebot-interactions ros-indigo-turtlebot-simulator ros-indigo-kobuki-ftdi ros-indigo-rocon-remocon ros-indigo-rocon-qt-library ros-indigo-ar-track-alvar-msgs
Enable USB cameras on your machine[1]:
See instructions here
Install Driver for XBOX ONE Controller
See GitHub links here
Set Up a Deep Learning Ready Environment
If you're using GPU
-
GPU: The following part of document is pretty much based on ref [2].
A CUDA capable GPU is highly preferred to work on deep learning projects. We are using a NVIDIA GTX1080 GPU and it works just amazing.
If you're using GPU, you will need to download the correct driver based on your GPU model. Check with this :
lspci | grep -I nvidiaYou can heck the Proprietary GPU Drivers PPA repository to find the current release for your GPU. However it's recommended to go with the 375.66 — the current long-lived branch release. Install the driver with the following commands:
sudo add-apt-repository ppa:graphics-drivers/ppa
sudo apt-get update sudo apt-get install nvidia-375 ~~~
Then restart your computer:
`sudo shutdown -r now`
To double check that the driver has installed correctly:
`cat /proc/driver/nvidia/version	`
-
CUDA
Download the CUDA 8.0 toolkit from Nvidia’s site. Go to the Downloads directory (or where ever you chose to save it) and install CUDA:
 sudo dpkg -I cuda-repo-ubuntu1604*amd64.deb
 sudo apt-get update
 sudo apt-get install cuda
Add CUDA to the environment variables:
 echo 'export PATH=/usr/local/cuda/bin:$PATH' >> ~/.bashrc
 echo 'export LD_LIBRARY_PATH=/usr/local/cuda/lib64:$LD_LIBRARY_PATH' >> ~/.bashrc
 source ~/.bashrc
Check that the correct version of CUDA is installed:
nvcc -VRestart your computer:
sudo shutdown -r now -
cuDNN
Download the cuDNN library from Nvidia’s site. You will need to first sign up for Nvidia’s developer program before you can download cuDNN. They state that this could take up to a couple of days, but I received access almost instantly. At the time of this writing, cuDNN v5.1 is the version officially supported by TensorFlow, so hold off on v6.0 unless you know it is supported (they are currently working on it). After downloading, go to your Downloads directory to extract and copy the files:
 tar xvf cudnn*.tgz
 cd cuda
 sudo cp -P */*.h /usr/local/cuda/include/
 sudo cp -P */libcudnn* /usr/local/cuda/lib64/
 sudo chmod a+r /usr/local/cuda/lib64/libcudnn*
Libraries and Dependences
The mainly deep learning tools we'll use are TensorFlow and Keras. But you'll need more than these.
If you're not using GPU, replacesudo pip install tensorflow-gpu==1.1 with sudo pip install tensorflow==1.1
sudo apt-get install build-essential gfortran libatlas-base-dev python-pip python-dev
sudo pip install --upgrade pip
sudo pip install numpy scipy matplotlib pandas tensorflow-gpu==0.12.1 keras==1.2 h5py scikit-image jupyter matplotlib imageio pygame

sudo pip install -U scikit-learn
Build your first self-driving car in simulator
Make Britshort a brilliant driver
Bring up turtlebot
-
Connect turtlebot, usb camera, xbox one controller (optional) to your laptop.
-
Include ros workspaces.
source /opt/ros/indigo/setup.zsh;source /home/ferrycake/ros_ws/devel/setup.zshPS: if you're using bash, then replace all the "zsh" to "bash" -
Bring up:
roslaunch turtlebot_bringup minimal.launch -
Open camera:
roslaunch usb_cam usb_cam-test.launchPS: Remember to check your camera's ID. Typically, the built-in camera in your laptop is /dev/video0, the external usb camera is /dev/video1. To change which camera to use:roscd usb_cam/launch/ vi usb_cam-test.launchThen you change the params such like device id and resolution. The default id is dev/video0 and the resolution is 320 x 240.
Collect dataset
You can collect dataset either by downloading from Comma.ai link or by collecting dataset yourself.
We have written a script to help you collect your own dataset by driving turtlebot with Xbox One Controller.
In terminal, cd to SDR/scripts/ run:
python record_dataset.py
Now start driving. The script will record a image from camera and the corresponding steering command (in Twist format) every 0.05 second.
When you end the program (by typing control+C), the script will save all the data in to a folder named dataset. The dataset will contain two parts: The images folder which holds all the raw images collected. The dataset.csv contains the path to those images (the first column), corresponding speed (the second column) and steering angle (the third column).
Under /dataset/ :
 Under /images/ :
 dataset.csv:

Train your model
In SDR/, run:
python model_SDR.py
this will begin training your model using TensorFlow and Keras. The network is built based on Nvidia's paper.
The network consists of 9 layers, including a normalization layer, 5 convolutional layers and 3 fully connected layers. The input image is split into YUV planes and passed to the network.

Convolution: 5x5, filter: 24, strides: 2x2, activation: ELU
Convolution: 5x5, filter: 36, strides: 2x2, activation: ELU
Convolution: 5x5, filter: 48, strides: 2x2, activation: ELU
Convolution: 3x3, filter: 64, strides: 1x1, activation: ELU
Convolution: 3x3, filter: 64, strides: 1x1, activation: ELU
Drop out (0.5)
Fully connected: neurons: 100, activation: ELU
Fully connected: neurons: 50, activation: ELU
Fully connected: neurons: 10, activation: ELU
Fully connected: neurons: 1 (output)
Evaluation
You can evaluate the result in 3 ways.
-
The Keras will report validation result once the training is done.
-
Visualizing the predictions on test dataset to a steering wheel.
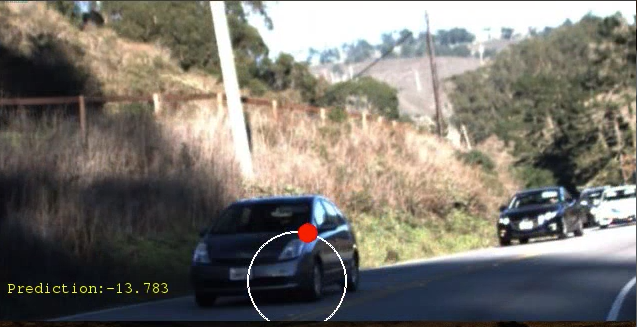
To visualize your predictions, first you need to predict angles on test dataset, then save the predictions to a csv file. cd to SDR/scripts/. Let's say you have put your test dataset in SDR/scripts/test_dataset/ as the same structure as the dataset folder. Run:
python save_predict.pyThis script will make predictions to all the images in test dataset and save them to a .csv file named predict.csv in test_dataset folder.
Now you are ready to visualize the test result as a video. in SDR/, run:
python visualize_own.py -
You can also just test on a real road. Connect your laptop to turtlebot and bring up as instructions above, in SDR/scripts/, run:
python runner.pyYou robot should now drive itself freely on the road.

Running with pre-trained model
Instead of training a model from scratch, our robot can also drive with a pre-trained model. Here's a pre-trained model by Chauffeur, winner of Udacity's challenge 2. They have trained their model on hours of real driving dataset provided by Udacity. The models files are cnn.json, cnn.weights, lstm.json, lstm.weights.
To run with pre-trained model, connect to ROS robot, bring up roscore, open camera, then run:
python prerunner.py
Check out this quick demo on Youtube.

Stashed changes
Ref
[1]: Webcam on ROS, Roel Noort
[2]: Ubuntu + Deep Learning Software Installation Guide , Nick Condo