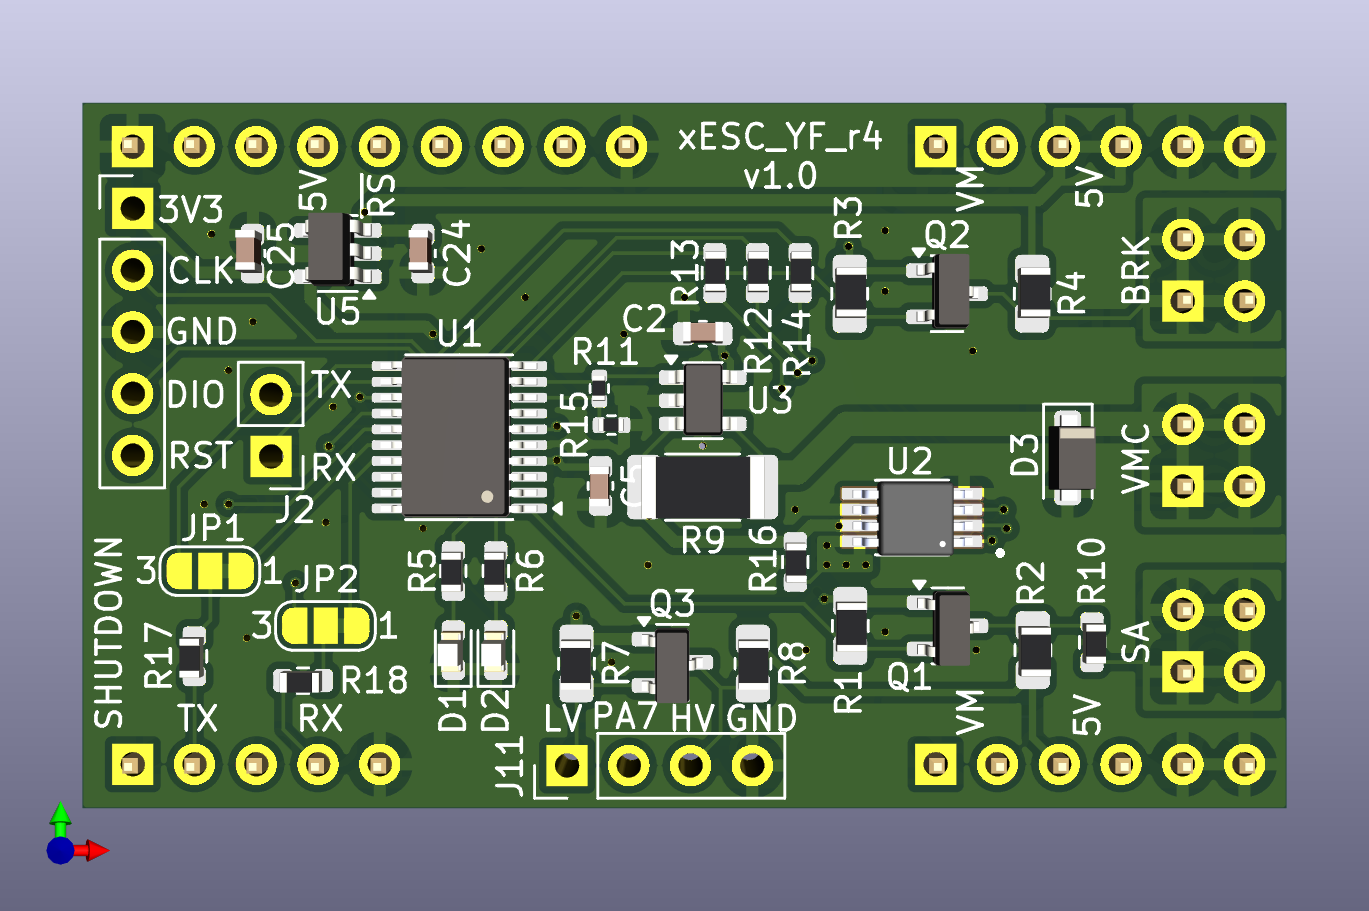
xESC YardForce (Rev4) adapter for OpenMower
Simple xESC adapter for stock Rev4 (built 2017) blade-motor
(the one with a internal motor controller under his cap)


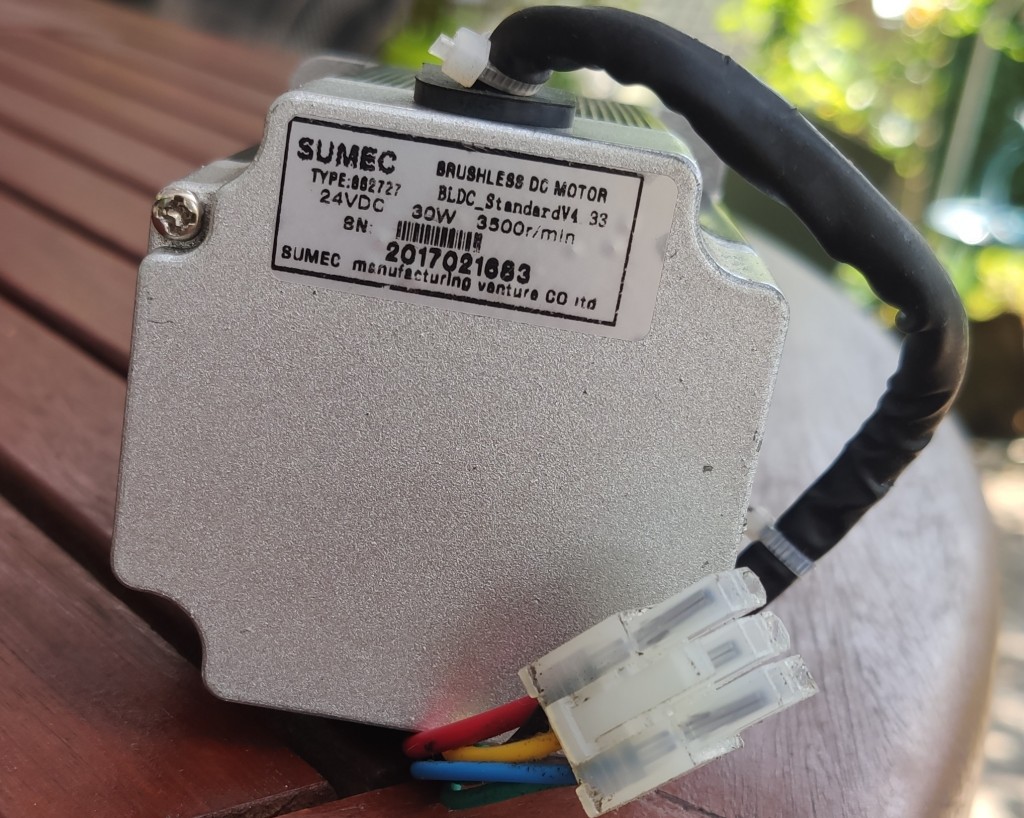
Those who want use OpenMower with an older YardForce "Rev. 4" (built 2017) model, fail with the stock Blade-Motor as it has an embedded motor-controller under it's cap.
It's not very difficult to use this motor:
- Remove stock driver controller
- Wire the coil cables directly
- Add a 5 pin cable to the motor hall sensors
- Connect them to OM's mow-motor-hall-input plug and use OM's xESC.
But it's somehow "crafted" and you need to be capable to do these things.
As an alternative, this "Adapter" is thought to replace OM's default Mow- xESC.
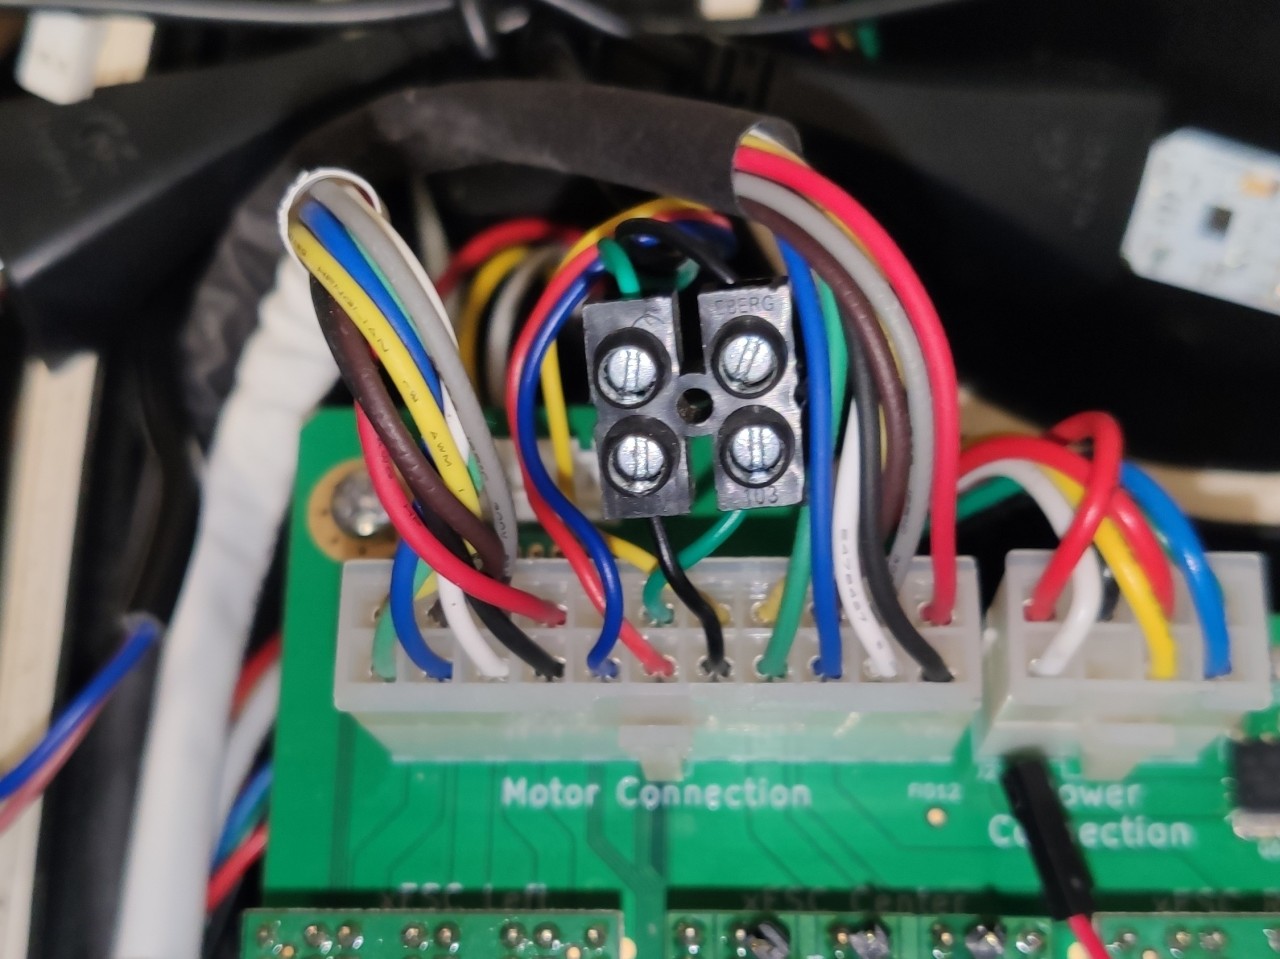
In addition to this adapter, it's nevertheless required to exchange two cables of the mow motor cabling. But this should be also possible for the untalented (see Requirements).

It's mandatory to cross the green and black mow-motor-cables!
Warning
Never plug or un-plug the mow-motor while the adapter is powered!
Warning
Do not simply trust the cable colors!
Check the image and validate if your
cables do have the same colors! If not adapt accordingly
Either exchange the pins within the plug, or do it the lazy way like me, with a luster terminal. The latter has the advantage that you immediately see that you already crossed green/black.
- The compiled firmware, which can be found within the Actions section. Click the one you're intersted in (newest or tagged), scroll down to 'Artifacts', download and unzip to somewhere.
- As of writing, your openmower image has to be on edge version >= commit 0bfd489 which happened on 2024-07-04
We've two options to install the firmware. Either via:
- ST-Link debugger/programmer, for which you need to have access to the adapter PCB's SWDIO pins, or via
- Open-Mower's UART via STM32 internal bootloader (which can be done with a closed mower)
- You need an ST-Link debugger/programmer, like one of the cheap "ST-Link V2" probes from one of the big online retailer.
- STLINK Tools >= v1.8.0 (earlier versions do not support the used STM32C0x MCU)
-
Connect your ST-Link probe to the adapter PCB. Do not connect the 3.3V pin if your adapter is already assembled to the OpenMower Mainboard and get powered by it!
-
Flash the adapter:
st-flash --reset write firmware_xesc_yf_rev4.bin 0x08000000
When done, st-flash should report 'Flash written and verified! jolly good!' (or similar) and immediately reboot.
[!WARNING]
Do not unplug now!On absolutely first firmware boot, it need to flash some settings to the MCU. You'll see some blink codes.
Do NOT unplug till you see:- 3 simultaneous blinks of the green+red LED (=success), following of a
- quick blink of the red LED (=no motor connected) as well as a
- normal green blink (=ROS not connected).
The whole procedure will only take about 10 seconds. Once the procedure got processed it don't get triggered again for this MCU on future firmware flashes.
If the board doesn't come up with blink signs, unplug and replug it. But once you see blink signs, do not unplug it before getting the described LED codes of the previous paragraph.
- STM32CubeProgrammer is the tool we need to flash via UART. But because we like to use it with our OpenMower's Raspberry-Pi, we need it in
aarch64architecture. Unfortunately (as well as unbelievable) ST's programmer tool for ARM CPU's isn't available for ARM CPU's/architectures!!
So we need to trick a little bit, and for this you need a non-arm Linux machine (x86_64).
- Download STM32CubePrg-Lin package with (or to) a x86_64 Linux machine
- Unpack and install it on the x86_64 Linux machine
- Pack (zip, tar, ...) the installed binaries from where you just installed them
- Copy that package to your Raspberry-Pi and unpack it to somewhere. I placed mine to /opt/STM32CubeProgrammer
- box64 to be able to run the STM32CubeProgrammer's x86_64 binary with our aarch64 architecture.
Luckily they do have pre-build Debian packages. Please follow their instruction.
Once box64 got installed, you should be able to start the STM32Programmer CLI i.e. via: /opt/STM32CubeProgrammer/bin/STM32_Programmer_CLI
-
Login to your OpenMower Raspberry-Pi and stop openmower:
sudo systemctl stop openmower -
Configure Raspberry-PI's serial device where the adapter is connected to, which is normally /dev/ttyAMA3:
stty -F /dev/ttyAMA3 115200 raw -
Now trigger the current running adapter firmware to do a reboot into the bootloader via:
echo -e "\x00Reboot into Bootloader" > /dev/ttyAMA3 -
Check if STM32 MCU is now in bootloader mode (Step 3. was successful):
/opt/STM32CubeProgrammer/bin/STM32_Programmer_CLI -c port=/dev/ttyAMA3
Should output something like:------------------------------------------------------------------- STM32CubeProgrammer v2.16.0 ------------------------------------------------------------------- Serial Port /dev/ttyAMA3 is successfully opened. Port configuration: parity = even, baudrate = 115200, data-bit = 8, stop-bit = 1.0, flow-control = off Activating device: OK Board : -- Chip ID: 0x443 BootLoader protocol version: 3.1 Device name : STM32C01x Flash size : 32 KBytes (default) Device type : MCU Revision ID : -- Device CPU : Cortex-M0+ -
Flash:
/opt/STM32CubeProgrammer/bin/STM32_Programmer_CLI -c port=/dev/ttyAMA3 -w firmware_xesc_yf_rev4.bin 0x08000000 -
Reset the device (start our newly flashed program):
/opt/STM32CubeProgrammer/bin/STM32_Programmer_CLI -c port=/dev/ttyAMA3 --go 0x08000000[!WARNING]
Do not power-off now!On absolutely first firmware boot, it need to flash some settings to the MCU. You'll see some blink codes.
Do NOT unplug till you see:- 3 simultaneous blinks of the green+red LED (=success), following of a
- quick blink of the red LED (=no motor connected) as well as a
- normal green blink (=ROS not connected).
The whole procedure will only take about 10 seconds. Once the procedure got processed it don't get triggered again for this MCU on future firmware flashes.
-
Finally start openmower again:
sudo systemctl start openmower
Lastly, you need to add the adapter to your mower_config. Here's the relevant section out of mower_config.sh.example:
# Select your ESC type
# Supported values as of today:
# xesc_mini: for the STM32 version (VESC)
# xesc_mini_w_r4ma: for the STM32 version (VESC), but with Rev4 (Mow) Motor Adapter (only available for YardForceSA650 mower type)
# xesc_2040: for the RP2040 version (very experimental!)
# xesc_2040_w_r4ma: for the RP2040 version (very experimental!), but with Rev4 (Mow) Motor Adapter (only available for YardForceSA650 mower type)
export OM_MOWER_ESC_TYPE="xesc_mini"
Once adapted, restart openmower via: sudo systemctl restart openmower
| Green | Red | Description |
|---|---|---|
| 5 * blink | NRST Pin not yet disabled. Keep board powered and watch for further LED codes | |
| 5 * blink | NRST successful flashed | |
| 3 * flash | 'Power up' successful | |
| 1Hz blink | Waiting for init by xesc_ros | |
| 0.5Hz flash (short flash every 2 seconds) | Shutdown (Sleep) triggered by OpenMower Pico FW | |
| on | All fine (initialized, xesc_ros connected and no error) | |
| 4Hz quick blink | Open VMC (no motor connected). WARNING: Do not connect the motor while the adapter is powered! | |
| 2Hz fast blink | VMS temperature issue or over-current detected | |
| 1Hz blink | Waiting for OpenMower (xesc_ros driver) connect | |
| flash | One single short flash for every host communication error, like packet or CRC error | |
This project is build with modm. You need to install the required toolchain as described in their Installation section, before going on.
Once done:
- Clone this repository (inclusive submodules):
git clone --recurse-submodules https://github.com/ClemensElflein/xESC_YF_rev4-adapter.git - Change into the project source directory:
cd xESC_YF_rev4-adapter/firmware/src - Build the modm library files:
lbuild build - Compile the firmware binary:
scons bin - Flash firmware:
For this, a specific xPack OpenOCD version is required. Either install your own one, or use the one within the package folder by:
export MODM_OPENOCD_BINARY=../packages/xpack-openocd-0.12.0-3-linux-x64/bin/openocd
Afterwards flash the firmware via:
scons program
(Ordered by priority)
- Design schematics and PCB
- Produce PCB
- Firmware
- Generic VM control (on/off)
- Generic motor control (start, stop, break)
- Read SA, math RPM
- Open VMC (no motor connected) detection
-
VMC-short and thermal error handling of VM-Switch - Disable NRST pin functionality
- Motor current consumption
- PCB temperature (junction temp of STM)
- Support shutdown signal
- Stock motor (wrong) cabling detection
- STM32 bootloader / flash via UART support
- ROS driver
- xesc_ros::xesc_yfr4
- Add RPM
See the open issues for a full list of proposed features (and known issues).
| Version | Release Date | Info |
|---|---|---|
| 0.2.2 | 2024-08-25 | - Support STM32 bootloader flash via UART |
| 0.2.1 | 2024-08-19 | - Add shutdown signal handling (sleep/power-off VMC) - Handle over-temp and over-current |
| 0.2.0 | 2024-08-16 | - Switch from Arduino to modm lib - Integrate flash procedure to disable-NRST - Add Motor current and PCB temperature |
| 0.1.1 | 2024-07-10 | - Open VMC (no motor connected) detection - VMC-short and thermal error detection |
| 0.1.0 | 2024-07-05 | Generic functionality like Start, Stop, Break |
Contributions are what make the open source community such an amazing place to learn, inspire, and create. Any contributions you make are greatly appreciated.
If you have a suggestion that would make this better, please fork the repo and create a pull request. You can also simply open an issue with the tag "enhancement". Don't forget to give the project a star! Thanks again!
- Fork the Project
- Create your Feature Branch (
git checkout -b feature/AmazingFeature) - Commit your Changes (
git commit -m 'Add some AmazingFeature') - Push to the Branch (
git push origin feature/AmazingFeature) - Open a Pull Request
Distributed under the MIT License. See LICENSE.txt for more information.
Project Link: https://github.com/ClemensElflein/xESC_YF_rev4-adapter


