dvrk_calib_hand_eye
The goal of this code is to estimate the geometric transformations between a camera and the robotic arms of a da Vinci dVRK robot. E.g., the transformation from the left-stereo camera to the PSM1's base. This is a fundamental calibration for tasks such as visual servoeing, where you want to move the PSM given input endoscopic images.
Surgical instrument and projected joint after calibrating the transformation:
Assumptions:
-
I will assume that you will be using a
8.35 [mm]surgical instrument, which is the standard diameter of the shaft; -
You will have
"neon green"sticker paper, which you can buy on Amazon or any another store. This sticker paper will be used to wrap a marker around the shaft of the surgical instrument;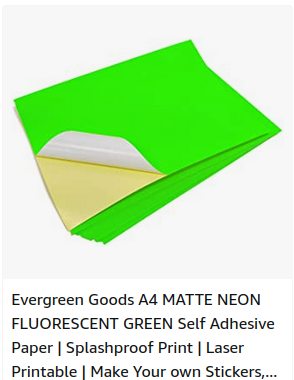
-
You have a monocular (or stereo)
camera at a fixed position. If you are using the ECM, you can lock the ECM's joints to a fixed state;
Step 0 - Setting up
- Clone and build this repo as a catkin package. Do not forget to add
--recurse-submodulesas shown below (this flag is used to clone the cylmarker submodule):
cd ~/catkin_ws/src
git clone --recurse-submodules https://github.com/Cartucho/dvrk_calib_hand_eye.git
catkin build dvrk_calib_hand_eye
- When the build is completed, open a new terminal and set-up the cylmarker code:
roscd dvrk_calib_hand_eye/cylmarker
python3.9 -m pip install --user virtualenv
python3.9 -m virtualenv venv
source venv/bin/activate
pip install -r requirements.txt
- Edit the rostopics in config.yaml to the target PSM and camera.
Step 1 - Camera calibration
First, we will calculate both the distortion and intrinsic camera parameters of the camera that you will be using as pivot. In the case of a stereo endoscope, we suggest that you use the left-stereo camera as pivot. It is very important that the camera is well calibrated, since this will have a significant impact in the accuracy of the estimated transformations. If you have already accurately calibrated your camera just then edit the values in the camera_calibration.yaml file and skip to step 2, otherwise follow the camera_calibration.md instructions.
Step 2 - Record data (by moving the surgical instrument)
First, print the marker on green sticker paper, PDF file
Then, you cut one of the printed markers and wrap it around the shaft of a 8.3 [mm] surgical instrument.
Launch the PSM (similar to this rosrun dvrk_robot dvrk_console_json -j xml/console-PSM.json) and press Power On.
Turn the camera/endoscope's light on.
After doing that, let's record the green marker at multiple poses:
rosrun dvrk_calib_hand_eye record_image_and_joints.py
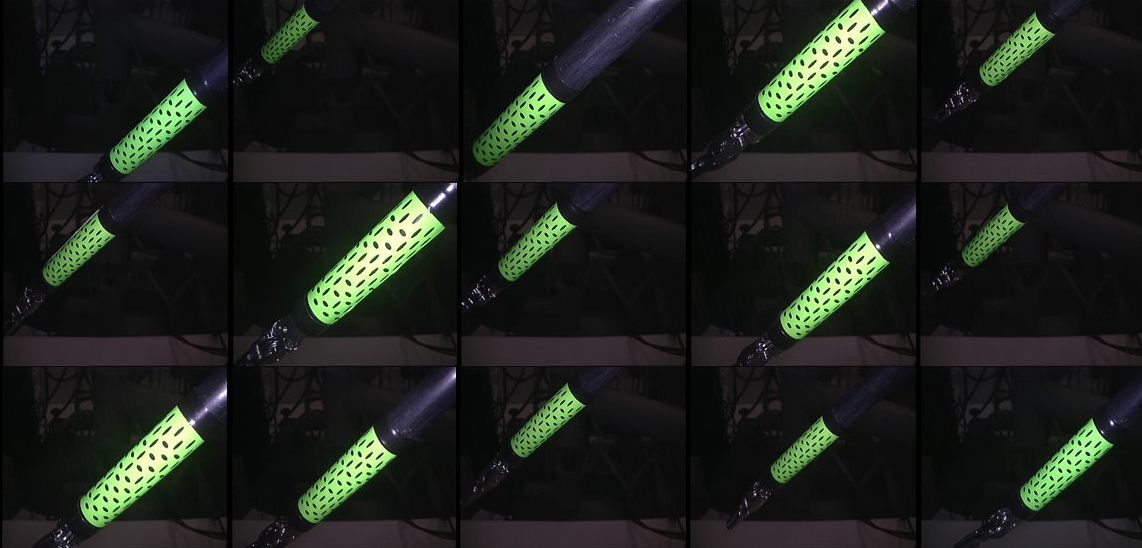
All you have to do is move the arm to multiple poses and press the [Enter] key to record each one. We recommend recording at least 15 poses. It's very important to rotate the tool around the shaft's axis between poses, rotate it to one one side and then the other between successive poses. Keep the marker close to the camera, around 10 [cm], as exemplified in the images below. Press q when finished. Example of recorded poses:
After recording the poses, press Home PSM and then run the following command:
rosrun dvrk_calib_hand_eye replay_interpolated.py
The robot will now move the PSM through the recorded poses and automatically interpolate points in between. If the robot does not move, then you probably forgot to press the Home button.
This is both to guarantee that the images are taken at a stable pose (no motion blur) and that we have enough data for the calibration.
This step will take a few minutes to be completed. You can check that the data is being recorded in data/cam_interpolated and data/joint_interpolated.yaml.
Step 3 - Get green marker pose in recorded data
Open a new terminal and run the following commands:
roscd dvrk_calib_hand_eye/cylmarker
source venv/bin/activate
unset PYTHONPATH
Then check if the HSV values are good for segmenting the green marker:
python main.py --task a --path ..
You should see the entire marker highlighted in red in the images. If you don't you will have to adjust the HSV ranges in the config.yaml file. Tip: If you move your mouse over the images you will see the HSV value at each point of the image.
After adjusting the HSV ranges (if needed), let's get the poses (which will be automatically saved if the marker is successfully detected):
python main.py --task p --path ..
Remember always to activate the virtual environment (venv) and unset ROS's default old OpenCV unset PYTHONPATH before running the command python main.py --task p --path ..
Step 4 - Calculate the transformation (cam_T_basePSM)
Final step - in a separate terminal to re-set the ROS Python path - do the hand-eye calibration:
rosrun dvrk_calib_hand_eye calib_hand_eye.py
Step 5 - Get position of end-effector relative to camera, like in the GIFF above
All surgical instruments share the same initial DH parameters (up to j4), however the last 2 transformations (j5 and j6) it's specific for each instrument.
Therefore you need to update the DH table below if you are not used the pro-grasp. These values you can find in the .json file of the tool, for example psm-pro-grasp.json.
def get_bPSM_T_j6(joint_value):
    LRcc = 0.4318
    LTool = 0.4162
    LPitch2Yaw = 0.0091
    #                                 alpha  ,          a  ,        theta               ,        d
    base_T_j1 = transf_DH_modified( np.pi*0.5,          0. , joint_value[0] + np.pi*0.5 ,                  0. )
    j1_T_j2   = transf_DH_modified(-np.pi*0.5,          0. , joint_value[1] - np.pi*0.5 ,                  0. )
    j2_T_j3   = transf_DH_modified( np.pi*0.5,          0. ,                        0.0 , joint_value[2]-LRcc )
    j3_T_j4   = transf_DH_modified(       0. ,          0. ,             joint_value[3] ,               LTool )
    j4_T_j5   = transf_DH_modified(-np.pi*0.5,          0. , joint_value[4] - np.pi*0.5 ,                  0. )
    j5_T_j6   = transf_DH_modified(-np.pi*0.5 , LPitch2Yaw , joint_value[5] - np.pi*0.5 ,                  0. )
    """
    j6_T_j6f  = np.array([[ 0.0, -1.0,  0.0,  0.0], # Offset from file `psm-pro-grasp.json`
                          [ 0.0,  0.0,  1.0,  0.0],
                          [-1.0,  0.0,  0.0,  0.0],
                          [ 0.0,  0.0,  0.0,  1.0]])
    """
    bPSM_T_j2 = np.matmul(base_T_j1, j1_T_j2)
    bPSM_T_j3 = np.matmul(bPSM_T_j2, j2_T_j3)
    bPSM_T_j4 = np.matmul(bPSM_T_j3, j3_T_j4)
    bPSM_T_j5 = np.matmul(bPSM_T_j4, j4_T_j5)
    bPSM_T_j6 = np.matmul(bPSM_T_j5, j5_T_j6)
    #bPSM_T_j6f = np.matmul(bPSM_T_j6, j6_T_j6f) # To make pose the same as the one in the dVRK
    return bPSM_T_j6
Then you simply multiply cam_T_basePSM @ bPSM_T_j6, and you have the end-effector relative to the camera.
FAQ
-
I moved the set-up joints, what should I do?If you move the set-up joints you need to repeat the calibration (step 2, 3 and 4). -
I moved the camera, what should I do?The easiest is to repeat the calibration (step 2, 3 and 4). If you are using the ECM you could try sending the camera to the same initial state (same joint values as when you did the calibration). Please note that when locking and unlocking motors the joint values will always change slightly, which adds error to the calibration. Read question 4. to learn how to compensate for the ECM joint motions. -
What if I want to use rectified images instead of the ones captured directly from the camera?When you rectify the camera rotates, therefore you need to update the transformation according to that rotation. Specifically, if you are using OpenCV's... R1 ... = cv.stereoRectify()you have to multiplyR1 = camRect_T_camwith the estimated transformationcam_T_basePSM, sincecamRect_T_basePSM = camRect_T_cam @ cam_T_basePSM. Note that you will have to makeR1homogeneous and 4x4 for doing this product. Another alternative (Option B) is to rectify the images captured in step 2 and repeat step 3 and 4. Note that if you do (Option B) you will also need to update the camera calibration values, set all the distortion to 0, since rectified images have no distortion and set the intrinsic with the first 3x3 values of your rectified intrinsics, you get this fromP1if you usecv.stereoRectify(). -
How to update the cam_T_basePSM transformation in real-time if I move the ECM?To be honest this is hard to achieve, because the encoder readings of the ECM are not very accurate. Still, you could try to achieve this by performing another hand-eye calibration to estimate the rigid transformation from the ECM's centre (/ECM/measured_cp), to the camera. This way, every time the ECM joint values change you can re-adjust thecam_T_basePSMtransformation. However, keep in mind that at any time, if you move the set-up joints, you need to calibratecam_T_basePSMfrom scratch (step 2, 3 and 4).
Reference
If you use this tool please cite the following paper:
@article{cartucho2022enhanced,
  title={An enhanced marker pattern that achieves improved accuracy in surgical tool tracking},
  author={Cartucho, Jo{\~a}o and Wang, Chiyu and Huang, Baoru and S. Elson, Dan and Darzi, Ara and Giannarou, Stamatia},
  journal={Computer Methods in Biomechanics and Biomedical Engineering: Imaging \& Visualization},
  volume={10},
  number={4},
  pages={400--408},
  year={2022},
  publisher={Taylor \& Francis},
  doi = {10.1080/21681163.2021.1997647},
  URL = {https://doi.org/10.1080/21681163.2021.1997647},
}