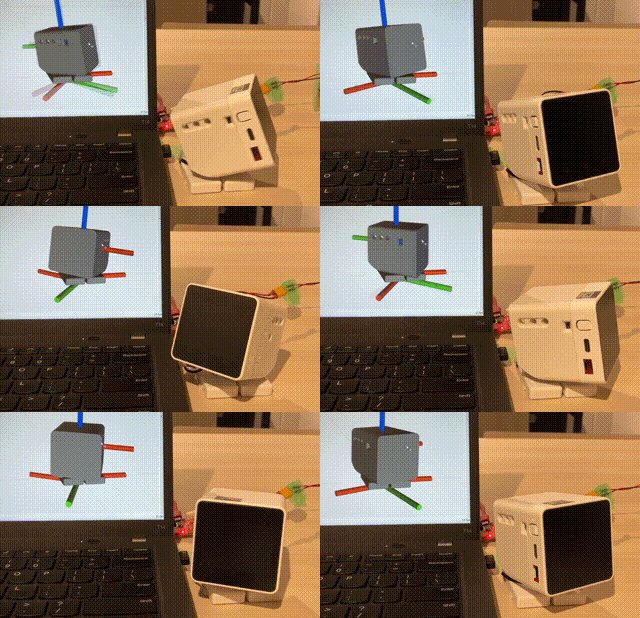
ROS2で構成したスタックチャン(ロスタックチャン)です。
- ROS 2 Humble (Ubuntu 22.04)
- feetech_scs_ros2_driver
- (表情の変化): Docker
- FeeTech SCS0009 (ID: 0, 1, baudrate: 1000000)
- M5Stack CORE2
PlatformIOを起動して、 faceをM5Stackに書き込みます。
- 内部でM5Unifiedを使用していますが、micro-ROSの関係上、S3・C3系のビルドが通らない可能性があります。
- ip_template.hppをもとに
ip.hppを作成してWi-Fi(2.4GHz)への接続先を設定してください。 IP_ADDRESSは接続先のコンピュータのIPアドレスを設定してください。ROS_DOMAIN_IDは0固定です。(何も設定していない場合のROS_DOMAIN_IDは0です)
Dockerとros-humble-desktopをインストールした上で、package.xmlを満たす依存関係をインストールします。
sudo apt install -y \
    ros-humble-ros2-control* \
    ros-humble-control-msgs \
    ros-humble-xacro
次に、aptでインストールできないパッケージをインストールします。
mkdir -p ~/ws_rostackchan/src
cd ~/ws_rostackchan/src

git clone https://github.com/HarvestX/h6x_serial_interface.git -b humble
git clone https://github.com/Ar-Ray-code/feetech_scs_ros2_driver.git -b main
git clone https://github.com/Ar-Ray-code/rostack-chan.git -b main~/ws_rostackchan内のパッケージをビルドします。
cd ~/ws_rostackchan
source /opt/ros/humble/setup.bash
colcon buildスタックチャンに5Vを供給してサーボモータをPCに接続します。
その上で、以下のコマンドを実行します。
docker run -it --rm --net=host microros/micro-ros-agent:humble udp4 --port 2000source ~/ws_rostackchan/install/setup.bash
ros2 launch rostackchan_example rostackchan_random.launch.pyrostackchan_exampleを含むセンサパッケージがビルドされています。(詳しくは rpi-bullseye-ros2) を確認してください。
