If there is information missing here on how to do something that you think would be useful to the team or that you yourself want to know how to do, either add it to the repo yourself via a PR, create an issue requesting it, or ask someone on the team for help (for example by asking @@balena in a new balena-org Jellyfish chat thread).
Note: Until the release party for docs has been completed, the docusarus website version of the handbook is not deployed. However, all changes made to the handbook will be reflected on the website once live.
Other resources
Github Skills - Learn how to use Github with interactive courses designed for beginners and experts
Contributing to balena docs guidelines
-
Keep all file names in the balenaltd/handbook repo lower case with dashes separating words (with the exception of the README.md). Please don't use any other symbols as naming conventions.
-
When making changes, please leave clear and detailed commit messages and descriptions so it's easy to understand what that change was and why that change was made.
Desired commit message format
[First line with easy to understand description of change]
[Optional line with more description]

Change-type: (e.g. [major, minor, or patch](https://github.com/balena-io/docs/blob/master/CONTRIBUTING.md#creating-commits-in-line-with-semantic-versioning))
Signed-off-by: Your Name <Youremail@balena.io>

branch-name-example
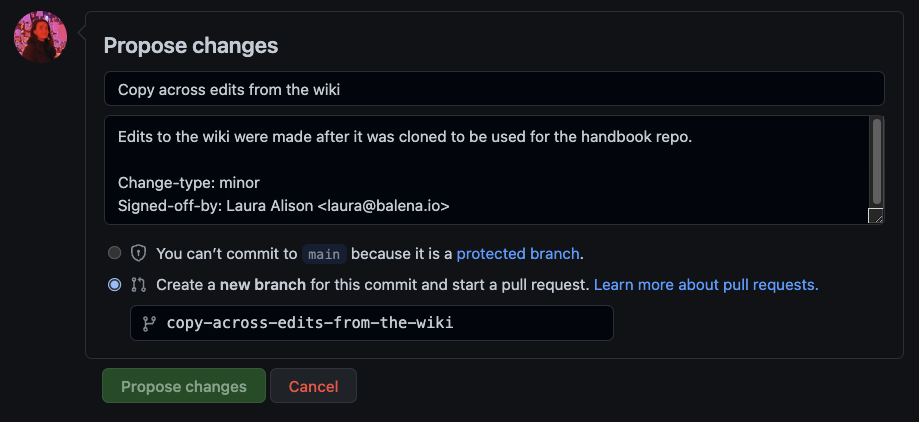
Here's an example of a great commit message:
You can learn more about the differences in change types here
You can find the written content of the handbook within the 'docs' folder.
Go to the markdown file you want to edit and click on the pencil icon in the top right to begin editing the page.
Make your changes, write your commit message and branch name and select the 'propose changes' button.
A pull request will be created and another member of the team will need to review your changes first, before it's committed to the handbook repo.
Reviews can be carried out by any other team member, so just ask! You can either ask someone directly or add reviewers on the pull request itself (use the cog icon in the reviewers box on the top right).
You can see your pull request by visiting the pull request tab on the handbook repo and clicking on it from the list.
Once your PR has been reviewed, hit the merge pull request button. This may already have been done for you by your reviewer, but it's worth checking.
**bold**
*italic*
<u>underlined</u>
<strike>strike through</strike>

# heading1 (there should only ever be one of these on a page - this is the main title of the page)
## heading2 (smaller than heading 1)
### heading3 (smaller again)
.etc

[link text](www.the-url-you-want-to-link-to.com)
Also check out the official Markdown Guide.
The contents on the website defaults to the alphabetical order of the file names (not the H1 title of pages), prioritising captial letters first (which is why we want to keep all file names in lowercase).
In the instance you need to override the positioning of a page / folder, you can use the snippet below and change the number weighting depending on the order needed. This starts from '0' at the top, the higher the number the lower down it will sit on the contents order.
---
sidebar_position: 0
---
Note: The 'Welcome' page should always sit at the top of the contents
To add assets and images you will need to add your the file to the docs/assets folder in the repo.
Once done, use the following format to add it to your chosen location in the markdown:

Note: An exception - to add assets to this README.md file (the handbook manual) you will need to add your image to the static/img folder and use the following format:

Once the website version has been deployed, you will be able to get to the corresponding markdown file in the github repo via the 'edit this page in github' link/button at the bottom of each webpage.
This will take you to github to make your edits as detailed above.
This handbook website is built using Docusaurus 2, a modern static website generator.
Clone the repo, npm install, and start a local development server:
git clone git@github.com:balenaltd/handbook.git
cd handbook
npm install
npm start
The npm start command resolves to docusaurus start which starts a local development server, and opens up a browser window. Most changes are reflected live without having to restart the server.
$ npm build
This command generates static content into the build directory and can be served using any static contents hosting service.
Using SSH:
$ USE_SSH=true yarn deploy
Not using SSH:
$ GIT_USER=<Your GitHub username> yarn deploy
We're using GitHub pages for hosting, this command is a convenient way to build the website and push to the gh-pages branch.

