SSD is an unified framework for object detection with a single network.
You can use the code to train/evaluate/test for object detection task.
This is a re-implementation of original SSD which is based on caffe. The official repository is available here. The arXiv paper is available here.
This example is intended for reproducing the nice detector while fully utilize the remarkable traits of MXNet.
- The model is fully compatible with caffe version.
- Model converter from caffe is available now!
- The result is almost identical to the original version. However, due to different implementation details, the results might differ slightly.
- This repo is now deprecated, I am migrating to the latest Gluon-CV which is more user friendly and has a lot more algorithms in development. This repo will not receive active development, however, you can continue use it with the mxnet 1.1.0(probably 1.2.0).
- Now this repo is internally synchronized up to data with offical mxnet backend.
pip install mxnetwill work for this repo as well in most cases. - MobileNet pretrained model now provided.
- Added multiple trained models.
- Added a much simpler way to compose network from mainstream classification networks (resnet, inception...) and Guide.
- Update to the latest version according to caffe version, with 5% mAP increase.
- Use C++ record iterator based on back-end multi-thread engine to achieve huge speed up on multi-gpu environments.
- Monitor validation mAP during training.
- More network symbols under development and test.
- Extra operators are now in
mxnet/src/operator/contrib, symbols are modified. Please use Release-v0.2-beta for old models. - added Docker support for this repository, prebuilt & including all packages and dependencies. (linux only)
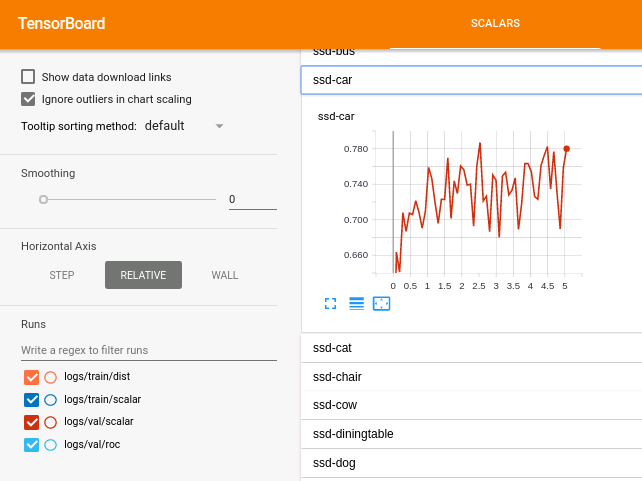
- added tensorboard support, allowing a more convenient way of research. (linux only)


| Model | Training data | Test data | mAP | Note |
|---|---|---|---|---|
| VGG16_reduced 300x300 | VOC07+12 trainval | VOC07 test | 77.8 | fast |
| VGG16_reduced 512x512 | VOC07+12 trainval | VOC07 test | 79.9 | slow |
| Inception-v3 512x512 | VOC07+12 trainval | VOC07 test | 78.9 | fastest |
| Resnet-50 512x512 | VOC07+12 trainval | VOC07 test | 79.1 | fast |
| MobileNet 512x512 | VOC07+12 trainval | VOC07 test | 72.5 | super fast |
| MobileNet 608x608 | VOC07+12 trainval | VOC07 test | 74.7 | super fast |
More to be added
| Model | GPU | CUDNN | Batch-size | FPS* |
|---|---|---|---|---|
| VGG16_reduced 300x300 | TITAN X(Maxwell) | v5.1 | 16 | 95 |
| VGG16_reduced 300x300 | TITAN X(Maxwell) | v5.1 | 8 | 95 |
| VGG16_reduced 300x300 | TITAN X(Maxwell) | v5.1 | 1 | 64 |
| VGG16_reduced 300x300 | TITAN X(Maxwell) | N/A | 8 | 36 |
| VGG16_reduced 300x300 | TITAN X(Maxwell) | N/A | 1 | 28 |
Forward time only, data loading and drawing excluded.
- Option #1 - install using 'Docker'. if you are not familiar with this technology, there is a 'Docker' section below. you can get the latest image:
docker pull daviddocker78/mxnet-ssd:gpu_0.12.0_cuda9
- You will need python modules:
cv2,matplotlibandnumpy. If you use mxnet-python api, you probably have already got them. You can install them via pip or package manegers, such asapt-get:
sudo apt-get install python-opencv python-matplotlib python-numpy
- Clone this repo:
# if you don't have git, install it via apt or homebrew/yum based on your system
sudo apt-get install git
# cd where you would like to clone this repo
cd ~
git clone --recursive https://github.com/zhreshold/mxnet-ssd.git
# make sure you clone this with --recursive
# if not done correctly or you are using downloaded repo, pull them all via:
# git submodule update --recursive --init
cd mxnet-ssd/mxnet
- (Skip this step if you have offcial MXNet installed.) Build MXNet:
cd /path/to/mxnet-ssd/mxnet. Follow the official instructions here.
# for Ubuntu/Debian
cp make/config.mk ./config.mk
# modify it if necessary
Remember to enable CUDA if you want to be able to train, since CPU training is insanely slow. Using CUDNN is optional, but highly recommanded.
- Download the pretrained model:
ssd_resnet50_0712.zip, and extract tomodel/directory. - Run
# cd /path/to/mxnet-ssd
python demo.py --gpu 0
# play with examples:
python demo.py --epoch 0 --images ./data/demo/dog.jpg --thresh 0.5
python demo.py --cpu --network resnet50 --data-shape 512
# wait for library to load for the first time
- Check
python demo.py --helpfor more options.
This example only covers training on Pascal VOC dataset. Other datasets should
be easily supported by adding subclass derived from class Imdb in dataset/imdb.py.
See example of dataset/pascal_voc.py for details.
- Download the converted pretrained
vgg16_reducedmodel here, unzip.paramand.jsonfiles intomodel/directory by default. - Download the PASCAL VOC dataset, skip this step if you already have one.
cd /path/to/where_you_store_datasets/
wget http://host.robots.ox.ac.uk/pascal/VOC/voc2012/VOCtrainval_11-May-2012.tar
wget http://host.robots.ox.ac.uk/pascal/VOC/voc2007/VOCtrainval_06-Nov-2007.tar
wget http://host.robots.ox.ac.uk/pascal/VOC/voc2007/VOCtest_06-Nov-2007.tar
# Extract the data.
tar -xvf VOCtrainval_11-May-2012.tar
tar -xvf VOCtrainval_06-Nov-2007.tar
tar -xvf VOCtest_06-Nov-2007.tar
- We are going to use
trainvalset in VOC2007/2012 as a common strategy. The suggested directory structure is to storeVOC2007andVOC2012directories in the sameVOCdevkitfolder. - Then link
VOCdevkitfolder todata/VOCdevkitby default:
ln -s /path/to/VOCdevkit /path/to/this_example/data/VOCdevkit
Use hard link instead of copy could save us a bit disk space.
- Create packed binary file for faster training:
# cd /path/to/mxnet-ssd
bash tools/prepare_pascal.sh
# or if you are using windows
python tools/prepare_dataset.py --dataset pascal --year 2007,2012 --set trainval --target ./data/train.lst
python tools/prepare_dataset.py --dataset pascal --year 2007 --set test --target ./data/val.lst --shuffle False
- Start training:
python train.py
- By default, this example will use
batch-size=32andlearning_rate=0.004. You might need to change the parameters a bit if you have different configurations. Checkpython train.py --helpfor more training options. For example, if you have 4 GPUs, use:
# note that a perfect training parameter set is yet to be discovered for multi-gpu
python train.py --gpus 0,1,2,3 --batch-size 128 --lr 0.001
- Memory usage: MXNet is very memory efficient, training on
VGG16_reducedmodel withbatch-size32 takes around 4684MB without CUDNN(conv1_x and conv2_x fixed).
Use:
# cd /path/to/mxnet-ssd
python evaluate.py --gpus 0,1 --batch-size 128 --epoch 0
This simply removes all loss layers, and attach a layer for merging results and non-maximum suppression. Useful when loading python symbol is not available.
# cd /path/to/mxnet-ssd
python deploy.py --num-class 20
# then you can run demo with new model without loading python symbol
python demo.py --prefix model/ssd_300_deploy --epoch 0 --deploy
Converter from caffe is available at /path/to/mxnet-ssd/tools/caffe_converter
This is specifically modified to handle custom layer in caffe-ssd. Usage:
cd /path/to/mxnet-ssd/tools/caffe_converter
make
python convert_model.py deploy.prototxt name_of_pretrained_caffe_model.caffemodel ssd_converted
# you will use this model in deploy mode without loading from python symbol
python demo.py --prefix ssd_converted --epoch 1 --deploy
There is no guarantee that conversion will always work, but at least it's good for now.
Since the new interface for composing network is introduced, the old models have inconsistent names for weights.
You can still load the previous model by rename the symbol to legacy_xxx.py
and call with python train/demo.py --network legacy_xxx
For example:
python demo.py --network 'legacy_vgg16_ssd_300.py' --prefix model/ssd_300 --epoch 0
First make sure docker is installed. The docker plugin nvidia-docker is required to run on Nvidia GPUs.
- pre-built docker images are available at https://hub.docker.com/r/daviddocker78/mxnet-ssd/ to download a pre-built image, run:
docker pull daviddocker78/mxnet-ssd:gpu_0.12.0_cuda9
Otherwise, if you wish to build it yourself, you have the Dockerfiles available in this repo, under the 'docker' folder.
- to run a container instance:
nvidia-docker run -it --rm myImageName:tag
now you can execute commands the same way as you would, if you'd install mxnet on your own computer. for more information, see the Guide.
- There has been some great effort to bring tensorboard to mxnet. If you chose to work with dockers, you have it installed in the pre-built image you've downloaded. otherwise, follow here for installation steps.
- To save training loss graphs, validation AP per class, and validation ROC graphs to tensorboard while training, you can specify:
python train.py --gpus 0,1,2,3 --batch-size 128 --lr 0.001 --tensorboard True
- To save also the distributions of layers (actually, the variance of them), you can specify:
python train.py --gpus 0,1,2,3 --batch-size 128 --lr 0.001 --tensorboard True --monitor 40
- Visualization with Docker: the UI of tensorboard has changed over time. to get the best experience, download the new tensorflow docker-image:
# download the built image from Dockerhub
docker pull tensorflow/tensorflow:1.4.0-devel-gpu
# run a container and open a port using '-p' flag.
# attach a volume from where you stored your logs, to a directory inside the container
nvidia-docker run -it --rm -p 0.0.0.0:6006:6006 -v /my/full/experiment/path:/res tensorflow/tensorflow:1.4.0-devel-gpu
cd /res
tensorboard --logdir=.
To launch tensorboard without docker, simply run the last command Now tensorboard is loading the tensorEvents of your experiment. open your browser under '0.0.0.0:6006' and you will have tensorboard!