Note
This repository represents an example of using a Chainlink product or service. It is provided to help you understand how to interact with Chainlink’s systems so that you can integrate them into your own. This template is provided "AS IS" without warranties of any kind, has not been audited, and may be missing key checks or error handling to make the usage of the product more clear. Take everything in this repository as an example and not something to be copy pasted into a production ready service.
This project demonstrates how Chainlink CCIP can be used to create a cross-chain Tic-Tac-Toe game
Verify installation by typing:
node -vand
npm -v- Install packages
npm install
- Compile contracts
npx hardhat compile
Comment out import './tasks' line in the file hardhat.config if you have issue of it. Please don't forget uncomment the line after compiling.
- Run tests
TS_TRANSPILE_NODE=1 npx hardhat test
Chainlink Cross-Chain Interoperability Protocol (CCIP) provides a single, simple, and elegant interface through which dApps and web3 entrepreneurs can securely meet all their cross-chain needs, including token transfers and arbitrary messaging.
With Chainlink CCIP, one can:
- Transfer supported tokens
- Send messages (any data)
- Send messages and tokens
CCIP receiver can be:
- Smart contract that implements
CCIPReceiver.sol - EOA
Note: If you send a message and token(s) to EOA, only tokens will arrive
To use this project, you can consider CCIP as a "black-box" component and be aware of the Router contract only. If you want to dive deep into it, check the Official Chainlink Documentation.
In the next section you can see a couple of basic Chainlink CCIP use case examples. But before that, you need to set up some environment variables.
We are going to use the @chainlink/env-enc package for extra security. It encrypts sensitive data instead of storing them as plain text in the .env file, by creating a new, .env.enc file. Although it's not recommended to push this file online, if that accidentally happens your secrets will still be encrypted.
- Set a password for encrypting and decrypting the environment variable file. You can change it later by typing the same command.
npx env-enc set-pw- Now set the following environment variables:
PRIVATE_KEY, Source Blockchain RPC URL, Destination Blockchain RPC URL. You can see available options in the.env.examplefile:
ETHEREUM_SEPOLIA_RPC_URL=""
OPTIMISM_GOERLI_RPC_URL=""
ARBITRUM_TESTNET_RPC_URL=""
AVALANCHE_FUJI_RPC_URL=""
POLYGON_MUMBAI_RPC_URL=""
To set these variables, type the following command and follow the instructions in the terminal:
npx env-enc setAfter you are done, the .env.enc file will be automatically generated.
If you want to validate your inputs you can always run the next command:
npx env-enc viewIn this example, we will use a simple game called TicTacToe to demonstrate how to transmit messages from one chain to another using CCIP.
In the game, we will deploy the TicTacToe smart contract on two different blockchains. By sending a transaction on the source chain, which can be either "start" or "move," the state of the game board will be modified, and these states will be "synchronized" by Chainlink CCIP on the other chain.
Before starting the game, the contract needs to be deployed on two different blockchains using the following commands:
npx hardhat run ./scripts/deployTicTacToe.ts --network <blockchain>
npx hardhat run ./scripts/deployTicTacToe.ts --network <blockchain>
Where the list of supported chains consists of (case sensitive):
- ethereumSepolia
- optimismGoerli
- arbitrumTestnet
- avalancheFuji
- polygonMumbai
Although you can choose any two chains from the list, I highly recommend using Sepolia and Fuji because time consumed by CCIP to relay messages between these 2 chains are relatively shorter. If you want to deploy the contract at Sepolia and Fuji, the commands:
npx hardhat run ./scripts/deployTicTacToe.ts --network ethereumSepolia
npx hardhat run ./scripts/deployTicTacToe.ts --network avalancheFujiAfter the deployment of the contract, you must transfer native tokens to these 2 contracts respectively. If you deployed contracts on Fuji and Sepolia, please transfer 2 AVAX and 0.01 ETH to contracts on Fuji and Sepolia respectively. If you are trying with polygon mumbai, please transfer 2 MATIC to contract.
Please use commands below to update router address for ccipSend. For most of cases, the router addresses input here are same as router addresses of CCIP.
npx hardhat ttt-update-router --blockchain ethereumSepolia --contract <address of TicTacToe on Ethereum Sepolia> --router 0xd0daae2231e9cb96b94c8512223533293c3693bf
npx hardhat ttt-update-router --blockchain avalancheFuji --contract <address of TicTacToe on Avalanche Fuji> --router 0x554472a2720e5e7d5d3c817529aba05eed5f82d8
Since you can have your own proxy to forward request to CCIP, update the addresses above with your own proxy addresses if you want to use proxies. If you don't want to use proxies, keep the router addresses the same as CCIP.
Router addresses are listed below:
- Ethereum Sepolia: 0xd0daae2231e9cb96b94c8512223533293c3693bf
- Polygon Mumbai: 0x70499c328e1e2a3c41108bd3730f6670a44595d1
- Optimism Goerli: 0xeb52e9ae4a9fb37172978642d4c141ef53876f26
- Avalanche Fuji: 0x554472a2720e5e7d5d3c817529aba05eed5f82d8
- Arbitrum Goerli: 0x88e492127709447a5abefdab8788a15b4567589e
You can start a new game through a TicTacToe contract on any chain. The player who starts a game is player 1. Player 1 needs to send a transaction to create a session, allowing the other player on the other chain to join that session and make a move.
Start a game with the command blow:
npx hardhat ttt-start --source-blockchain ethereumSepolia --sender <address of TicTacToe on Ethereum Sepolia> --destination-blockchain avalancheFuji --receiver <address of TicTacToe on Avalanche Fuji>You will see the message below in the terminal and that means the message is sent by CCIP.
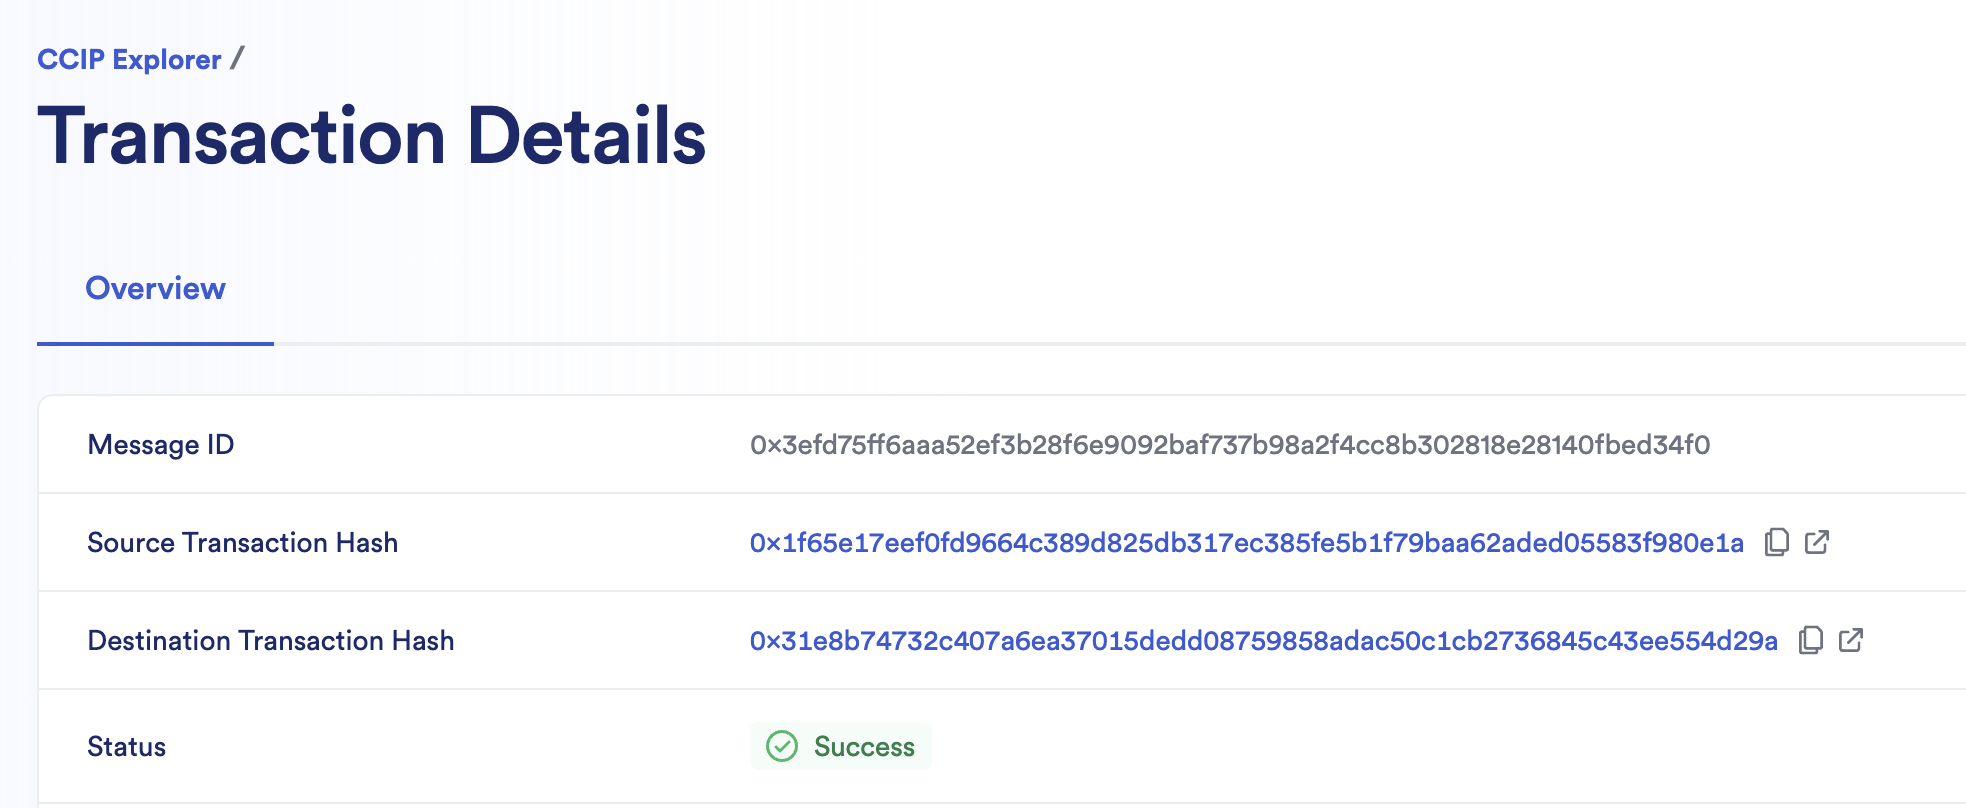
✅ Message sent, game session created! transaction hash: 0x1f65e17eef0fd9664c389d825db317ec385fe5b1f79baa62aded05583f980e1a
While the message sent to CCIP, the status would not be synced until the the message is finalized on source chain and written into the contract on the other chain. Check the information in CCIP explorer and find message below to make sure the message sent to the dest chain.
Usually it takes about 20mins to complete the cross-chain transaction.
In order to join a game, a player needs to know the session ID of the game.
Get the session ID of the game by index with the command below:
npx hardhat ttt-get-sessionId --blockchain ethereumSepolia --contract <address of TicTacToe on Ethereum Sepolia> --index 0Player 2 on the other chain can make a move within the game session. The player needs to select a position with x and y coordinates(the range of x and y are from 0 to 2) with the command below:
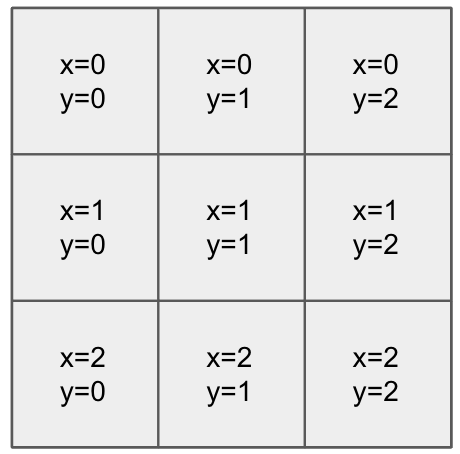
npx hardhat ttt-move --x <x coordinate> --y <y coordinate> --player 2 --session-id <sessionId> --source-blockchain avalancheFuji --sender <address of TicTacToe on Avalanche Fuji> --destination-blockchain ethereumSepolia --receiver <address of TicTacToe on Ethereum Sepolia>the x and y are coordinates in the board. eg:
After player 2 made the move, player 1 can make the move with x and y coordinates. Please noted that transaction will fail if the position of represented by x and y coordinates is occupied.
Player 1 makes a move with command below:
npx hardhat ttt-move --x <x coordinate> --y <y coordinate> --player 1 --session-id <sessionId> --source-blockchain ethereumSepolia --sender <address of TicTacToe on Ethereum Sepolia> --destination-blockchain avalancheFuji --receiver <address of TicTacToe on Avalanche Fuji>Repeat steps 6 and 7 until either combination of player 1 or player 2 matches a winning combination.
Check the winner by command:
npx hardhat ttt-check-winner --blockchain ethereumSepolia --contract <address of TicTacToe on Ethereum Sepolia> --session-id <sessionId>you can also check the winner from the contract on the other blockChain with command:
npx hardhat ttt-check-winner --blockchain avalancheFuji --contract <address of TicTacToe on Avalanche Fuji> --session-id <sessionId>If you're interested in trying to interact with CCIP Tic-Tac-Toe using the frontend, please refer to the frontend README.md here to learn how to use it.


