前几天在写Pythonde的一个Demo的时候,用到一个控件Treeview();
tree = ttk.Treeview(win)
tree.pack()
想到在iOS中没有这个控件,网上看了一下有很多treeView的相关控件,但是都扩展性有点差,有的专为聊天列表设计,有的专为选择列表设计;还有笔者上个月在找工作有个面试官也问到了这个事情,我当时只把方案思路说了一个,因此我做了ZFJTreeViewKit!
ZFJTreeViewKit一款高效简单扩展性极强而且可以无限插入子节点的树状列表视图。
| 项目地址 | https://github.com/zfjsyqk/ZFJTreeViewKit.git |
|---|---|
| Demo地址 | https://gitee.com/zfj1128/ZFJTreeView.git |
| 博客地址 | https://zfj1128.blog.csdn.net/article/details/94393642 |
具体结构图如下:
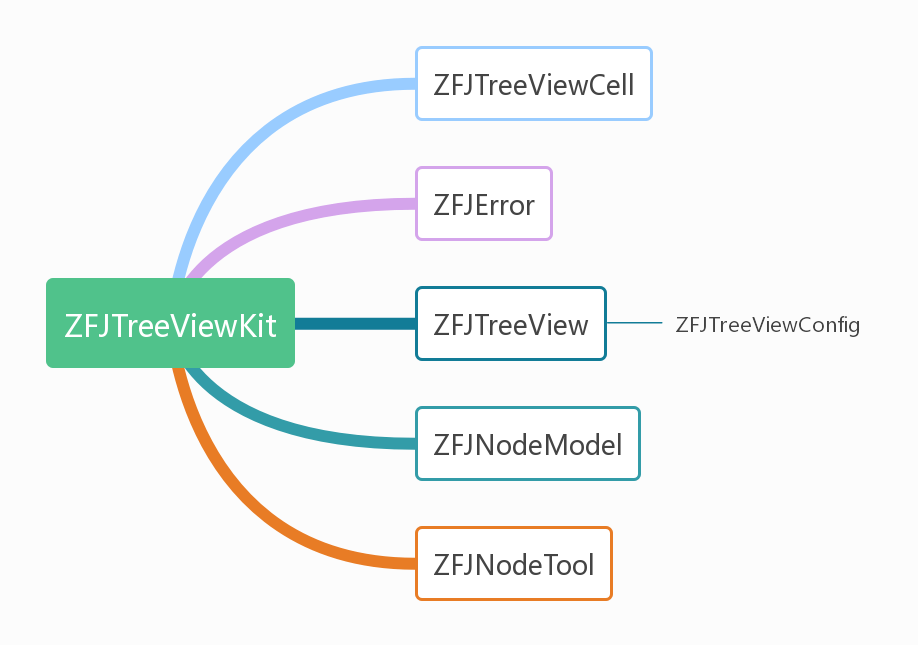
项目的主要类就是ZFJTreeView和ZFJNodeModel,在ZFJTreeView中我们主要封装了一个ZFJTreeView的公共方法,需要主要说明的就是我们的节点数据模型了ZFJNodeModel,其结构图如下:
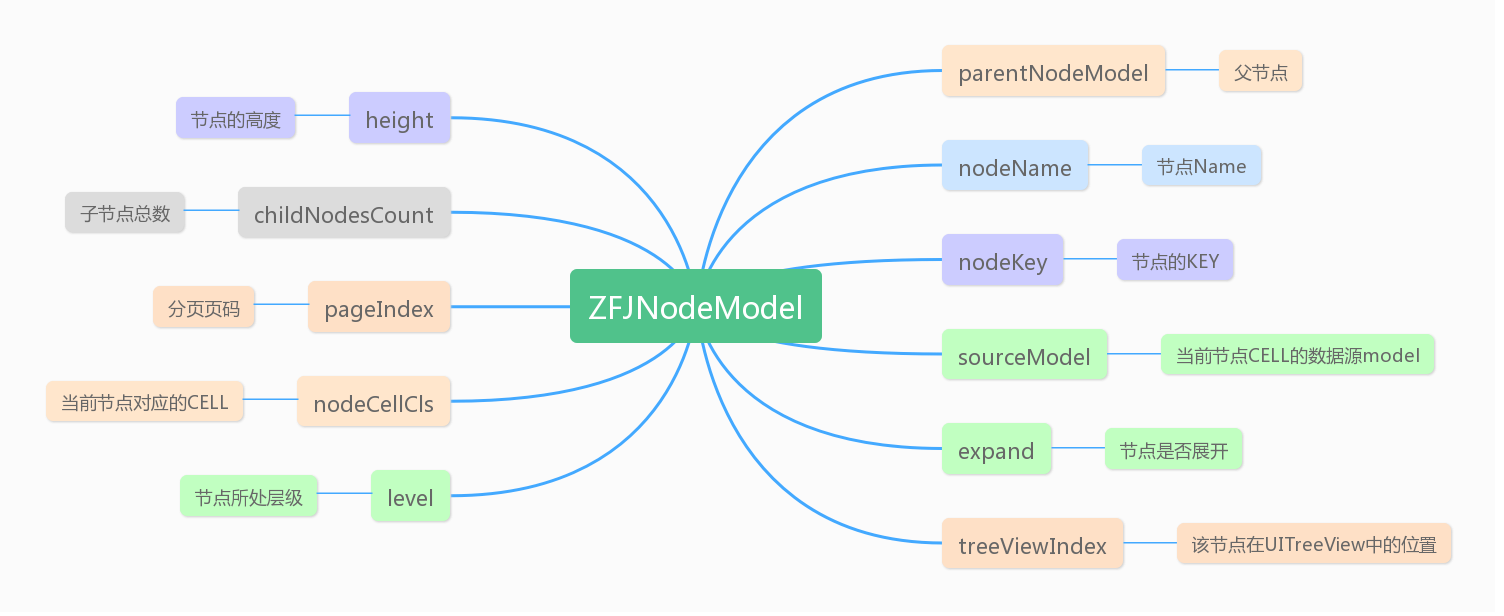
ZFJNodeModel包含了节点的关键信息,最重要的就是nodeKey了,这里是ZFJTreeViewKit自动生成,并不需要用户管理和操心,为了方便用户使用和ZFJTreeViewKit的扩展,笔者在这里提供了@property (nonatomic,strong) NSObject *sourceModel;自定义数据源模型,用户可以传入自己自定义的数据模型,方便在CELL中使用;
说到CELL,ZFJTreeViewKit不提供CELL的样式,需要用户自己定义和设计CELL,这也给用户提供了极高的自由度,方便用户根据需求来设计自己的样式功能,但是用户一定要在@property (nonatomic, copy) Class nodeCellCls;中注册自己的CELL。
- pod 'ZFJTreeViewKit'
- pod install
- 导入头文件#import "ZFJTreeViewKit.h"
本控件的主要视图View就是ZFJTreeView,所以用户在使用的时候直接创建ZFJTreeView类就行,示例代码如下:
- (ZFJTreeView *)treeView{
if(_treeView == nil){
ZFJTreeViewConfig *model = [[ZFJTreeViewConfig alloc] init];
model.separatorStyle = UITableViewCellSeparatorStyleNone;
model.selectionStyle = UITableViewCellSelectionStyleNone;

_treeView = [[ZFJTreeView alloc] initWithFrame:self.view.bounds config:model];
_treeView.delegate = self;
}
return _treeView;
}
如果不考虑性能问题,ZFJTreeViewKit是可以无限制添加子节点的,笔者这里面展示了添加十级节点的示例,每个节点都有一个自定义数据模型,比如创建一级节点:
MyNodeModel *myModel = [[MyNodeModel alloc] init];
myModel.title = @"自定义Title";

#pragma mark - 添加一级节点
for (int i = 0; i<25; i++) {
ZFJNodeModel *model_f1 = [[ZFJNodeModel alloc] initWithParentNodeModel:nil];
model_f1.nodeName = [NSString stringWithFormat:@"一级节点%d楼",i];
model_f1.height = 55;//节点高度
model_f1.sourceModel = myModel;
model_f1.nodeCellCls = [MyNodeViewCell class];
[self.treeView insertNode:model_f1 completed:^(ZFJError * _Nonnull error) {
NSLog(@"%@",error.message);
}];
[self.dataArr_1 addObject:model_f1];
}
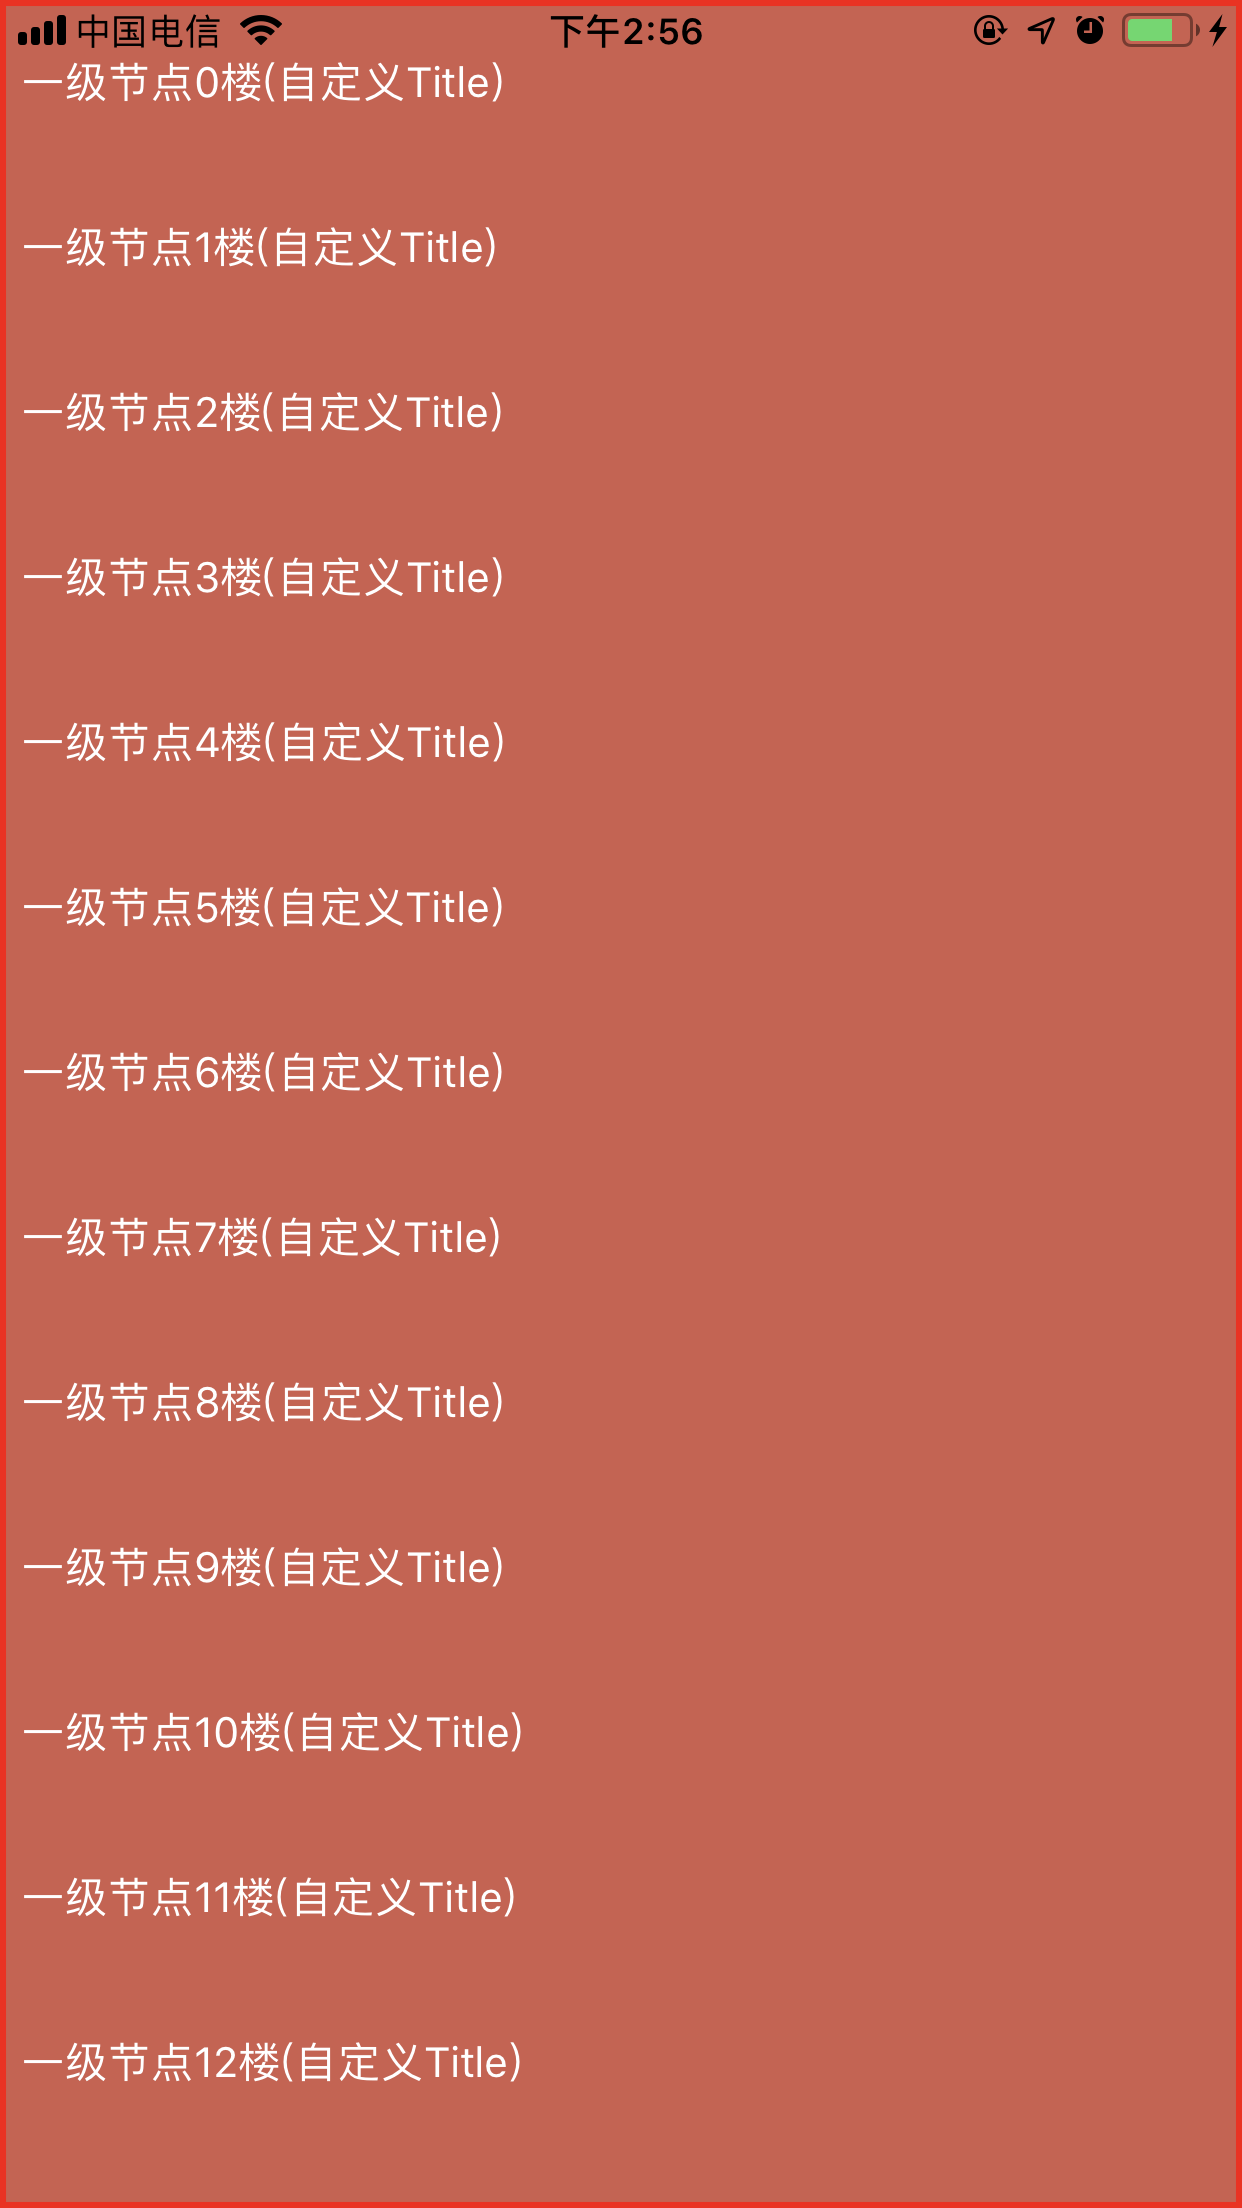
从上面的代码可以看到,我们需要设置CELL的高度、自定义数据模型Model(如果有)、注册自定义CELL(必须要有)然后就是调用插入事件了! 效果如图:
接着我们添加二级节点:
#pragma mark - 添加二级节点
for (ZFJNodeModel *model_f1 in self.dataArr_1) {
for (int i = 0; i<2; i++) {
ZFJNodeModel *model_f2 = [[ZFJNodeModel alloc] initWithParentNodeModel:model_f1];
model_f2.nodeName = [NSString stringWithFormat:@"二级节点%d楼",i];
model_f2.height = 55;//节点高度
//model_f2.sourceModel = myModel;
model_f2.nodeCellCls = [MyNodeViewCell class];
[self.treeView insertNode:model_f2 completed:^(ZFJError * _Nonnull error) {
NSLog(@"%@",error.message);
}];
[self.dataArr_2 addObject:model_f2];
}
}
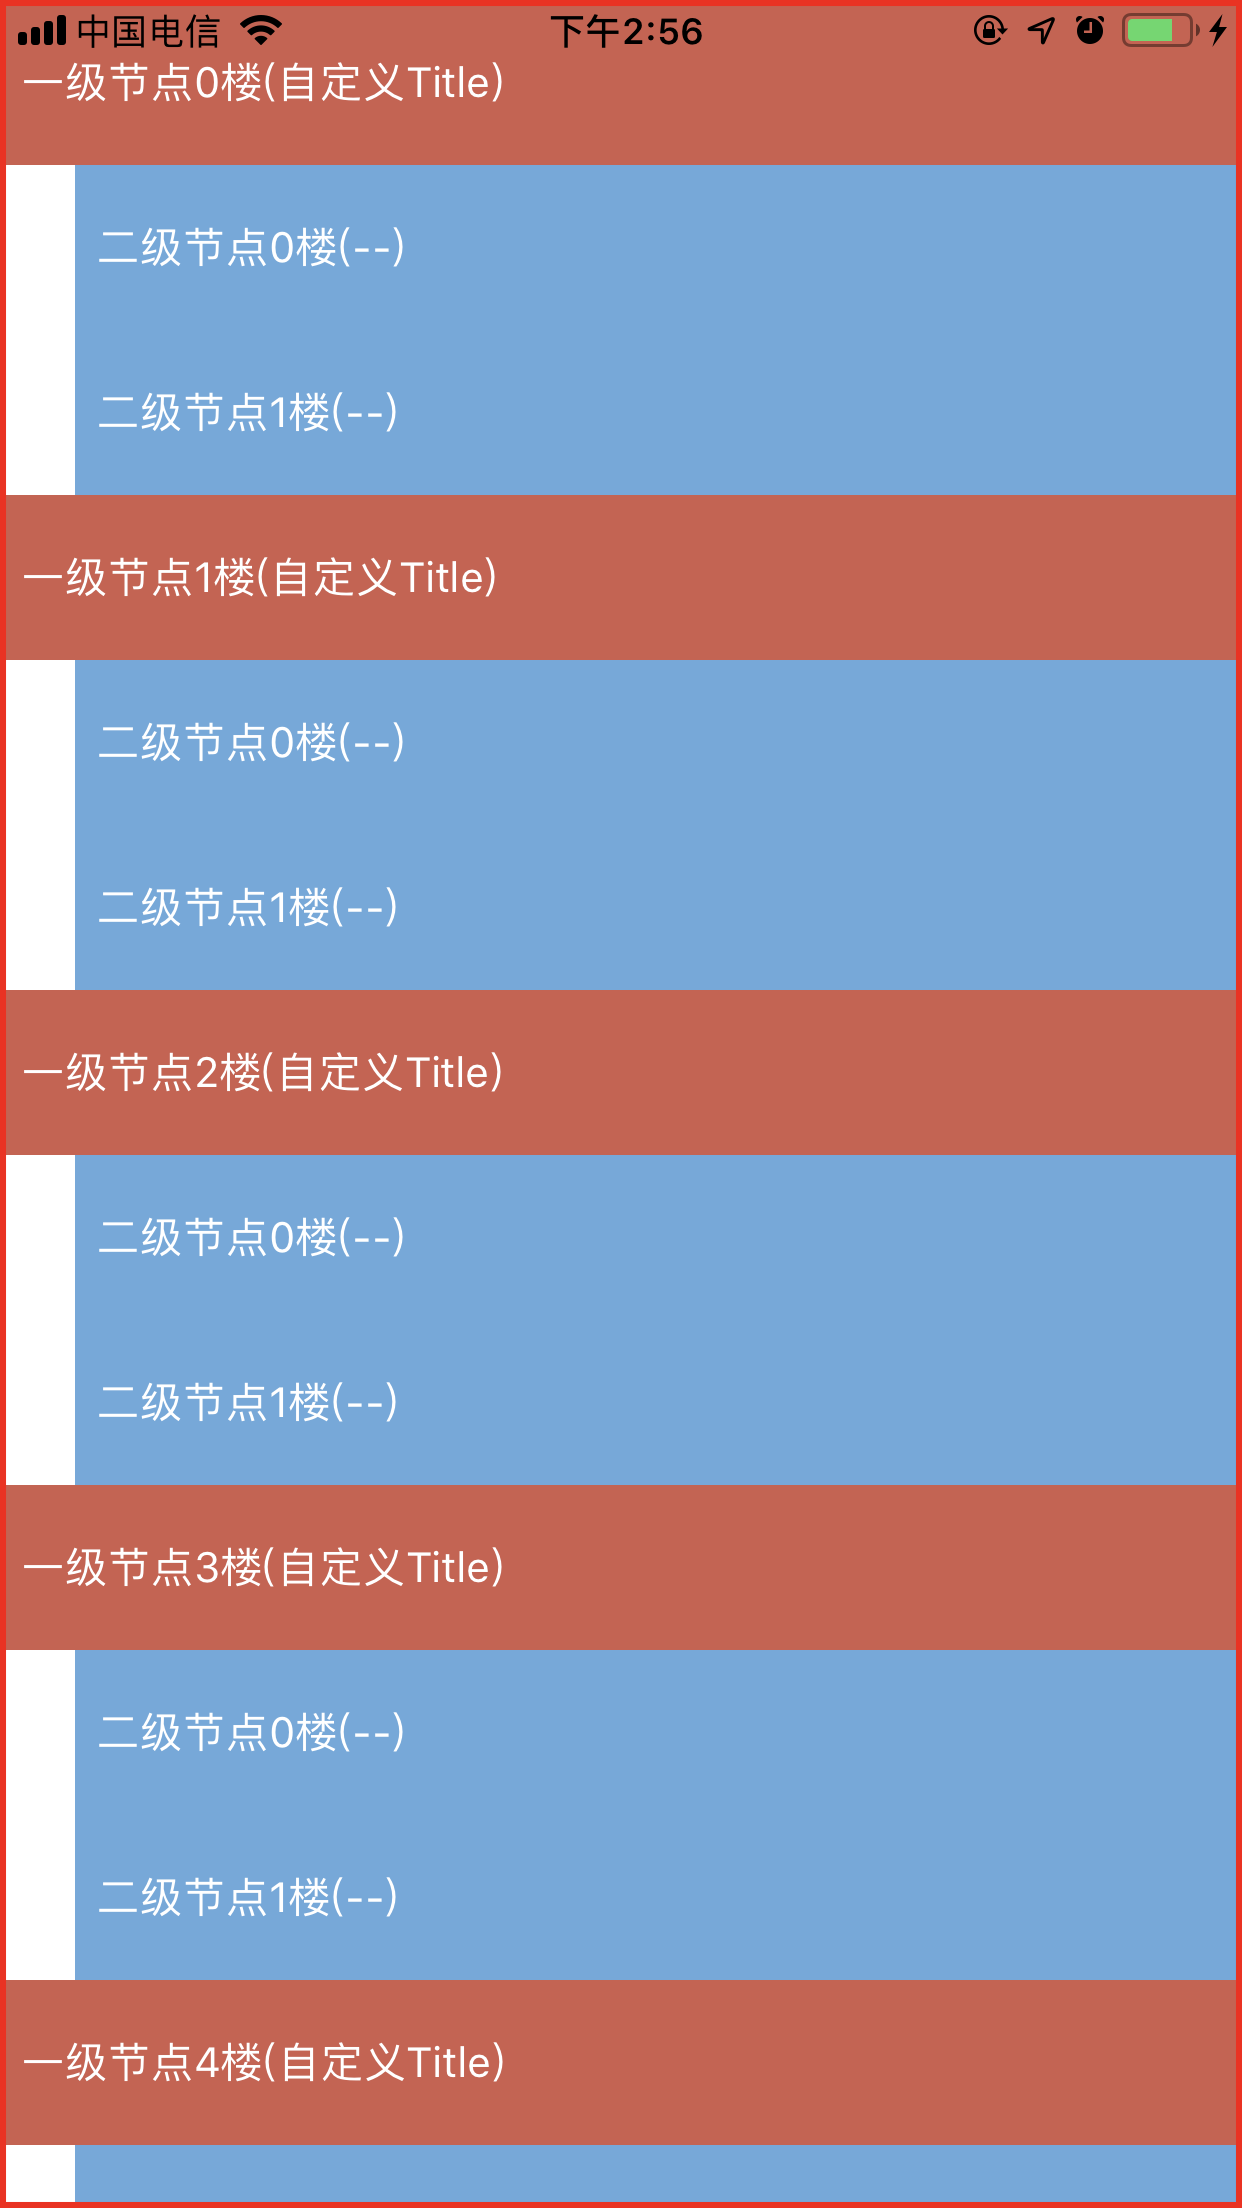
从上面的代码我们可以看出,我把所有的一级节点存到数组self.dataArr_1中,然后给所有的一级节点都添加了两个二级节点,所有的二级节点都设置了父节点ZFJNodeModel *model_f2 = [[ZFJNodeModel alloc] initWithParentNodeModel:model_f1];,效果图如下:
继续添加三级节点:
#pragma mark - 添加三级节点
for (ZFJNodeModel *model_f2 in self.dataArr_2) {
for (int i = 0; i<2; i++) {
ZFJNodeModel *model_f3 = [[ZFJNodeModel alloc] initWithParentNodeModel:model_f2];
model_f3.nodeName = [NSString stringWithFormat:@"三级节点%d楼",i];
model_f3.height = 55;//节点高度
model_f3.sourceModel = myModel;
model_f3.nodeCellCls = [MyNodeViewCell class];
[self.treeView insertNode:model_f3 completed:^(ZFJError * _Nonnull error) {
NSLog(@"%@",error.message);
}];
[self.dataArr_3 addObject:model_f3];
}
}
同样的道理,需要设置父节点ZFJNodeModel *model_f3 = [[ZFJNodeModel alloc] initWithParentNodeModel:model_f2];,效果图如下:
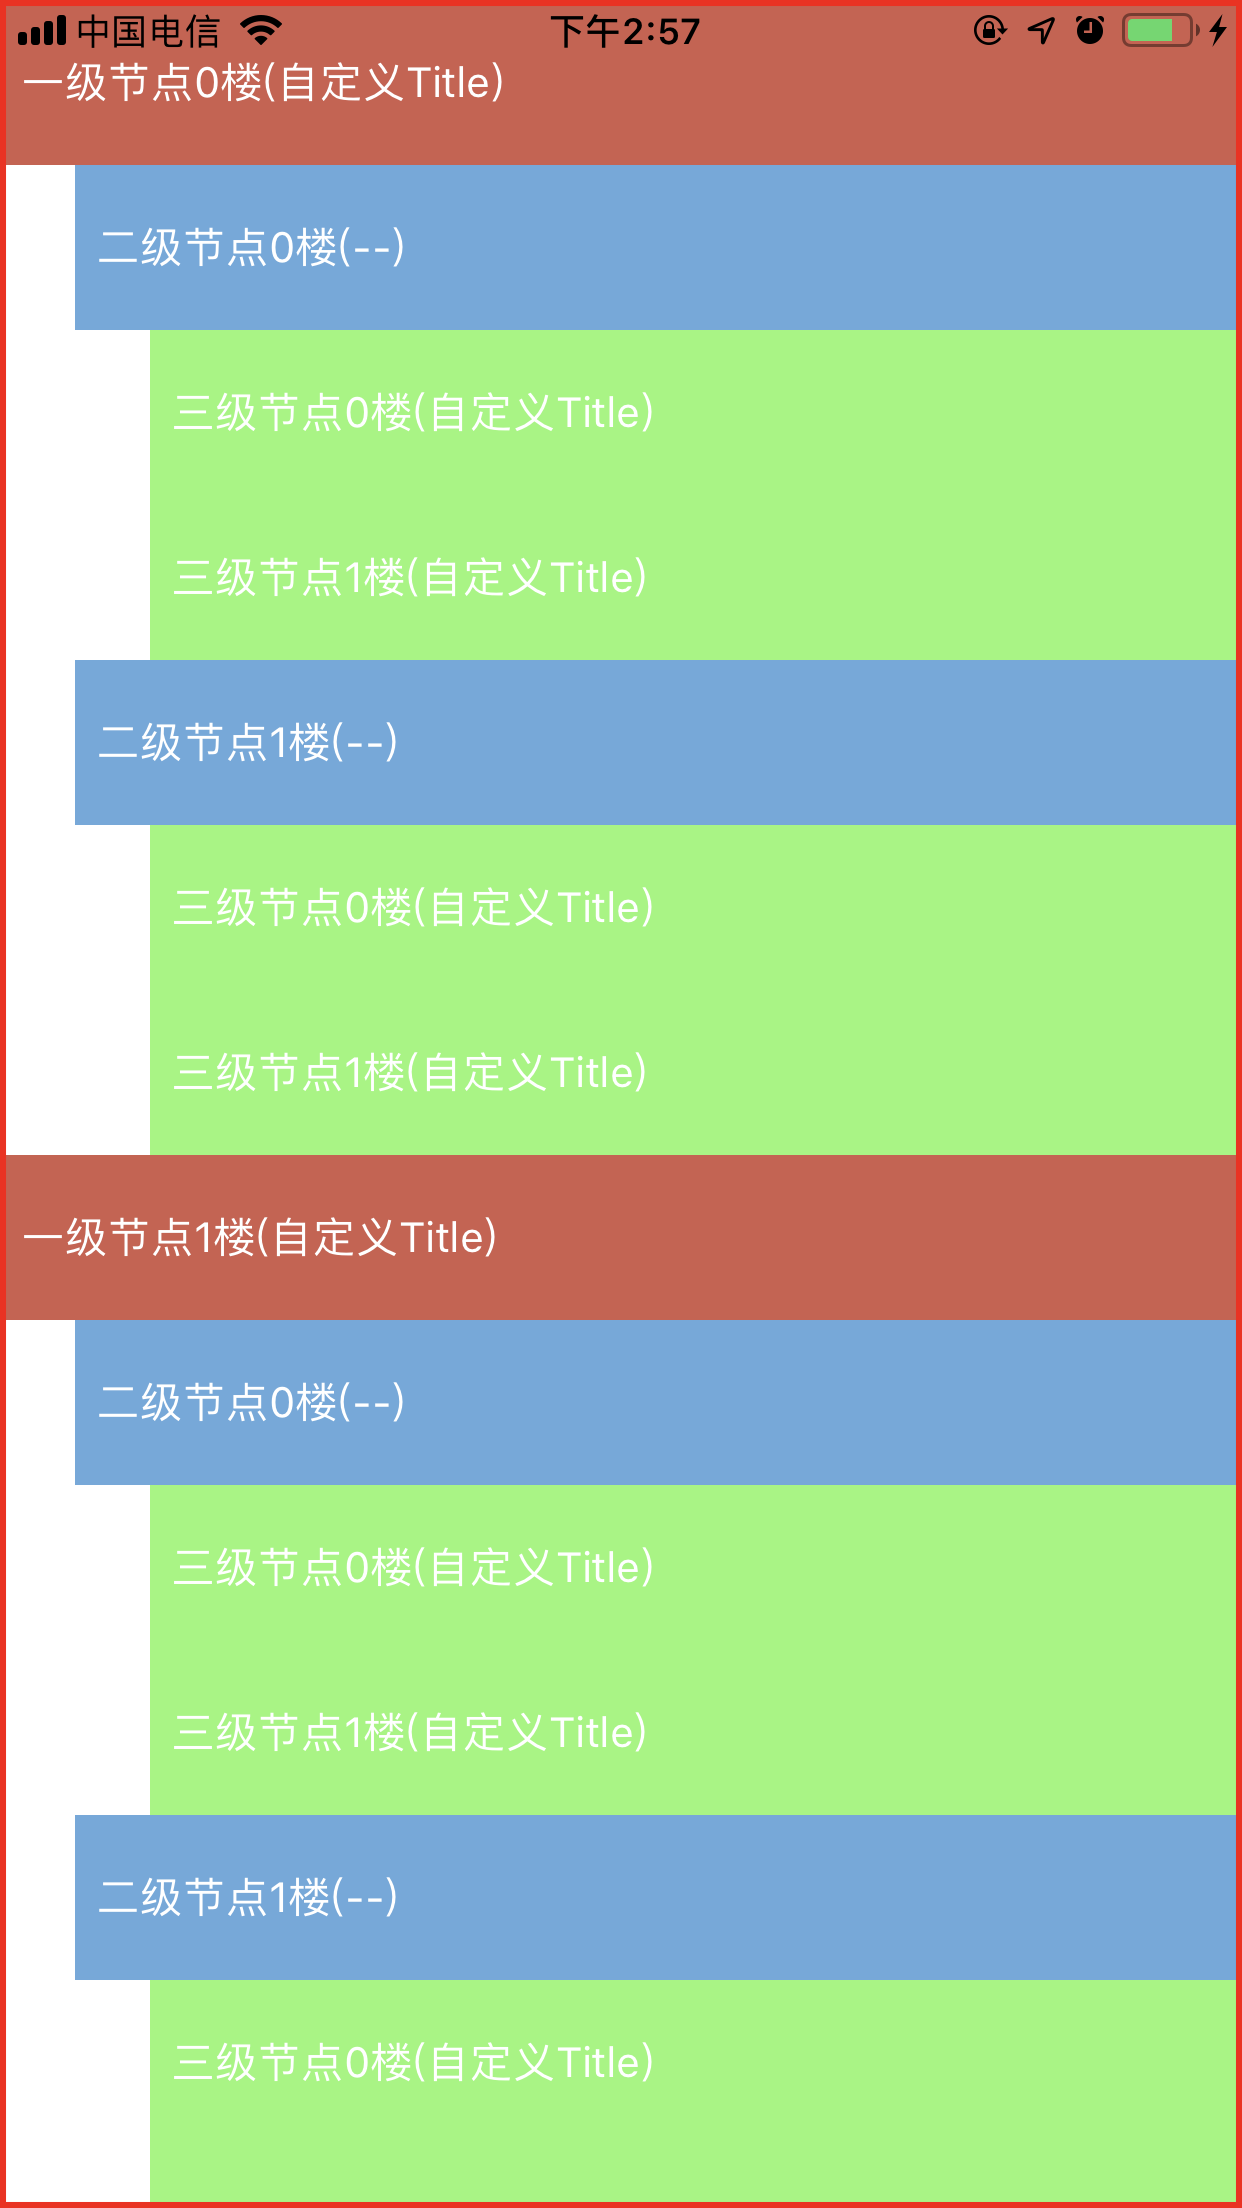
同理,我们可以一直往下添加子节点,为某个节点动态添加子节点,但是一定要设置对父节点!!!
在ZFJTreeView的公共方法里面,我提供了对常用的点击、展开、折叠、插入、删除、查询等操作,具体如下:
//
//  ZFJTreeView.h
//  ZFJTreeViewDemo
//
//  Created by 张福杰 on 2019/6/27.
//  Copyright © 2019 张福杰. All rights reserved.
//

#import <UIKit/UIKit.h>

@class ZFJTreeView, ZFJTreeViewConfig, ZFJNodeModel, ZFJError;

NS_ASSUME_NONNULL_BEGIN

@protocol ZFJTreeViewDelegate <NSObject>

/**
节点点击事件代理

@param listView ZFJTreeView
@param model 节点model
@param indexPath indexPath
*/
- (void)treeListView:(ZFJTreeView *)listView didSelectNodeModel:(ZFJNodeModel *)model indexPath:(NSIndexPath *)indexPath;

@end

@interface ZFJTreeView : UIView

/**
初始化方法

@param frame frame
@param config ZFJTreeView配置文件
@return self
*/
- (instancetype)initWithFrame:(CGRect)frame config:(ZFJTreeViewConfig *)config;

/**
代理方法
*/
@property (nonatomic, weak) id<ZFJTreeViewDelegate> delegate;

/**
ZFJTreeView头部视图
*/
@property (nonatomic,strong) UIView *headerView;

/**
ZFJTreeView尾部视图
*/
@property (nonatomic,strong) UIView *footerView;

/**
插入某个节点

@param model 节点model
*/
- (void)insertNode:(ZFJNodeModel *)model completed:(void(^)(ZFJError *error))completed;

/**
删除某个节点(删除父节点,则子节点全部删除)

@param model 节点model
*/
- (void)deleteNode:(ZFJNodeModel *)model completed:(void(^)(ZFJError *error))completed;

/**
展开/折叠某个节点的所以子节点

@param model 节点model(需要展开/折叠的父节点)
@param completed 错误信息回调
*/
- (void)expandAllNodes:(ZFJNodeModel *)model completed:(void(^)(ZFJError *error))completed;

/**
展开/折叠某个节点的下一级子节点

@param model 节点model(需要展开/折叠的父节点)
@param completed 错误信息回调
*/
- (void)expandChildNodes:(ZFJNodeModel *)model completed:(void(^)(ZFJError *error))completed;

/**
展开/折叠全部节点

@param expand YES:全部展开||NO:全部关闭
*/
- (void)expandAllNodes:(BOOL)expand;

/**
通过节点Key获取节点model

@param nodeKey 节点Key
@return 节点model
*/
- (ZFJNodeModel *)getNodeModelWithNodeKey:(NSString *)nodeKey;

/**
获取子节点是否全部展开(用于设置Cell样式)

@param nodeModel 节点model
@return YES:全部展开 || NO:没有全部展开
*/
- (BOOL)getchildNodesExpandState:(ZFJNodeModel *)nodeModel;

/**
获取节点在父节点中的位置

@param nodeModel 当前节点model
@return 在父节点中的下标(-1 未找到)
*/
- (NSInteger)getIndexFromParentNode:(ZFJNodeModel *)nodeModel;

#pragma mark ----------NS_UNAVAILABLE----------

+ (instancetype)new NS_UNAVAILABLE;

- (instancetype)init NS_UNAVAILABLE;

- (instancetype)initWithCoder:(NSCoder *)coder NS_UNAVAILABLE;

- (instancetype)initWithFrame:(CGRect)frame NS_UNAVAILABLE;

- (instancetype)initWithFrame:(CGRect)frame style:(UITableViewStyle)style NS_UNAVAILABLE;

@end

NS_ASSUME_NONNULL_END
从上面的代码可以看到,ZFJTreeView高度灵活自由且扩展性极强,用户还可以设置ZFJTreeView的头部视图和尾部视图,如下:
self.treeView.backgroundColor = [UIColor groupTableViewBackgroundColor];
[self.view addSubview:self.treeView];

UIView *headerView = [[UIView alloc] init];
headerView.frame = CGRectMake(0, 0, ScreenWidth, 100);
headerView.backgroundColor = [UIColor yellowColor];
self.treeView.headerView = headerView;
这是添加了十级子节点的效果图:
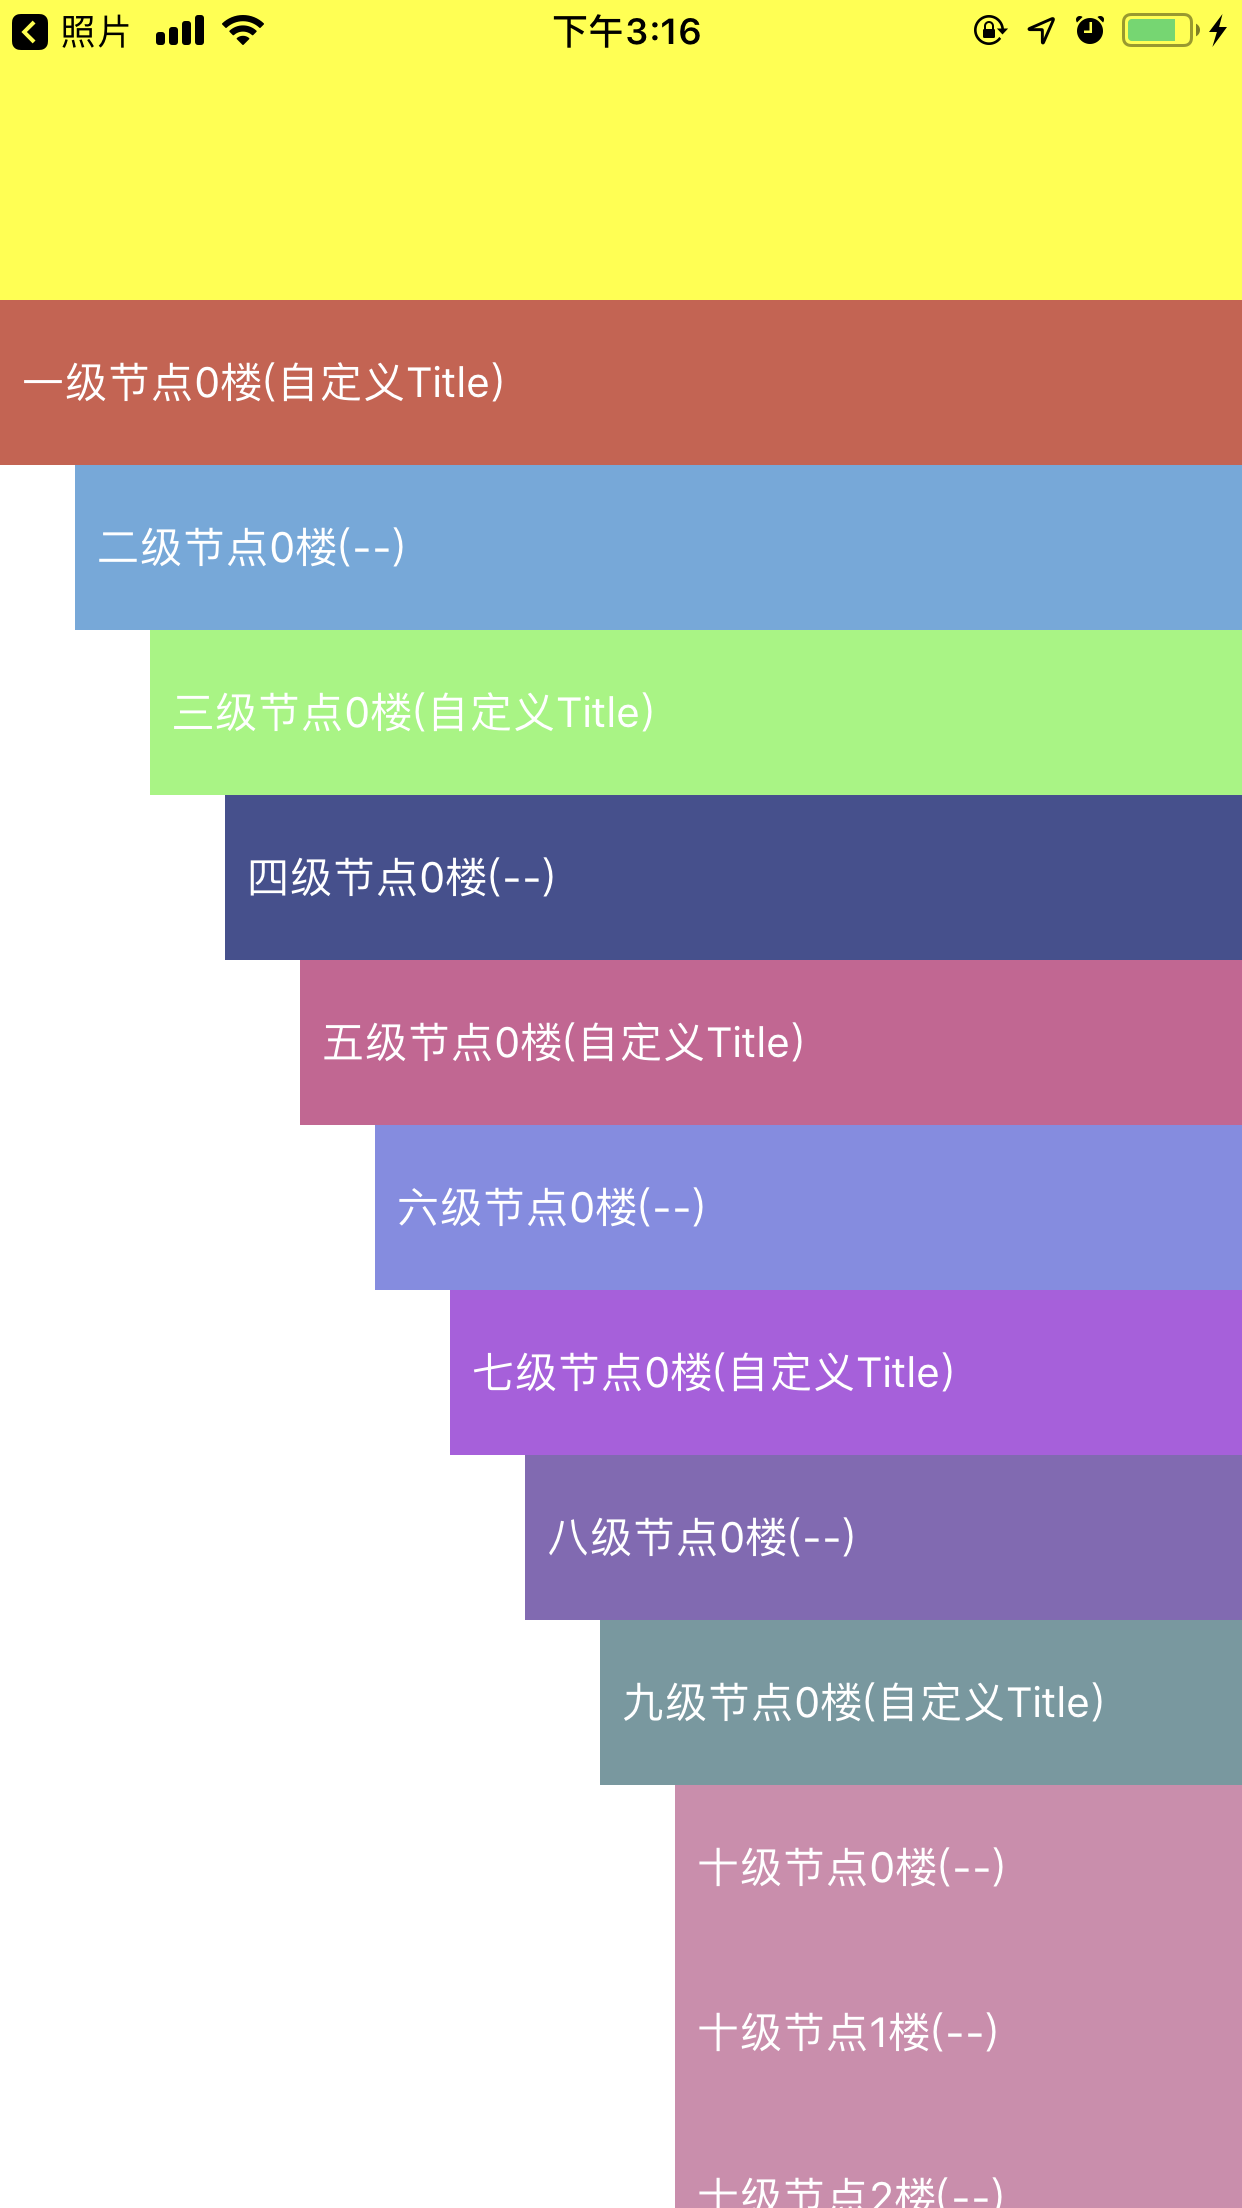
这种类型的控件使用场景是非常多的,比如地址多级选择、抖音评论列表还有一些社区评论列表等等!

更多UI效果等你来设计!!!
这里Demo的样式效果比较丑,大家将就一下吧😂😂😂,但是代码绝对是高效而且工工整整注释详细的!👍👍👍 欢迎各位大神提出宝贵的意见和建议,也欢迎大家进群交流365152048!