In this guide we will build a video chat using React and Agora.io. This guide will assume you have little to no experience using React but understand the basics of webRTC and/or have used the Agora.io SDK.
Let us first layout the basic features of the app we are going to build. Then we will jump straight in.
- Video/Audio group call
- Join/Leave channel
- Mute/Unmute Video/Audio
Before we can use react and the react CLI we will need to install React.
In your terminal enter the following commands.
npm install -g create-react-app- this will install React globally onto your machine.
create-react-app --version- Run this command to ensure React was installed. You should see a version number in the console. Ex: '2.1.1'
- If you do not see a version number, try closing and reopening your terminal then re-running the version number. If still nothing, repeat steps 1 and 2.
Now that we have the React CLI we can use it to generate a new React app template.
create-react-app video-chat- This will generate a new React starter template with the name "video-chat" into your current working directory.
cd video-chat- To move into your new react app parent directory.
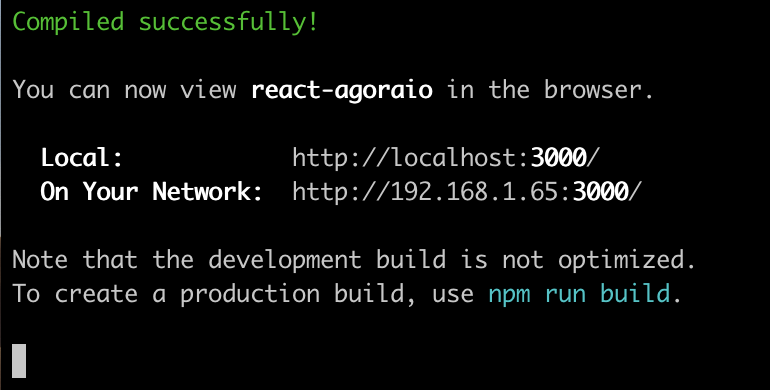
npm start- This is a sript built into the react starter template. This will start your application in a new browser window at http://localhost:3000. You should see the page open automatically and your terminal should have output something like this.
- Open the new react starter template in your favorite code editor.
create-react-app comes with a bit of boiler plate that we won't need. Let's go ahead and clean that up as well as add the basic structure for the components we will need.
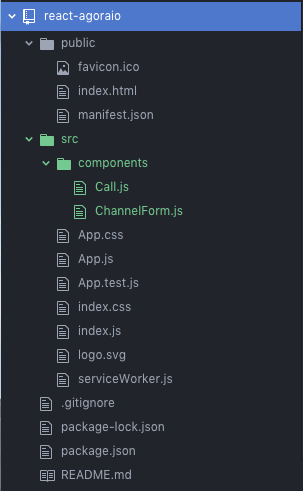
- Navigate to the src dir in your project. Here we will make a new directory called components.
- In the components directory we will create two empty files, ChannelForm.js and Call.js.
Your app structure should now look like this.
Now we will create the form that allows the user to join a room. For simplicity, we will only require the user to insert the name of a channel. If the channel does not exist, we will create it behind the scenes, otherwise we will just join it.
- Open ChannelForm.js and add the following,
// ChannelForm.js
import React, { Component } from "react";

export default class ChannelForm extends Component {
  render() {
    return <div>This will be the ChannelForm</div>;
  }
}- Now, navigate back to App.js and replace the file contents with this:
// App.js
import React, { Component } from "react";
import ChannelForm from "./components/ChannelForm";

class App extends Component {
  render() {
    return (
      <div className="App">
        <ChannelForm />
      </div>
    );
  }
}

export default App;
* If you save the changes so far and navigate back to your browser window you should see:

Nothing too interesting yet. So far, we have demonstrated the power of React's jsx. JSX is React's version of HTML. We created a class ChannelForm in ChannelForm.js that extends the React class Component. We then used this class in App.js on line 8 with .
When our app renders to the page, React will replace App.js line 8 <ChannelForm /> with the content of the ChannelForm class's render method. In this case, a <div/> with the text "This will be the ChannelForm".
Now let's add a form for the user to submit a channel name to join.
- First, let's add the JSX for the Form. In ChannnelForm.js replace the
rendermethod with the following:
// ChannelForm.js
render() {
return (
<div>
<form>
<label>Channel Name</label>
<input placeholder="Channel Name" />
<input type="submit" value="Join Channel" />
</form>
</div>
);
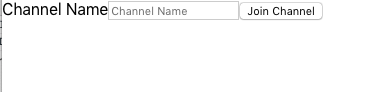
}* Save your changes. In the browser you should now see
- Now, let's add state to our component so we can keep track of what the user types into the Channel Form.
    // ChannelForm.js
    import React, { Component } from "react";

    export default class ChannelForm extends Component {
      constructor(props) {
        super(props);
        this.state = {
          channel: ""
        };
      }
      ... // render method
}-
- All classes that extend React's
Componentclass are provided with React's state manager. React will keep track of any changes that occur to the state object and will trigger a re-render if a state property changes. React is selective in it's re-render and will cherry pick only parts of the DOM that are effected by the state change. To learn more visit React State and Lifecycle.
- All classes that extend React's
-
Now that we have state, we can add methods to trigger state changes that will fire based on user input. We will first add on onChange handler to attatch to our channel name input.
//ChannelForm.js
import React, { Component } from "react";

export default class ChannelForm extends Component {
  constructor(props) {
    super(props);
    this.state = {
      channel: ""
    };
  }
  onChange = e => {
    let { name, value } = e.target;
    this.setState({ [name]: value });
  };
  render() {
    return (
      <div>
        <form>
          <label>Channel Name</label>
          <input
            placeholder="Channel Name"
            name="channel"
            value={this.state.channel}
            onChange={this.onChange}
          />
          <input type="submit" value="Join Channel" />
        </form>
      </div>
    );
  }
}
- Let's look at the new changes. First, we added an onChange method. In this method we make a call to
this.setState.setStateis React's built in state updater. This is the only way to update a value on a React component'sthis.stateobject.this.setStatemust be used for React to be able to pick up a state change to then fire a re-render. Using something likethis.state.channel = "A new channel"will NOT trigger React's state updater or a re-render and can lead to unexpected behavior. - The second change we made is to the channel name input. We added a
nameandvalueproperty. Notice, the input'snameproperty matches the piece of state that corresponds to this input, "channel". You can see this when we set the input'svaluetothis.state.channel. In this example, it is very important that our inputnamematches thevalue's piece of state so that our onChange method can work. - At this point, you should not see any noticible changes in the app functionality.
Now that we can keep track of the state of the user's typed channel name, we can finish wiring up our ChannelForm with a submitForm method.
-
Modify ChannelForm.js like so:
// ChannelForm.js
import React, { Component } from "react";

export default class ChannelForm extends Component {
  constructor(props) {
    super(props);
    this.state = {
      channel: ""
    };
  }
  onChange = e => {
    let { name, value } = e.target;
    this.setState({ [name]: value });
  };
  onSubmit = e => {
    e.preventDefault();
    console.log("Submiting ", this.state.channel);
    this.setState({ channel: "" });
  };
  render() {
    return (
      <div>
        <form onSubmit={this.onSubmit}>
          <label>Channel Name</label>
          <input
            placeholder="Channel Name"
            name="channel"
            value={this.state.channel}
          />
          <input type="submit" value="Join Channel" />
        </form>
      </div>
    );
  }
}
- First, we added an onSubmit method to our ChannelForm component. At the moment, our onSubmit method logs the channel name to the console, then resets the channel name value to an empty string. We will come back to complete the onSubmit method after we setup our Call component.
- If you save and navigate to your browser everything should appear the same. However, if you open your dev tools, type and submit a channel name, you should see the channel name logged into your console and the channel name form value cleared out. channel form submit
-
Navigate to Call.js and add the following:
// Call.js
import React, { Component } from "react";

export default class Call extends Component {
  render() {
    return <div>Video Call Component</div>;
  }
}
-
Navigate to App.js and add our new Call component.
// App.js
import React, { Component } from "react";
import ChannelForm from "./components/ChannelForm";
import Call from "./components/Call";

class App extends Component {
  render() {
    return (
      <div className="App">
        <ChannelForm />
        <Call />
      </div>
    );
  }
}

export default App;
- If you save your changes, your browser should now look like this video call component
-
Before we can use the agora.io sdk we will need to create install it into our project. In your terminal, navigate to the root directory of your project and run
npm install --save agora-rtc-sdk. If done correctly you should seeagora-rtc-sdklisted in your package.json underdependencies. -
Before we can take full advantage of the agoria sdk we will need an agora appId. To get an appId follow steps 1-4 of the Agora.io Integrate the SDK tutorial
-
Now that the Agora SDK is installed and we have an appId we can start using Agora SDK in our app. Let's start by importing the Agora SDK into the Call component and initialize Agora's localStream.
// Call.js
import React, { Component } from "react";
import AgoraRTC from "agora-rtc-sdk";

const USER_ID = Math.floor(Math.random() * 1000000001);

export default class Call extends Component {
  localStream = AgoraRTC.createStream({
    streamID: USER_ID,
    audio: true,
    video: true,
    screen: false
  });

  render() {
    return <div>Video Call Component</div>;
  }
}
- First, we imported the AgoraRTC on line 3.
- Then, for the sake of simplicity, we used a random number generator to create a user id. We will use this ID when creating our localStream.
- Finally, we created an object
localStreamon our Call component and set it equal to a new instance of an AgoraRTC stream.
- In the previous step, we created our localStream but did not acutally initialize it. Let's do that now.
-
In our Call component, let's add a
componentDidMountmethod and initialize our localStream there.componentDidMountis a method given to us on all React.Components. This method is fired one time, and only one time, right after the first render of the component. To learn more see React's componentDidMount docs.
// Call.js
import React, { Component } from "react";
import AgoraRTC from "agora-rtc-sdk";

const USER_ID = Math.floor(Math.random() * 1000000001);

export default class Call extends Component {
  localStream = AgoraRTC.createStream({
    streamID: USER_ID,
    audio: true,
    video: true,
    screen: false
  });

  componentDidMount() {
    this.initLocalStream();
  }

  initLocalStream = () => {
    let me = this;
    me.localStream.init(
      function() {
        console.log("getUserMedia successfully");
        me.localStream.play("agora_local");
      },
      function(err) {
        console.log("getUserMedia failed", err);
      }
    );
  };

  render() {
    return (
      <div>
        <div id="agora_local" style={{ width: "400px", height: "400px" }} />
      </div>
    );
  }
}
- Notice, on line 23 we say
me.localStream.play('agora_local')and on line 34 we have<div id="agora_local" />. These two lines work together. The string passed on line 23 tome.localStream.playmust match the id of adivon the page where you would like agora to append your local video stream. If this step is missed, you will get aTypeError: Cannot read property 'appendChild' of null. - If you save your changes, you should now see a live video/audio feed of yourself in your browser.
- Now that our localStream is setup, we have something to share with other app user's. Let's setup the Agora.io client so we can publish our local stream.
-
First we will create the Agora Client with
AgoraRTC.createClient. At the top of Call.js, right after we import the AgoraRTC we will addimport AgoraRTC from "agora-rtc-sdk"; // Add the following. let client = AgoraRTC.createClient({ mode: "live", codec: "h264" });
-
Now, in our
componentDidMountfunction, we will callthis.initClient(). Then we will add theinitClientmethod to our Call component.... componentDidMount() { this.initLocalStream(); this.initClient(); } initClient = () => { client.init( <YOUR_APP_ID>, function() { console.log("AgoraRTC client initialized"); }, function(err) { console.log("AgoraRTC client init failed", err); } ); }; ...- Save your changes and navigate back to your browser. In the console you should now see output indicating you have successfully initialized the AgoraRTC client.
-
With the Agora client initialized, we can now create or join a channel on the client. To do this, we will need to back up a little.
- First, navigate to App.js. In App.js we are going to add state for a channel name and a method to update that state. We will pass the channel state to our Call component and use the update method in our ChannelForm.
- Add state to the App component.
// App.js
class App extends Component {
  constructor(props) {
    super(props);
    this.state = {
      channel: ''
    }
  }
  ...
}
- Add the channel state update method.
// App.js
selectChannel = channel => {
  this.setState({ channel });
};
- Pass the selectChannel as a prop to the ChannelForm.
/// App.js ... render() { return ( <div className="App"> <ChannelForm selectChannel={this.selectChannel}/> <Call /> </div> ); } ...-
And finally, we will pass the state of our channel to our Call component.
// App.js
render() {
    return (
      <div className="App">
        <ChannelForm selectChannel={this.selectChannel}/>
        <Call channel={this.state.channel}/>
      </div>
    );
  }
-
You App.js file should now look like this
// App.js
import React, { Component } from "react";
import ChannelForm from "./components/ChannelForm";
import Call from "./components/Call";

class App extends Component {
  constructor(props) {
    super(props);
    this.state = {
      channel: ""
    };
  }

  selectChannel = channel => {
    this.setState({ channel });
  };

  render() {
    return (
      <div className="App">
        <ChannelForm selectChannel={this.selectChannel} />
        <Call channel={this.state.channel} />
      </div>
    );
  }
}

export default App;
-
Now, let's move to our ChannelForm.js and use the new
selectChannelmethod in our form submit. Update the ChannelFormonSubmitmethod as follows:// ChannelForm.js onSubmit = e => { e.preventDefault(); console.log("Submiting ", this.state.channel); this.props.selectChannel(this.state.channel); this.setState({ channel: "" }); };
-
Note, we first call
this.props.selectChannelthen callthis.setStateto clear the typed channel. If we do the opposite, we would be passing an empty string tothis.props.selectChannel. -
Next, we want to alert our Call component when the selected Channel updates so we can join the new channel. To do this we will use a React lifecycle method
componentDidUpdate.componentDidUpdateget's fired everytime a React component state or prop changes. In this case, the prop 'channel' will be the trigger for ourcomponentDidUpdate. You can learn more about React'scomponentDidUpdatelifecycle method here.// Call.js ... componentDidUpdate(prevProps, prevState) { if (prevProps.channel !== this.props.channel && this.props.channel !== '') { this.joinChannel(); } } ... joinChannel = () => { let me = this; client.join( null, me.props.channel, USER_ID, function(uid) { console.log("User " + uid + " join channel successfully"); client.publish(me.localStream, function(err) { console.log("Publish local stream error: " + err); }); client.on("stream-published", function(evt) { console.log("Publish local stream successfully"); }); }, function(err) { console.log("Join channel failed", err); } ); }; ... -
The complete Call.js file should now look like this
import React, { Component } from "react";
import AgoraRTC from "agora-rtc-sdk";
let client = AgoraRTC.createClient({ mode: "live", codec: "h264" });

const USER_ID = Math.floor(Math.random() * 1000000001);

export default class Call extends Component {
  localStream = AgoraRTC.createStream({
    streamID: USER_ID,
    audio: true,
    video: true,
    screen: false
  });

  componentDidMount() {
    this.initLocalStream();
    this.initClient();
  }

  componentDidUpdate(prevProps, prevState) {
    if (prevProps.channel !== this.props.channel && this.props.channel !== "") {
      this.joinChannel();
    }
  }

  initLocalStream = () => {
    let me = this;
    me.localStream.init(
      function() {
        console.log("getUserMedia successfully");
        me.localStream.play("agora_local");
      },
      function(err) {
        console.log("getUserMedia failed", err);
      }
    );
  };

  initClient = () => {
    client.init(
      <YOUR_APP_ID>,
      function() {
        console.log("AgoraRTC client initialized");
      },
      function(err) {
        console.log("AgoraRTC client init failed", err);
      }
    );
  };

  joinChannel = () => {
    let me = this;
    client.join(
      null,
      me.props.channel,
      USER_ID,
      function(uid) {
        console.log("User " + uid + " join channel successfully");
        client.publish(me.localStream, function(err) {
          console.log("Publish local stream error: " + err);
        });

        client.on("stream-published", function(evt) {
          console.log("Publish local stream successfully");
        });
      },
      function(err) {
        console.log("Join channel failed", err);
      }
    );
  };

  render() {
    return (
      <div>
        <div id="agora_local" style={{ width: "400px", height: "400px" }} />
      </div>
    );
  }
}
-
If you save all your changes and navigate back to your browser window you should now be able to join a channel. You'll know you're successfull by the console output. You should see output simmilar to "Join channel <channel_name> success, join with uid <your_uid>".
-
-
With the Agora client initialized and the ability to join channels complete, we are ready to subscribe to any event that may be fired by the Agora client. For this demo, we will subscribe to four events;
stream-added,stream-subscribed,stream-removed, andpeer-leave. For now we will just subscribe to the events. When we use them later on in the application we will go into more detail about each event.- Working in Call.js we will first add a line to the end of our
initClientmethod to callthis.subscribeClient
// Call.js
...
initClient = () => {
    client.init(
      APP_ID,
      function() {
        console.log("AgoraRTC client initialized");
      },
      function(err) {
        console.log("AgoraRTC client init failed", err);
      }
    );
    // Add this
    this.subscribeToClient();
  };
  ...
-
Then we will add the new
subscribeToClientmethod to our Call component.// Call.js ... subscribeToClient = () => { let me = this; client.on("stream-added", me.onStreamAdded); client.on("stream-subscribed", me.onRemoteClientAdded); client.on("stream-removed", me.onStreamRemoved); client.on("peer-leave", me.onPeerLeave); }; ...
- Note, the callback functions have not yet been created. We will do that now.
- Working in Call.js we will first add a line to the end of our
-
Let's start with the
stream-addedevent. When thestream-addedevent is fired, it is an indication that a new user has added their stream to our channel. We will want to track all users in our stream in our Call component's state. Let's add a state holder for remoteStreams and the onStreamAdded method.... state = { remoteStreams: {} } ... onStreamAdded = evt => { let me = this; let stream = evt.stream; console.log("New stream added: " + stream.getId()); me.setState( { remoteStreams: { ...me.state.remoteStream, [stream.getId()]: stream } }, () => { // Subscribe after new remoteStreams state set to make sure // new stream dom el has been rendered for agora.io sdk to pick up client.subscribe(stream, function(err) { console.log("Subscribe stream failed", err); }); } ); }; ...-
In our new
onStreamAddedmethod we have done two things. First, we add a new remoteStream to our remoteStreams state. The new remoteStream will be stored on an object with a key of the remoteStreams id. This will make it easy for us to find it later. Second, we pass a callback function to React'ssetStatemethod. This callback function will be called immediately after React completes it's state updates. In the callback function we will subscribe to the remoteSteam we just added to our Call component's state. We want to make sure we do not subscribe to the remoteStream until after the stream is registered in our Call component's state. If we subscribe too early, our re-render will not have completed before the Agora Client searches for the remove video's corresponding div, and our render will fail. -
Save your changes and navigate back to your browser window. You should now be able to open the app in two tabs, join the same channel from both tabs, and observe the console output. If everything is right to this point, you should see something like "Remote stream subscribed with uid"
-
-
Next, we will the state object
remoteStreamsto determine how many peer video's to render onto the page and to sync them to the appropriate remote stream. Let's update the Call component's render method.// Call.js ... render() { return ( <div> <div id="agora_local" style={{ width: "400px", height: "400px" }} /> {Object.keys(this.state.remoteStreams).map(key => { let stream = this.state.remoteStreams[key]; let streamId = stream.getId(); return ( <div key={streamId} id={`agora_remote ${streamId}`} style={{ width: "400px", height: "400px" }} /> ); })} </div> ); } ...
- At this point, after saving your changes, you can visit the app from two tabs and join the same channel from each. If you inspect the DOM you will see there is now an extra video element for a remote user, it just isn't playing yet. We'll do that next.
-
Now that we have remote user's videos rendering, we can complete the
onRemoteClientAddedmethod and make our remote user's videos play.onRemoteClientAdded = evt => { let me = this; let remoteStream = evt.stream; me.state.remoteStreams[remoteStream.getId()].play( "agora_remote " + remoteStream.getId() ); };
- In
onRemoteClientAdded, we find the remoteStream in the Call compoennt's state with a key that matches the newly added streamId and call it'splaymethod. In theplaymethod we pass a string"agora_remote " + remoteStream.getId(). Notice that this corresponds to the id of the remote video div generated when we looped over the remoteStreams in our render method. This is why it was so important for us to subscribe to the remote stream only after we setState inonStreamAdded. We cannot call play on a stream id if the corresponding div has not yet been rendered.
- In
-
At this point, Call.js should look like this.
import React, { Component } from "react";
import AgoraRTC from "agora-rtc-sdk";
let client = AgoraRTC.createClient({ mode: "live", codec: "h264" });

const USER_ID = Math.floor(Math.random() * 1000000001);

export default class Call extends Component {
  localStream = AgoraRTC.createStream({
    streamID: USER_ID,
    audio: true,
    video: true,
    screen: false
  });

  state = {
    remoteStreams: []
  };

  componentDidMount() {
    this.initLocalStream();
    this.initClient();
  }

  componentDidUpdate(prevProps, prevState) {
    if (prevProps.channel !== this.props.channel && this.props.channel !== "") {
      this.joinChannel();
    }
  }

  initLocalStream = () => {
    let me = this;
    me.localStream.init(
      function() {
        console.log("getUserMedia successfully");
        me.localStream.play("agora_local");
      },
      function(err) {
        console.log("getUserMedia failed", err);
      }
    );
  };

  initClient = () => {
    client.init(
      <YOUR_APP_ID>,
      function() {
        console.log("AgoraRTC client initialized");
      },
      function(err) {
        console.log("AgoraRTC client init failed", err);
      }
    );
    this.subscribeToClient();
  };

  subscribeToClient = () => {
    let me = this;
    client.on("stream-added", me.onStreamAdded);
    client.on("stream-subscribed", me.onRemoteClientAdded);

    client.on("stream-removed", me.onStreamRemoved);

    client.on("peer-leave", me.onPeerLeave);
  };

  onStreamAdded = evt => {
    let me = this;
    let stream = evt.stream;
    console.log("New stream added: " + stream.getId());
    me.setState(
      {
        remoteStreams: {
          ...me.state.remoteStream,
          [stream.getId()]: stream
        }
      },
      () => {
        // Subscribe after new remoteStreams state set to make sure
        // new stream dom el has been rendered for agora.io sdk to pick up
        client.subscribe(stream, function(err) {
          console.log("Subscribe stream failed", err);
        });
      }
    );
  };

  joinChannel = () => {
    let me = this;
    client.join(
      null,
      me.props.channel,
      USER_ID,
      function(uid) {
        console.log("User " + uid + " join channel successfully");
        client.publish(me.localStream, function(err) {
          console.log("Publish local stream error: " + err);
        });

        client.on("stream-published", function(evt) {
          console.log("Publish local stream successfully");
        });
      },
      function(err) {
        console.log("Join channel failed", err);
      }
    );
  };

  onRemoteClientAdded = evt => {
    let me = this;
    let remoteStream = evt.stream;
    me.state.remoteStreams[remoteStream.getId()].play(
      "agora_remote " + remoteStream.getId()
    );
  };

  render() {
    return (
      <div>
        <div id="agora_local" style={{ width: "400px", height: "400px" }} />
        {Object.keys(this.state.remoteStreams).map(key => {
          let stream = this.state.remoteStreams[key];
          let streamId = stream.getId();
          return (
            <div
              key={streamId}
              id={`agora_remote ${streamId}`}
              style={{ width: "400px", height: "400px" }}
            />
          );
        })}
      </div>
    );
  }
}
If you save and navigate back to your browser, you should finally be able to see your group call working. Open the app in two tabs and join the same channel from each tab. You should see two videos streaming live!
All we have now is to add the ability to leave the channel. Right now, if you close one of the open tabs, the other is left with a black video playing. Let's fix that.
-
To clean up when a user leaves the channel we need to complete the
stream-removedandpeer-leaveevents. These events will both perform the same function of removing a stream from theremoteStreamsstate object. We will want to listen for both to ensure we cover cases for when the user joins a different channel and when a user just closes the app.- Add the
onStreamRemovedmethod
// Call.js
...
onStreamRemoved = evt => {
    let me = this;
    let stream = evt.stream;
    if (stream) {
      let streamId = stream.getId();
      let { remoteStreams } = me.state;

      stream.stop();
      delete remoteStreams[streamId];

      me.setState({ remoteStreams });

      console.log("Remote stream is removed " + stream.getId());
    }
  };
  ...
- Add the
onPeerLeavemethod
// Call.js
...
onPeerLeave = evt => {
    let me = this;
    let stream = evt.stream;
    if (stream) {
      let streamId = stream.getId();
      let { remoteStreams } = me.state;

      stream.stop();
      delete remoteStreams[streamId];

      me.setState({ remoteStreams });

      console.log("Remote stream is removed " + stream.getId());
    }
  };
  ...
* You'll notice these methods are identical. For explicitness we will leave both methods but if you would like to refactor and use only one feel free. - Add the
- After saving your changes and navigating back to your browser, open two or more tabs. Join the same channel in each tab and see your group video chat working! If you close a tab or join a different channel from any of the tabs you should see a user leave the original video chat.
You have just completed building a Group Video Chat with React and the Agora.io SDK. You can find the full code sample for this demo here.