Connext Stack is a stack comprised of Couchbase, Ottoman ODM, Node.js, and Next.js. This is meant to be an opinionated quick start template with batteries included.
- Getting Started
- Installation
- Running Development Server
- Build and Deploy
- Environment Vars
- Full Feature List
- Learn More
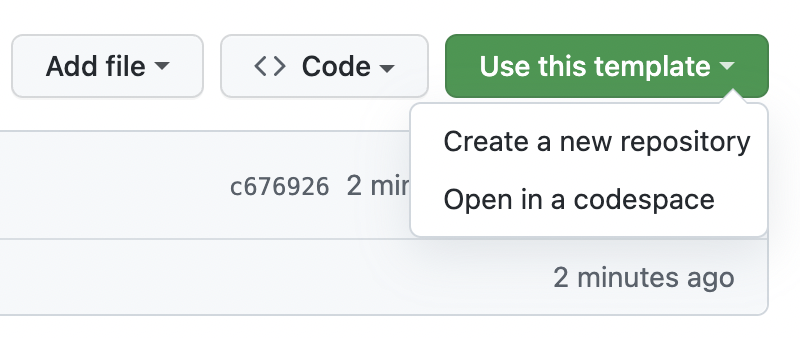
First click Use This Template above the file list to effectively create a clone in your own repository.
- Need to have docker desktop or docker (linux) installed to run a couchbase server
- OR a couchbase installation that you have network access to (setup in .env.local)
If you want to spin up a quick couchbase docker container that will work with connext stack out of the box you can run the below command.
docker run -d --name couchbase-sandbox -p 8091-8094:8091-8094 -p 11210:11210 couchbase/server-sandbox:7.0.0After cloning the template to your own repo you can then clone your repo into your local machine and run:
# For windows, running these commands (and all other npm run commands) from powershell works best
npm install
cp .env.example .env.local
npm run seed

# FOR WINDOWS USERS:  If accidentally ran these commands in WSL first...
# You may have to delete node_modules and run the above commands again using powershell
# Running npm install in powershell after already running it in WSL (or git bash) will result weird failures and behaviors.
This should work mostly out of the box, but there may be other dependencies required depending on your machine and setup. My approach is to try something and then if it doesn't work there is usually some helpful output about which dependencies are missing, then from there attempt to install them. But here is a list of dependencies that may be required:
npm run dev
# or
yarn dev
Open http://localhost:3000 with your browser to see the result.
You can start editing the page by modifying pages/index.tsx. The page auto-updates as you edit the file.
API routes can be accessed on http://localhost:3000/api/hello. This endpoint can be edited in pages/api/hello.ts.
The pages/api directory is mapped to /api/*. Files in this directory are treated as API routes instead of React pages.
Refer to next.js docs for more detailed information about going to production and deploying.
npm run build
npm run startIMPORTANT! ANY CHANGES TO ENVIRONMENT VARIABLES REQUIRES A SERVER RESTART TO TAKE EFFECT!
An example .env file can be found in the root of this repo at .env.example. For a quick start just rename or make a copy of this file to .env.local (This is done automatically in the devcontainer setup) and make the changes that you need for your project.
For Next.js specific information about other useful environment variable setups see Next.js Environment Variables
COUCHBASE_CONNECTION=couchbase://localhost
COUCHBASE_BUCKET=connext
COUCHBASE_USER=Administrator
COUCHBASE_PW=password
#DEBUG=true # Uncomment this to see couchbase queries output to the consoleNext-Auth is included in this package and setup for a quickstart with google sign on, just need to setup google oauth credentials and provide the id and secret in the environment variables file.
The SECRET variable is used by next auth for hashing tokens, sign/encrypt cookies and generate cryptographic keys
# To enable next auth google sign on
# --> Setup oath with your google account to get an ID and secret to put here
NEXTAUTH_URL=http://localhost:3000
#SECRET=xxxxxxxxxxxxxxxxxxxxxxxxxxxxxxxx # Linux: `openssl rand -hex 32` or go to https://generate-secret.now.sh/32
#GOOGLE_ID=xxxxxxxxxxxx-xxxxxxxxxxxxxxxxxxxxxxxxxxxxxxxx.apps.googleusercontent.com
#GOOGLE_SECRET=XXXXXX-xxxxxxxxxxxxxxxxxxxxxxxxxxxx
See the Next-Auth Documenation for setting up other providers like github, facebook, twitter, etc.
In the cypress starter tests (testing/cypress/integration/main-page.spec.ts) there are units for testing the google sign on workflow. After setting up google credentials above you can specify a test email user and password in the environment vars to use for testing.
NOTE: THE GOOGLE SIGN ON TESTS WILL ONLY RUN IF THE CYPRESS_GOOGLE_USER AND CYPRESS_GOOGLE_PW VARS ARE SET --- THIS PREVENTS FAILED TESTS WHEN THIS IS NOT SETUP
##Cypress Testing Environment
#CYPRESS_GOOGLE_USER=testuser@gmail.com
#CYPRESS_GOOGLE_PW=1234567890
CYPRESS_COOKIE_NAME=next-auth.session-token
CYPRESS_SITE_NAME=http://localhost:3000
This email should have any 2 factor authentication disabled so that the tests will run headless. If you have trouble with this test you will need to do a manual installation on your local machine so that the cypress GUI will run and make the following changes to the main-page.spec.ts:
// find this object definition in the test file
// and change headless to false.
const socialLoginOptions = {
  username,
  password,
  loginUrl,
  headless: true, // <--- change this to false
  logs: false,
  isPopup: false,
  loginSelector: ".sign-in",
  postLoginSelector: ".signed-in-as",
};
You can then run npm run cypress to open the GUI and watch the test run, a separate window should open when trying to log in and you should be able to see what is failing. Usually, it is google trying to get you to confirm your signing on to a new unknown device... sometimes you have to go into your google account settings and enable 2 factor authentication and disable it again as well as making sure you have no backup email or phone number setup.
The following additional goodies are included in this package:
- Typescript (Just learn it! It is totally worth it!)
- Github Pages with Jekyll (in
docsfolder) - Ottoman ODM DB Config with Seed file (found in
src/db) - Ottoman ODM Starter Models (found in
src/models) - Styling Examples:
- Global Styles (in
public/folder, implemented insrc/pages/_app.tsxusingNext/HeadComponent ) - CSS Modules (in
src/stylesused insrc/pages/index.tsx) - No front end library is included, this is where opinion ends... use what you like!
- Global Styles (in
- Github Code QL Analysis Workflow
- Opinionated eslint and prettier configuration
- npm run lint
- npm run pretty
- npm run pretty-check
- Opinionated Folder Structure / Organization
- Next-Auth (just need to add google id and secret)
- Next-Auth-Couchbase-Adapter
- Redux Toolkit (starter code in
src/store) - React Icons
- Jest Testing Library (starter tests in
testing/__tests__) - Cypress Testing Library (starter tests in
testing/cypress/integration) - Code Coverage pre-configured for
- npm run test:jest --> output to
coverage_jest - npm run test:cypress --> output to
coverage_cypress - npm run test:all --> output to
docs/coverage
- npm run test:jest --> output to
To learn more about Next.js, take a look at the following resources:
- Next.js Documentation - learn about Next.js features and API.
- Learn Next.js - an interactive Next.js tutorial.
You can check out the Next.js GitHub repository - your feedback and contributions are welcome!
The easiest way to deploy your Next.js app is to use the Vercel Platform from the creators of Next.js.
Check out our Next.js deployment documentation for more details.