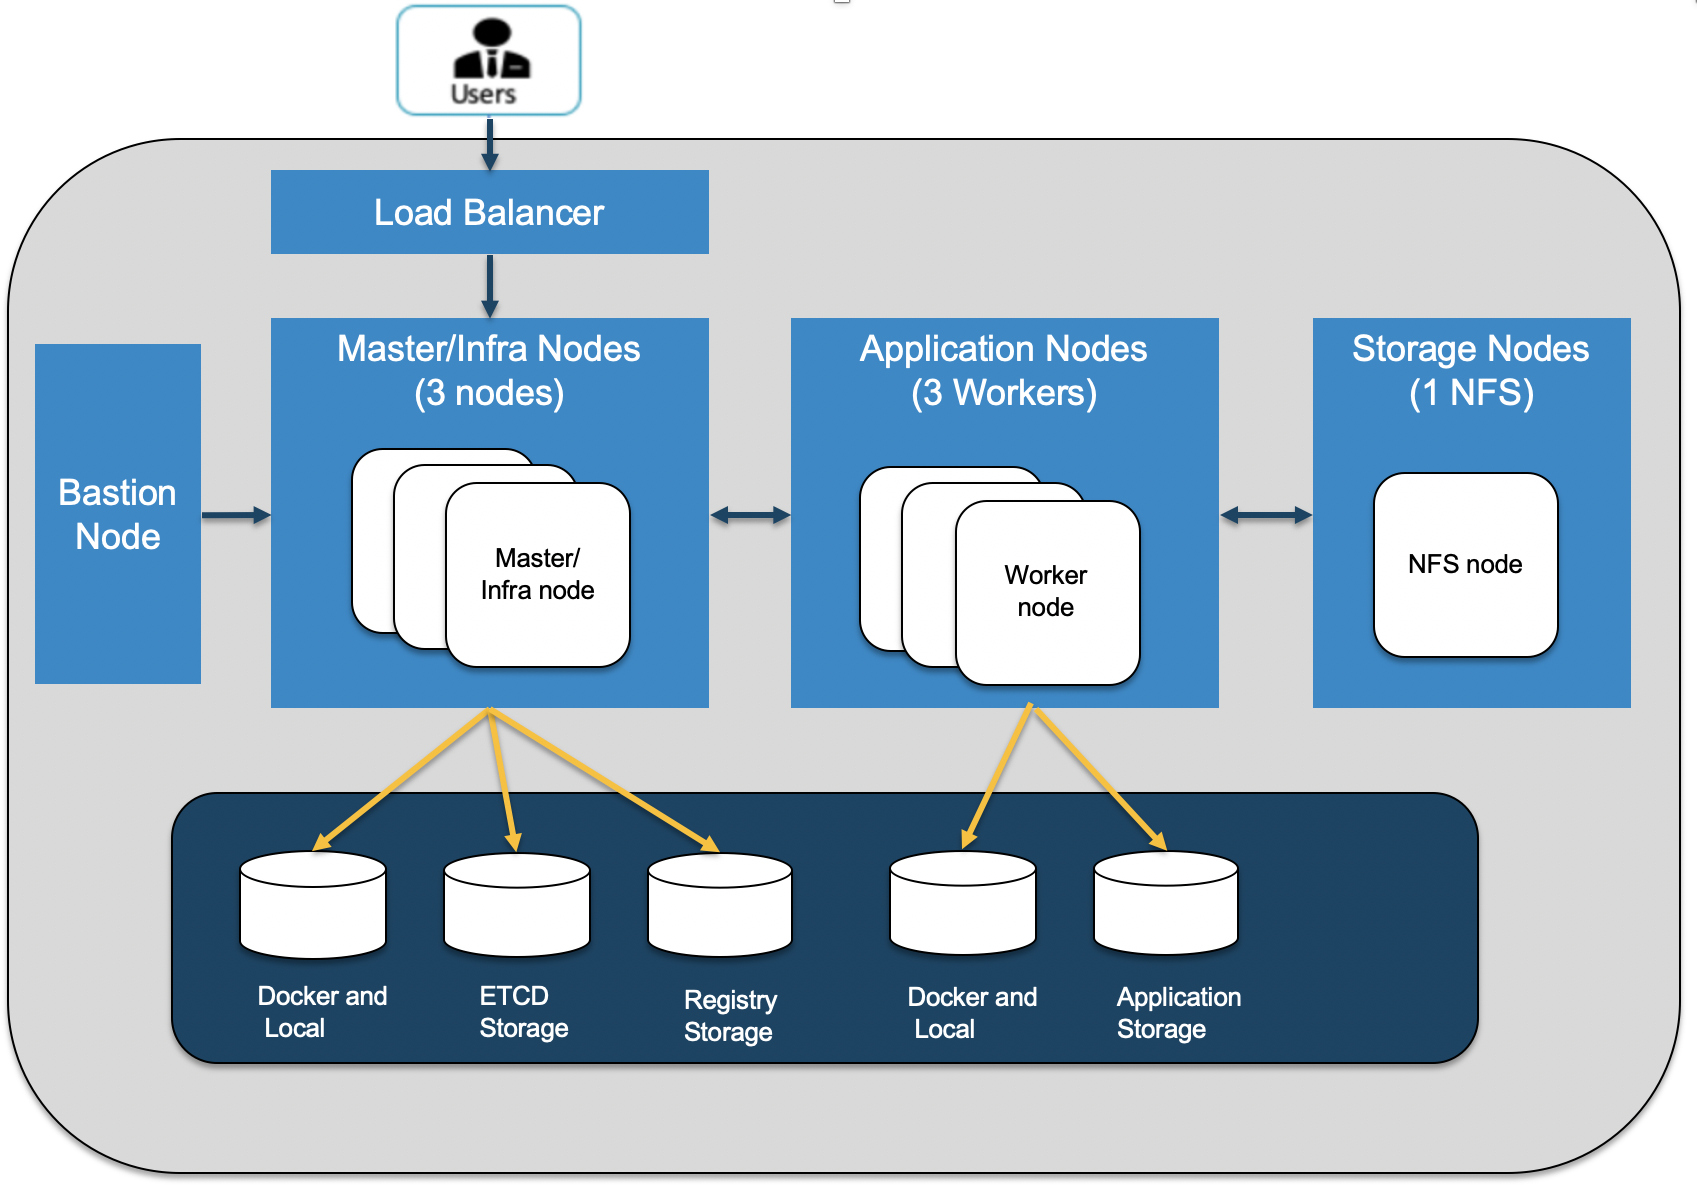
This documentation will walk throught the steps to deploy an OCP instance from scratch in Google Cloud Platform, from provisioning the vms, system prerequisites, all the way to OCP installation.
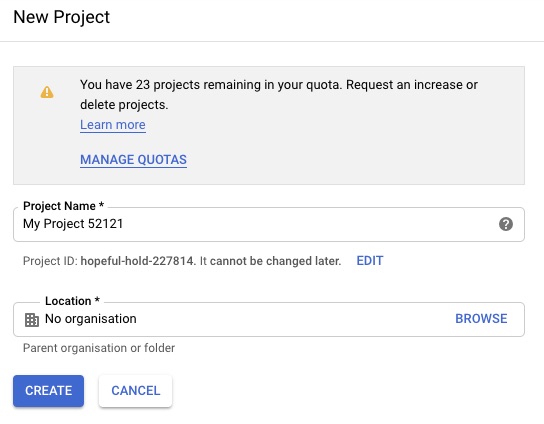
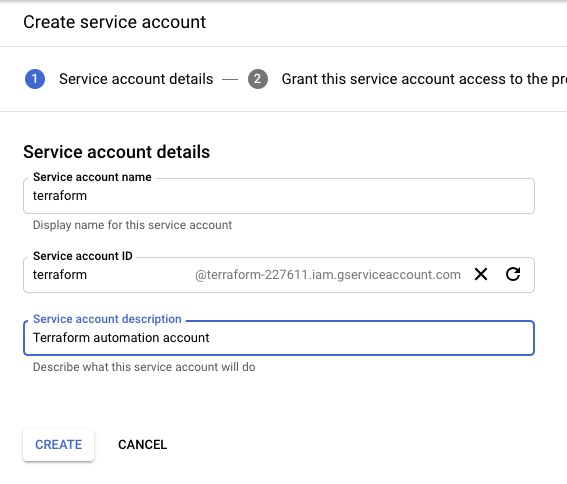
Before you start you need to create a project on Google Cloud Platform, then continue to create the service account and generate the private key and download the credential as JSON file.
1 Reference link:
https://techbloc.net/archives/3681
2 Create the new project:
3 Create the service account:
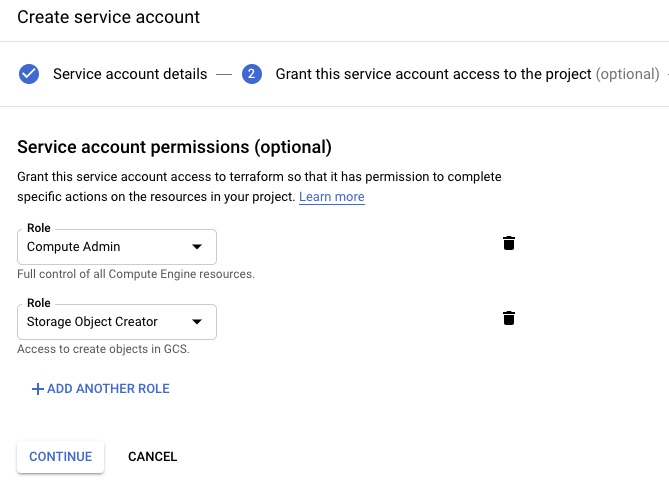
4 Give the service account compute admin and storage object creator permissions:
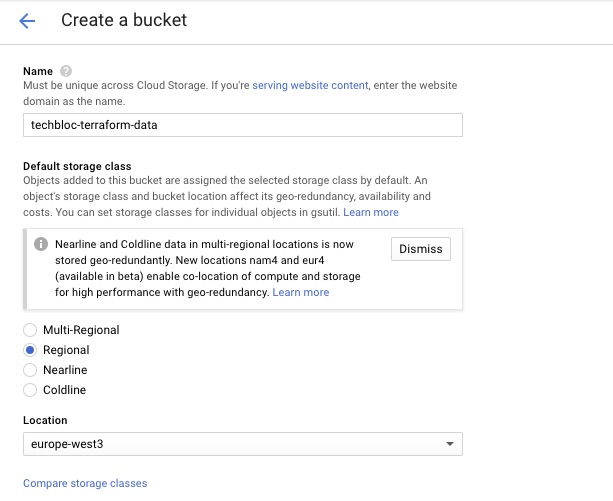
5 Create a storage bucket:
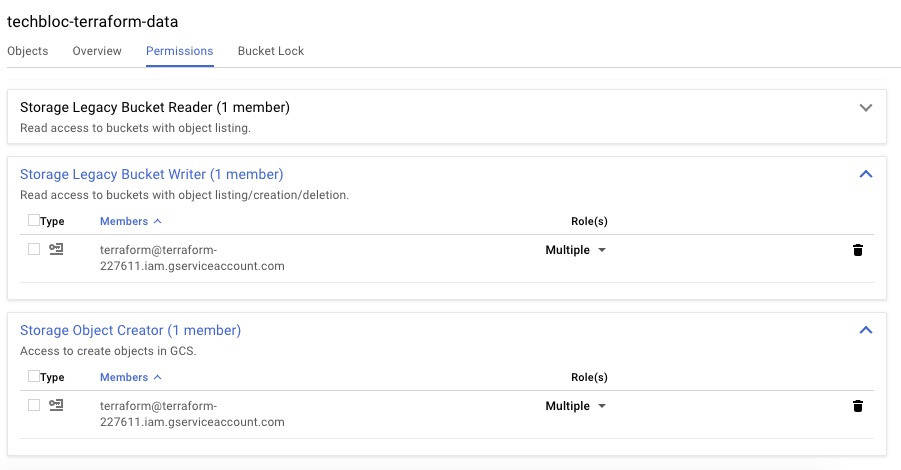
6 Set bucket permissions:
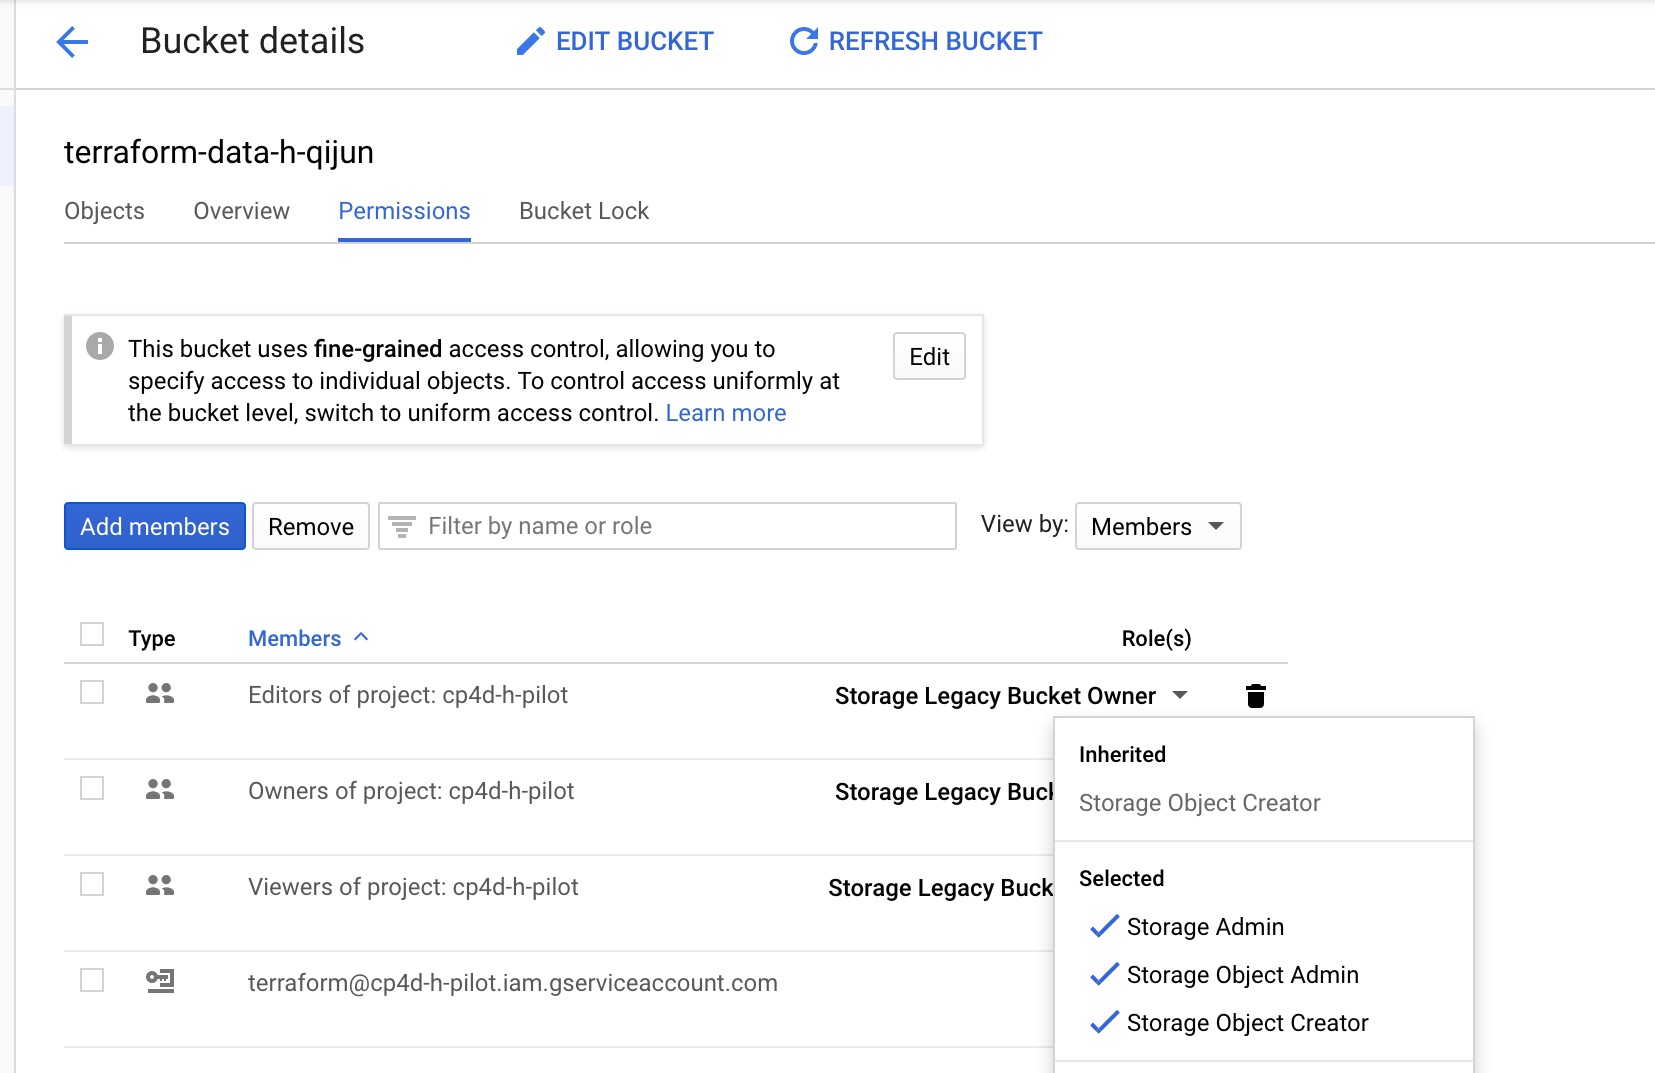
7 Add service account to bucket permissions:
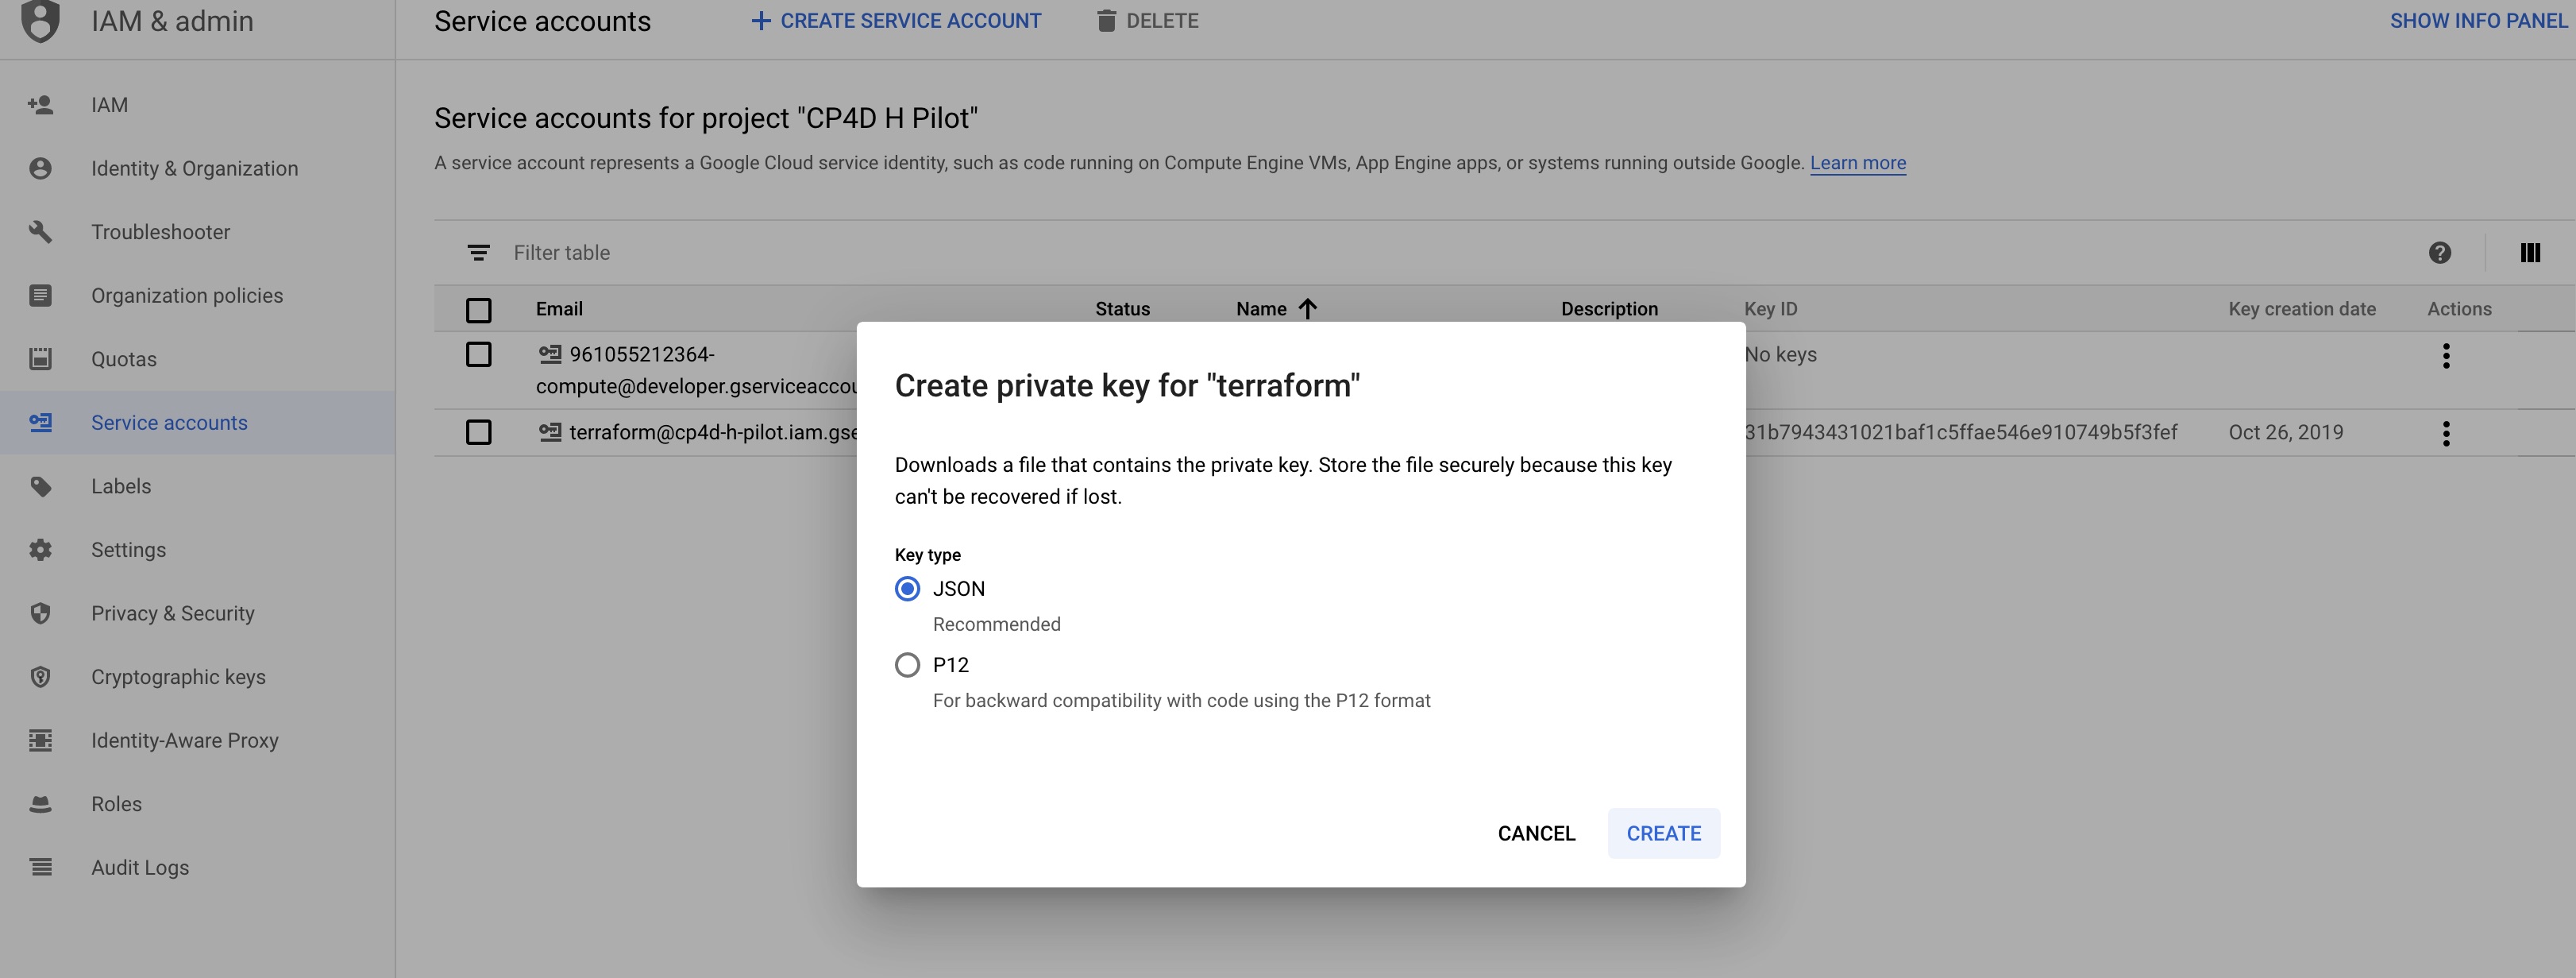
8 Create Json credential files for terraform.
1 Download this github repo.
2 Go to "terraform" folder.
3 Change the "cp4d-h-pilot-31b794343102.json" to your own credential file, which can be downloaded from GCP web console.
4 Change the settings in variable.tf and gce.tf, including vm type, disk size, and node number according to sizing requirement.
5 Install terraform if your system doesn't have.
6 Run "terraform init".
7 Run "terraform plan"
8 Run "terraform apply"
1 Copy the contents of "user-setup.sh" in folder 'scripts' and modify the username and password in the file, and run it in each node of the cluster (this shell script will create a new user call "ocp" and set password of it, and it also configure the OS to accept ssh login by username and password).
2 Copy the "scripts" folder to bastion node by:
scp -r ./scripts ocp@<bastion node public ip>:/
3 Ssh login to the bastion node and then go to 'Scripts' folder and modify "username", "password", and "pool id" in file "register-repo.sh" and then run it.
bash -x register-repo.sh
4 Run following command to make sure you only have the four required repos:
[ocp@bastion scripts]$ yum repolist
Loaded plugins: product-id, search-disabled-repos, subscription-manager
repo id                                                         repo name                                                                                            status
rhel-7-server-ansible-2.6-rpms/x86_64                           Red Hat Ansible Engine 2.6 RPMs for Red Hat Enterprise Linux 7 Server                                25
rhel-7-server-extras-rpms/x86_64                                Red Hat Enterprise Linux 7 Server - Extras (RPMs)                                                 1,229
rhel-7-server-ose-3.11-rpms/x86_64                              Red Hat OpenShift Container Platform 3.11 (RPMs)                                                    929
rhel-7-server-rpms/7Server/x86_64                               Red Hat Enterprise Linux 7 Server (RPMs)                                                         27,011
repolist: 29,194
5 In bastion node, run following commands to install ansible and openshift-ansible:
sudo yum -y install openshift-ansible
Check ansible version to make sure it's 2.6.X:
sudo ansible --version
6 Generate key files in bastion node.
   echo "" | ssh-keygen -t rsa -N ""
   cat id_rsa.pub > authorized_keys
7 Go to 'Scripts' folder and run "ssh-copy.sh" to copy public key to all the other nodes:
bash -x ssh-copy.sh
1 Copy disk.sh in scripts folder from bastion node and to nfs node.
2 Run the disk.sh to create a new nfs mount path from the raw disk:
sudo bash -x ./disk.sh /dev/sdc /nfs
3 Install and configure NFS service:
sudo yum install -y nfs-utils
sudo systemctl enable rpcbind
sudo systemctl enable nfs-server
sudo systemctl start rpcbind
sudo systemctl start nfs-server
sudo chmod -R 755 /nfs

Make sure firewalld service is running in nfs node (if it's not installed, run:

sudo yum install firewalld
sudo systemctl enable firewalld
sudo systemctl start firewalld) and then run:

sudo firewall-cmd --permanent --add-service=nfs
sudo firewall-cmd --permanent --add-service=mountd
sudo firewall-cmd --permanent --add-service=rpc-bind
sudo firewall-cmd --reload
4 Configure NFS experts file.
 sudo vi /etc/exports


 /nfs *(rw,sync,no_root_squash)


 sudo systemctl restart nfs-server
5 Verify NFS service works well.
showmount -e nfs01
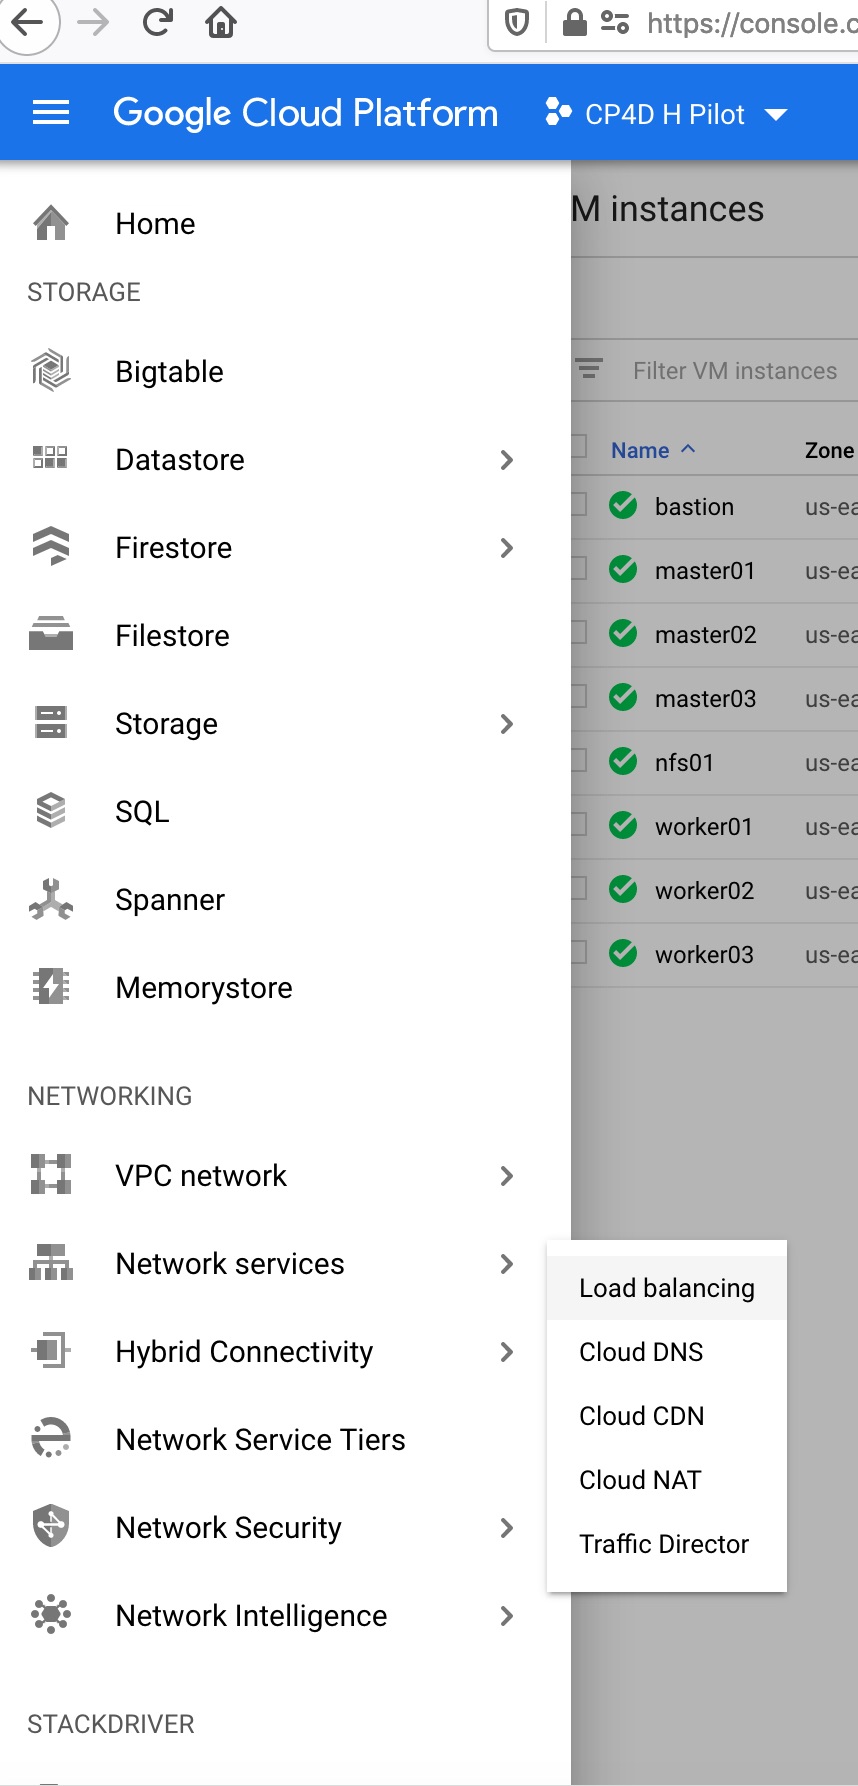
1 First go to google cloud web console and choose network service -> load balancing:
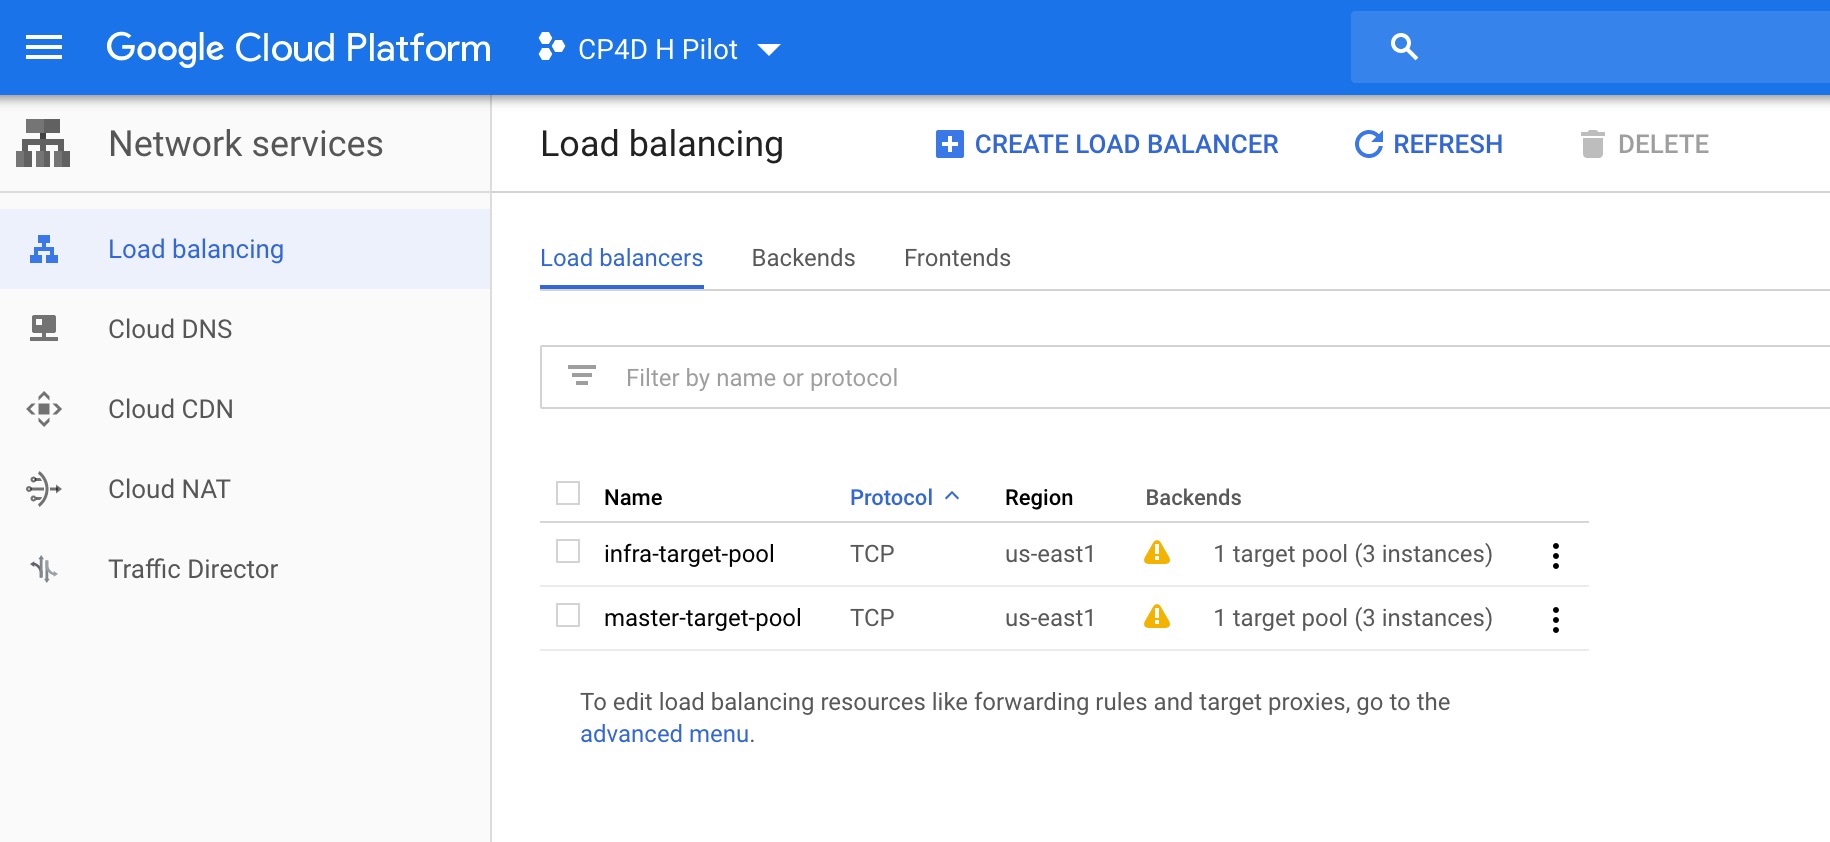
2 Make sure you have two load balancers created by terraform:
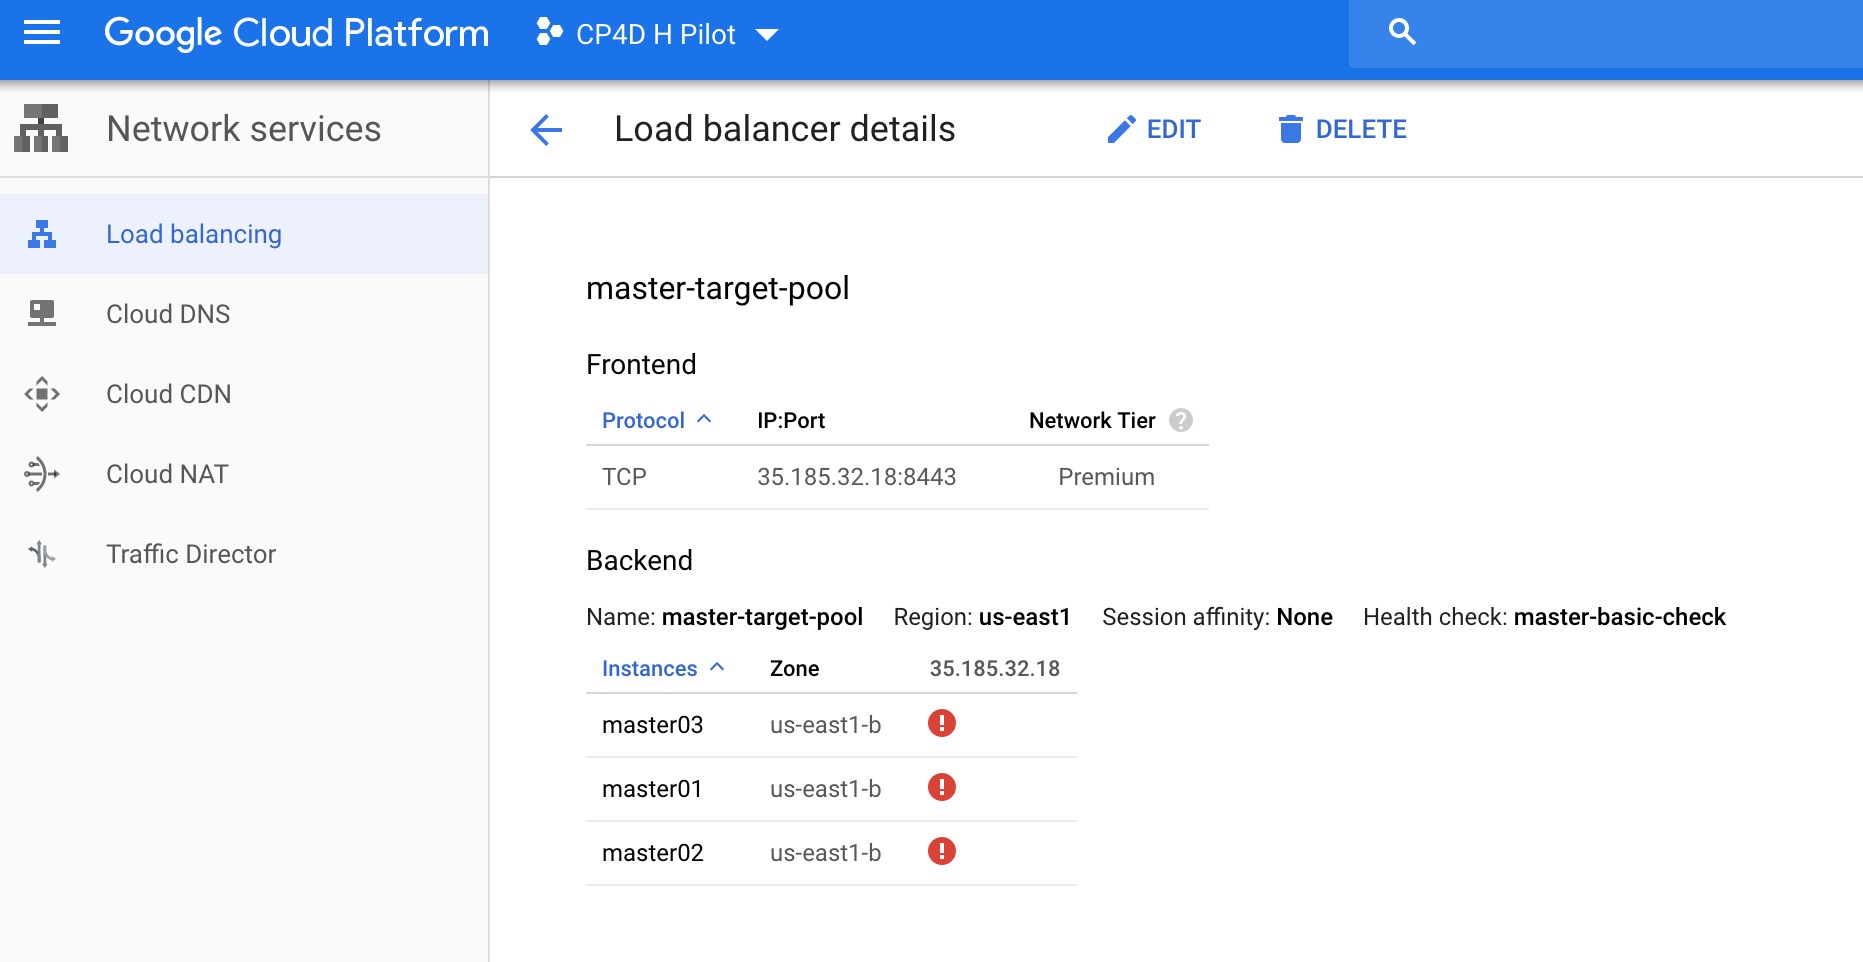
3 Check the public IP address of the master target pool:
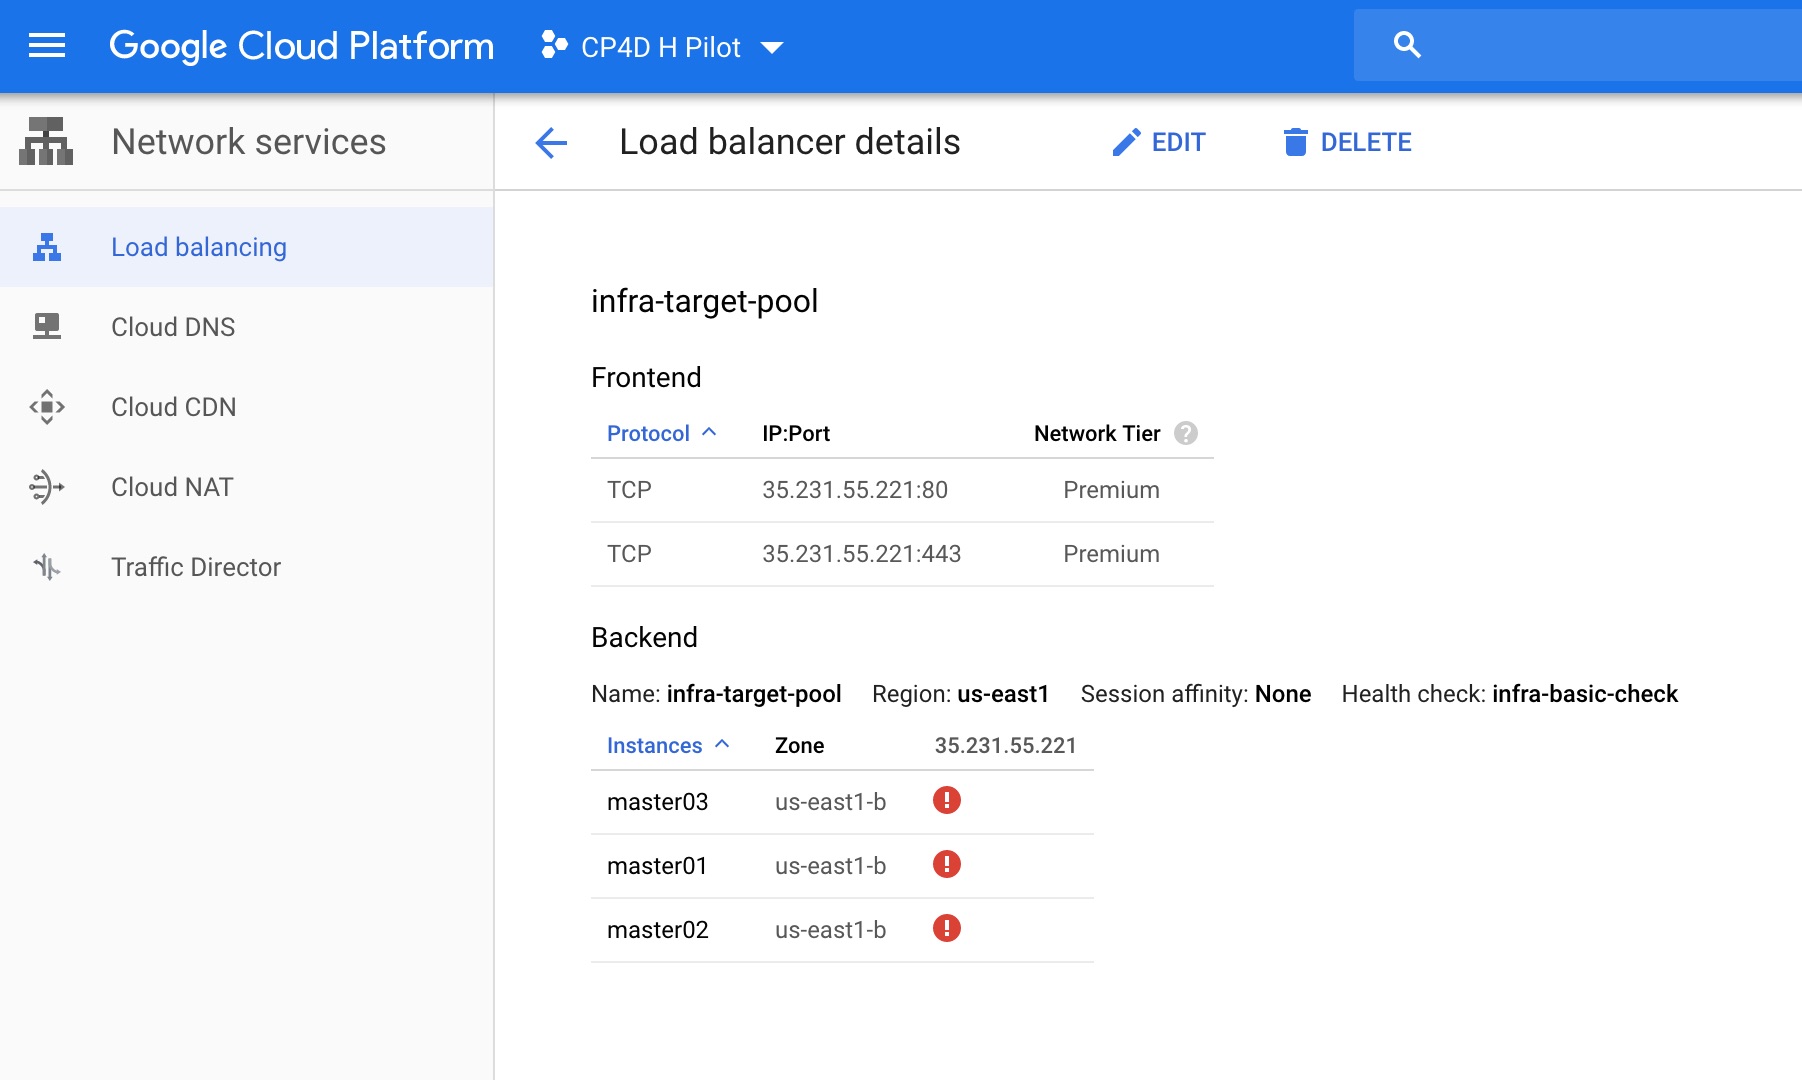
4 Check the public IP address of the infra target pool:
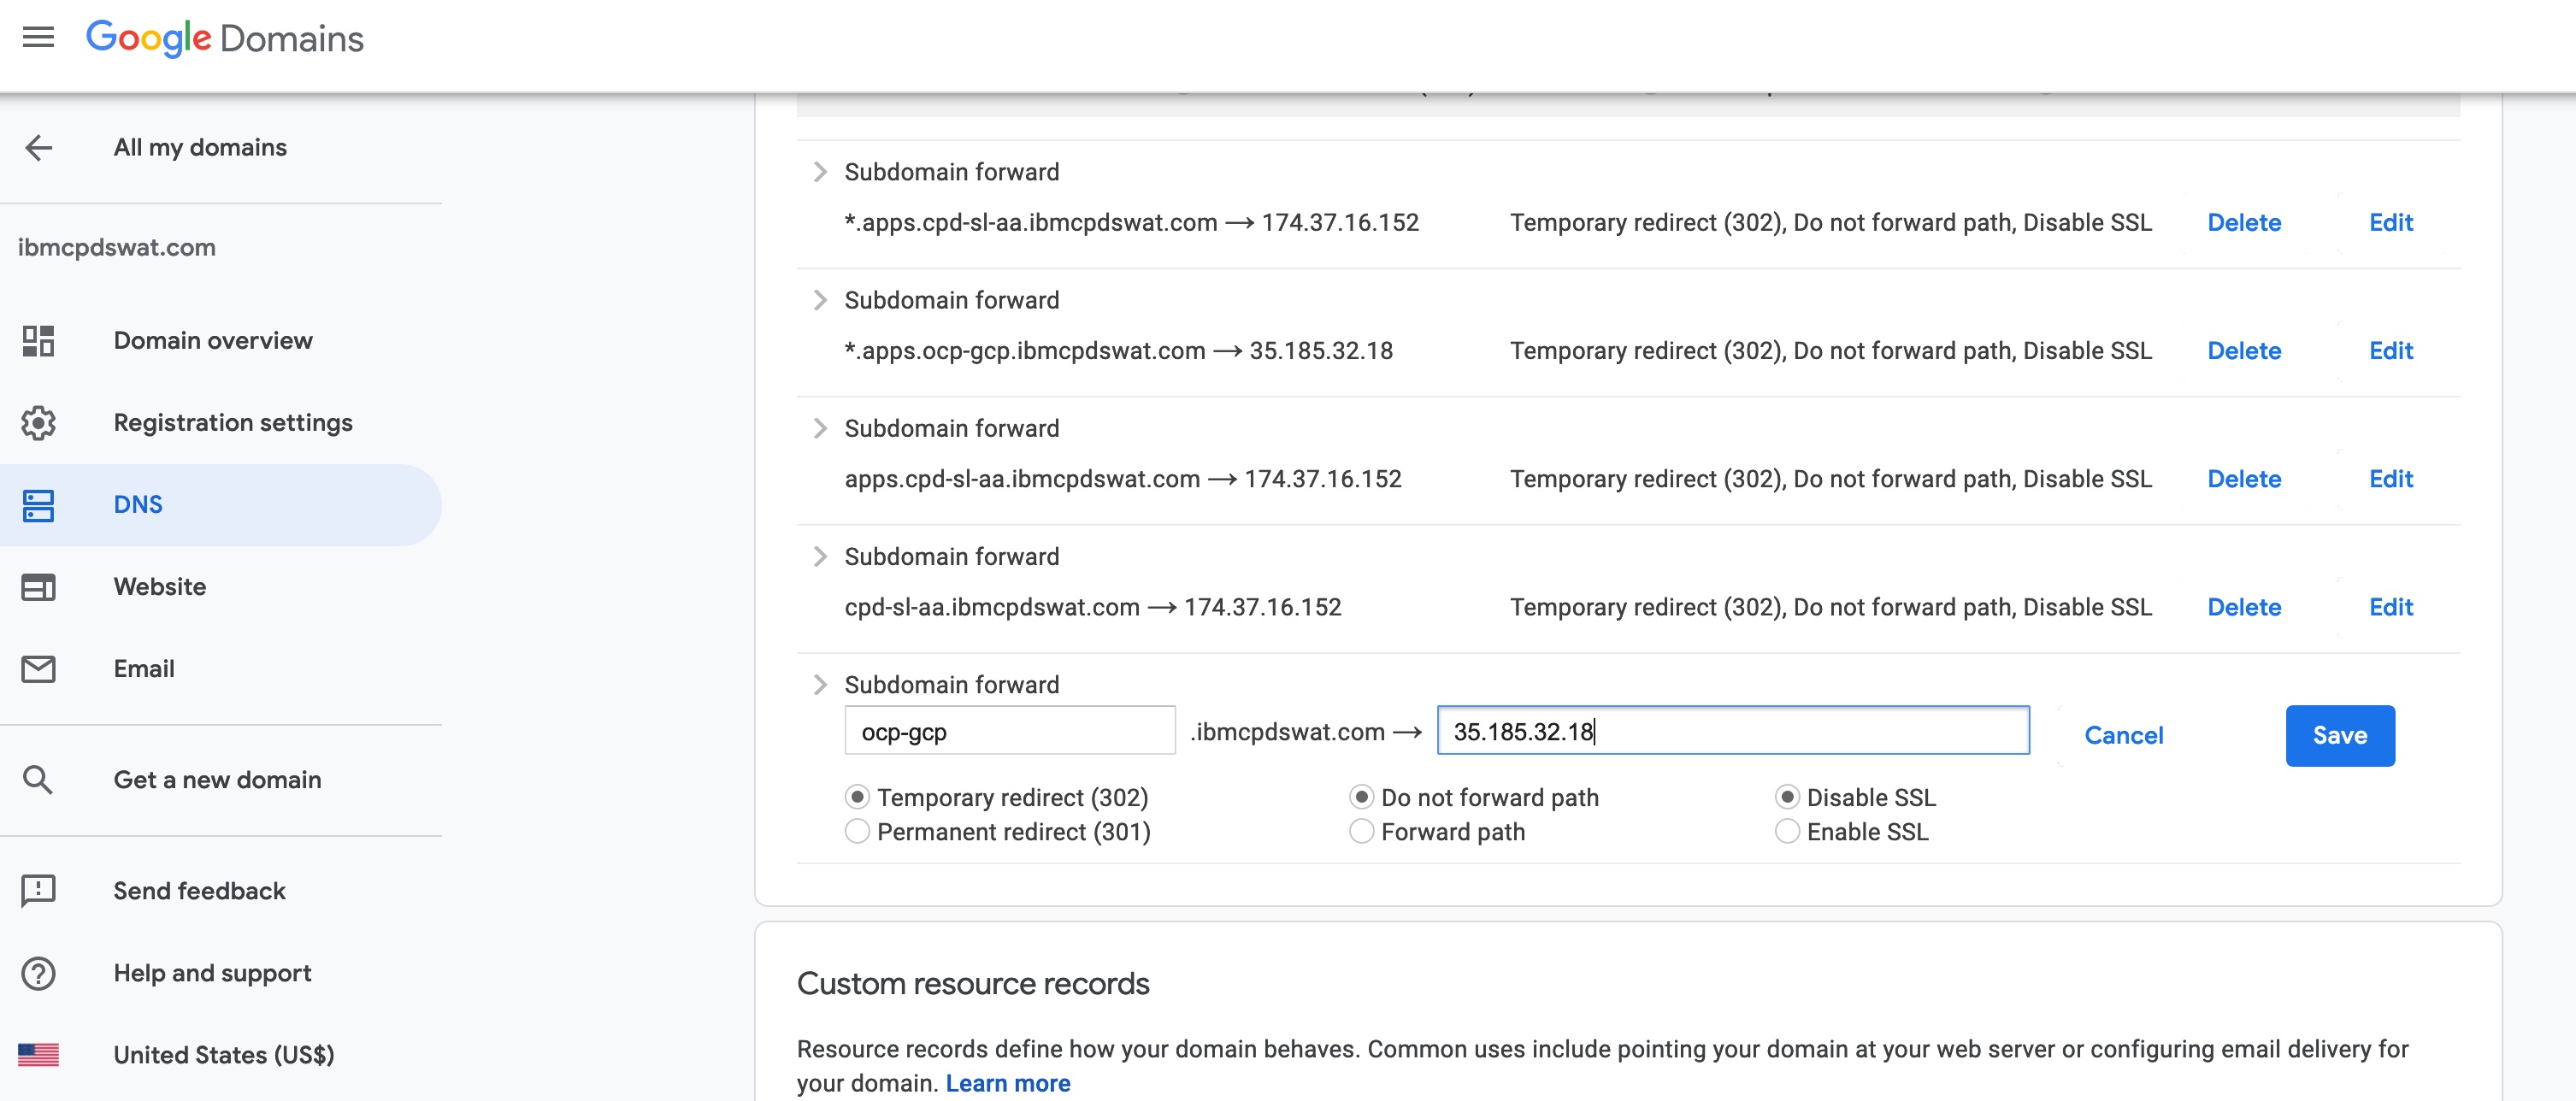
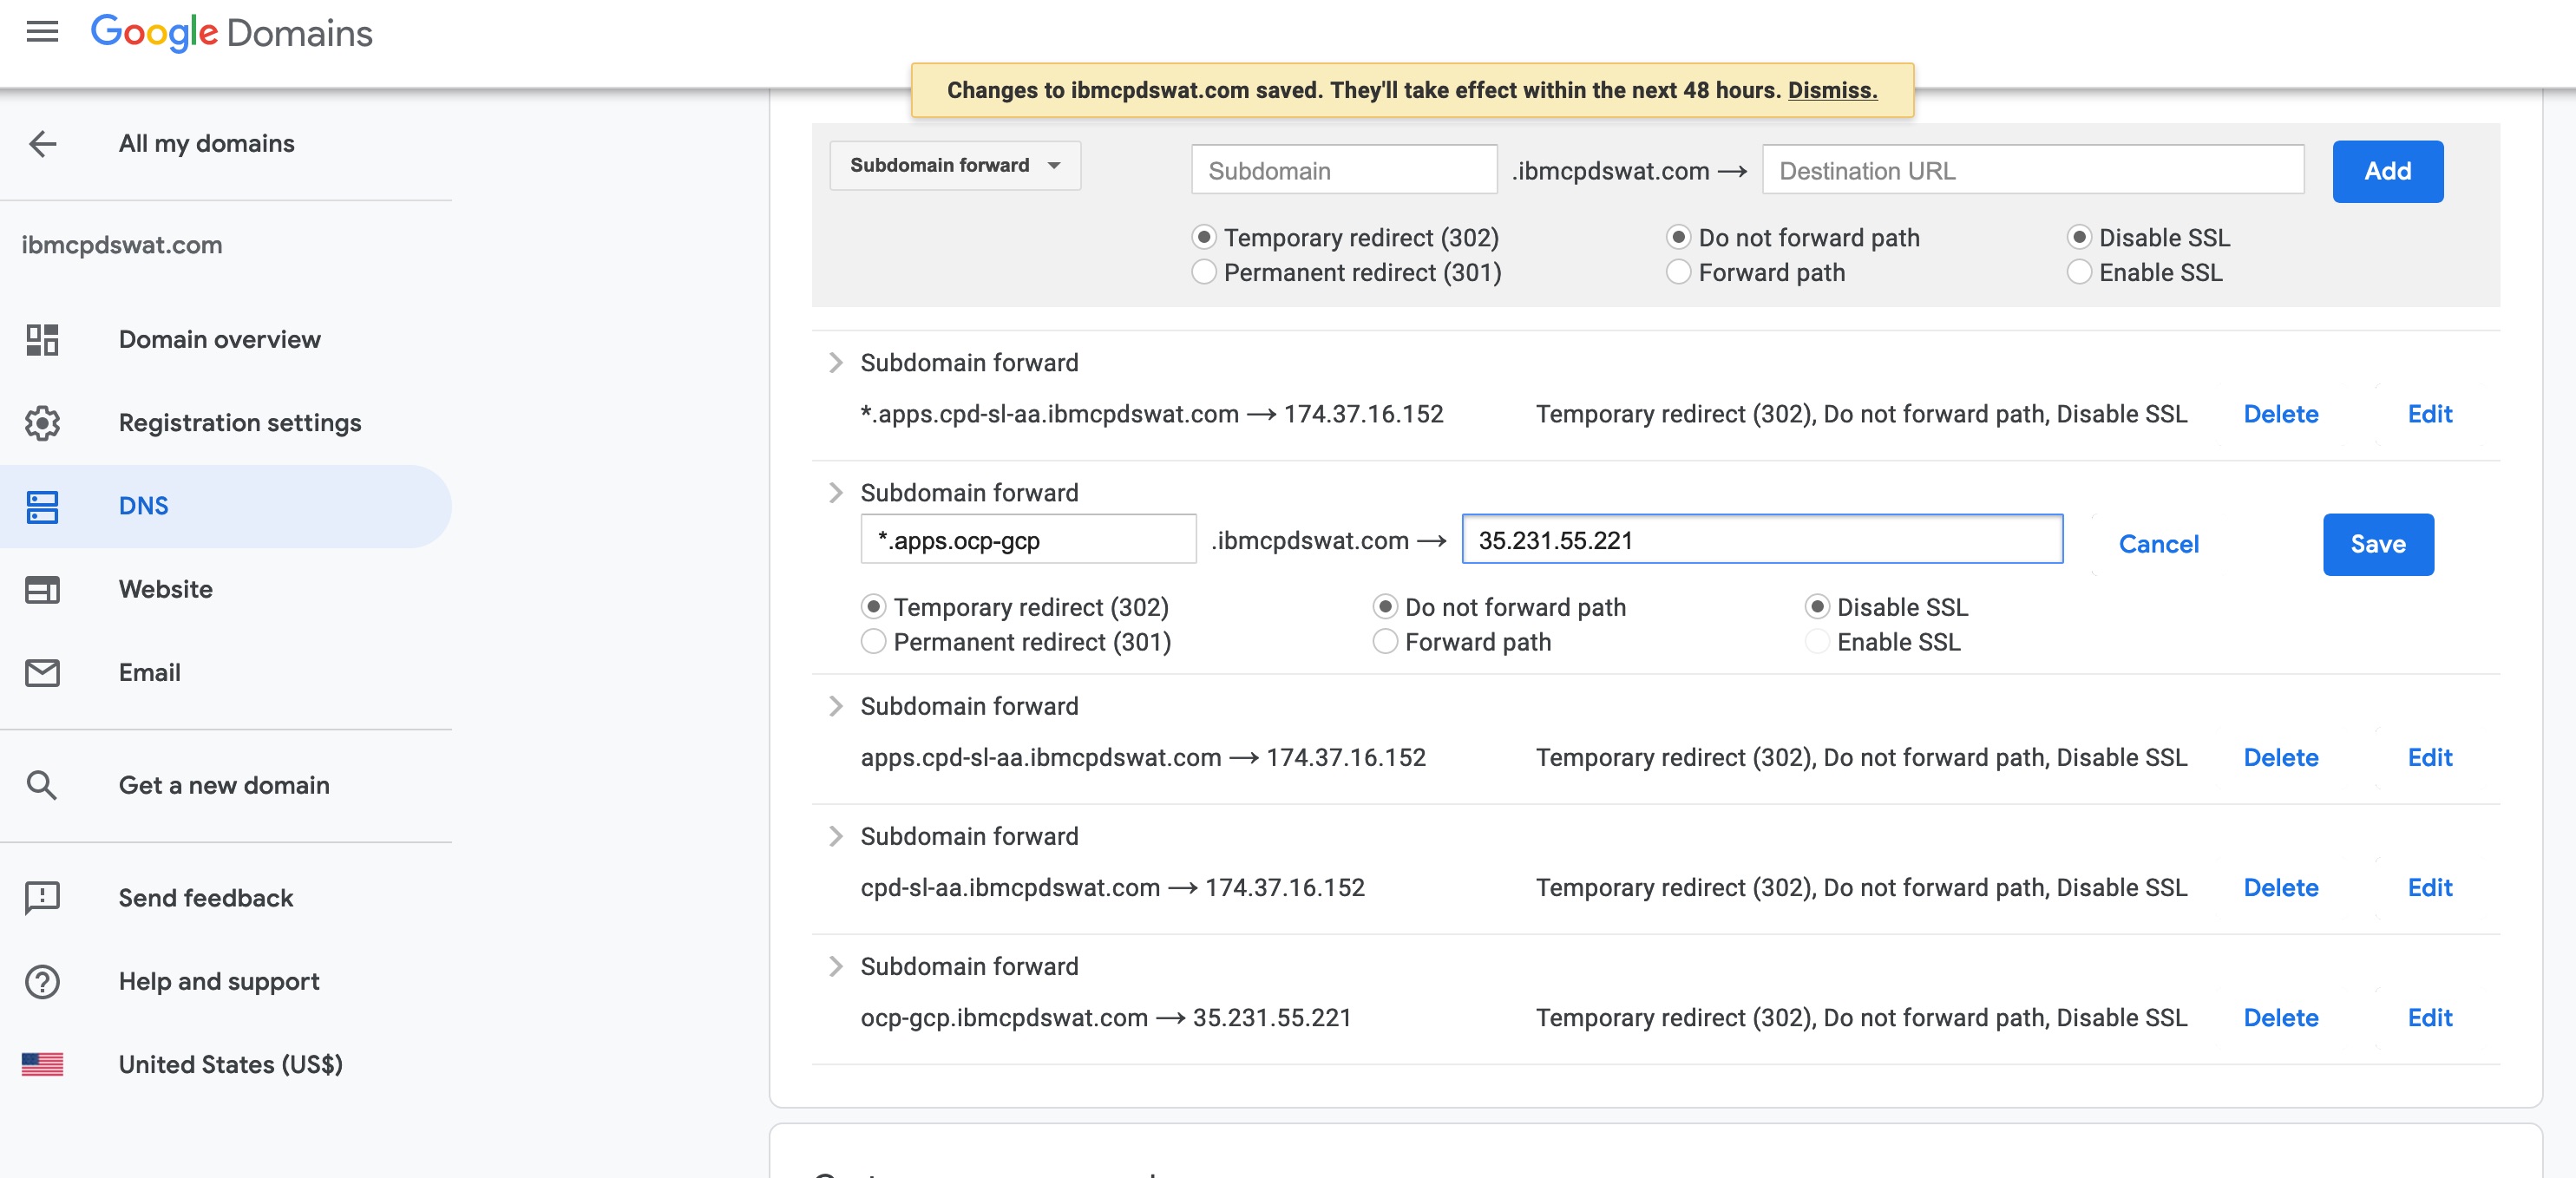
5 Set DNS forwarding for master-target-pool in Domain service provider:
6 Set DNS forwarding for infra-target-pool in Domain service provider:
Inventory file template with NFS and Crio enabled(Portworx required):
# define openshift components
[OSEv3:children]
masters
nodes
nfs
etcd


# define openshift variables
[OSEv3:vars]
containerized=true
openshift_deployment_type=openshift-enterprise
openshift_hosted_registry_storage_volume_size=50Gi
openshift_docker_insecure_registries="172.30.0.0/16"
openshift_disable_check=docker_storage,docker_image_availability,package_version
oreg_url=registry.access.redhat.com/openshift3/ose-${component}:${version}
openshift_master_identity_providers=[{'name': 'htpasswd_auth', 'login': 'true', 'challenge': 'true', 'kind': 'HTPasswdPasswordIdentityProvider'}]
openshift_master_htpasswd_users={'ocadmin': '$apr1$CdyzN7vS$wM6gchgqURLe1A7gQRbIi0'}
ansible_ssh_user=ocp
ansible_become=true
nsible_ssh_common_args='-o StrictHostKeyChecking=no'
ansible_service_broker_install=False

#openshift_release=v3.11
#openshift_image_tag=v3.11.146

os_firewall_use_firewalld=True

openshift_master_cluster_method=native
openshift_master_cluster_hostname=ocp-gcp.ibmcpdswat.com
openshift_master_cluster_public_hostname=ocp-gcp.ibmcpdswat.com
#osm_cluster_network_cidr=172.16.0.0/16
#openshift_public_hostname=master01.us-east1-b.c.cp4d-h-pilot.internal
openshift_master_default_subdomain=apps.ocp-gcp.ibmcpdswat.com
openshift_master_api_port=8443
openshift_master_console_port=8443

# CRI-O
openshift_use_crio=True
openshift_use_crio_only=True

# NFS Host Group
# An NFS volume will be created with path "nfs_directory/volume_name"
# on the host within the [nfs] host group.  For example, the volume
# path using these options would be "/exports/registry".  "exports" is
# is the name of the export served by the nfs server.  "registry" is
# the name of a directory inside of "/exports".
openshift_hosted_registry_storage_kind=nfs
openshift_hosted_registry_storage_access_modes=['ReadWriteMany']
# nfs_directory must conform to DNS-1123 subdomain must consist of lower case
# alphanumeric characters, '-' or '.', and must start and end with an alphanumeric character
openshift_hosted_registry_storage_nfs_directory=/nfs
openshift_hosted_registry_storage_nfs_options='*(rw,no_root_squash,anonuid=1000,anongid=2000)'
openshift_hosted_registry_storage_volume_name=registry
openshift_hosted_registry_storage_volume_size=200Gi


[masters]
master01.us-east1-b.c.cp4d-h-pilot.internal openshift_ip=10.0.0.2 openshift_schedulable=true
master02.us-east1-b.c.cp4d-h-pilot.internal openshift_ip=10.0.0.5 openshift_schedulable=true
master03.us-east1-b.c.cp4d-h-pilot.internal openshift_ip=10.0.0.4 openshift_schedulable=true

[etcd]
master01.us-east1-b.c.cp4d-h-pilot.internal openshift_ip=10.0.0.2
master02.us-east1-b.c.cp4d-h-pilot.internal openshift_ip=10.0.0.5
master03.us-east1-b.c.cp4d-h-pilot.internal openshift_ip=10.0.0.4

[nodes]
master01.us-east1-b.c.cp4d-h-pilot.internal openshift_ip=10.0.0.2 openshift_schedulable=true openshift_node_group_name='node-config-master-infra-crio'
master02.us-east1-b.c.cp4d-h-pilot.internal openshift_ip=10.0.0.5 openshift_schedulable=true openshift_node_group_name='node-config-master-infra-crio'
master03.us-east1-b.c.cp4d-h-pilot.internal openshift_ip=10.0.0.4 openshift_schedulable=true openshift_node_group_name='node-config-master-infra-crio'
worker01.us-east1-b.c.cp4d-h-pilot.internal openshift_ip=10.0.1.5 openshift_schedulable=true openshift_node_group_name='node-config-compute-crio'
worker02.us-east1-b.c.cp4d-h-pilot.internal openshift_ip=10.0.1.2 openshift_schedulable=true openshift_node_group_name='node-config-compute-crio'
worker03.us-east1-b.c.cp4d-h-pilot.internal openshift_ip=10.0.1.4 openshift_schedulable=true openshift_node_group_name='node-config-compute-crio'


# nfs server
[nfs]
nfs01.us-east1-b.c.cp4d-h-pilot.internal openshift_ip=10.0.1.3
Invertory file with NFS and Crio disabled:
# define openshift components
[OSEv3:children]
masters
nodes
nfs
etcd


# define openshift variables
[OSEv3:vars]
containerized=true
openshift_deployment_type=openshift-enterprise
openshift_hosted_registry_storage_volume_size=50Gi
openshift_docker_insecure_registries="172.30.0.0/16"
openshift_disable_check=docker_storage,docker_image_availability,package_version
oreg_url=registry.access.redhat.com/openshift3/ose-${component}:${version}
openshift_master_identity_providers=[{'name': 'htpasswd_auth', 'login': 'true', 'challenge': 'true', 'kind': 'HTPasswdPasswordIdentityProvider'}]
openshift_master_htpasswd_users={'ocadmin': '$apr1$CdyzN7vS$wM6gchgqURLe1A7gQRbIi0'}
ansible_ssh_user=ocp
ansible_become=true
nsible_ssh_common_args='-o StrictHostKeyChecking=no'
ansible_service_broker_install=False

#openshift_release=v3.11
#openshift_image_tag=v3.11.146

os_firewall_use_firewalld=True

openshift_master_cluster_method=native
openshift_master_cluster_hostname=ocp-gcp.ibmcpdswat.com
openshift_master_cluster_public_hostname=ocp-gcp.ibmcpdswat.com
#osm_cluster_network_cidr=172.16.0.0/16
#openshift_public_hostname=master01.us-east1-b.c.cp4d-h-pilot.internal
openshift_master_default_subdomain=apps.ocp-gcp.ibmcpdswat.com
openshift_master_api_port=8443
openshift_master_console_port=8443

# CRI-O
openshift_use_crio=false
openshift_use_crio_only=false

# NFS Host Group
# An NFS volume will be created with path "nfs_directory/volume_name"
# on the host within the [nfs] host group.  For example, the volume
# path using these options would be "/exports/registry".  "exports" is
# is the name of the export served by the nfs server.  "registry" is
# the name of a directory inside of "/exports".
openshift_hosted_registry_storage_kind=nfs
openshift_hosted_registry_storage_access_modes=['ReadWriteMany']
# nfs_directory must conform to DNS-1123 subdomain must consist of lower case
# alphanumeric characters, '-' or '.', and must start and end with an alphanumeric character
openshift_hosted_registry_storage_nfs_directory=/nfs
openshift_hosted_registry_storage_nfs_options='*(rw,no_root_squash,anonuid=1000,anongid=2000)'
openshift_hosted_registry_storage_volume_name=registry
openshift_hosted_registry_storage_volume_size=200Gi


[masters]
master01.us-east1-b.c.cp4d-h-pilot.internal openshift_ip=10.0.0.2 openshift_schedulable=true
master02.us-east1-b.c.cp4d-h-pilot.internal openshift_ip=10.0.0.5 openshift_schedulable=true
master03.us-east1-b.c.cp4d-h-pilot.internal openshift_ip=10.0.0.4 openshift_schedulable=true

[etcd]
master01.us-east1-b.c.cp4d-h-pilot.internal openshift_ip=10.0.0.2
master02.us-east1-b.c.cp4d-h-pilot.internal openshift_ip=10.0.0.5
master03.us-east1-b.c.cp4d-h-pilot.internal openshift_ip=10.0.0.4

[nodes]
master01.us-east1-b.c.cp4d-h-pilot.internal openshift_ip=10.0.0.2 openshift_schedulable=true openshift_node_group_name='node-config-master-infra'
master02.us-east1-b.c.cp4d-h-pilot.internal openshift_ip=10.0.0.5 openshift_schedulable=true openshift_node_group_name='node-config-master-infra'
master03.us-east1-b.c.cp4d-h-pilot.internal openshift_ip=10.0.0.4 openshift_schedulable=true openshift_node_group_name='node-config-master-infra'
worker01.us-east1-b.c.cp4d-h-pilot.internal openshift_ip=10.0.1.5 openshift_schedulable=true openshift_node_group_name='node-config-compute'
worker02.us-east1-b.c.cp4d-h-pilot.internal openshift_ip=10.0.1.2 openshift_schedulable=true openshift_node_group_name='node-config-compute'
worker03.us-east1-b.c.cp4d-h-pilot.internal openshift_ip=10.0.1.4 openshift_schedulable=true openshift_node_group_name='node-config-compute'


# nfs server
[nfs]
nfs01.us-east1-b.c.cp4d-h-pilot.internal openshift_ip=10.0.1.3
1 Copy the "playbook" folder to bastion node and go to the "playbook" folder, and modify the variable definition file var.yml, where you need to set your own "redhat_username", "redhat_password" and "redhat_pool_ids".
2 Install subscription-manager in each node:
  ansible-playbook -i ../inventory-nfs-crio install-subscription-manager.yml

  (you mayn need to run:  sudo pip install --upgrade setuptools if you meet such error "ERROR! Unexpected Exception, this is probably a bug: name 'platform_system' is not defined")
3 Register each node with Redhat account. Make sure you have Redhat subscription account before this step:
ansible-playbook -i ../inventory-nfs-crio redhat-register-machines.yml
4 Disable all the google cloud repos:
ansible-playbook -i ../inventory-nfs-crio disable-repo.yaml
5 Redhat repo set up:
ansible-playbook -i ../inventory-nfs-crio redhat-rhos-reposubscribe.yml
6 Check the status of yum repolist and make sure in each node, only four required repos are enabled:
ansible-playbook -i ../inventory-nfs-crio check-repolist.yaml
7 Install basic package for OCP:
ansible-playbook -i ../inventory-nfs-crio install-base-package.yml
8 Install openshift-ansible in each node:
ansible-playbook -i ../inventory-nfs-crio install-ansible.yml
9 Install docker in each node (Optional, only required for NFS):
ansible-playbook -i ../inventory-nfs-crio install-docker.yml
10 Configure docker storage in each node(Optional, only required for NFS and root partition size less than 300G and there is another raw disk for docker storage):
ansible-playbook -i ../inventory-nfs-crio docker_storage.yml
11 Check the statue of clock syncronization in each node by:
 (make sure ntp service is installed, otherwise run: " ansible-playbook -i ../inventory-nfs-crio ntp-install.yaml"):

  ansible-playbook -i ../inventory-nfs-crio check-clock.yaml
12 Check the status of Network Manager by:
ansible-playbook -i ../inventory-nfs-crio check-NetworkManager.yaml
13 install podman (Optional, only required for Portworx):
ansible-playbook -i ../inventory-nfs-crio podman.yaml
14 Run following command to set the ip forward to 1:
ansible-playbook -i ../inventory-nfs-crio ipforward.yml
1 Before you run the redhat openshift playbooks, make sure the two DNS names you set up previously are working. You can simply validate it by ping:
  qijuns-mbp:ocp qijunwang$ ping ocp-gcp.ibmcpdswat.com
PING ocp-gcp.ibmcpdswat.com (35.185.32.18): 56 data bytes
64 bytes from 35.185.32.18: icmp_seq=0 ttl=40 time=37.903 ms
64 bytes from 35.185.32.18: icmp_seq=1 ttl=40 time=43.241 ms
64 bytes from 35.185.32.18: icmp_seq=2 ttl=40 time=42.902 ms
^C
--- ocp-gcp.ibmcpdswat.com ping statistics ---
3 packets transmitted, 3 packets received, 0.0% packet loss
round-trip min/avg/max/stddev = 37.903/41.349/43.241/2.440 ms
qijuns-mbp:ocp qijunwang$
qijuns-mbp:ocp qijunwang$
qijuns-mbp:ocp qijunwang$ ping console.apps.ocp-gcp.ibmcpdswat.com
PING *.apps.ocp-gcp.ibmcpdswat.com (35.231.55.221): 56 data bytes
64 bytes from 35.231.55.221: icmp_seq=0 ttl=42 time=38.261 ms
64 bytes from 35.231.55.221: icmp_seq=1 ttl=42 time=42.550 ms
64 bytes from 35.231.55.221: icmp_seq=2 ttl=42 time=42.819 ms
^C
--- *.apps.ocp-gcp.ibmcpdswat.com ping statistics ---
4 packets transmitted, 3 packets received, 25.0% packet loss
round-trip min/avg/max/stddev = 38.261/41.210/42.819/2.088 ms
2 Run "prerequisites.yml" to check each node and install required package if needed.
ansible-playbook -i ../inventory-nfs-crio /usr/share/ansible/openshift-ansible/playbooks/prerequisites.yml
3 Run "deploy-cluster.yml" to kick off the installation.
ansible-playbook -i ../inventory-nfs-crio /usr/share/ansible/openshift-ansible/playbooks/deploy_cluster.yml
1 After deployment, you should see following message:
 INSTALLER STATUS    *********************************************************************************************************************************************************************
 Initialization               : Complete (0:00:31)
 Health Check                 : Complete (0:00:16)
 Node Bootstrap Preparation   : Complete (0:37:02)
 etcd Install                 : Complete (0:01:06)
 Master Install               : Complete (0:07:01)
 Master Additional Install    : Complete (0:05:32)
 Node Join                    : Complete (0:00:55)
 GlusterFS Install            : Complete (0:04:27)
 Hosted Install               : Complete (0:01:00)
 Cluster Monitoring Operator  : Complete (0:01:14)
 Web Console Install          : Complete (0:00:23)
 Console Install              : Complete (0:00:22)
 Metrics Install              : Complete (0:02:17)
 metrics-server Install       : Complete (0:00:47)
 Logging Install              : Complete (0:02:19)
 Service Catalog Install      : Complete (0:02:47)
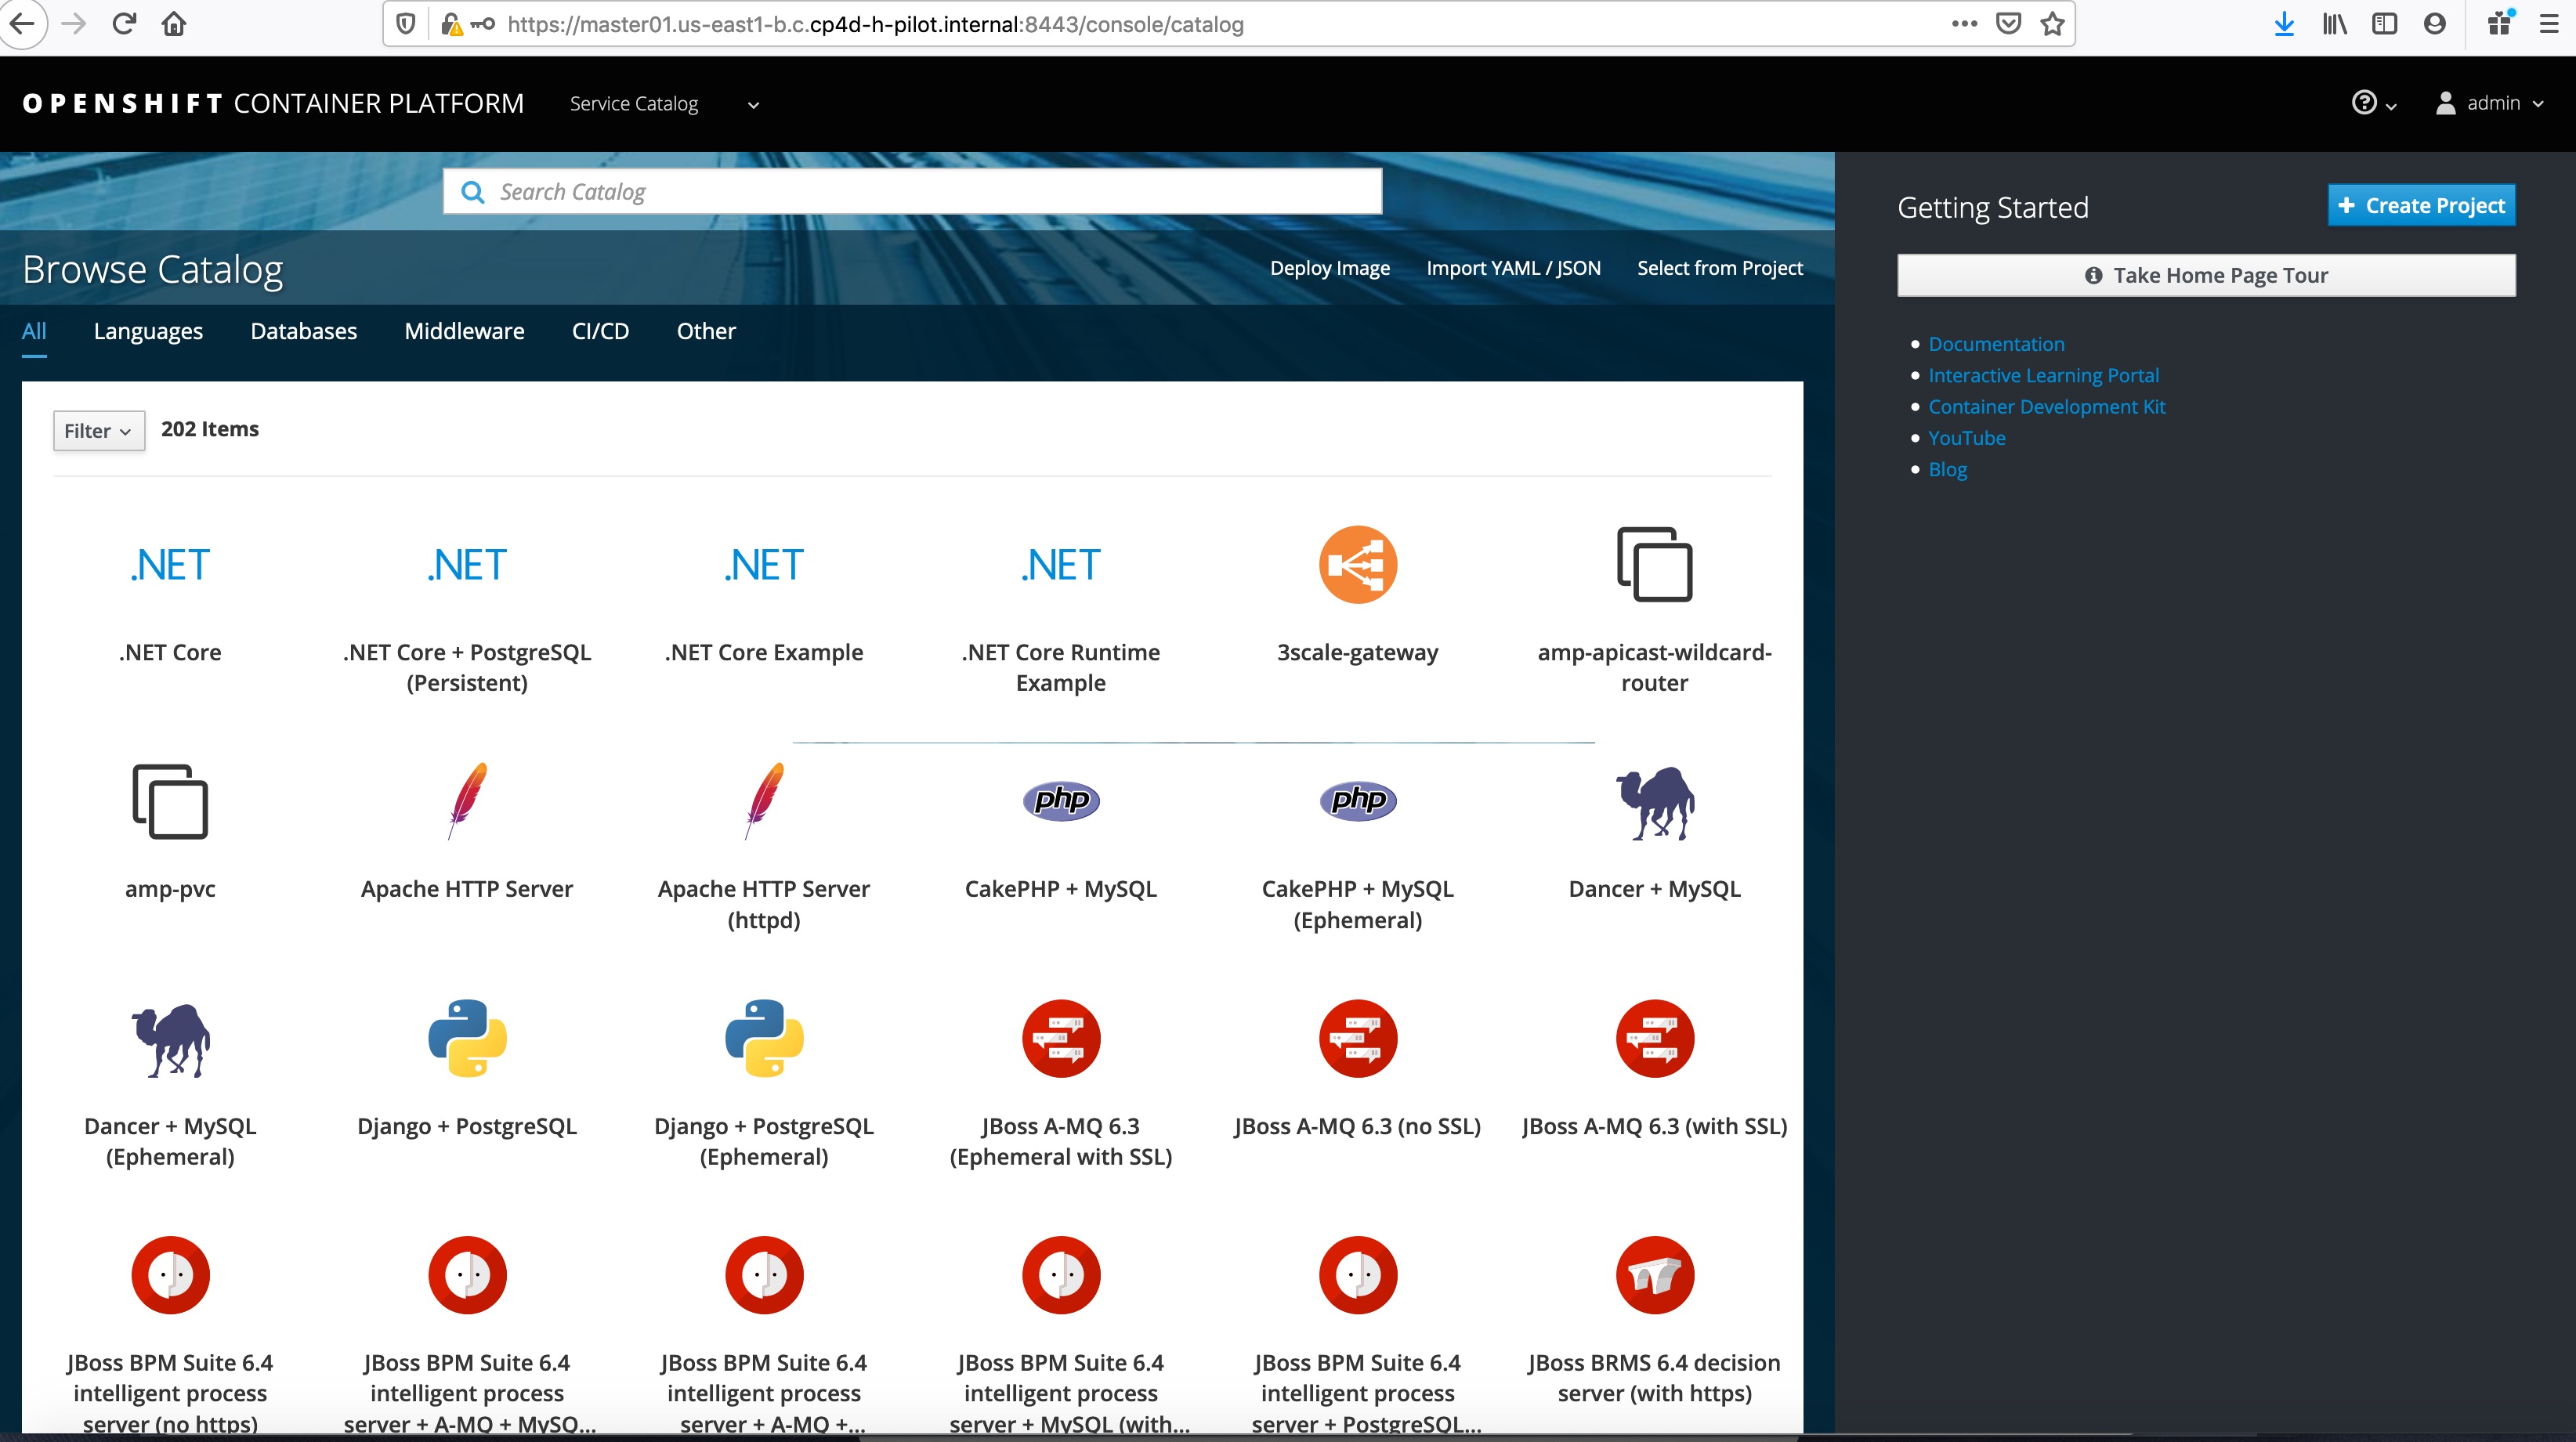
1 Access the the OCP web console, for example: "https://ocp-gcp.ibmcpdswat.com:8443" with user name "ocadmin".
2 Install "oc" client tool in bastion node:
Go to Openshift web console and then choose "help" -> "command line tool" -> "Download oc", and then copy the "oc-3.11.146-linux.tar.gz" to bastion node and untar it, and then mv the "oc" file to /usr/bin.
3 Login to OCP from terminal and grant ocadmin cluster administration role:
 sudo oc login -u system:admin
 sudo oc adm policy add-cluster-role-to-user cluster-admin ocadmin
 sudo oc login with ocadmin
 sudo oc get no
 sudo oc get po --all-namespaces
Create NFS storage class for Cloud Pak For Data deployment (optional, only required for NFS deployment)
1 Copy the "nfs" folder to bastion node or master01 node (make you can run oc command)
2 Go the nfs folder and edit the NFS_SERVER and NFS_PATH, and also the "server" and "path" in the volume section if needed.
3 Run the nfs-setup.sh.
4 Run "oc get sc" to double check the nfs storage class has been created:
[root@master01 ~]# oc get sc
 NAME                      PROVISIONER                     AGE
 nfs-client                icpd-nfs.io/nfs                 7m
1 Download Cloud Pak For Data installer from IBM Passport Advantages:
CP4D_EE_Installer_V2.5.bin
2 Copy it bastion node or master01 node and run it.
  chmod +x CP4D_EE_Installer_V2.5.bin
  ./CP4D_EE_Installer_V2.5.bin
3 Go to "cpd" folder and untar the file "cloudpak4data-ee-v2.5.0.0.tgz:
tar xvf cloudpak4data-ee-v2.5.0.0.tgz
4 Untar the file "cpd-portworx.tgz"
tar xvf cpd-portworx.tgz
5 Go to folder "cpd-portworx" and run following commands one by one:
  bin/px-images.sh -d /tmp/cpd-px-images download
  bin/px-util initialize --sshKeyFile /root/.ssh/id_rsa
  bin/px-images.sh -e 'ssh -o StrictHostKeyChecking=no -l root' -d /tmp/cpd-px-images load
  bin/px-install.sh -pp Never install
6 Check the installation status:
  oc get po --all-namespaces -o wide | grep portworx
  PX_POD=$(kubectl get pods -l name=portworx -n kube-system -o jsonpath='{.items[0].metadata.name}')
  kubectl exec $PX_POD -n kube-system -- /opt/pwx/bin/pxctl status
7 Create Portworx Storage classes:
./bin/px-sc.sh
8 Check created storage classes:
[root@master01 ~]# oc get sc
NAME                      PROVISIONER                     AGE
nfs-client                icpd-nfs.io/nfs                 7m
portworx-cassandra-sc     kubernetes.io/portworx-volume   5h
portworx-couchdb-sc       kubernetes.io/portworx-volume   5h
portworx-db-gp            kubernetes.io/portworx-volume   5h
portworx-db-gp3           kubernetes.io/portworx-volume   5h
portworx-db2-sc           kubernetes.io/portworx-volume   5h
portworx-elastic-sc       kubernetes.io/portworx-volume   5h
portworx-kafka-sc         kubernetes.io/portworx-volume   5h
portworx-metastoredb-sc   kubernetes.io/portworx-volume   5h
portworx-nonshared-gp     kubernetes.io/portworx-volume   5h
portworx-nonshared-gp2    kubernetes.io/portworx-volume   5h
portworx-nonshared-gp3    kubernetes.io/portworx-volume   5h
portworx-shared-gp        kubernetes.io/portworx-volume   5h
portworx-shared-gp2       kubernetes.io/portworx-volume   5h
portworx-shared-gp3       kubernetes.io/portworx-volume   5h
portworx-shared-sc        kubernetes.io/portworx-volume   5h
portworx-solr-sc          kubernetes.io/portworx-volume   5h
stork-snapshot-sc         stork-snapshot                  6h
[root@master01 ~]#
1 Create new project "zen":
oc new-project zen
2 Update the api key in repo.yaml file.
3 Create cp-override.yaml accoding to this link:
https://www.ibm.com/support/knowledgecenter/SSQNUZ_2.5.0/cpd/install/portworx-override-files.html
4 Run following adm command:
./cpd-linux adm --repo ../repo.yaml --assembly lite --namespace zen --apply
5 Start the installation by:
./cpd-linux --repo ../repo.yaml --assembly lite --verbose -o ../cp-override.yaml --target-registry-password $(oc whoami -t) --target-registry-username $(oc whoami) -c portworx-shared-gp3 --insecure-skip-tls-verify --transfer-image-to docker-registry.default.svc:5000/zen -n zen
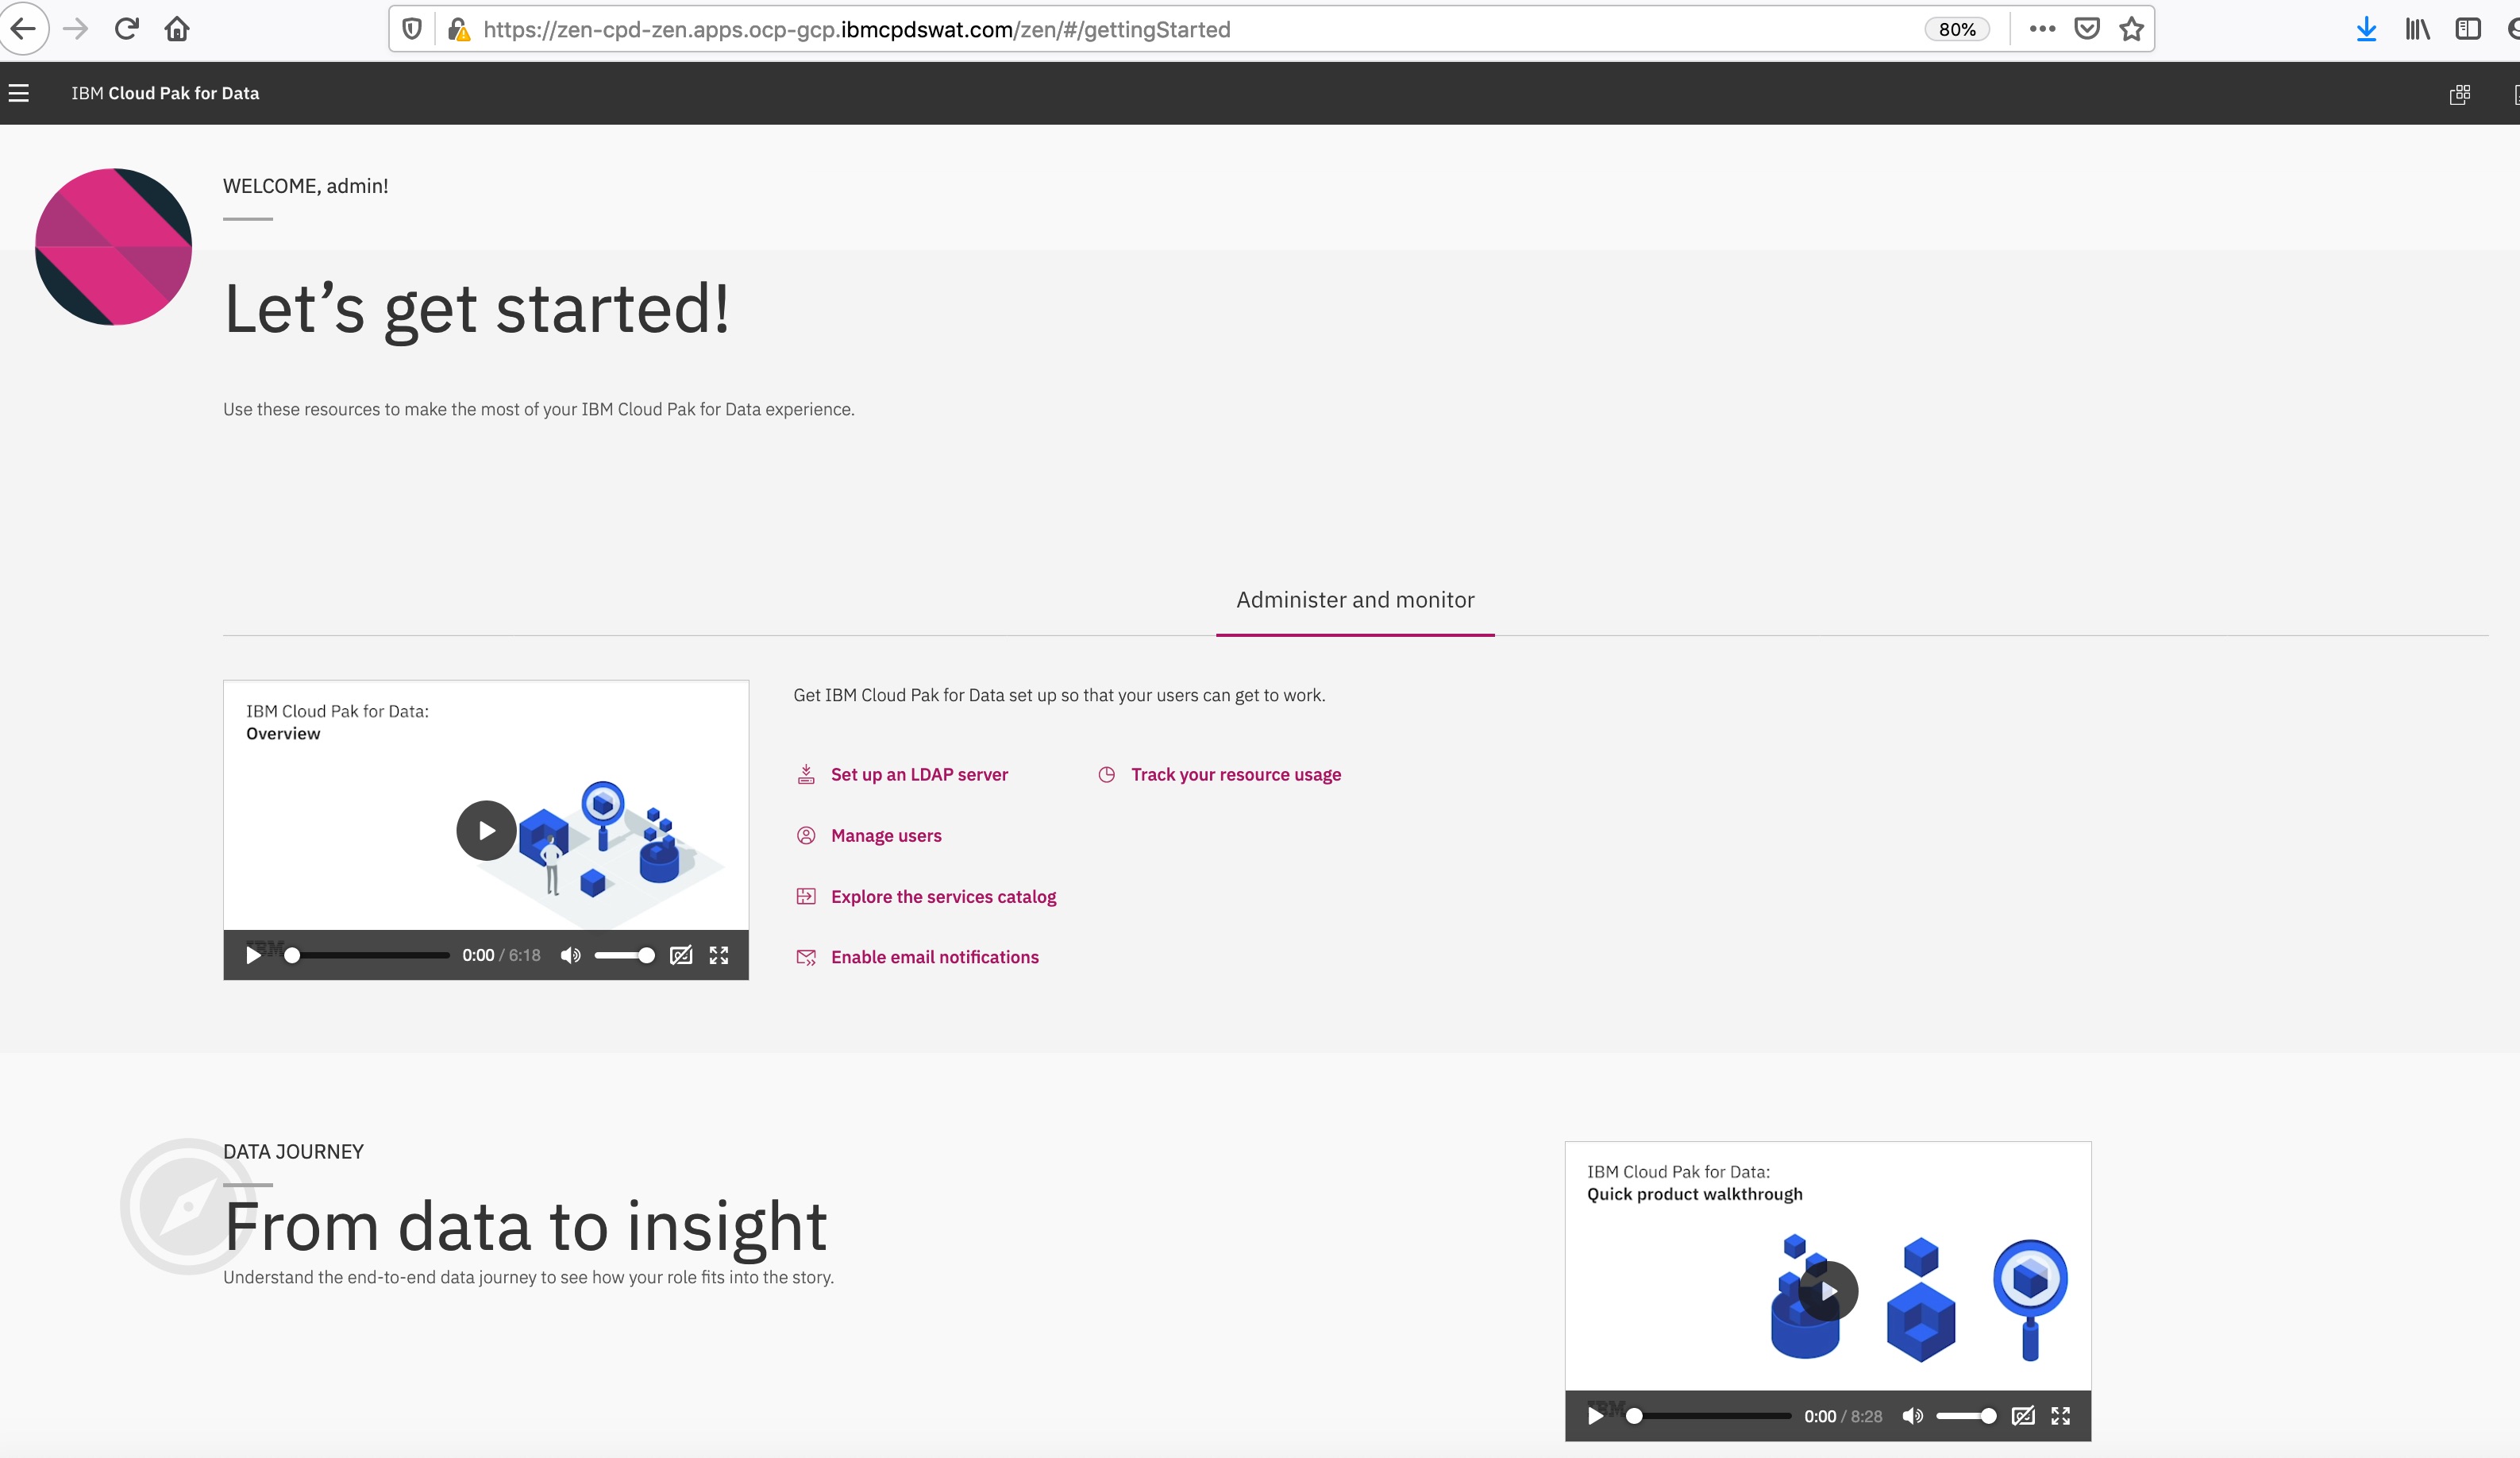
6 Log in to CPD web console:
1 Create ws-override.yaml accoding to this link:
https://www.ibm.com/support/knowledgecenter/SSQNUZ_2.5.0/cpd/install/portworx-override-files.html
2 Run following adm command:
./cpd-linux adm --repo ../repo.yaml --assembly wsl --namespace zen --apply
3 Start the installation by:
./cpd-linux --repo ../repo.yaml --assembly wsl --verbose -o ../ws-override.yaml --target-registry-password $(oc whoami -t) --target-registry-username $(oc whoami) -c portworx-shared-gp --insecure-skip-tls-verify --transfer-image-to docker-registry.default.svc:5000/zen -n zen
