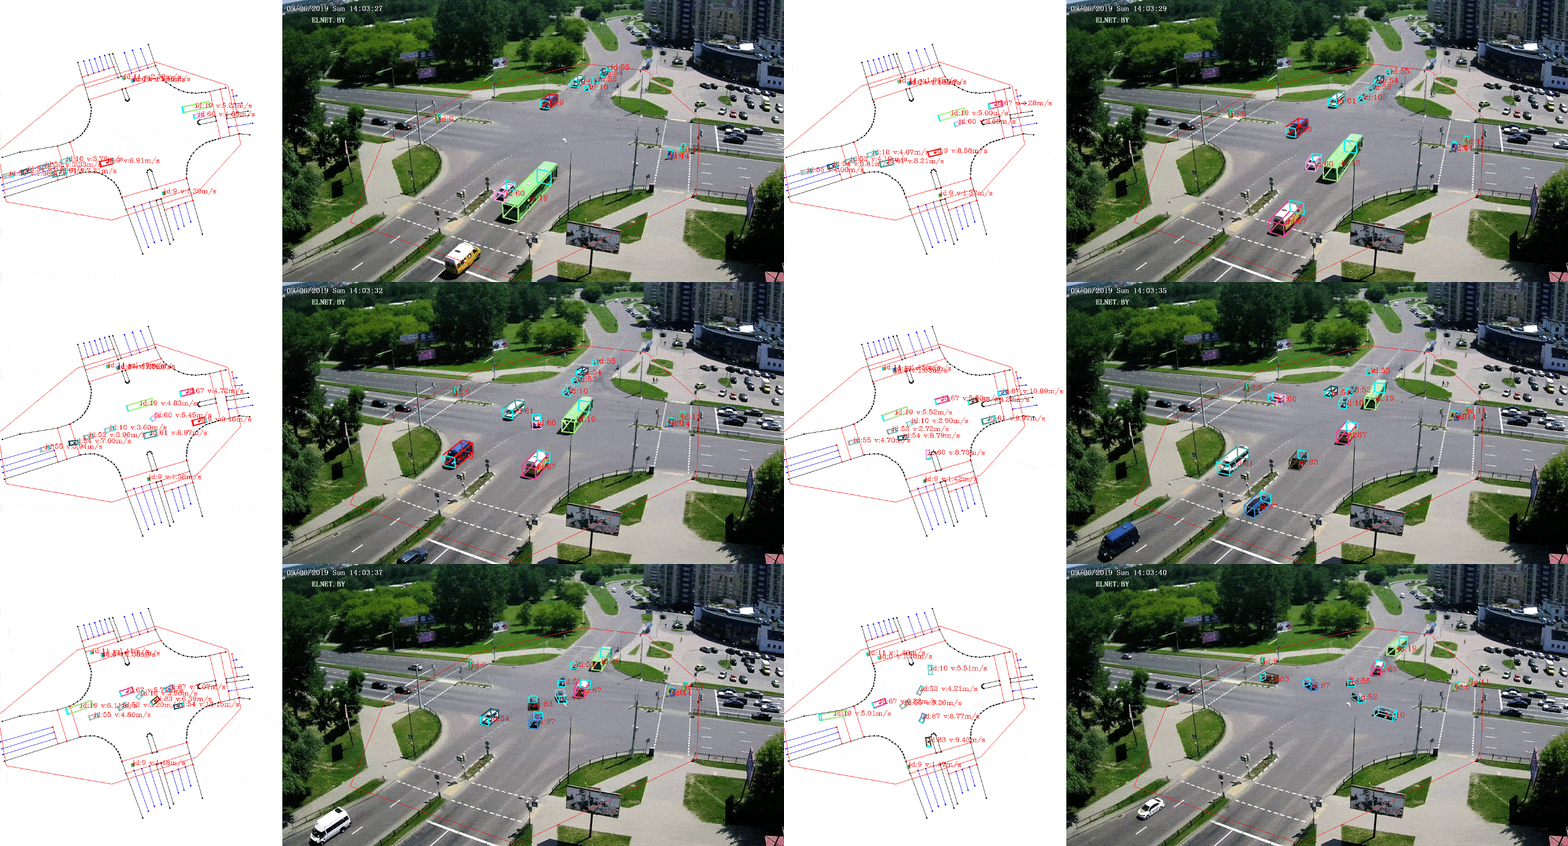
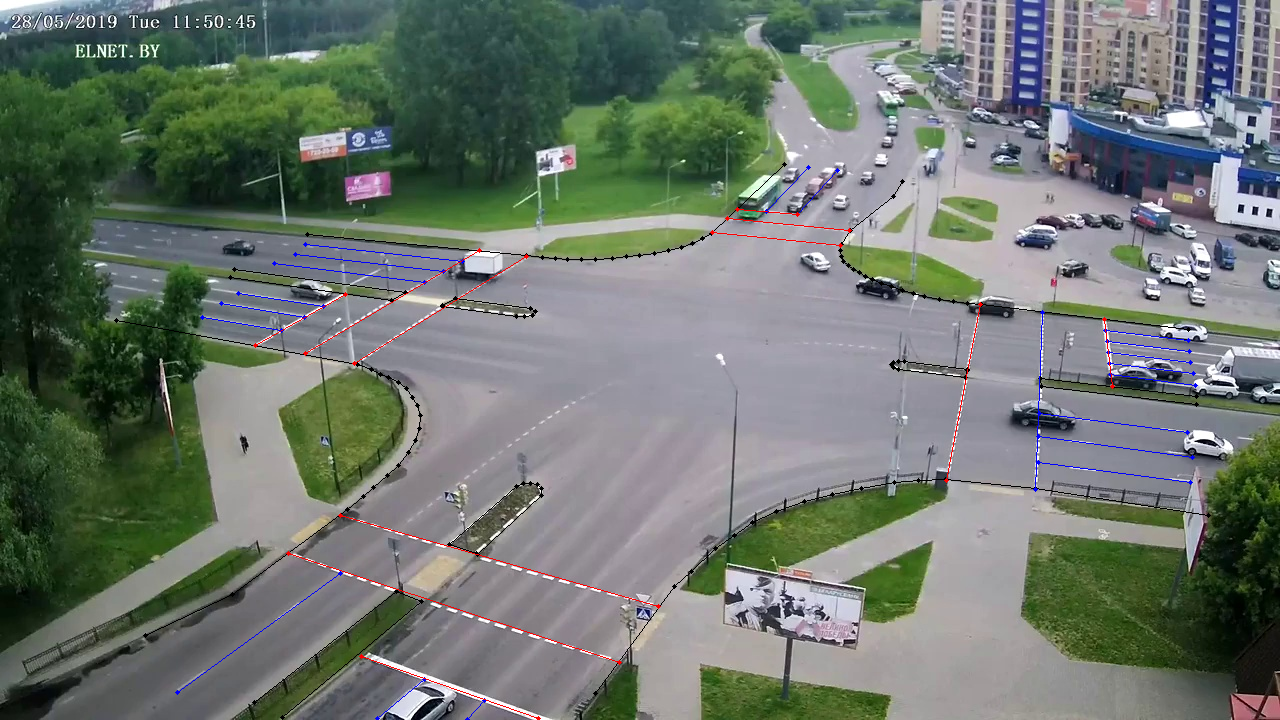
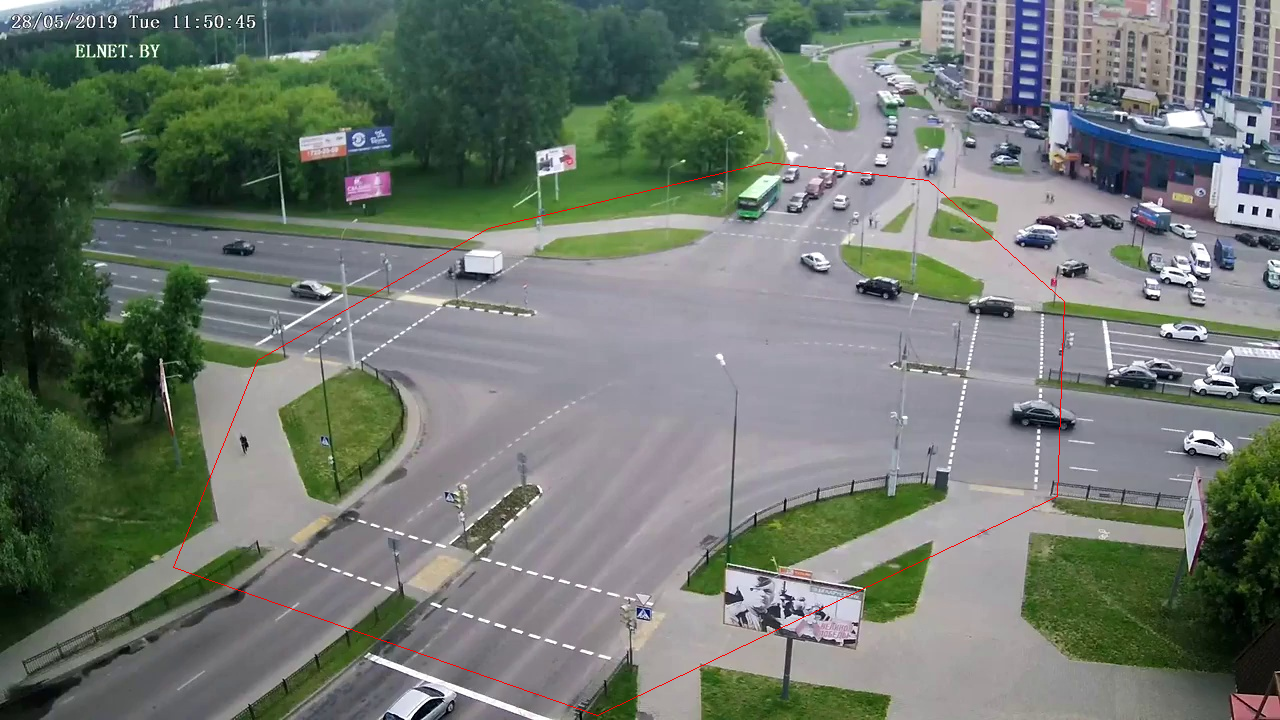
This is a python3 implementation of a framework to extract vehicle trajectories from traffic cameras.
DISCLAIMER: This project is not actively maintained and the code is provided as is.
Update submodules:
git submodule update --init --recursive
Setup a virtual environment with Python 3:
virtualenv -p /usr/bin/python3 ve_trajectory-extractor
source ve_trajectory-extractor/bin/activate
Install dependencies:
pip install -e .
Note: If pip install -e . fails because of numpy and Cython, you can install them mannually pip install numpy Cython before running pip install -e .
Download and save mask_rcnn_coco.h5 weights in traj_ext/object_det/mask_rcnn/Mask_RCNN/: https://github.com/matterport/Mask_RCNN/releases/download/v2.0/mask_rcnn_coco.h5
The run_trajectory_extraction.sh provides a short example to run the full pipeline for a given video:
./run_trajectory_extraction.sh
Note: By default it process the video used for test data, but the video can be changed in the script.
This tool is limited by:
- Not robust to occlusions as the detection-to-track association relies on visual information (detection overlap and visual tracking)
- Tracks can jump from one target object to another (identity switch):
- Due to erroneous detections taking two distinct objects as one single one
- High velocity of the target: Detections overlap in successive frame because two objects moved quicker than the framerate
To limit the occurrence of identity switches, re-training the detection network can improve detections, and therefore decrease the number of erroneous detections and identity switches.
Please refer to the Manual Inspection section to see how to use the manual inspection tool to correct/fix erroneous trajectories.
If you use this project in your work, please consider citing it with:
@INPROCEEDINGS{8814095,
author={A. {Clausse} and S. {Benslimane} and A. {de La Fortelle}},
booktitle={2019 IEEE Intelligent Vehicles Symposium (IV)},
title={Large-Scale extraction of accurate vehicle trajectories for driving behavior learning},
year={2019},
volume={},
number={},
pages={2391-2396},
keywords={cameras;image processing;learning (artificial intelligence);road vehicles;traffic engineering computing;autonomous vehicles;pedestrians;machine learning methods;single fixed monocular traffic cameras;driving behavior learning;vehicle trajectory dataset creation;vehicle trajectory extraction},
doi={10.1109/IVS.2019.8814095},
ISSN={},
month={June},}
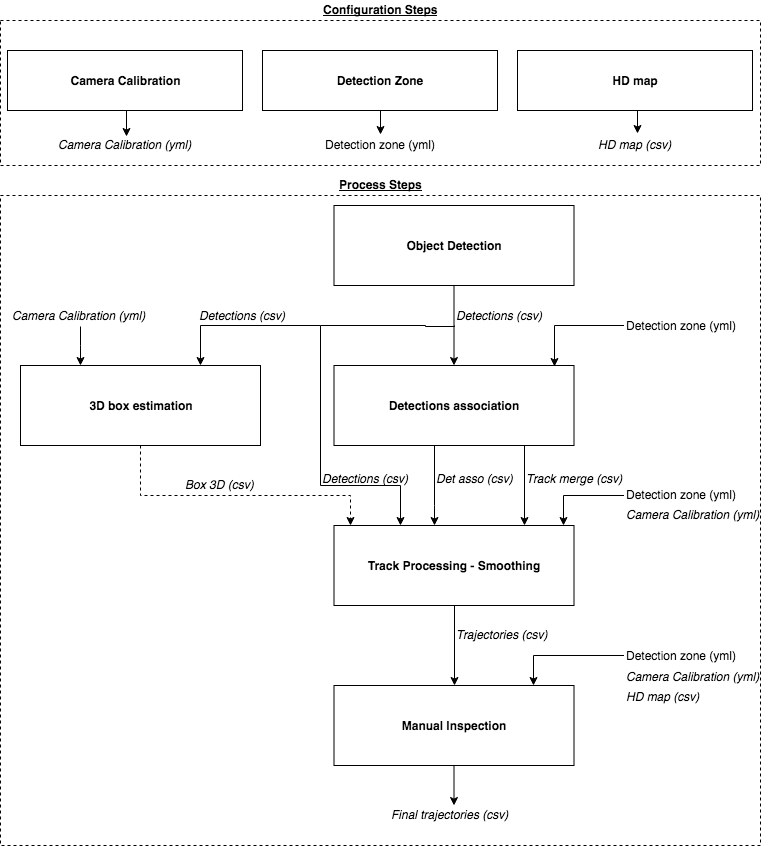
The process of extracting vehicles trajectories from traffic camera is composed of several steps. It is decomposed in different processes to allow for modularity and flexibility. The different processes generate outputs that will serve as inputs to the next steps (usually csv files).
Main steps:
- Camera Calibration: Estimate the position / orientation and focal length of the camera
- Object Detection: On each frame, detect object of interest (car, trucks, etc)
- Detections Association: Associate detections in successive frames to form tracks (e.g tracking-by-detections)
- Smoothing: Smooth the tracks to obtain good trajectories based on a dynamical model and measurement model (RTS smoother)
Optional steps:
- 3D box fitting: Fit generic fixed-size 3D box to the detection's mask provided by Mask-RCNN to obtain the vehicle position on the ground
- Manual Inspection: Allows to manually
- Detections:
- Delete wrong detections: e.g detections that merges several vehicles into one detections, etc
- Add detections to improve the tracking performances
- Merge tracks:
- Merge tracks that correspond to the same agent if they have not been merged by the track_merge process
- Correct for wrong tracks merge: Visual trackers might merge tracks from different vehicles
- Change track agent_type: e.g car, truck, bus, etc
- Detections:
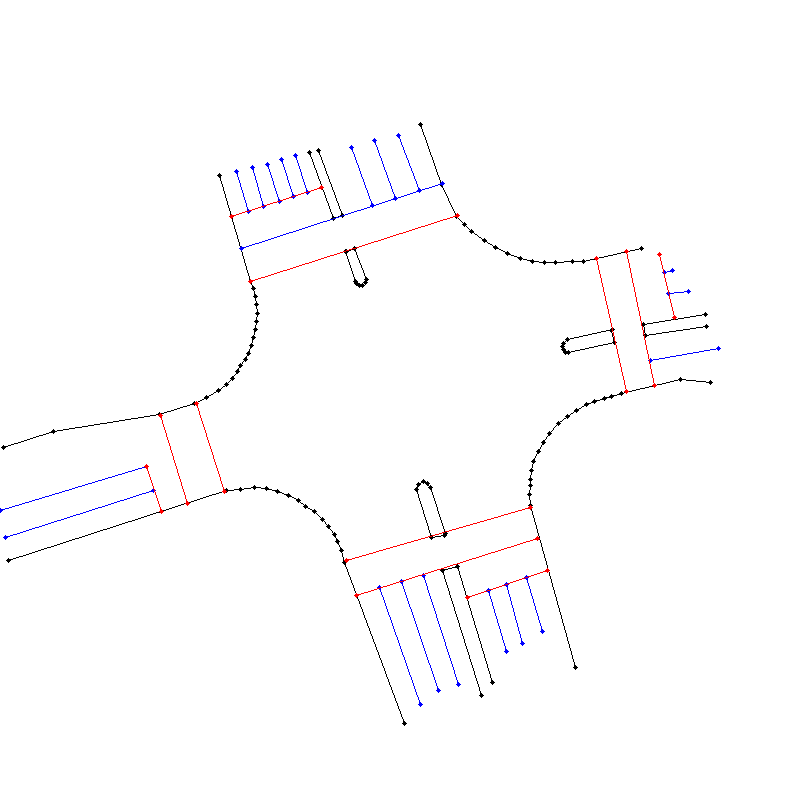
- HD Map: Create a map of the area from the camera point of view to ensure trajectory alignment with the map
Since we are interested in kinematics information of the objects (actual position on the ground, velocity), we need to determine the camera parameters:
- Position of the camera
- Orientation of the camera
- Focal Length (we assume the there is no distortion)
Details can be found in: Trajectory Extractor Write-Up
To calibrate the camera, you need to provide keypoints pixel positions with their associated Lat/Lon coordinates (or NED position), usually obtained by looking them up on Google Earth).
Run:
python traj_ext/camera_calib/run_calib_manual.py --help
Generate input file with -init flag, and fill camera_calib_manual_cartesian.csv or camera_calib_manual_latlon.csv with keypoints pairs:
- Pixel positions
- NED or Lat/Lon points
Note: For satellite view, add the -satellite flag to set the focal length of the camera manually to avoid singularity.
Input:
- Key points:
camera_calib_manual_cartesian.csvorcamera_calib_manual_latlon.csv
Outputs:
- Camera Calibration:
XXXXX_cfg.yml
It is possible to create a HD map from the camera view using the previously obtained camera model.
Run:
python traj_ext/hd_map/run_generate_HD_map.py --help
Inputs:
- Camera image
- Origin lat/lon
Outputs:
- HD map
XXXXX_hd_map.csv
In the camera field of view, it is possible to define a detection zone that will be used to track agents only in this zone.
Run:
python traj_ext/camera_calib/run_detection_zone.py --help
Inputs:
- Camera image
- Camera calibration
XXXXX_cfg.yml
Outputs:
- Detection Zone FNED
XXXXX_detection_zone.yml - Detection Zone Image
XXXXX_detection_zone_im.yml
Once Mask-RCCN is setup properly, run:
python traj_ext/object_det/mask-rcnn/run_detections_csv.py --help
Inputs:
- Images
- Cropping coordonates
Outputs:
- Detections files:
det/csv/ - Detections images:
det/img/
Note:
- You can use
/object_det/run_saveimages.pyscript to extract frames as images from a video file (mp4) - To improve performances, the object detector can be re-trained / fine-tuned for a specific traffice camera: https://github.com/matterport/Mask_RCNN#training-on-your-own-dataset
Issues: Please refer to https://github.com/matterport/Mask_RCNN if you have some trouble setting-up Mask-RCNN
This steps aims at grouping detections into tracks, it consists of two steps:
- Detection associations: We compute the overlap between masks in successive frames and we associate the best matching pairs (inspired from
IOU Tracker: https://github.com/bochinski/iou-tracker) - Track merging: When a track ends in the middle of the detection zone, we create a visual tracker (
CRSTtracker) to try to match it with a track that starts afterwards (bridging gaps in tracking)
Run :
python traj_ext/det_association/run_det_association.py --help
Inputs:
- Images
- Detections files:
det/csv/ - Detection Zone Image
XXXXX_detection_zone_im.yml
Outputs:
- Detections association files:
det_asso/csv - Detections association images:
det_asso/img - Track merge:
det_asso/XXXXXX_tracks_merge.csv
From the masks detected by Mask-RCNN, we compute a 3D box associated by maximizing the overlap between the mask and the 3D box projected in the image plane. This allows to reduce the re-projection error when computing the 3D world position of the vehicle from the detection in the image.
Run:
python traj_ext/3Dbox_fitting/box_detection/run_optim_3Dbox_mono.py --help
Inputs:
- Images
- Detections files:
det/csv/ - Camera Calibration:
XXXXX_cfg.yml
Outputs:
- Box estimation files:
box3D/csv - Box estimation images:
box3D/img
This step aims at taking the raw tracks measurements and create smooth world frame trajectories with: position, velocity and heading of the vehicles using a Rauch-Tung-Striebel Smoother. It uses:
- Process model: Bycicle Model to capture the underlying kinematics of vehicles
- Measurement model: Pin-Hole camera model to capture the noise / uncertainty directly from pixel position.
Details can be found in: Trajectory Extractor Write-Up
Run:
python traj_ext/postprocess_track/run_postprocess.py --help
Inputs:
- Images
- Detections files:
det/csv/ - Detections association files:
det_asso/csv - Track merge:
det_asso/XXXXXX_tracks_merge.csv - Camera Calibration:
XXXXX_cfg.yml - Detection Zone FNED
XXXXX_detection_zone.yml
Outputs:
- Trajectories:
traj/csv/XXXXX_traj.csv - Trajectories time:
traj/csv/XXXXX_time_traj.csv - Trajectories meta:
traj/csv/XXXXX_traj_meta.csv - Trajectories not merged:
traj/csv/XXXXX_traj_not_merged.csv - Trajectory ignore:
traj/csv/XXXXX_traj_ignore.csv - Trajectory time ignore:
traj/csv/XXXXX_time_ignore.csv - Trajectory traj reverse:
traj/csv/XXXXX_traj_reverse.csv - Trajectory type correct:
traj/csv/XXXXX_traj_type_corr.csv
After the smoothing of the trajectories, we can manually inspect the trajectories to correct for erroneous:
- Detections:
- Delete wrong detections: e.g detections that merges several vehicles into one detections, etc
- Add detections to improve the tracking performances
- Merge tracks:
- Merge tracks that correspond to the same agent if they have not been merged by the track_merge process
- Correct for wrong tracks merge: Visual trackers might merge tracks from different vehicles
- Change track agent_type: e.g car, truck, bus, etc
Run:
python traj_ext/visualization/run_inspect_traj.py --help
Inputs:
- Images
- Detections files:
det/csv/ - Detections association files:
det_asso/csv - Track merge:
det_asso/XXXXXX_tracks_merge.csv - Camera Calibration:
XXXXX_cfg.yml - Detection Zone FNED
XXXXX_detection_zone.yml - Trajectories:
traj/csv/XXXXX_traj.csv - Trajectories time:
traj/csv/XXXXX_time_traj.csv - Trajectories meta:
traj/csv/XXXXX_traj_meta.csv - Trajectories not merged:
traj/csv/XXXXX_traj_not_merged.csv - Trajectory ignore:
traj/csv/XXXXX_traj_ignore.csv - Trajectory time ignore:
traj/csv/XXXXX_time_ignore.csv - Trajectory traj reverse:
traj/csv/XXXXX_traj_reverse.csv - Trajectory type correct:
traj/csv/XXXXX_traj_type_corr.csv
Output:
- Trajectories:
traj_inspect/csv/XXXXX_traj.csv - Trajectories time:
traj/csv/XXXXX_time_traj.csv
Note:
- Adding / Deleting detections requires to re-run the Detection Association step
- Adding / Deleting detections association requires to re-run the Traj PostProcess - Smoothing step
- Changing the Track Merge requires to re-run the Traj PostProcess - Smoothing step
- Changing the Agent Type requires to re-run the Traj PostProcess - Smoothing step
The visualizer provides a way to visualize the trajectories on the camera images, as well as on the bird-view map. It also allows to export annotated images with the trajectories.
Run:
python traj_ext/visualization/run_visualizer.py --help
The output of each block consists of img and/or csv files and serves as input for other blocks.
The directory structure is flexible, but here is a suggested folder structure (used in the run_trajectory_extraction.sh example script:
DATA
└─── img (images from the video)
└─── output
|    └─── vehicles
|         └─── det
|              └─── csv
|              └─── img
|         └─── det_association
|              └─── csv
|              └─── img
|              └─── XXXXXX_tracks_merge.csv
|         └─── box3D
|              └─── csv
|              └─── img
|         └─── traj
|              └─── csv
|              └─── img
|         └─── traj_inspect
|              └─── csv
|    └─── pedestrians
|         └─── det
|              └─── csv
|              └─── img
|         └─── det_association
|              └─── csv
|              └─── img
|              └─── XXXXXX_tracks_merge.csv
|         └─── box3D
|              └─── csv
|              └─── img
|         └─── traj
|              └─── csv
|              └─── img
|         └─── traj_inspect
|              └─── csv
|    └─── visualizer
|         └─── img_annotated
|         └─── img_hdmap
|         └─── img_concat
|         └─── img_raw
└─── XXXXXX_detection_zone.yml
└─── XXXXXX_detection_zone_im.yml
└─── XXXXXX_cam_street_cfg.yml
└─── XXXXXX_cam_street.png
└─── XXXXXX_cam_sat_cfg.yml
└─── XXXXXX_cam_sat.png
└─── XXXXXX_hd_map.csv
Create a video from images:
ffmpeg -framerate 10 -pattern_type glob -i '*.png' video.mp4
Slice video:
ffmpeg -i source-file.foo -ss 0 -t 600 first-10-min.m4v
Install python3 and virtualenv: http://docs.python-guide.org/en/latest/dev/virtualenvs/
Instantiate the virtualenv, in the python folder:
virtualenv -p /usr/bin/python3 ve_trajectory-extractor
Before running the code, make sure you activate the virtualenv:
source ve_trajectory-extractor/bin/activate
