- demo from official website是来自官网文档中的demo,自己练习用的,请参考https://facebook.github.io/react/docs/hello-world.html
- demos是5个react实例,参考http://blog.csdn.net/iambinger/article/details/51803606
- 下面只讲述5个react的实例,虽然仅有5个,但在常用的开发中,几乎会包含大部分的情况,只要熟练掌握这5个demo,相信一定会解决大部分问题。
- demo都是采用ES6语法写的,不懂的可以学习一下。
<!DOCTYPE html>
<html>
<head>
<meta charset="UTF-8" />
<title>Hello World</title>
<script src="https://unpkg.com/react@latest/dist/react.js"></script>
<script src="https://unpkg.com/react-dom@latest/dist/react-dom.js"></script>
<script src="https://unpkg.com/babel-standalone@6.15.0/babel.min.js"></script>
<style type="text/css">
#name{
background: #5bc0de;
color: white;
font-size: 24px;
}
</style>
</head>
<body>
<button id="name">DEMO1</button>
<div id="root"></div>
<script type="text/babel">
class Text extends React.Component {
render(){
return (
<div className="text">
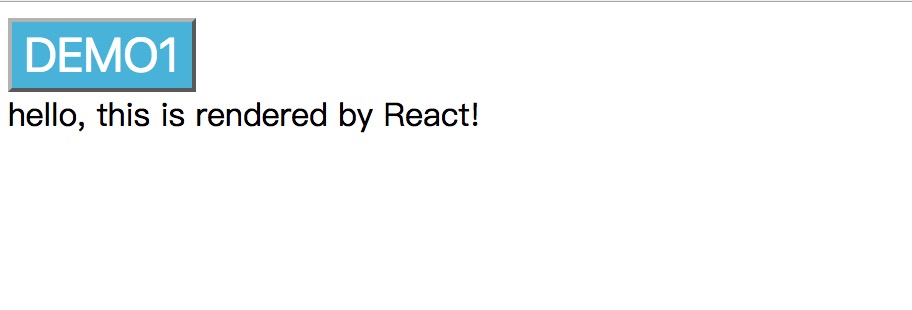
hello, this is rendered by React!
</div>
)
}
}
ReactDOM.render(
<Text/>,
document.getElementById('root')
);
</script>
</body>
</html>
- 页面中,只有
<div id='name'>这里的内容是使用react渲染出来的,代码中这里是空的,依赖下面的js进行渲染 - 首先看下
class Text extends React.Component这块,这里是声明一个组件,名字叫做Text,名字随意起,但第一个字母必须大写,用来区分html中原生的标签
class Text extends React.Component {
        render(){
          return (
            <div className="text">
              hello, this is rendered by React!
            </div>
          )
        }
      }
- 其中参数有很多,但都可以省略,唯有
render不可以省略,因为这是用来表述这个插件被加载后,显示的是什么样子,它的返回结果,就是加载在页面上最终的样式。
ReactDOM.render(
   <Text/>,
    document.getElementById('root')
);
这段代码是用来渲染react组件的,第一个参数是组件,第二个参数是要渲染的位置。
- 使用
<Text/>的 方式就可以实例化组件,或者写成<Text></Text>,要注意下,react中标签的闭合非常严格,任何标签的关闭与打开必须一一对应,否则会报错。 - 到目前为止,就完成了一次渲染,将Text组件render函数返回的内容,填充到了id=root的div中。
往往在使用中,文本的内容并不是写死的,而是需要被我们指定,这样组件才能更通用。下面介绍下,如何向react中传递参数。
###代码:
<!DOCTYPE html>
<html>
  <head>
    <meta charset="UTF-8" />
    <title>Hello World</title>
    <script src="https://unpkg.com/react@latest/dist/react.js"></script>
    <script src="https://unpkg.com/react-dom@latest/dist/react-dom.js"></script>
    <script src="https://unpkg.com/babel-standalone@6.15.0/babel.min.js"></script>
    <style type="text/css">
      #name{
        background: #5bc0de;
        color: white;
        font-size: 24px;
      }
    </style>
  </head>
  <body>
    <button id="name">DEMO1</button>
    <div id="root"></div>
    <script type="text/babel">
      class Text extends React.Component {
        render(){
          return (
            <div className="text">
              hello, this is rendered by {this.props.name}! age={this.props.age}
            </div>
          )
        }
      }

      ReactDOM.render(
        <Text name="React" age={11}/>,
        document.getElementById('root')
      );
    </script>
  </body>
</html>
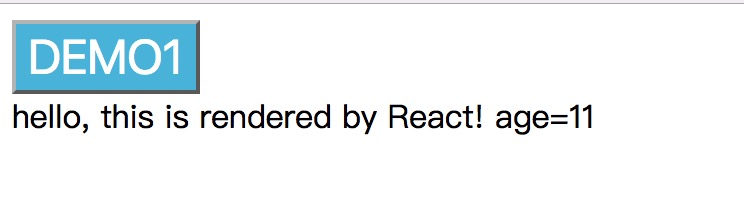
- 首先,这个大体上跟第一个demo类似,唯有实例化Text时,多了参数。
- 当我们传递参数时,写了两种方式,一种是
name="react"另一种是age={11},这两种写法是有区别的,并不仅仅因为一个是str,一个是int。如果是str这种类型,写成name="xxx"或者name={"xxx"}都是可以的,加了{}的意思就是js中的变量,更加精确了。而后者age={181}是不可以去掉{}的,这样会引起异常,所以这里要注意下,并且建议任何类型都加上{}来确保统一。 - 当在Text初始化时添加了参数,在组件内部,都收集在this.props中,使用时只要{this.props.name}既可以获取name对应的值,如果取得key并不存在,这里不会报错,只是取到的值是空的。当然可以在
getDefaultProps中定义默认的props值,即使在没有传递参数的情况下,也能取到默认值。 - props中的参数,在初始化传递后,便不能再修改。
state算是react的核心了,任何页面的变化,刷新都是state的变化引起。在react中,只要调用了setState都会引起render的重新执行。下面介绍下如何通过键盘事件触发状态变化。
<!DOCTYPE html>
<html>
<head>
<meta charset="UTF-8" />
<title>Hello World</title>
<script src="https://unpkg.com/react@latest/dist/react.js"></script>
<script src="https://unpkg.com/react-dom@latest/dist/react-dom.js"></script>
<script src="https://unpkg.com/babel-standalone@6.15.0/babel.min.js"></script>
<style type="text/css">
#name{
background: #5bc0de;
color: white;
font-size: 24px;
}
</style>
</head>
<body>
<button id="name">DEMO1</button>
<div id="root"></div>
<script type="text/babel">
class Text extends React.Component {
constructor(props) {
super(props);
this.state = {
name: this.props.name
};
this.keyUp = this.keyUp.bind(this);
}
keyUp(e) {
this.setState({name: e.target.value}, function() {
console.log(this.state.name);
});
}
render(){
return (
<div className="text">
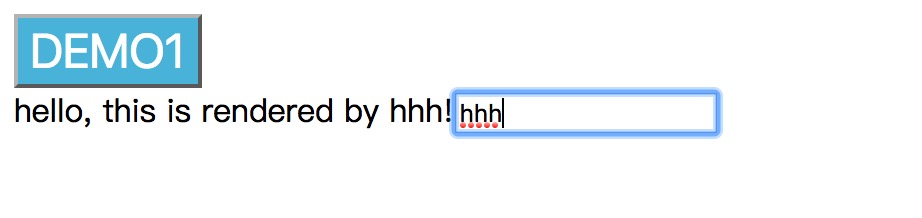
hello, this is rendered by {this.state.name}!
<input type="text" name="" onKeyUp={this.keyUp} />
</div>
)
}
}
ReactDOM.render(
<Text name="react" age={11}/>,
document.getElementById('root')
);
</script>
</body>
</html>
- 这次组件中多了一个函数,
keyUp,keyUp是我自定义的函数,用来响应键盘事件的。 - 我们先看constructor函数,这里constructor接收props,并采用super(props)去继承父组件的方法和属性,
this.state = { name: this.props.name };是初始化state;另外,this.keyUp = this.keyUp.bind(this);是绑定this,否则this是react组件支撑实例,而不是组件实例。 - 再看render函数,文字渲染中加了{this.state.name},这个是react内部的状态,可以理解是存储数据的k-v结构,这里的v支持的对象较多。{this.state.name}就是引用状态中的name属性,与props的区别在于,如果state中不存在这个属性,是会报错的,所以我们要在constructor中初始化这个状态的初始值。
- render中还多了一个,onKeyUp是注册键盘键弹起的事件,当按键按下后弹起,就会触发onKeyUp事件,然后通过绑定的this.keyUp,将事件传递给了自己定义的keyUp函数中。
- keyUp函数中,使用了this.setState({name: e.target.value}),setState是react中内部的函数,专门用来更新状态的,这里是讲状态中name的值变更为引起事件的value值。
- 在react中,每次状态的变化,都会引起render函数的重新渲染,这是它自己的机制,我们无需人为处理,当键盘输入内容时,会触发状态变化,导致render重新渲染,渲染的过程会从state中取出变量,所以我们就看到了页面的内容发生了变化。
- 我们在setState下面加了一个console,通过控制台可以发现,每次打印的值并不是当前输入的值,而是上一次输入的值,这是怎么回事呢?在setState中,这是一个异步处理的函数,并不是同步的,console在setState后立刻执行了,所以这时候状态还没有真正变更完,所以这里取到的状态仍旧是更新前的。这里要特殊注意下。如果需要在更新状态后,再执行操作怎么办呢,setState还有第二个参数,接受一个callback,我们尝试将keyUp中代码改成这样
this.setState({name: e.target.value}, function(){
    console.log(this.state.name);
})
- 这时候log打印出来的只就是我们期望的内容,当每次状态更新成功后,都会调用传进去的callback函数。
- react中渲染dom有自己的优化方式,首先它在内存中构建一套虚拟的dom,每次更新前将虚拟dom与浏览器中dom对比,只讲有变化的部分进行更新,这样大大的提高了性能。或者我们可以重写函数来控制是否刷新,当然这种方式我们并不提倡。
上一节讲到状态变化触发render的重新渲染,这里将常用的网络请求引入,结合到状态变化中。
<!DOCTYPE html>
<html>
  <head>
    <meta charset="UTF-8" />
    <title>Hello World</title>
    <script src="https://unpkg.com/react@latest/dist/react.js"></script>
    <script src="https://unpkg.com/react-dom@latest/dist/react-dom.js"></script>
    <script src="https://unpkg.com/babel-standalone@6.15.0/babel.min.js"></script>
    <script src="https://cdn.bootcss.com/jquery/3.2.1/jquery.min.js"></script>
    <style type="text/css">
      #name{
        background: #5bc0de;
        color: white;
        font-size: 24px;
      }
    </style>
  </head>
  <body>
    <button id="name">DEMO1</button>
    <div id="root"></div>
    <script type="text/babel">
      class Text extends React.Component {
        constructor(props) {
          super(props);
          this.state = {
            username: '',
            lastGistUrl: '',
            dateTime: ''
          }
          this.request = this.request.bind(this);
        }

        request() {
          $.ajax({
            type: 'get',
            url: this.props.url,
            success: function(result){
              var lastGist = result[0];
              this.setState({
                username: lastGist.owner.login,
                lastGistUrl: lastGist.html_url,
                dateTime: new Date().getTime()
              });
            }.bind(this)
          });
        }
        componentDidMount() {
          setInterval(this.request, 1000)
        }

        render(){
          return (
            <div className="text">
              {this.state.username}用户最新的Gist地址为:
              <a href={this.state.lastGistUrl}>{this.state.lastGistUrl}</a>
              <div>{this.state.dateTime}</div>
            </div>
          )
        }
      }

      ReactDOM.render(
        <Text url="https://api.github.com/users/octocat/gists"/>,
        document.getElementById('root')
      );
    </script>
  </body>
</html>

###讲解:
- 这个例子中,页面每秒会请求一次网络,将请求到的数据中时间戳更新到状态中。
- 仍旧是先看代码,相比于上一个例子,这里多了两个函数
request和componentDidMount,其中request是请求网络的函数,componentDidMount是react内部的函数,也是react生命周期的一部分,它会在render第一次渲染前执行,而且只会执行一次。 - 先看request,一个普通的ajax请求,在success回调中,服务器返回result,然后将里面的值赋给state中的username、lastGistUrl属性。这时状态发生了变化,render函数会重新渲染。
- 为什么success回调函数最后会加一个bind(this)?因为这个函数已经不是react内部的函数了,它是一个外部函数,它里面的this并不是react组件中的this,所以要将外部函数绑定到react中,并能使用react内部的方法,例如setState,就要在函数最后bind(this),这样就完成了绑定。
- 再看下
componentDidMount函数,这个函数在render渲染前会执行,里面的代码也很简单,增加了一个定时器,1秒钟执行一次request。 - 这里应该在加一个回调,就是定时器在初始化时创建,却没有对应的销毁,所以在组件销毁的时候,应该在这个生命周期中销毁定时器。
在封装react时,我们往往按照最小单位封装,例如封装一个通用的div,一个通用的span,或者一个通用的table等,所以各自组件对应的方法都会随着组件封装起来,例如div有自己的方法可以更改背景色,span可以有自己的方法更改字体大小,或者table有自己的方法来更新table的内容等~ 这里我们用一个div相互嵌套的例子来查看父子组件如何相互嵌套及调用各自的方法。在下面的例子中,父组件与子组件都有一个方法,来改变自身的背景色,我们实现父子组件相互调用对方的方法,来改变对方的背景色。
<!DOCTYPE html>
<html>
<head>
<meta charset="UTF-8" />
<title>Hello World</title>
<script src="https://unpkg.com/react@latest/dist/react.js"></script>
<script src="https://unpkg.com/react-dom@latest/dist/react-dom.js"></script>
<script src="https://unpkg.com/babel-standalone@6.15.0/babel.min.js"></script>
<script src="https://cdn.bootcss.com/jquery/3.2.1/jquery.min.js"></script>
<style type="text/css">
.child{
height: 100px;
width: 200px;
display: inline-block;
}
li{
list-style: none;
display: inline-block;
}
</style>
</head>
<body>
<button id="name">DEMO1</button>
<div id="root"></div>
<script type="text/babel">
class Parent extends React.Component{
constructor(props) {
super(props);
this.state={
background: ''
};
this.child1ChangeColor=this.child1ChangeColor.bind(this);
this.child2ChangeColor=this.child2ChangeColor.bind(this);
this.changeColor=this.changeColor.bind(this);
}
child1ChangeColor(e) {
this.refs['child1'].changeColor(e)
}
child2ChangeColor(e) {
this.refs['child2'].changeColor(e)
}
changeColor(e) {
this.setState({background: $(e.target).css("background-color")});
}
render() {
return (
<div className="parent" style={{background: this.state.background}}>
<br/>
<ul className="list-inline">
<li>对应第一个child</li>
<li><button style={{background:"#286090"}} onClick={this.child1ChangeColor}> </button></li>
<li><button href="#" style={{background:"#31b0d5"}} onClick={this.child1ChangeColor}> </button></li>
<li><button href="#" style={{background:"#c9302c"}} onClick={this.child1ChangeColor}> </button></li>
<li><button href="#" style={{background:"#ec971f"}} onClick={this.child1ChangeColor}> </button></li>
<li><button href="#" style={{background:"#e6e6e6"}} onClick={this.child1ChangeColor}> </button></li>
</ul>
<ul className="list-inline">
<li>对应第二个child</li>
<li><button href="#" style={{background:"#286090"}} onClick={this.child2ChangeColor}> </button></li>
<li><button href="#" style={{background:"#31b0d5"}} onClick={this.child2ChangeColor}> </button></li>
<li><button href="#" style={{background:"#c9302c"}} onClick={this.child2ChangeColor}> </button></li>
<li><button href="#" style={{background:"#ec971f"}} onClick={this.child2ChangeColor}> </button></li>
<li><button href="#" style={{background:"#e6e6e6"}} onClick={this.child2ChangeColor}> </button></li>
</ul>
<hr/>
<Child ref="child1" parentChangeColor={this.changeColor}></Child>
<Child ref="child2" parentChangeColor={this.changeColor}></Child>
</div>
)
}
}
class Child extends React.Component{
constructor(props) {
super(props);
this.state={
background: ''
};
this.changeColor=this.changeColor.bind(this);
}
changeColor(e) {
this.setState({background: $(e.target).css("background-color")});
}
render() {
return (
<div className="child" style={{background: this.state.background}}>
<ul className="list-inline">
<li><button href="#" style={{background:"#286090"}} onClick={this.props.parentChangeColor}> </button></li>
<li><button href="#" style={{background:"#31b0d5"}} onClick={this.props.parentChangeColor}> </button></li>
<li><button href="#" style={{background:"#c9302c"}} onClick={this.props.parentChangeColor}> </button></li>
<li><button href="#" style={{background:"#ec971f"}} onClick={this.props.parentChangeColor}> </button></li>
<li><button href="#" style={{background:"#e6e6e6"}} onClick={this.props.parentChangeColor}> </button></li>
</ul>
</div>
)
}
}
ReactDOM.render(
<Parent />,
document.getElementById('root')
);
</script>
</body>
</html>
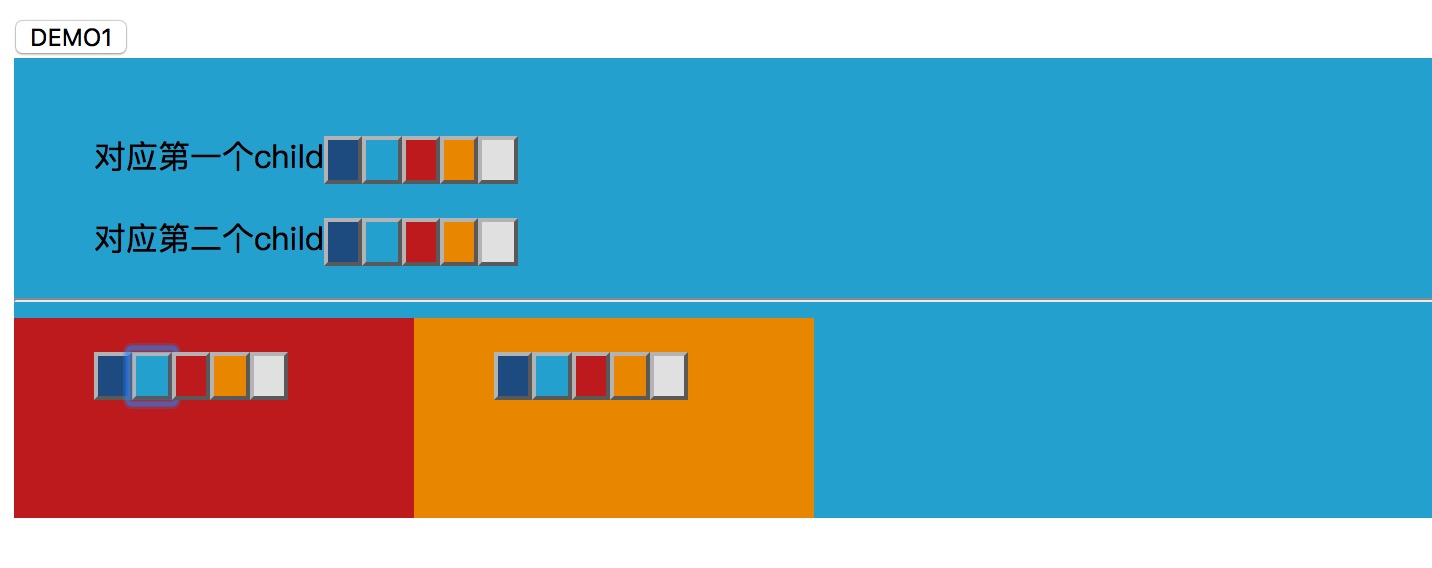
- 首先说下,刚打开页面并不是这样的,背景都是白色的。这里的截图是点击各个按钮后变色的样子。
- 在这个例子中,蓝色的div是一个父组件,它里面包含了两个子组件,分别是红色和橙色,这两个子组件实际上是一模一样的。我们先看下父组件如何调用子组件。
- 代码中,子组件里面定义了changeColor函数,用来接收onClick事件,并将点击的按钮的data-color属性值作为色值,更改到state中的color属性中,然后触发render来更新背景色。在父组件调用子组件时,我们写了,里面的ref="child1"就是react中提供的一个属性标签,它与普通的props不同,这里写上ref="xxx"后,在父组件中,使用this.refs["child1"]就可以引用对应的子组件,当然这里的ref的值是可以随意定义,只要不重复就好。这样就可以实现组组件引用子组件,然后直接调用里面的方法就好,例如
child1ChangeColor中就有this.refs["child1"].changeColor(e);的使用。连起来说下逻辑,在点击父组件中第一列中的按钮后,触发onClick事件,然后onClick事件后,传递到child1ChangeColor后,将事件传递进入,然后再次传递给子组件的changeColor中,因为子组件的changeColor是更改子组件自身的state,所以这时候子组件再次渲染,于是改变了颜色。这就是父组件调用子组件的逻辑。 - 再说下子组件何如调用父组件的方法,父组件自身也有一个changeColor函数,用来改变自身的背景色。当父组件调用子组件时,,通过props,也就是第二个例子中讲的那样,通过参数的方式传递给子组件,这样子组件中就可以使用this.props.parentChangeColor,来把子组件的onClick事件传递给父组件的changeColor方法中,来改变父组件的背景色。这就是子组件调用父组件函数的方法。
- 还有一种情况,就是一个父组件下有多个子组件,但是子组件中并没有直接的关系,这时候如果一个子组件调用另一个子组件的方法,就得通过他们共同的父组件来作为中转,在父组件中增加函数来作为中转的函数,来实现子组件间的调用。