A simple 1-click way to install and use Stable Diffusion on your own computer. No dependencies or technical knowledge required.


️🔥🎉 New! Live Preview, More Samplers, In-Painting, Face Correction (GFPGAN) and Upscaling (RealESRGAN) have been added!
This distribution currently uses Stable Diffusion 1.4. Once the model for 1.5 becomes publicly available, the model in this distribution will be updated.
- No Dependencies or Technical Knowledge Required: 1-click install for Windows 10/11 and Linux. No dependencies, no need for WSL or Docker or Conda or technical setup. Just download and run!
- Face Correction (GFPGAN) and Upscaling (RealESRGAN)
- In-Painting
- Live Preview: See the image as the AI is drawing it
- Lots of Samplers: ddim, plms, heun, euler, euler_a, dpm2, dpm2_a, lms
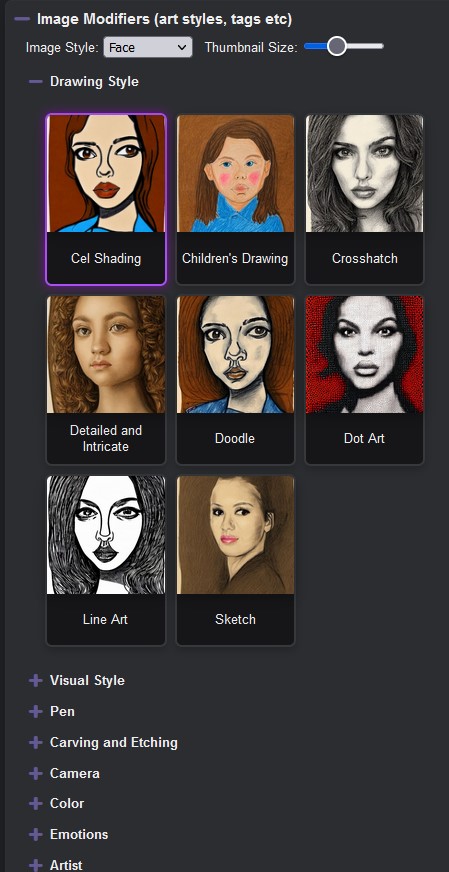
- Image Modifiers: A library of modifier tags like "Realistic", "Pencil Sketch", "ArtStation" etc. Experiment with various styles quickly.
- New UI: with cleaner design
- Waifu Model Support: Just replace the
stable-diffusion\sd-v1-4.ckptfile after installation with the Waifu model - Supports "Text to Image" and "Image to Image"
- NSFW Setting: A setting in the UI to control NSFW content
- Use CPU setting: If you don't have a compatible graphics card, but still want to run it on your CPU.
- Auto-updater: Gets you the latest improvements and bug-fixes to a rapidly evolving project.
- Low Memory Usage: Creates 512x512 images with less than 4GB of VRAM!


- Windows 10/11, or Linux. Experimental support for Mac is coming soon.
- An NVIDIA graphics card, preferably with 4GB or more of VRAM. But if you don't have a compatible graphics card, you can still use it with a "Use CPU" setting. It'll be very slow, but it should still work.
You do not need anything else. You do not need WSL, Docker or Conda. The installer will take care of it.
-
Download for Windows or for Linux.
-
Extract:
- For Windows: After unzipping the file, please move the
stable-diffusion-uifolder to yourC:(or any drive like D:, at the top root level), e.g.C:\stable-diffusion-ui. This will avoid a common problem with Windows (file path length limits). - For Linux: After extracting the .tar.xz file, please open a terminal, and go to the
stable-diffusion-uidirectory.
- Run:
- For Windows:
Start Stable Diffusion UI.cmdby double-clicking it. - For Linux: In the terminal, run
./start.sh(orbash start.sh)
This will automatically install Stable Diffusion, set it up, and start the interface. No additional steps are needed.
To Uninstall: Just delete the stable-diffusion-ui folder to uninstall all the downloaded packages.
Open http://localhost:9000 in your browser (after running step 3 previously). It may take a few moments for the back-end to be ready.
- Enter a text prompt, like
a photograph of an astronaut riding a horsein the textbox. - Press
Make Image. This will take some time, depending on your system's processing power. - See the image generated using your prompt.
- Click
Browse..next toInitial Image. Select your desired image. - An optional text prompt can help you further describe the kind of image you want to generate.
- Press
Make Image. See the image generated using your prompt.
You can use Face Correction or Upscaling to improve the image further.
Pro tip: You can also click Use as Input on a generated image, to use it as the input image for your next generation. This can be useful for sequentially refining the generated image with a single click.
Another tip: Images with the same aspect ratio of your generated image work best. E.g. 1:1 if you're generating images sized 512x512.
Please try the common troubleshooting steps. If that doesn't fix it, please ask on the discord server, or file an issue.
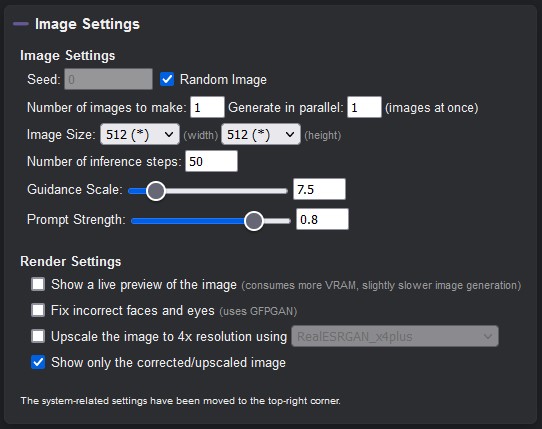
You can also set the configuration like seed, width, height, num_outputs, num_inference_steps and guidance_scale using the 'show' button next to 'Advanced settings'.
Use the same seed number to get the same image for a certain prompt. This is useful for refining a prompt without losing the basic image design. Enable the random images checkbox to get random images.

If there are any problems or suggestions, please feel free to ask on the discord server or file an issue.
Also, please feel free to submit a pull request, if you have any code contributions in mind. Join the discord server for development-related discussions, and for helping other users.
The authors of this project are not responsible for any content generated using this interface.
The license of this software forbids you from sharing any content that violates any laws, produce any harm to a person, disseminate any personal information that would be meant for harm, spread misinformation, or target vulnerable groups. For the full list of restrictions please read the license. You agree to these terms by using this software.