VDC Screen Editor
Commodore 128 80 column screen editor
Contents:

Version history and download
Version v099-20220324-1527:
- Major overhaul of memory management by moving many functions to memory overlays. Gives room for new functionality (as before I did not have room left)
- Added statusbar. Is enabled by default, can be toggled to show or not by pressing F6 in every mode.
- Statusbar autohides if you move the cursor to the lowest visible line, shows again if enabled if moving up again
- Statusbar shows present mode, co-ordinates, plot screencode (visual and as hexcode), plot color (visual and as number) and shows REV UND BLI ALT if these attributes (reverse, underline, blink and alternate charset) are enabled, shows nothing if disabled. Also hints at F8 for help.
- Added Try mode: pressing T shows the present selected character as plotted without cursor blinking. Pressing space in this mode plots the character for real, any other character cancels and returns without plotting.
- Tweaked pulldown menus so that the cyan also is visible different from yellow on a monochrome monitor. Added a minus to show the actual selection to also be able to distinguish selected option without needing the colors.
- Added cancel option in all load and save dialogues by pressing ESC or STOP on devide ID or filename input
- Small change: title screen shows load progress
Version v090-20220309-1618:
- Bugfix in 'does file exist' check
Version v090-20220307-1210:
- Minor tweaks to VDCSE2PRG:
- Show message if started in 40 column mode
- Leave program with standard charset and clear screen (in 80 column mode)
Version 090-20220227-0036:
- Added VDCSE2PRG utility
Version 090-20220221-0920:
- Added palette mode, including visual PETSCII mode
- Added favorite slots
- Changing selected character in the character editor now also changes selected character in main mode
- Made the disk images bootable
- Other minor optimizations
- (thanks to jab / Artline Designs for hints and inspiration )
Version 090-20220103-1000:
- Bugfix for plotting not working with offsets bigger than zero
Version 090-20210922-2251:
- First released beta version
Known issues and bugs
Crash on save screen after being idle for half an hour in VICE
Advice because of this bug is that if you use VICE instead of original hardware to run VDCSE to save your work often, at least every 15 minutes (which might be a good advice on other platforms as well).
Introduction
VDC Screen Editor is an editor to create text based screens for the Commodore 128 VDC 80 column mode. It fully supports using user defined character sets and allows the use of two 256 character character sets at the same time.
Main features of the program:
- Support for screen maps larger than 80x25 characters. Screens can be up to 30 KiB (30.720 bytes), all sizes fitting in that memory with width of 80 at minimum and heigth of 25 at minimum are supported. NB: As both the character data as the attribute data needs to be stored, a screen takes width times height times 2 bytes in storage. So 30k would fit up to 7 standard 80x25 screens to be distributed over width and height, so e.g. 2 screens wide and 3 screens high (160x75 characters).
- Supports resizing canvas size, clear or fill the canvas
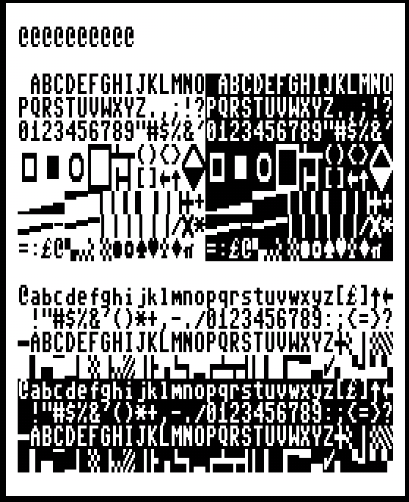
- Support for loading two user defined charsets (standard charset and alternate charset, should be standard 'C64' charsets of 256 characters of 8 bits width and 8 bits height).
- Includes a simple character editor to change characters on the fly and directly see the result in your designed screen (for editing a full character set one of the many alternatives for C64 character set editing is suggested).
- Supports all the attribute values the VDC offers, blink, underline, reverse and alternate character set. For example the reverse attribute removes the need to have a reverse copy of every character set stored in the upper 128 positions of the character set, creating more positions that can be freely used to design own graphics.
- 64KiB VDC memory only: An undo/redo system is included with up to 40 positions to go back or forward (depending on the size of the change in characters). As this uses a lot of memory, this feature is only available if 64 KiB of VDC memory is available (such as in the C128DCR).
- Write mode to freely type characters with the keyboard, supporting all printable PETSCII characters and also supporting Commodore or Control + 0-9 keys for selecting colors and RVS On/Off
- Color write mode to freely type attributes and colors
- Line and box mode for drawing lines and boxes
- Select mode to cut, copy, delete or repaint (only color or all attributes) the selection.
- Move mode to scroll the screen contents (due to memory constraints only for the 80x25 viewport)
Start program
Mount the VDCSE disk image. Choose the .D64, .D71 or .D81 image depending on what is supported on the hardware or emulator you use. The program will run the same from all three images, but the .D71 and especially the .D81 will be providing faster load times and more available free storage space for your screens if you want to save your work in this same image. The disk can be mounted from any valid device ID number.
Run the program by entering RUN "VDCSE",U<device number> (or use other methods like JiffyDOS shortcodes or your favorite file browser). The vdcse file (with PRG file type) is the executable that should be started, the other files on the disk are supporting binaries, system fonts, title screen or help screens.
Description of contents of the disk image:
- VDCSE (PRG): Main executable
- VDCSE.MACO (PRG): Machine code routines to be loaded in low memory
- VDCSE.FALT (PRG): System font for alternative charset
- VDCSE.FSTD (PRG): System font for standard charset
- VDCSE.TSCR (PRG): Title screen
- VDCSE.HSC1 (PRG): Help screen for main mode
- VDCSE.HSC2 (PRG): Help screen for character edit mode
- VDCSE.HSC3 (PRG): Help screen for select, move and line/box modes
- VDCSE.HSC4 (PRG): Help screen for write and color write modes
- VDCSE.PETV (PRG): Mapping table for visual PETSCII map
- VDCSE2PRG (PRG): Executable of the VDCSE2PRG utility
- VDCSE2PRG.ASS (PRG): BASIC header and assembly part for generating executables
- VDCSE2PRG.MAC (PRG): Machine code helper routines of VDCSE2PRG
(Fun fact: all screens have actually been created using VDCSE as editor)
Leave the title screen by pressing any key.
Main mode
After the title screen, the program starts in this mode. At start the screen shows this:

Only a blinking cursor with the presently selected screencode and attributes is visible.
Press these keys in main mode for editing:
| Key | Description |
|---|---|
| Cursor keys | Move cursor |
| + | Next character (increase screen code) |
| - | Previous character (decrease screen code) |
| 0-9 | Select character from favorite slot with corresponding number |
| SHIFT + 1-9 | Store character to favorite slot with corresponding number |
| * | Store character to favorite slot with number 0 (shift 0 does not exist) |
| , | Previous color (decrease color number) |
| . | Next color (increase color number) |
| SPACE | Plot with present screen code and attributes |
| DEL | Clear present cursor position (plot white space) |
| U | Toggle 'Underline' attribute |
| B | Toggle 'Blink' attribute |
| R | Toggle 'Reverse' attribute |
| A | Toggle 'Alternate character set' attribute |
| E | Go to 'character Edit mode' with present screen code |
| G | Grab underlying character and attribute at cursor position |
| W | Go to 'Write mode' |
| C | Go to 'Color write mode' |
| L | Go to 'Line and box mode' |
| M | Go to 'Move mode' |
| S | Go to 'Select mode' |
| P | Go to 'Palette mode' |
| T | Try mode |
| Z | Undo |
| Y | Redo |
| I | Toggle 'Inverse': toggle increase/decrease screencode by 128 |
| HOME | Move cursor to upper left corner of canvas |
| F1 | Go to main menu |
| F6 | Toggle statusbar visibility |
| F8 | Help screen |
Moving cursor
Press the cursor keys to move the cursor around the screen. If the canvas size is bigger than the 80x25 screensize, the sreen will scroll on reaching the edges.
Pressing HOME will return the cursor to the upper left position.
Selecting the screencode to plot
The + or - key will increase resp. decrease the selected screencode by one. The cursor will update to the presently selected screencode.
Pressing I will increase the screencode by 128 if the present screencode is lower than 128, otherwise decrease by 128. This will emulate RVS On / RVS Off.
Selecting the screencode to plot from a favotite slot
In VDCSE 10 positions are available to store your most frequently used characters in. Pressing one of the 0-9 keys selects the favorite with the corresponding number.
Storing the present screencode to a favorite slot
Pressing SHIFT plus 1-9 stores the presently selected character to the corresponding favorite slot. As SHIFT+0 is the same as 0 on the C128, press * for favorite position 0.
Selecting the attributes to plot
Increase or decrease the color code by one by pressing the . resp. , key. Pressing U, B, R or A will toggle the Underline, Blink, Reverse or Alternate charset attribute. The cursor will update to show the updated attribute code.
Plotting and deleting a character
Press SPACE to plot the presently selected character in the presently selected attributes at the present cursor position. DEL will delete the character and attribute value at the present position. Press T to preview how the selected character would look like if plotted without cursor blinking. Then press SPACE to confirm plotting the character, or any other key to cancel.
Grabbing a character
Pressing G will 'grab' the character and attributes at the present cursor position and change the selected character screencode and attribute to these values for use in all other edit functions.
Character edit mode
This will enter character edit mode and start with editing the presently selected screencode. Tip: if you want to edit a specific character on the screen, grab that character first by moving the cursor on that character and press G for grab.
Enter edit modes
Press S (Select mode) , M (Move mode), L (Line and box mode), W (Write mode) or C (Color write mode) for entering the corresponding edit modes. Reference is made to the specific sections in this readme for these modes (click the links). From all modes, return to main mode by pressing ESC or STOP.
NB: No visible clue is given which mode is activated (due to constraints by not being able to take unaltered charsets for granted and the cursor already used for showing screencode and attribute selected).
Toggle statusbar visibility Press F6 to toggle between the statusbar being visible (default) or not.
Help screen Press F8 to show a help screen with all keyboard commands for this mode.
Statusbar
If enabled, the statusbar is plotted as this at the lowest line of the screen:

From left to right, this status bar shows:
- Mode: mode the program is in (such as Main, Select, Line/Box, Palette or Character Editor).
- X,Y: X and Y co-ordinates of the cursor (co-ordinates of the large full screen, and not only the visible screen, if a larger screen than 80 by 25 characters is selected)
- Char: the present selected character to plot, first as actual visual character, then as screencode number in hexadecimal
- Color: the present selected color to plot, first as actual visual color, then as color number
- Atrributes: this shows the enabled attributes, REV for Reverse, UND for Underline, BLI for Blink and ALT for Alternate character set. If the abbreviation is shown, the corresponding attribute is enabled, else disabled.
- Reference that F8 gives you the help screen
The status bar auto hides if the cursor is moved to the lowest visible line on the screen, and pops up again (if enabled in the first place) when the cursor moves up.
Pressing F6 toggles statusbar visibility in every mode.
Main menu
From main mode, press F1 to go to the main menu. The following menu will pop up:

(NB: Note that if your design uses a changed alternate character set, the program will load the standard system font and you design might temporarily look incorrect. This will be restored on exiting the main menu. Also, the colors of the main menu and the highlight colors might differ if you have chosen a non-black background color, to ensure visibility of the menus).
Navigation in this menu is performed by the following keys:
| Key | Description |
|---|---|
| Cursor LEFT / RIGHT | Move between main menu options |
| Cursor UP/ DOWN | Move between pulldown menu options |
| RETURN | Select highlighted menu option |
| ESC / STOP | Leave menu and go back |
Screen menu

Width: Resize width
Resize the canvas width by entering the new width. You can both shrink as expand the width. Minimum width is 80, maximum width depends on the canvas height and the result fitting in the maximum of 30 KiB memory size allocation.
Note that with shrinking the width you might loose data, as all characters right of the new width will be lost. That is why on shrinking a pulldown menu will pop-up asking if you are sure. Select the desired answer (yellow highlighted position if using a black background).
NB: NO UNDO IS AVAILABLE FOR THIS, so if you confirm shrinking the size, all lost data is lost irretrievably.

Height: Resize height
Similar to resize width, with this option you can resize the height in the same way. Minimum height is 25, maximum again dependent on width given maximum of 30 KiB memory allocation.
Also here: on shrinking you might loose data, which is lost if you confirm.

Background: Change background color
Select the background color. Note that if the chosen color is not black or grey, the menu and popup colors will be changed to black on colors with intensity bit on, and white on colors with intensity bit off.
The color can be selected with the + and - keys to increase resp. decrease the color value. The background color will change directly accordingly. Press ENTER to accept the new color, or ESC or STOP to cancel.

Clear: Clear the canvas
Selecting this menu option will clear the canvas (which means filling the canvas with spaces, with attribute code for the color white, no other attributes). No confirmation will be asked (but undo is available if 64 KiB VDC memory is present).
Fill: Fill the canvas
Similar to clear, but this will fill the canvas with the present selected screencode and attributes (so the values that the cursor was showing).
File menu

In general: pressing ESC or STOP on any devide ID or filename input dialogue cancels the file operation.
Save screen
This option saves the present canvas to disk. First the device ID number is asked of the device to save to (should be between 8 and 30 and pointing to an active disk system with that ID number). Then the filename is asked (max 15 characters in length).
If a file with that name is already existing, confirmation is asked. Confirming will delete the old file before saving the new file.
In case of a file error, a popup will be shown with the error number.

Load screen
With this option you can load a screen from disk. Dialogue for this option is very similar to the Save screen option above. Device ID and filename will be asked, but next to that the width and height in characters will be asked as that can not be read from a standard screen file.

Save project
Similar to save screen, but with this option also the canvas metadata (width, height, present cursor position etc.) and the character sets if altered will be saved. Maximum filename length is now 10 to allow for an .xxxx suffix as it will save up to four files: filename.proj for the metadata, filename.scrn for the screen data, filename.chr1 for the standard charset and filename.chr2 for the alternate charset.

Load project Loads a project: the metadata, the screen and the charsets. Provide the filename without the .xxxx suffix (.proj,.scrn,.chr1 and .chr2). As the canvas width and height is now read from the metadata, no user input on canvas size is needed.

Charset: Load and save character sets

In this menu you can select the options to Load or Save character sets. Select the options standard to load or save the standard character sets, or alternate for alternate character set. Dialogue of these options is similar to the screen save and load options: enter device ID and filename.
Information: Version information, exit program or toggle Undo enabled
Depending on the available VDC memory size two or three options are available in this menu. As the Undo system is only available if 64 KiB VDC memory size is present, the third submenu option here is only shown if 64 KiB VDC memory is detected.
Menu with 16 KiB VDC memory:

Menu with 64 KiB VDC memory:

Information
This option shows a popup with version information.

Exit program
With this option you can exit the program. NB: No confirmation will be asked and unsaved work will be lost.
Undo: Enabled / Disabled : Toggle if Undo system is active or not
Only available if 64 KiB VDC memory is detected: This option toggles if the Undo system is enabled or not. Default is enabled, but if preferred for speed, Undo can be disabled here.
Character editor:
Pressing E from the main mode will result in the character editor popping up, which looks like this:

It shows a magnified grid of the bits in the present character. The header shows the screencode of the present character (in hex) and if the Standard (Std) or Alternate (Alt) character set is active. On the left of the grid the byte values of the 8 lines of the character are shown in hex.
Keyboard commands in this mode:
| Key | Description |
|---|---|
| Cursor keys | Move cursor |
| + | Next character (increase screen code) |
| - | Previous character (decrease screen code) |
| 0-9 | Select character from favorite slot with corresponding number |
| SHIFT + 1-9 | Store character to favorite slot with corresponding number |
| * | Store character to favorite slot with number 0 (shift 0 does not exist) |
| SPACE | Toggle pixel at cursor position (plot/delete pixel) |
| DEL | Clear character (delete all pixels of present character) |
| I | Inverse character |
| Z | Undo: revert present character to original state |
| S | Restore character from system character set (=lower case system ROM charset) |
| C | Copy present character |
| V | Paste present character |
| A | Toggle between standard and Alternate charset and vice versa |
| X / Y | Mirror in X axis or Y-axis |
| O | ROtate clockwise |
| L / R / U / D | Scroll Left, Right, Up or Down |
| H | Input Hex value for line at cursor position |
| ESC / STOP | Leave character mode and go back to main mode |
| F6 | Toggle statusbar visibility |
| F8 | Help screen |
Moving cursor
Press the cursor keys to move the cursor around the 8 by 8 grid.
Selecting the screencode to plot
The + or - key will increase resp. decrease the selected screencode by one. Pressing A will toggle the character set to be used between Standard and Alternate.
Selecting the screencode to plot from a favotite slot
In VDCSE 10 positions are available to store your most frequently used characters in. Pressing one of the 0-9 keys selects the favorite with the corresponding number.
Storing the present screencode to a favorite slot
Pressing SHIFT plus 1-9 stores the presently selected character to the corresponding favorite slot. As SHIFT+0 is the same as 0 on the C128, press * for favorite position 0.
Toggling bits in the grid
Press SPACE to toggle the bit at the present cursor position. DEL clears all bits in the grid, I inverts all bits in the grid.
Undo and restore
U reverts the present character to the original values. Note that after changing to a different screencode to edit, the previous screencode can no longer be reverted.
S copies the present screencode from the system font (which is the Alternate charset of the Commodore 128 ROM characterset, so the standard Commodore characterset in lower case).
Copy and paste
C copies the present screencode to buffer memory to be pasted with pressing *V at a different screencode after selecting this other screencode.
Mirror, rotate and scroll
Press X or Y to mirror the grid on the X resp. Y axis. O rotates the grid clockwise. L, R, U and D scrolls the grid to the Left, R*ight, Up or Down.
Hex input
Press H to edit the full present row of the grid by entering the hex value of the byte representing the bits in that byte for the line.
Leave mode and help
Pressing ESC or STOP leaves the character mode and returns to main mode. F8 will show a help screen with all keyboard commands of the character mode.
Palette mode:
Pressing P in the main mode starts the Palette mode. In this mode a character for plotting can be selected from the full set of the two character sets and the 10 favorite slots.
A window like this appears:

The window shows the 10 favorite slots as first line, below that the standard character set and below that the alternate character set.
Keyboard commands in this mode:
| Key | Description |
|---|---|
| Cursor keys | Move cursor |
| SPACE or ENTER | Select character |
| 0-9 | Store character in corresponding favorite slot |
| V | Toggle between normal mode and visual PETSCII mode |
| ESC / STOP | Leave character mode and go back to main mode |
| F6 | Toggle statusbar visibility |
| F8 | Help screen |
Moving cursor
Press the cursor keys to move the cursor around the grid. You can move over to the different sections by just moving out of a section to the other.
Selecting character
Press SPACE or ENTER to select the hightlighted characters as new character to plot with. This leaves the palette mode.
Storing to a favorite slot
Pessing 0-9 stores the presently highlighted character to the corresponding favorite slot.
Toggle visual PETSCII mode
Visual PETSCII mode is a mode in which the palette for the standard charset is mapped in such a way that PETSCII characters are ordered in a logical order for drawing. This mode makes only sense for standard charsets that left the PETSCII drawing characters unchanged.
This looks like this:
Pressing V toggles between normal and visual mode.
Leave mode and help
Pressing ESC or STOP leaves the palette mode and returns to main mode. F8 will show a help screen with all keyboard commands of the character mode.
Select mode:
Pressing S in the main mode starts the Select mode.
If enabled, the statusbar shows this on entering this mode:

In this mode a selection can be made on which different operations can be performed as described below.
| Key | Description |
|---|---|
| X | Cut: Delete selection at old position and paste at new position |
| C | Copy: Copy selection at new position, leaving selection unchanged at old position |
| D | Delete selection (fill with spaces) |
| A | Paint with Attribute: change attribute value of selection to present attribute value |
| P | Paint with color: change only the color value of selection |
| RETURN | Accept selection / accept new position |
| ESC / STOP | Cancel and go back to main mode |
| Cursor keys | Expand/shrink in the selected direction / Move cursor to select destination position |
| F6 | Toggle statusbar visibility |
| F8 | Help screen |
Making the selection
Ensure that the cursor is located at the desired upper left corner of the selection to be made before entering Select mode. On entering select mode, grow the selection by pressing Cursor Right to increase width and Cursor Down to increase height. Cursor Left and Cursor Up will shrink width resp. height. This is similar to the keys used in the Line and box mode.
The selection will be visually shown with plotting in the present selected screencode and attributes. It should look like this:

Accept the selection by pressing RETURN, cancel the selection by pressing ESC.
Choose action to perform
After accepting the selection, press X, C, D, A or P to choose an action, or press ESC or STOP to cancel. Statusbar (if enabled) shows this as prompter:

Cut and copy
After pressing X for cut or C for copy, move cursor to the upper left corner where the selection should be copied to. C will only make a copy, X will delete the selection at the old location.
Statusbar (if enabled) displays Cut or Copy correspondingly, like:

Delete
Pressing D will erase the present selection (fill the selected area with spaces).
Paint with attribute or only color
Pressing A will change the attribute values of all characters in the selected area to the present selected attribute value. Pressing P will only change the color, but will leave the other attributes (blink, underline, reverse and alternate charset) unchanged. Note that P is much slower than A.
Leaving mode and Help
Leave selection mode by pressing ESC or STOP. Pressing F8 at any time in this mode will provide a helpscreen with the key commands for this mode (not possible if the selection is grown but not yet accepted).
Move mode:
Pressing M in the main mode starts the Move mode. Use this mode to scroll the present viewport in the desired direction by pressing the Cursor keys.
Note that moving is only performed on the present 80x25 viewable part of the screen, so on larger canvas sizes not the whole screen will be moved. This is due to memory constraints.
It is also important to note that characters that 'fall off' of the screen are lost if the move is accepted.
Alternative to move mode is using select mode and use Cut to move a selection to a new position.
Accept with RETURN, cancel with ESC or STOP. Both will leave this mode and return to main mode.
| Key | Description |
|---|---|
| Cursor keys | Move in the selected direction |
| RETURN | Accept moved position |
| ESC / STOP | Cancel and go back to main mode |
| F6 | Toggle statusbar visibility |
| F8 | Help screen |
Line and box mode:
Pressing L in the main mode starts the Line and box mode. In this mode lines and boxes can be drawn, plotting with the present selected screencode and attribute value.
Ensure that the cursor is located at the desired upper left corner of the line or box to be made before entering Line and box mode. Grow the line or box by pressing Cursor Right to increase width and Cursor Down to increase height. Cursor Left and Cursor Up will shrink width resp. height. Leaving with or height at one character draws a line, otherwise a box is drawn.
Accept with RETURN, cancel with ESC or STOP. Both will leave this mode and return to main mode.
F8 will show a help screen with all screen commands for this mode.
| Key | Description |
|---|---|
| Cursor keys | Expand/shrink in the selected direction |
| RETURN | Accept line or box |
| ESC / STOP | Cancel and go back to main mode |
| F6 | Toggle statusbar visibility |
| F8 | Help screen |
Write mode:
Pressing W in the main mode starts the Write mode. In this mode text can be freely entered by using the full keyboard, making text input way easier than selecting the appropriate screencodes one by one. The full keyboard is supported, as long as the characters entered are printable (which means: can be transferred from the input PETSCII value to a screencode. To be able to enter the full range of characters, pressing SHIFT or C= with a supported key is possible.
Additionally, selecting colors and RVS On or Off is supported using the CONTROL and C= keys while pressing the 0 to 9 keys.
Blink, Underline, Reverse and Alternate Charset attributes can be toggled by using resp. the F1, F3, F5 or F7 key.
Undo and redo can be performed (if enabled and if 64 KiB VDC memory is present) with F2 for Undo and F4 for redo.
Leave Write mode by pressing ESC or STOP. F8 will show a help screen with the key commands for this mode.
| Key | Description |
|---|---|
| Cursor keys | Move in the selected direction |
| DEL | Clear present cursor position (plot white space) |
| F1 | Toggle 'blink' attribute |
| F3 | Toggle 'underline' attribute |
| F5 | Toggle 'reverse' attribute |
| F7 | Toggle '*alternate character set' attribute |
| F2 | Undo |
| F4 | Redo |
| C= / CONTROL + 1-8 | Select color |
| CONTROL + 9 / 0 | RVS On / RVS Off (toggle screencode + 128) |
| ESC / STOP | Go back to main mode |
| F6 | Toggle statusbar visibility |
| F8 | Help screen |
| Other keys | Plot corresponding character (if printable) |
Color write mode:
Pressing C in the main mode starts the Color write mode. In this mode you can conveniently edit colors in the screen by entering the color value of the desired color by pressing the key with the corresponding hex value of that color value (so 0-9 and A-F).
Blink, Underline, Reverse and Alternate Charset attributes can be toggled by using resp. the F1, F3, F5 or F7 key.
Undo and redo can be performed (if enabled and if 64 KiB VDC memory is present) with F2 for Undo and F4 for redo.
Leave Color write mode by pressing ESC or STOP. F8 will show a help screen with the key commands for this mode.
| Key | Description |
|---|---|
| Cursor keys | Move in the selected direction |
| 0-9 / A-F | Plot color with corresponding hex number |
| F1 | Toggle 'blink' attribute |
| F3 | Toggle 'underline' attribute |
| F5 | Toggle 'reverse' attribute |
| F7 | Toggle '*alternate character set' attribute |
| F2 | Undo |
| F4 | Redo |
| ESC / STOP | Go back to main mode |
| F6 | Toggle statusbar visibility |
| F8 | Help screen |
VDCSE2PRG utility
VDCSE2PRG is a separate utility to create an executable program file for the C128 of a VDCSE project. Only 80x25 screens are supported at the moment, but redefined character sets are supported.
This is a seperate utility which can not be started from the VDCSE main program but has to be started seperately by loading the VDCSE2PRG file from disk with for example RUN"VDCSE2PRG",U(device number).
Running this program gives this interface:

Follow the on screen instructions for selecting the input file and the output file name. Input file should be a VDCSE project file in 80x25 characters, with the associated screen and characterset files on the same disk/location. Enter the input file filename without the .proj at the end.
The generated program can be executed by using a RUN"(target filename)",U(target device ID).
Color value reference:
| Color | Decimal | Color write key | Write mode key |
|---|---|---|---|
| Black | 0 | 0 | CONTROL+1 |
| Dark Grey | 1 | 1 | C= + 5 |
| Dark Blue | 2 | 2 | CONTROL+7 |
| Light Blue | 3 | 3 | C= + 7 |
| Dark Green | 4 | 4 | CONTROL + 6 |
| Light Green | 5 | 5 | C= + 6 |
| Dark Cyan | 6 | 6 | C= + 4 |
| Light Cyan | 7 | 7 | CONTROL + 4 |
| Dark Red | 8 | 8 | CONTROL + 3 |
| Light Red | 9 | 9 | C= + 3 |
| Dark Purple | 10 | A | C= + 1 |
| Light Purple | 11 | B | CONTROL + 5 |
| Dark Yellow | 12 | C | C= + 2 |
| Light Yellow | 13 | D | CONTROL + 8 |
| Light Grey | 14 | E | C= + 8 |
| White | 15 | F | CONTROL+2 |
Attribute code reference:
The VDC chip uses a byte per character position with the following meaning of the bits in that byte (for character mode):
| Bit | 7 | 6 | 5 | 4 | 3 | 2 | 1 | 0 |
|---|---|---|---|---|---|---|---|---|
| Meaning of bit | Alternate | Reverse | Underline | Blink | Red | Green | Blue | Intensity |
This means an attribute code is calculated like:
| Add value | Meaning |
|---|---|
| 0-15 | Color value 0 to 15, see color value reference above. |
| 16 | Enable Blink |
| 32 | Enable Underline |
| 64 | Enable Reverse |
| 128 | Enable alternate character set (not enabled shows the character in the standard character set) |
Example:
- Light yellow text with underline and in alternate character set: 13+32+128=173
- Darkgreen text in reverse and standard character set: 4+64=68
Note that in VDCSE calculation of these attribute codes by yourselves is not necessary, the program will do so for you given the selected attributes and color. In memory however this is how the codes are stored.
File format reference
As both the character data as the attribute data needs to be stored, a screen takes width times height times 2 bytes in storage. A padding of 48 bytes is used to separate character and attribute data in order to be able to load a standard 80x25 screen for both character and attribute data in one go at the default VDC memory position of $0000 for text and $0800 for attributes.
For a default 80 characters wide and 25 characters high screen this would result that data would be stored as such:
| Offset to start address in bytes (decimal) | Offset in hex | Description |
|---|---|---|
| 0 | 0 | Start of text character data using screen codes |
| 2000 | 07D0 | Start of 48 byte padding. This is used to place a VDCSE version signature |
| 2048 | 0800 | Start of attribute data using VDC attribute codes. |
For screensizes greater than 80x25 this would translate to:
| Offset to start address in bytes (decimal) | Description |
|---|---|
| 0 | Start of text character data using screen codes |
| Width * Height | Start of 48 byte padding. This is used to place a VDCSE version signature |
| (Width * Height)+48 | Start of attribute data using VDC attribute codes. |
Credits
VDC Screen Editor
Screen editor for the C128 80 column mode
Written in 2021 by Xander Mol
https://github.com/xahmol/VDCScreenEdit
https://www.idreamtin8bits.com/
Code and resources from others used:
-
CC65 cross compiler:
-
C128 Programmers Reference Guide: For the basic VDC register routines and VDC code inspiration
http://www.zimmers.net/anonftp/pub/cbm/manuals/c128/C128_Programmers_Reference_Guide.pdf
-
Scott Hutter - VDC Core functions inspiration:
https://github.com/Commodore64128/vdc_gui/blob/master/src/vdc_core.c
(used as starting point, but changed to inline assembler for core functions, added VDC wait statements and expanded)
-
Francesco Sblendorio - Screen Utility: used for inspiration:
https://github.com/xlar54/ultimateii-dos-lib/blob/master/src/samples/screen_utility.c
-
DevDef: Commodore 128 Assembly - Part 3: The 80-column (8563) chip
https://devdef.blogspot.com/2018/03/commodore-128-assembly-part-3-80-column.html
-
Tips and Tricks for C128: VDC
-
6502.org: Practical Memory Move Routines: Starting point for memory move routines
-
DraBrowse source code for DOS Command and text input routine
DraBrowse (db*) is a simple file browser. Originally created 2009 by Sascha Bader. Used version adapted by Dirk Jagdmann (doj).
-
Bart van Leeuwen: For inspiration and advice while coding. Also for providing the excellent Device Manager ROM to make testing on real hardware very easy
-
jab / Artline Designs (Jaakko Luoto) for inspiration for Palette mode and PETSCII visual mode
-
Original windowing system code on Commodore 128 by unknown author.
-
Tested using real hardware (C128D and C128DCR) plus VICE.
The code can be used freely as long as you retain a notice describing original source and author.
THE PROGRAMS ARE DISTRIBUTED IN THE HOPE THAT THEY WILL BE USEFUL, BUT WITHOUT ANY WARRANTY. USE THEM AT YOUR OWN RISK!