This is the beginner guide to creating and deploying a simple ERC-721 smart contract to Ethereum's Goerli test network using ChainIDE, MetaMask, and Solidity. If you have any questions, feel free to join ChainIDE Discord!
Following are the steps to deploy an ERC-721 smart contract:
-
Install MetaMask
-
Write down an ERC-721 smart contract
-
Compile the smart contract
-
Deploy the smart contract
-
NFT Minting
-
Create a flattened file for the smart contract verification
-
Verify the deployed smart contract on Etherscan
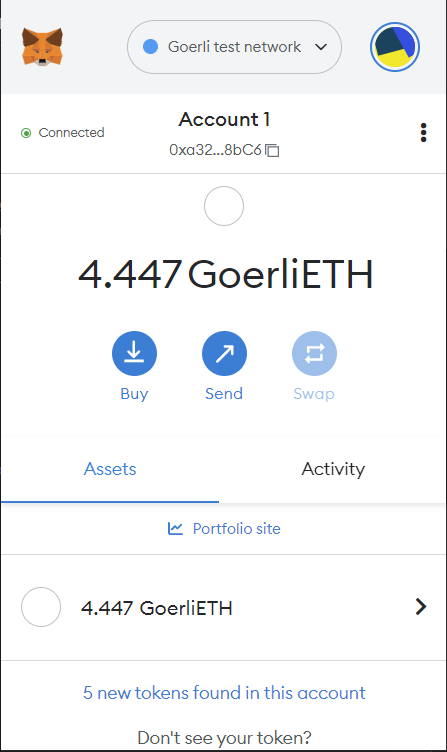
When we deploy a smart contract to the blockchain or make a transaction to the deployed smart contract, we need to pay the gas fee, and for that, we need to have a Web3 wallet, which is MetaMask. So, first of all, we'll install MetaMask.
Please click here to install MetaMask; meanwhile, we need to switch the network to Goerli and get test tokens on Goerli. Click on the Metamask wallet plug-in, log in to the MetaMask wallet, open the testnet in the settings, and switch to Goerli.

We can then claim test tokens at the link below.
AMOUNT: 0.1/24 Hours
Finally, make sure your network is switched to Goerli and has at least 0.1 GoerliETH.
You need to write down all the required functions that you want to implement in your ERC-721 smart contract. A general ERC-721 smart contract has the following functions.
-
balanceOf(): return by_ The number of NFTs held by the owner -
ownerOf(): returns the address of the token holder -
approve():grant address_ To has_ Token ID control. Approval event needs to be triggered after the method is successful -
setApprovalForAll(): Grant address_ The operator has the control of all NFTs, and the approvalforall event needs to be triggered after success -
getApproved(): Get the approved address for a single NFT -
isApprovedForAll(): Query if an address is an authorized operator for another address -
safeTransferFrom(): To transfer the ownership of an NFT, a successful transfer operation must initiate a transfer event -
transferFrom(): Used to transfer NFTs. After the method succeeds, it needs to trigger the transfer event. The caller confirms himself_ To address can receive NFT normally, otherwise, this NFT will be lost. When this function is implemented, it needs to check whether it meets the judgment conditions
The ChainIDE team has prepared the complete ERC-721 showcase including all the required functions, you may use that built-in template and add/delete functions according to your requirements.
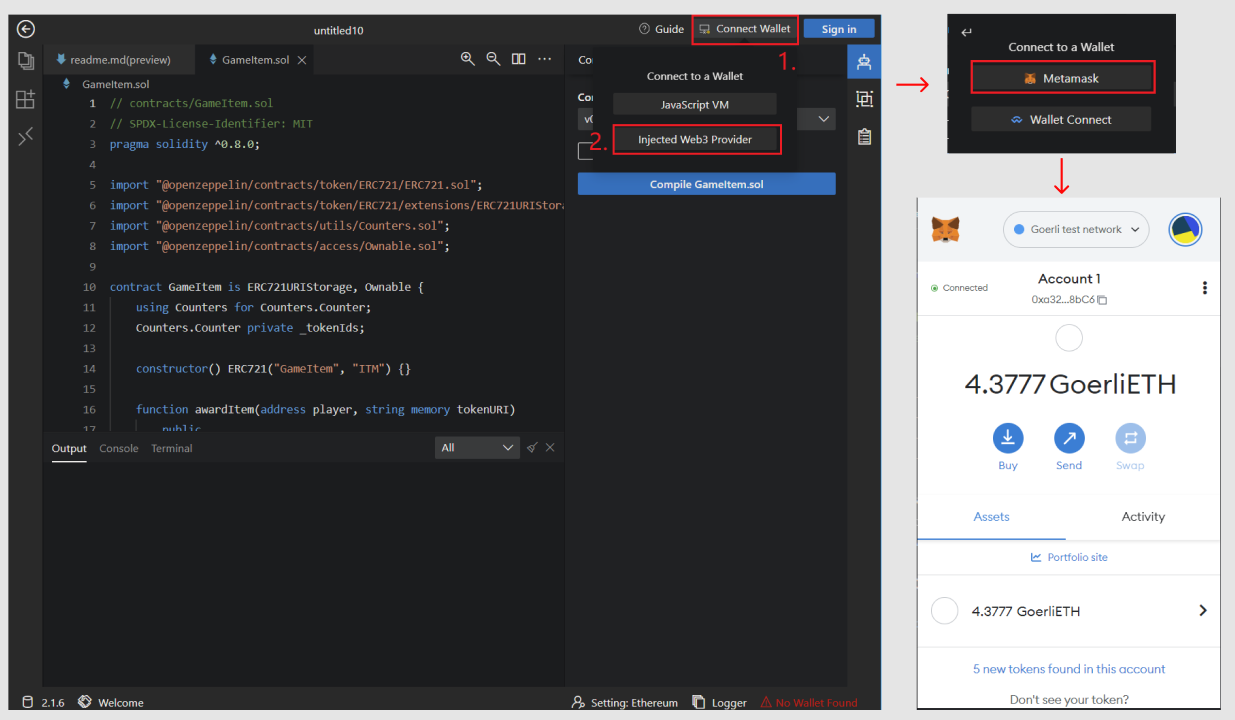
Now, you can see the template contract, GameItem.sol, that includes all the required functions.
Click on the "Connect wallet" in the upper right corner, select the "Injected Web3 Provider" button, and then select on MetaMask to connect to the MetaMask wallet (Ethereum Mainnet is the main network, and Goerli is the test network - connect to Goerli).
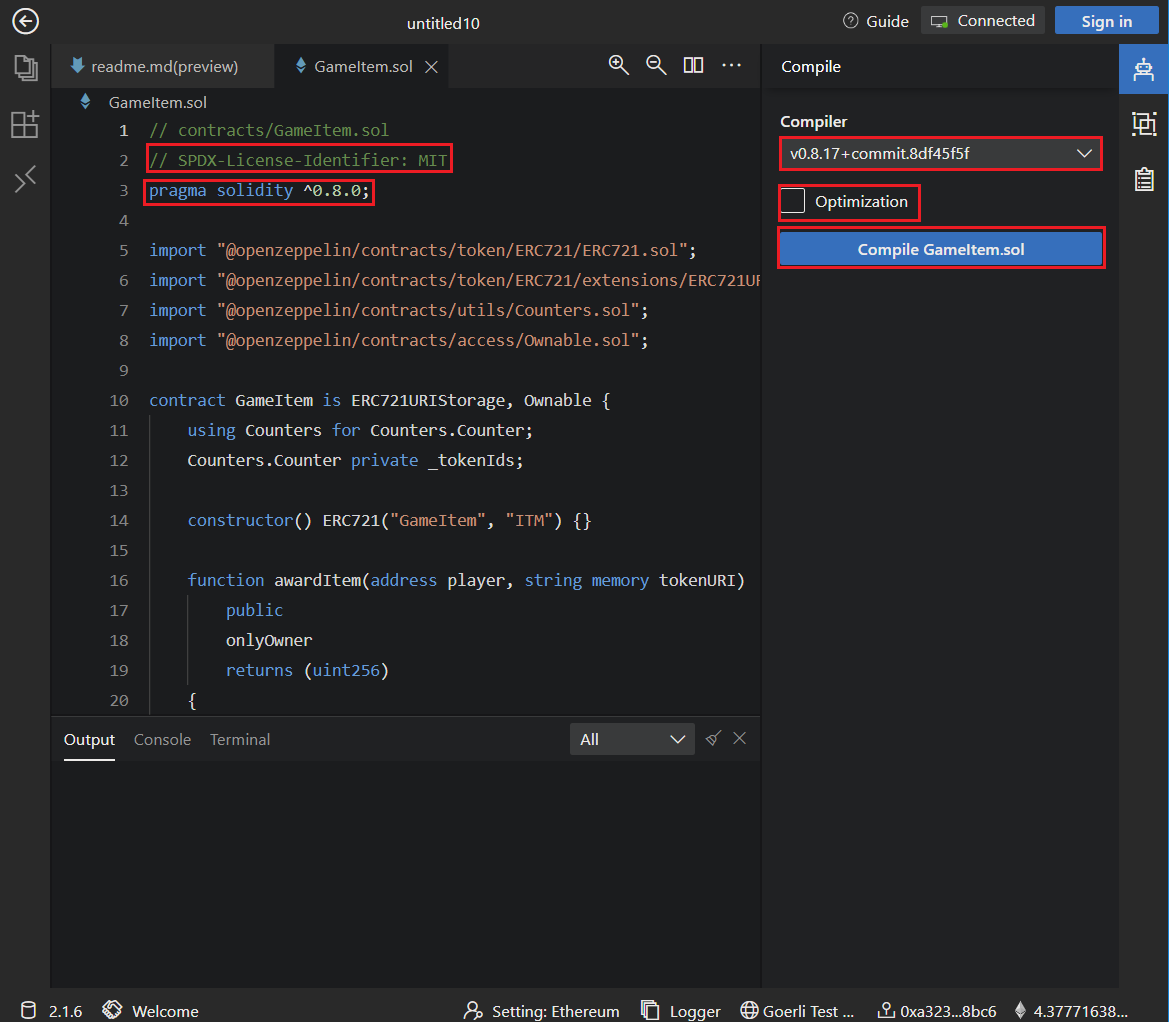
After you have completed writing down your smart contract, it's time to compile the smart contract. To compile, go to the "Compile" module, choose an appropriate compiler version according to your source code, and press compile button. After successful compilation, an ABI and byte code for the source code will be generated. If there are some errors in your source code, they woill be displayed under the output panel in the Logger module. You may need to carefully read the error, resolve it accordingly and compile it again.
Make a note of the compiler version, license and optimization of your source code, as it will be required when you validate your smart contract on Goerli.
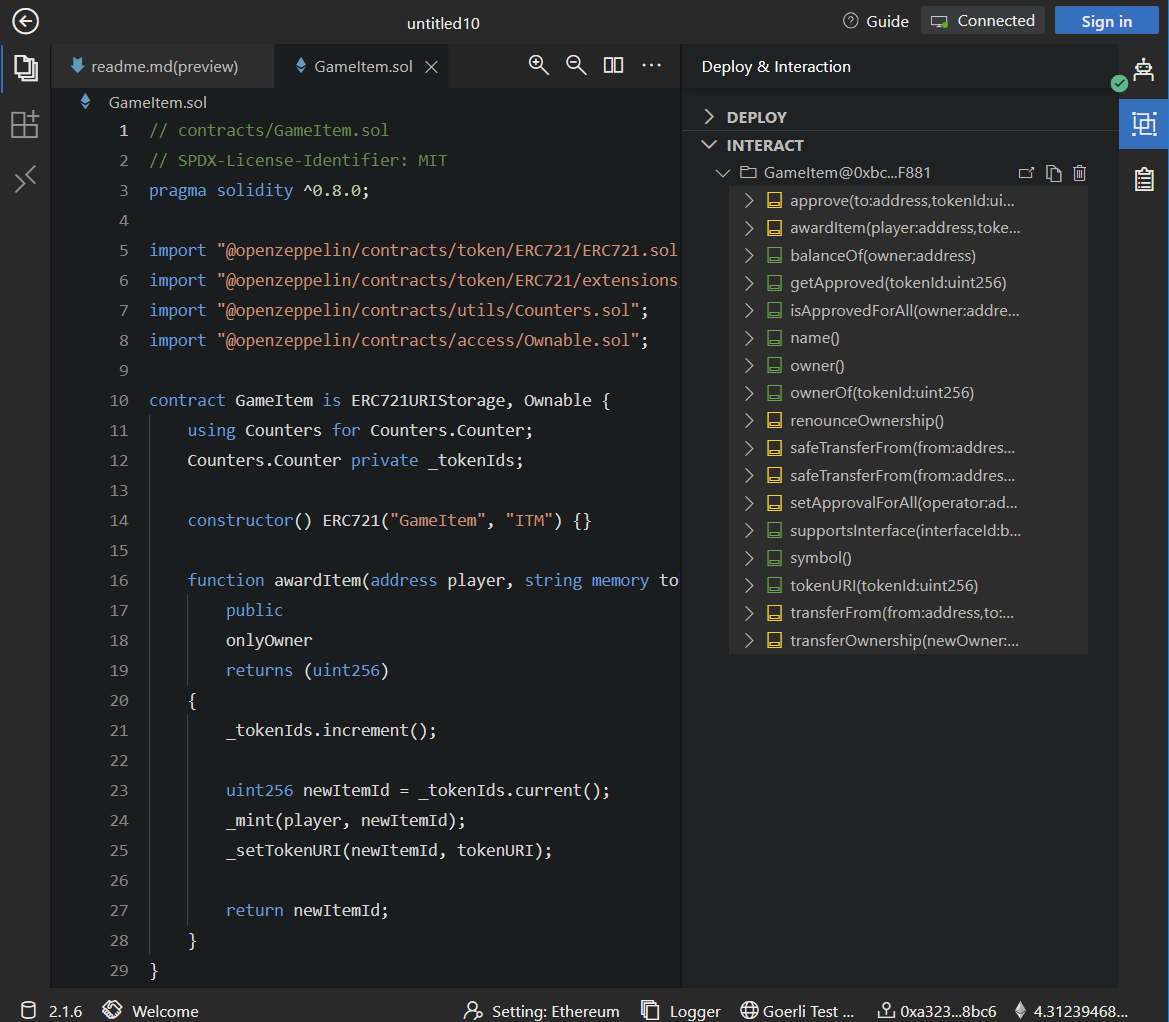
After the compilation is successful, it is time to deploy your compiled ERC-721 smart contract to the Goerli test network. Go to the "Depoly & Interaction" module, select the contract you want to deploy in the compiled smart contract, and deploy it.
In this tutorial, we will use the GameItem smart contract for deployment.

After the deployment is successful, you can see a message in the output section indicating that your smart contract has been successfully deployed. You can also verify deployed smart contracts on the Goerli testnet. In the "INTERACT" panel, you can see all the functions of the deployed smart contract.
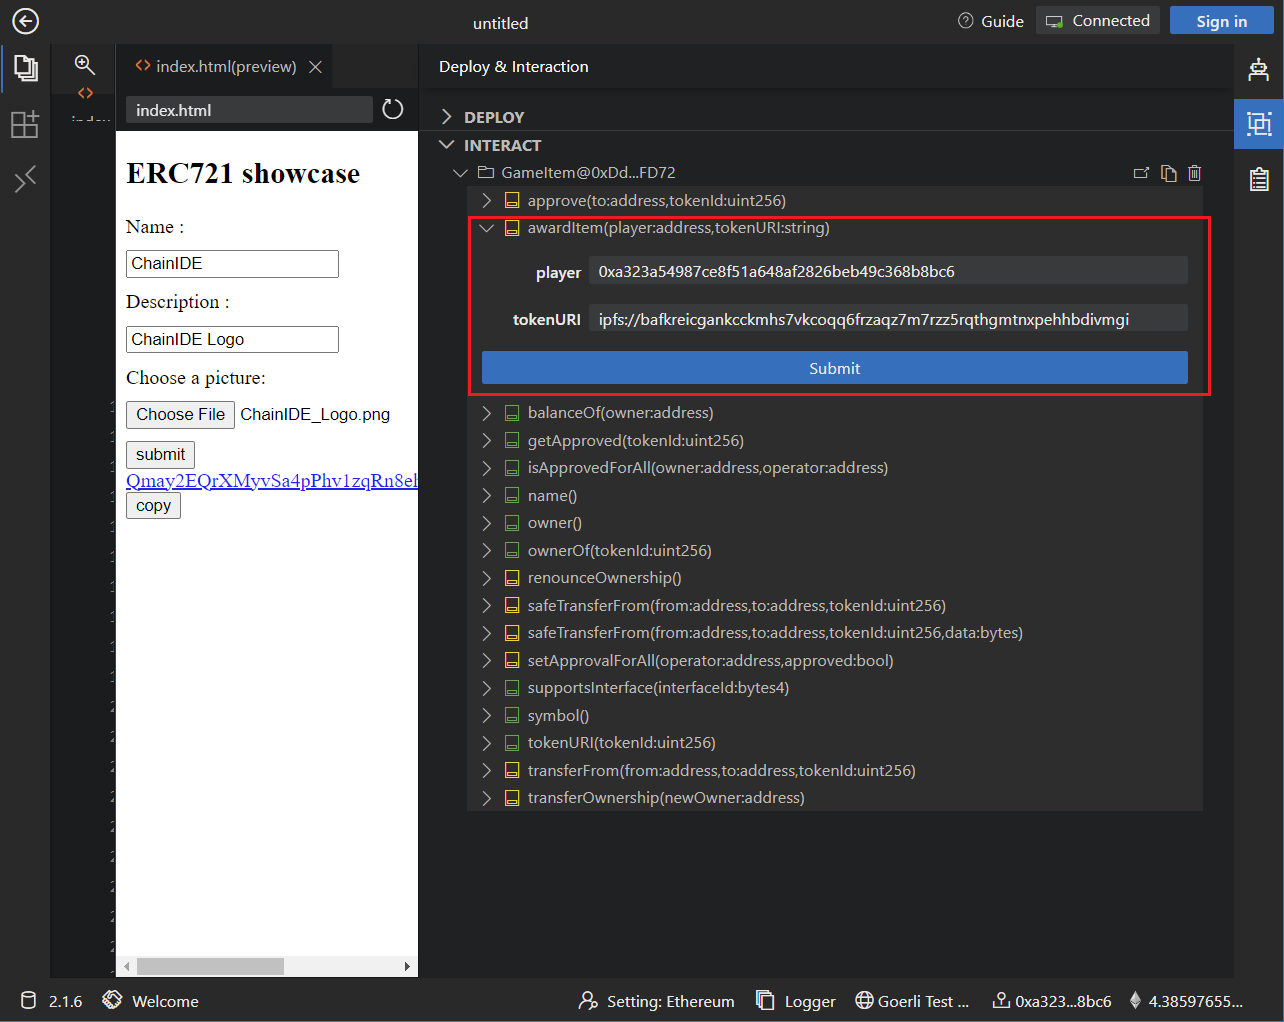
To mint a digital collection, you need to use the awarditem function and use the wallet address of the person you want to airdrop NFT. The token URL input field is the corresponding metadata address. Before Minting, you need to generate metadata, and metadata is stored on decentralized storage that ensures the immutability of the NFT. To this end, ChainIDE provides two ways to generate metadata.
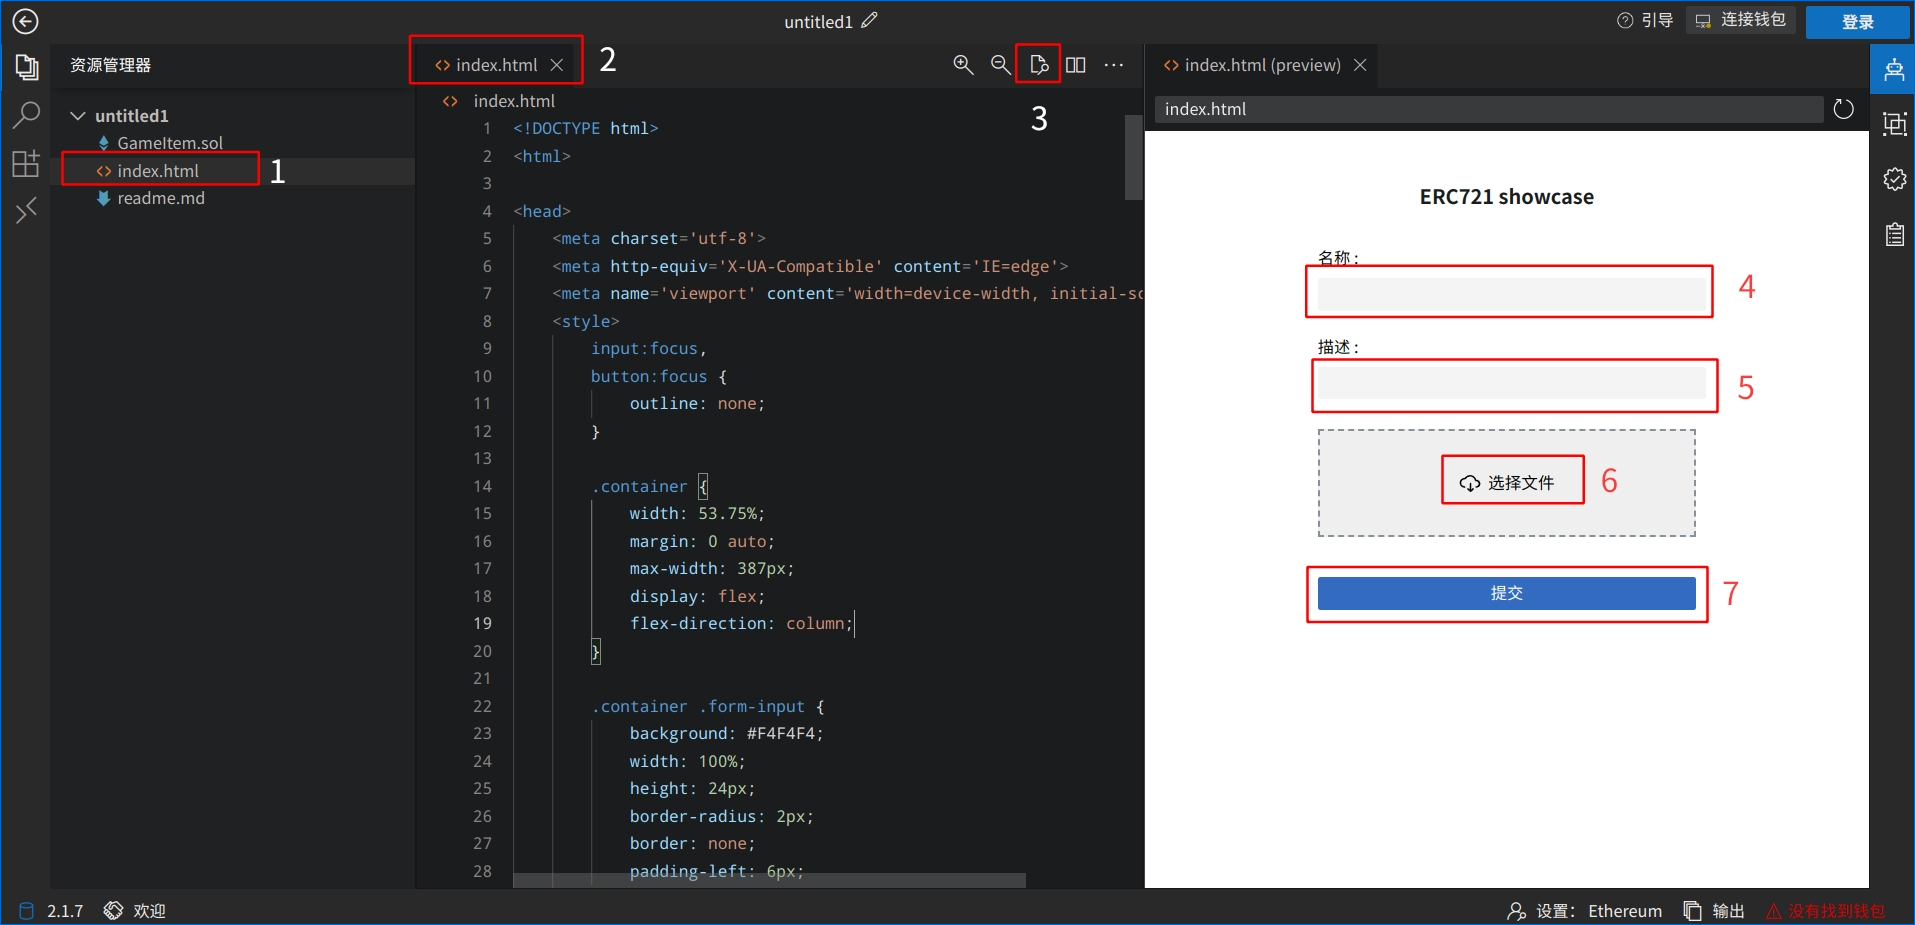
ChainIDE has prepared a built-in HTML template to upload metadata to IPFS. Under the explorer panel, you can find the "index.html" file, and click the preview button on the right side to preview the output of the HTML file, fill in the required information there and click the "Submit" button.
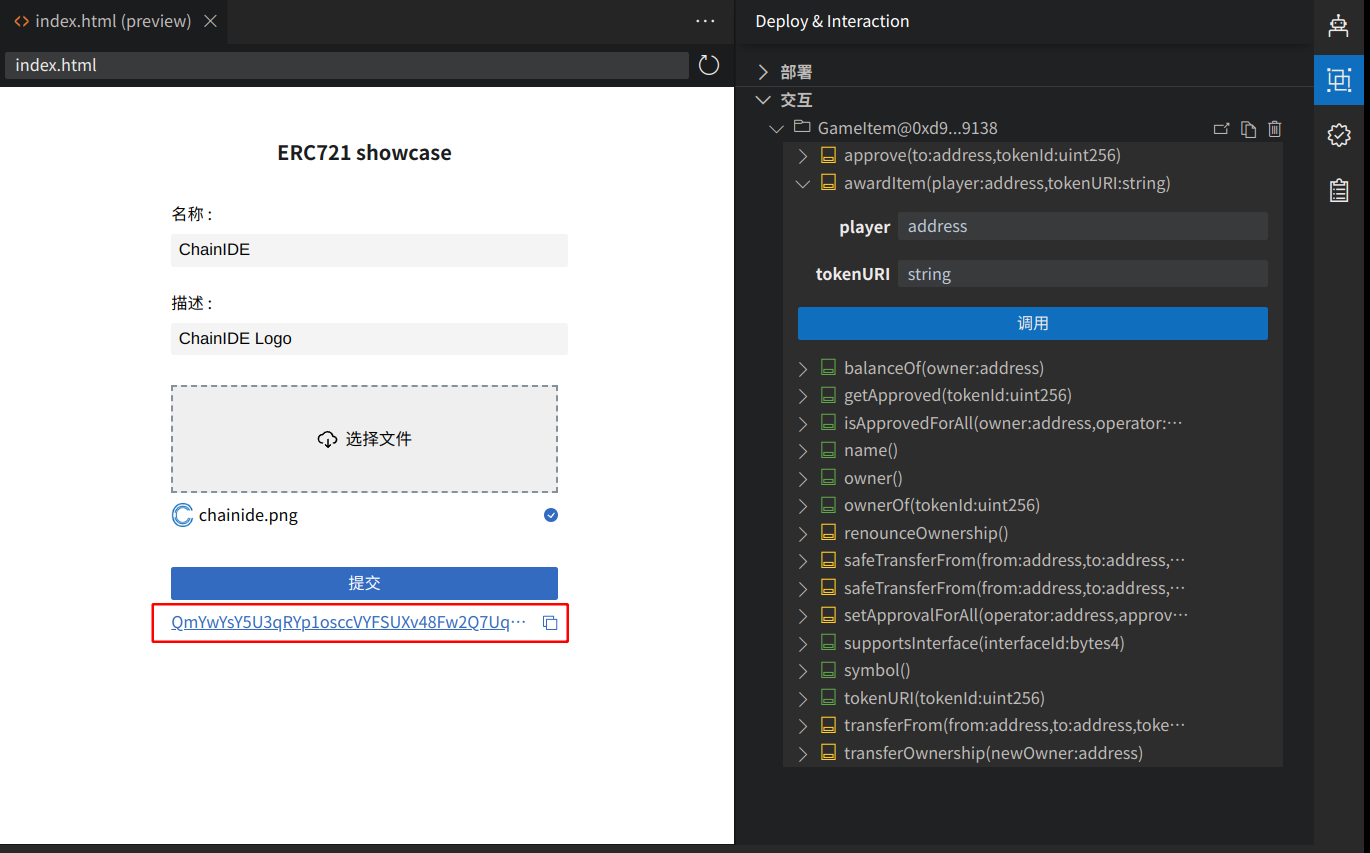
After you click the "Submit" button, you will get a CID. When clicking on the CID and encountering 504, we need to use the method of 5.2 to generate metadata.
5.2. Use NFT.STORAGE, a website dedicated to uploading files to IPFS
(Other uploading IPFS sites are also available, such as Pinata) First, prepare the images to be uploaded, such as the ChainIDE logo.
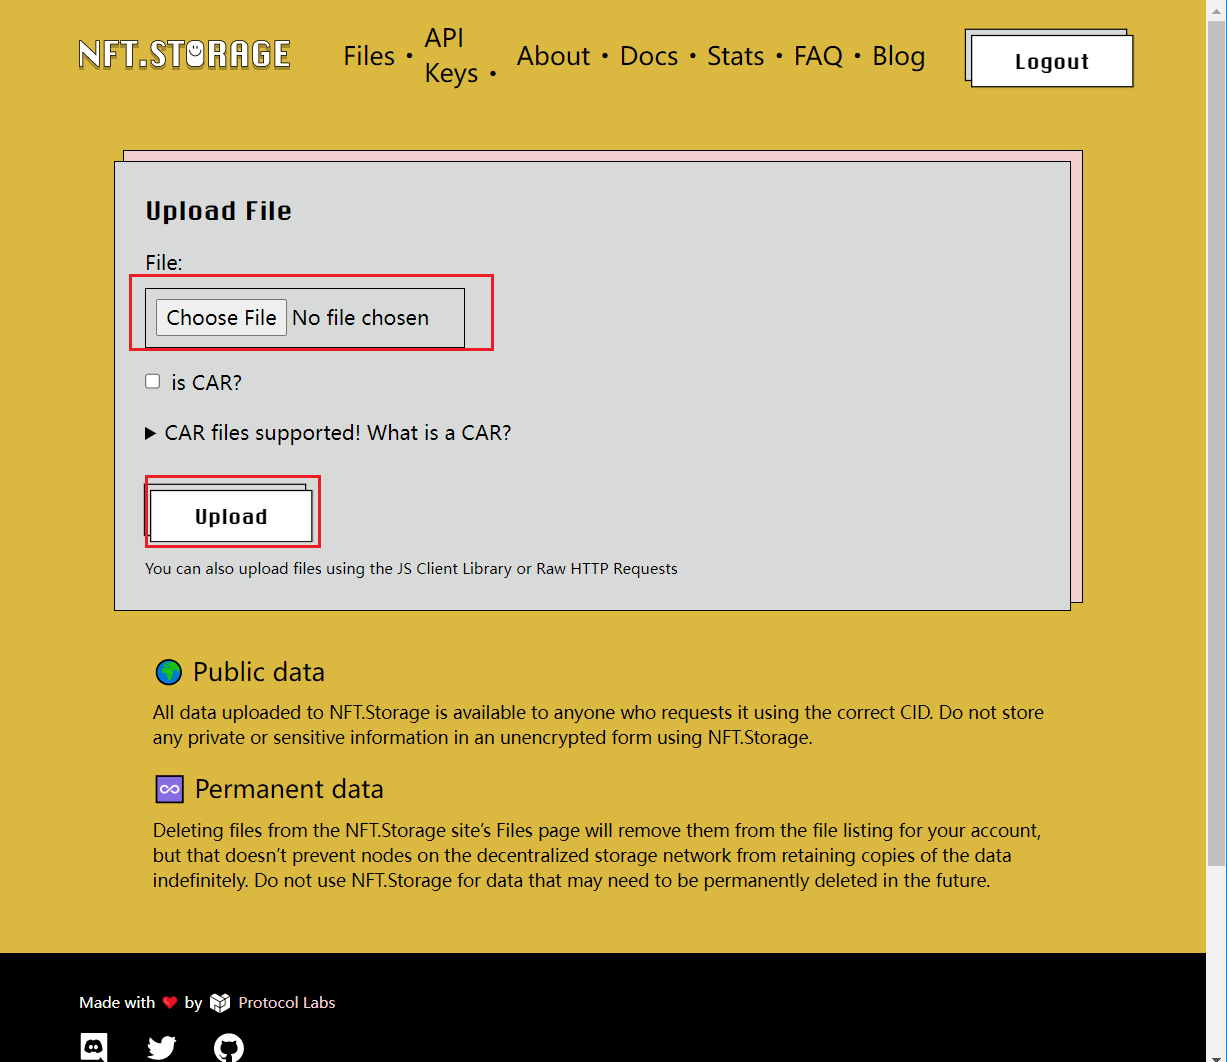
Then enter NFT.STORAGE, a webpage dedicated to uploading files to IPFS.
Click "Upload" - "Choose File" - select an image and click Upload
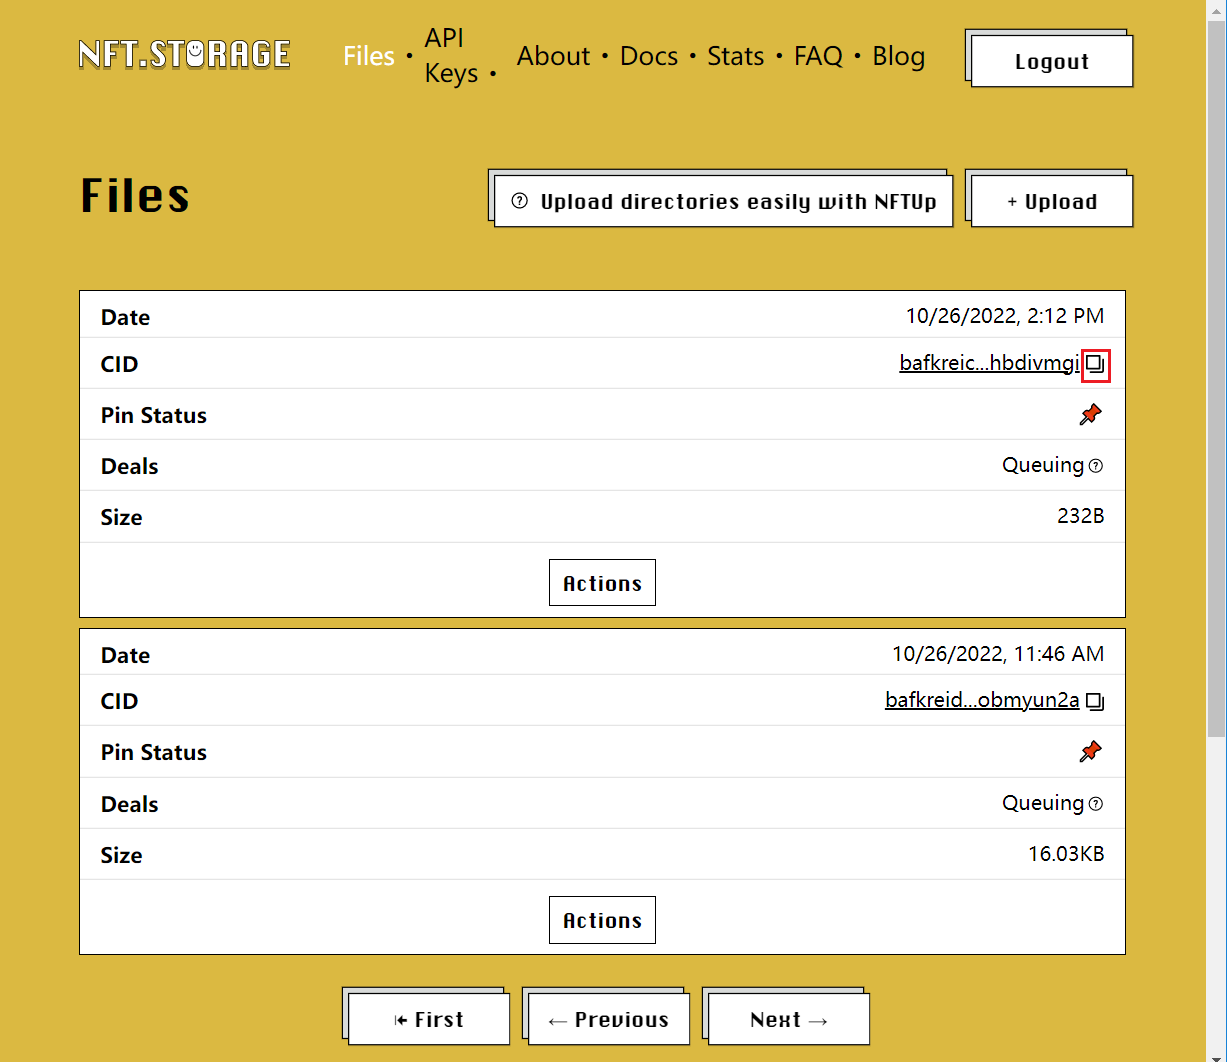
After the upload is successful, click the CID of the image to see the image stored on IPFS (CID is used to point to the data stored in IPFS).

Next, we need to generate the JSON format file of metadata.
Metadata format:
{
    "title": "Token Metadata",
    "type": "object",
    "properties": {
        "name": {
            "type": "string",
            "description": "Identifies the asset to which this token represents"
        },
        "decimals": {
            "type": "integer",
            "description": "The number of decimal places that the token amount should display - e.g. 18, means to divide the token amount by 1000000000000000000 to get its user representation."
        },
        "description": {
            "type": "string",
            "description": "Describes the asset to which this token represents"
        },
        "image": {
            "type": "string",
            "description": "A URI pointing to a resource with mime type image/* representing the asset to which this token represents. Consider making any images at a width between 320 and 1080 pixels and aspect ratio between 1.91:1 and 4:5 inclusive."
        },
        "properties": {
            "type": "object",
            "description": "Arbitrary properties. Values may be strings, numbers, object or arrays."
        }
    }
}
Let's create a new json file locally, such as: ChainIDE_Logo.json
{
    "name": "ChainIDE",
    "description": "ChainIDE Logo",
    "image": "ipfs://bafkreid2t3wk4gd3xgrg4uqt2jndr5ocwycizjdqyg4tbqayjyobmyun2a",
    "properties": {
        "initials": "c",
        "rarity": "common"
    }
}
name: Fill in the name of the NFT
description: Fill in the introduction of NFT
image: Fill in the image link of the NFT, the format is ipfs:// + CID
properties: Fill in the characteristics of the NFT, the number is not limited
After creation, upload ChainIDE_Logo.json to IPFS.
After uploading successfully, copy the CID of ChainIDE_Logo.json: bafkreicgankcckmhs7vkcoqq6frzaqz7m7rzz5rqthgmtnxpehhbdivmgi
Select the awarditem function. The player is the address where you want to airdrop the NFT, tokenURI is the metadata link (the format of the IPFS link is uniformly ipfs://+CID, and the CID of method 2 is used here, so the link of the ChainIDE Logo is ipfs://bafkreicgankcckmhs7vkcoqq6frzaqz7m7rzz5rqthgmtnxpehhbdivmgi, click the "Submit" button.
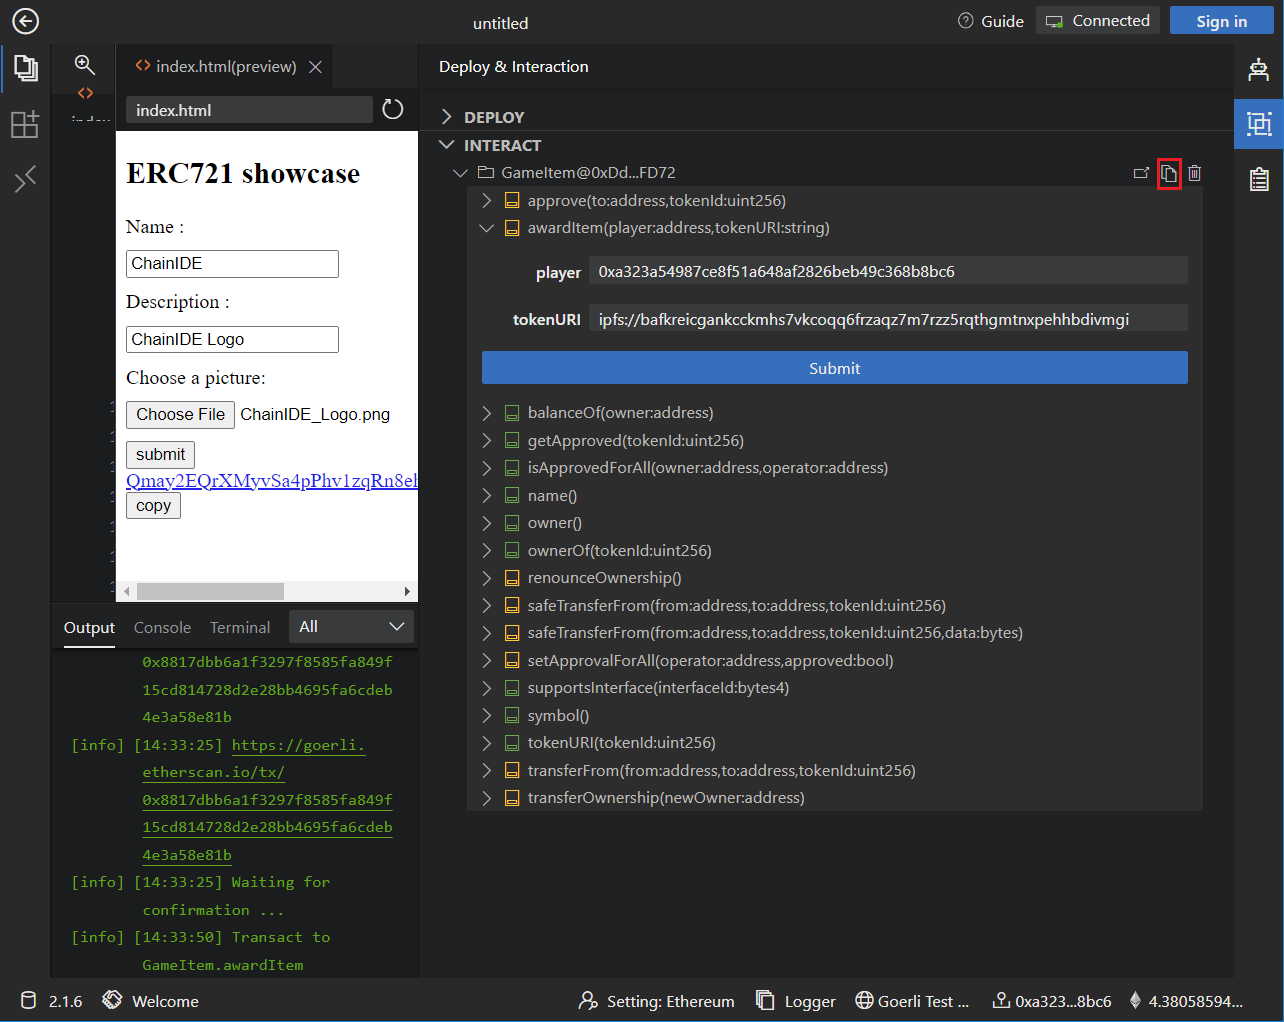
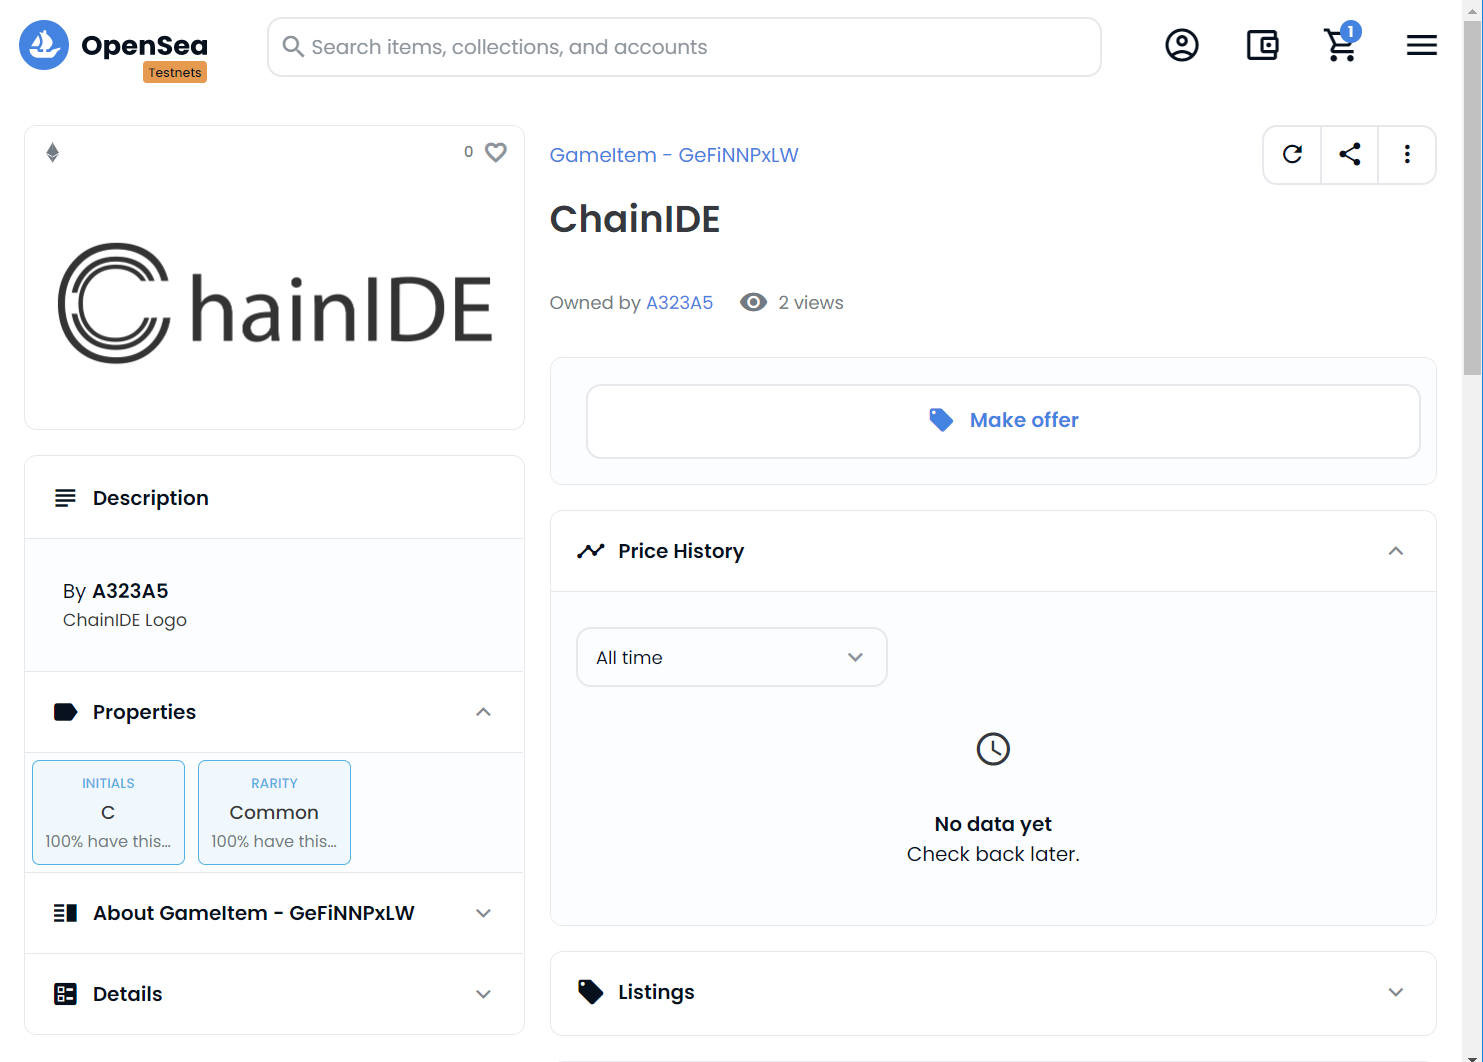
After successful minting, you can view your NFT on the OpenSea NFT market. Visit https://testnets.opensea.io/assets/goerli/0xdd1780dbd0dac8e3ad6d3615ec15bc8be67efd72/1 (replace 0xdd1780dbd0dac8e3ad6d3615ec15bc8be67efd72 with your contract address, which can be copied using the method below), connect to your MetaMask wallet, and make sure the selected network is Goerli, you can see NFTs that have been minted successfully on the OpenSea NFT marketplace.
To verify a smart contract that imports other smart contracts, we need to create a flattened file, a flattened file including all the source codes of imported contracts in a single file. To create a flattened file, you need to activate a "Flattener" plug-in from the "PLUGIN Manager" panel.
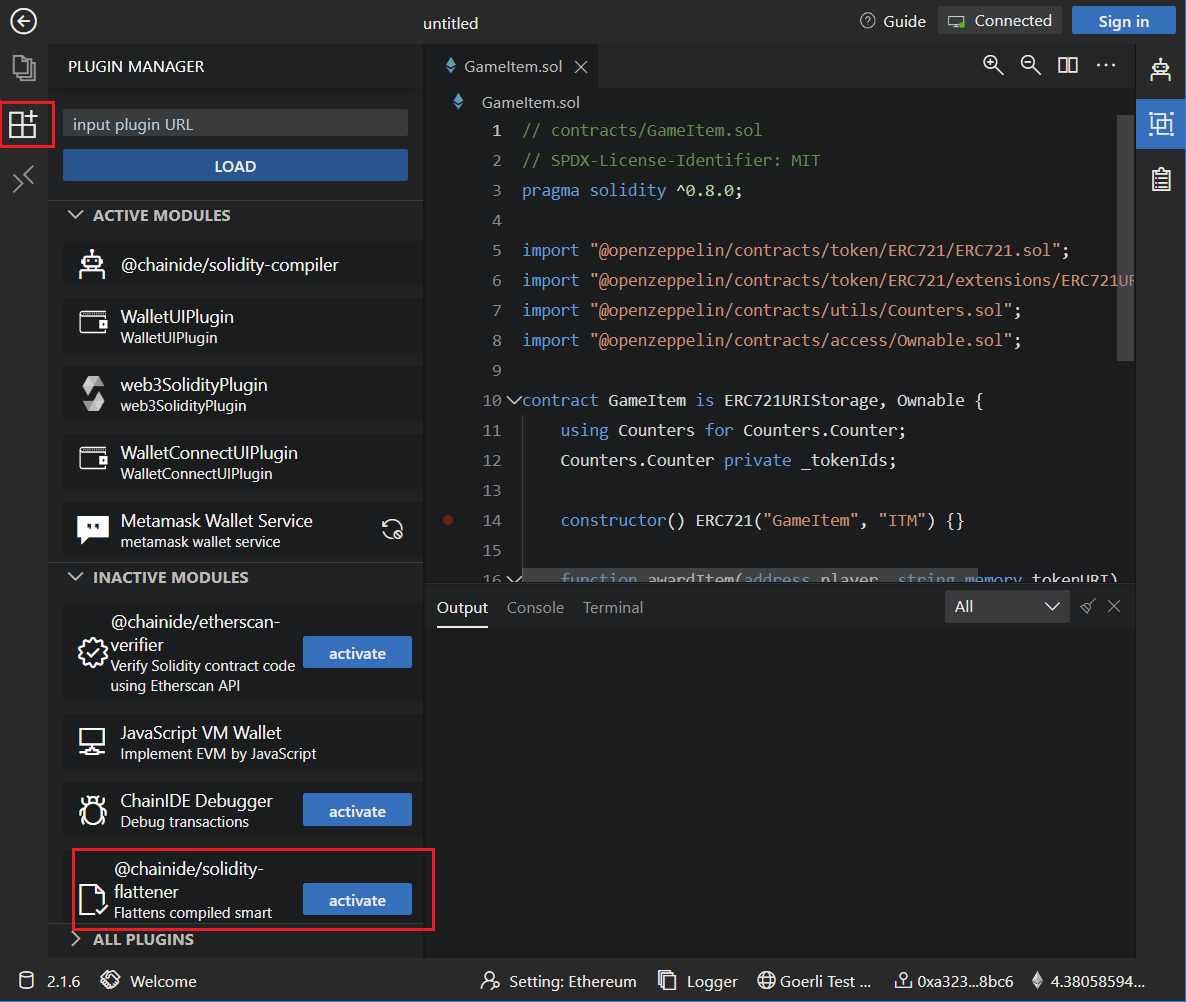
Once the Flatterner plug-in is activated, you'll be able to access it as a separate module, as shown in the figure below. Choose GameItem.sol, and click on the flatten button to create a flattened file; once the flattened file is created, it will be automatically copied to the clipboard; you may paste it to a file and save it for later usage.
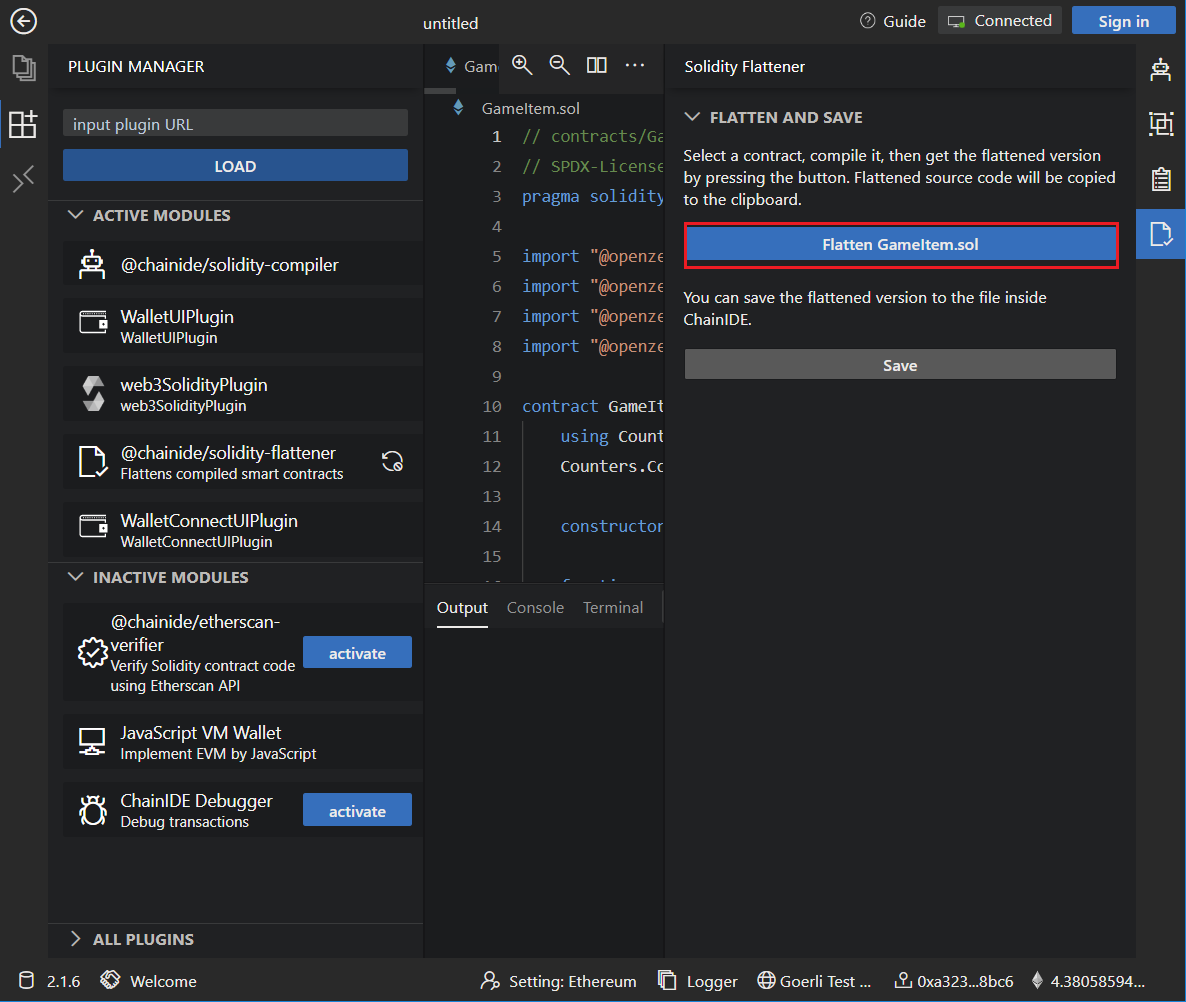
If you want to save the flattened file, click the save button, and a flattened file will be saved in the current repository.

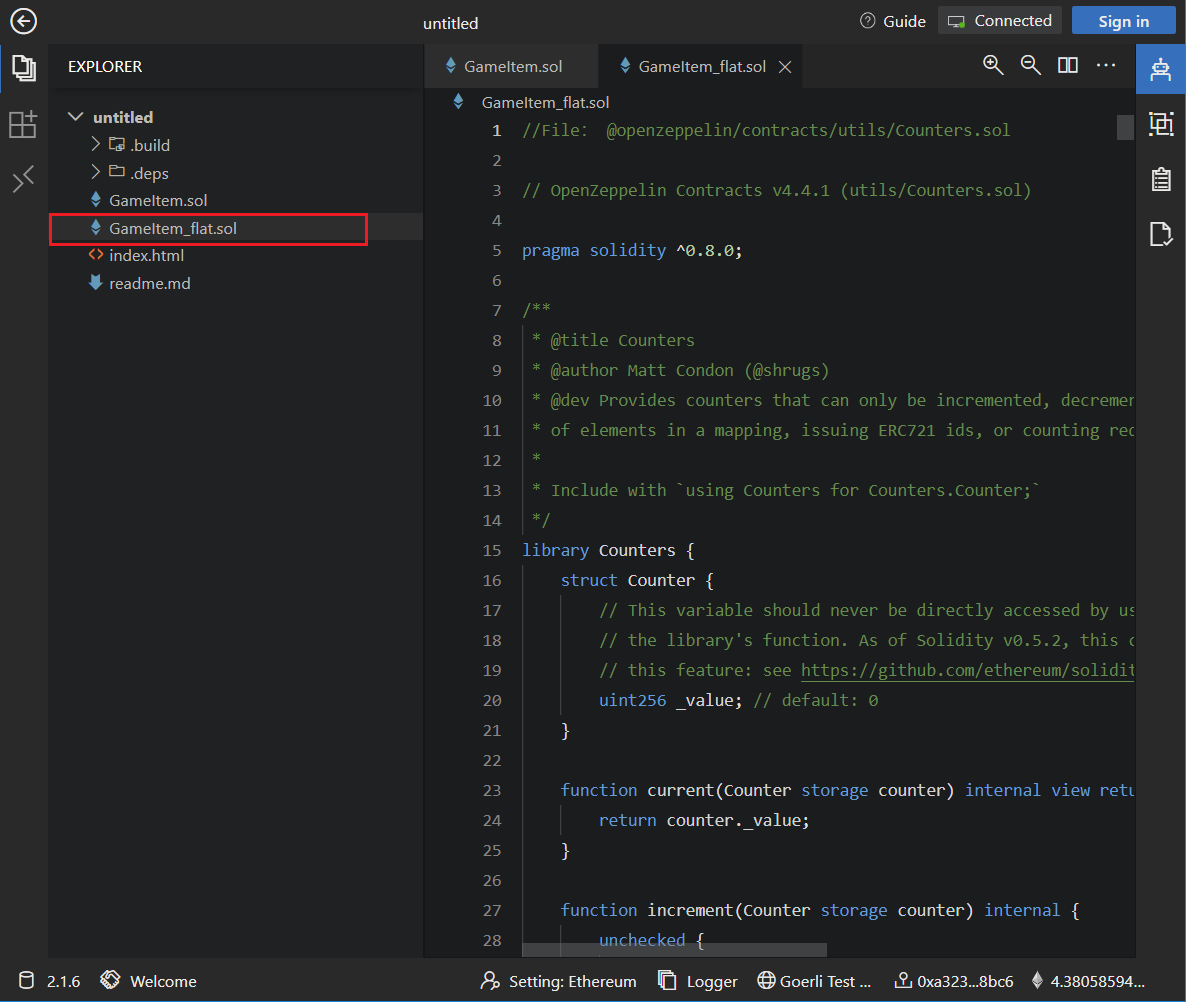
The saved flattened file can be accessed under the "Explorer" panel.
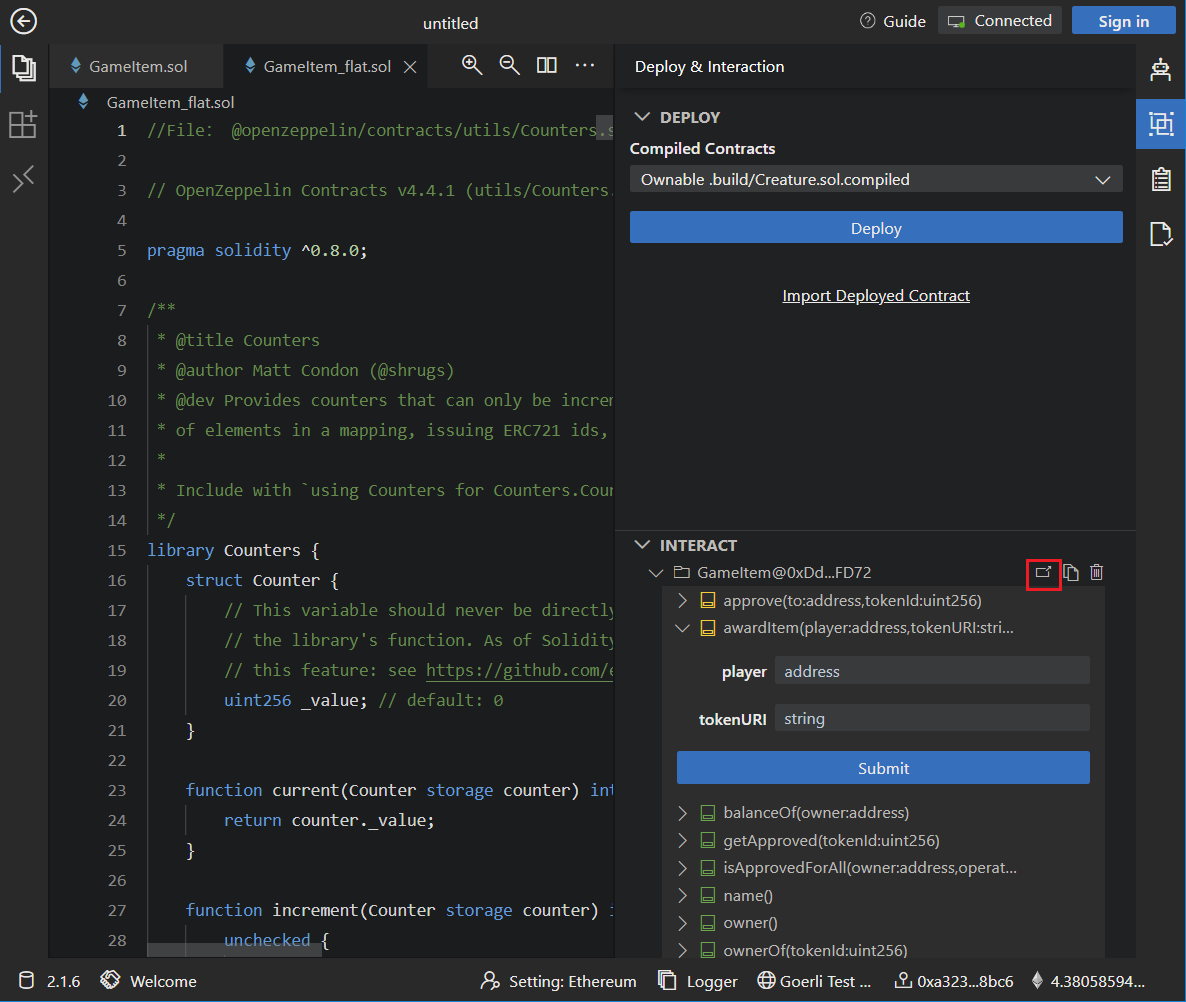
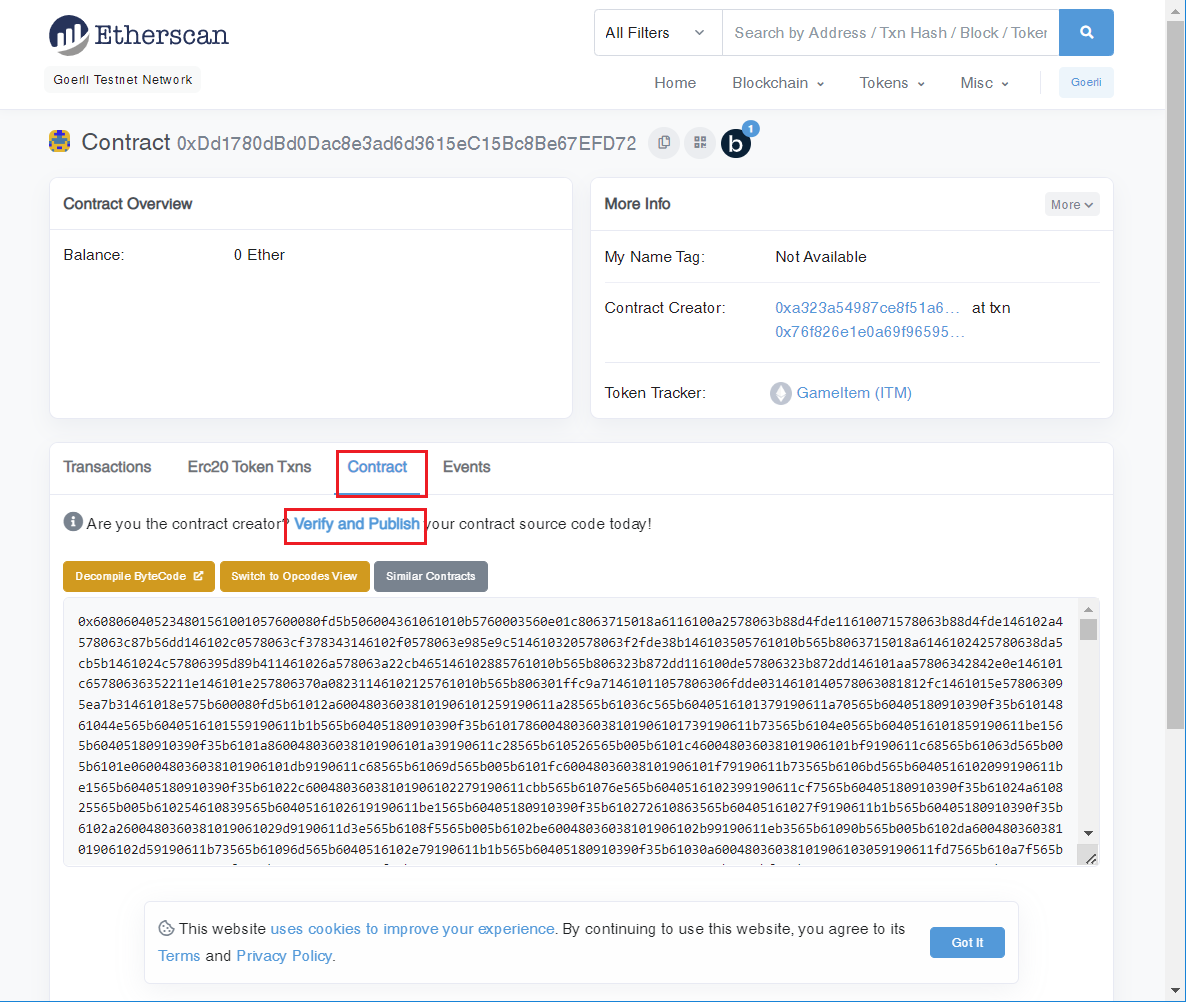
To verify a smart contract, you need to visit EtherScan and search for the deployed smart contract using the contract address, or you can click the highlighted button shown in the figure below.
Click on the verify and publish link shown under the contract section.
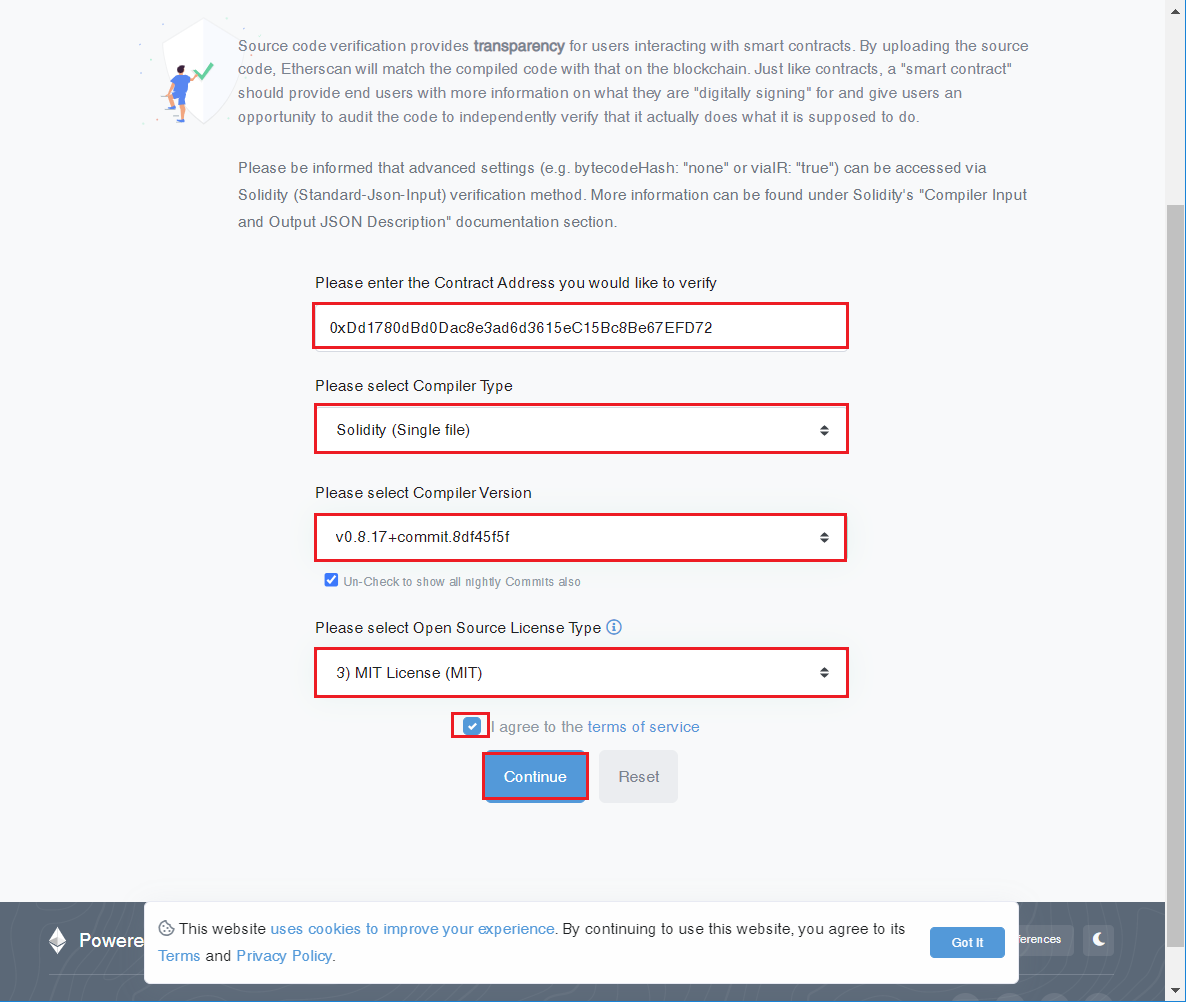
Once you click on the verify and publish link, you will be asked for the following:
-
Contract Address: The address of a deployed smart contract that you want to verify
-
Compiler Type: Either you want to verify a single file or multiple files
-
Compiler Version: The compiler version that you used to compile the smart contract
-
License: Open-source license type that you used for your source code
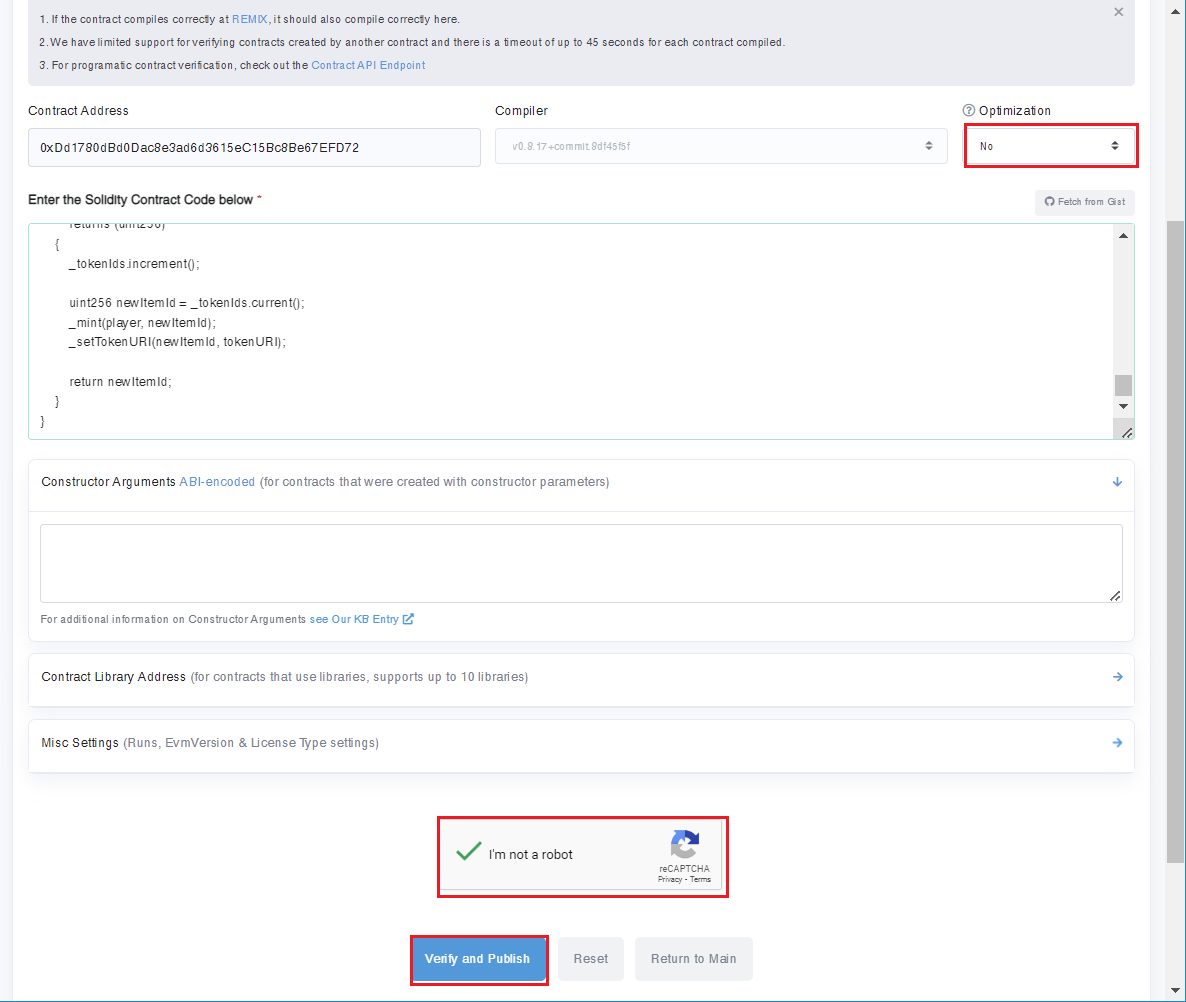
After that, you need to paste the flattened file you created in step 5, and make sure that Optimization is on or off during the compilation process, click OK, and your smart contract will be verified.
If there are no issues with your smart contract, it would be verified, and you'll be able to see an image similar to the one that is shown below.
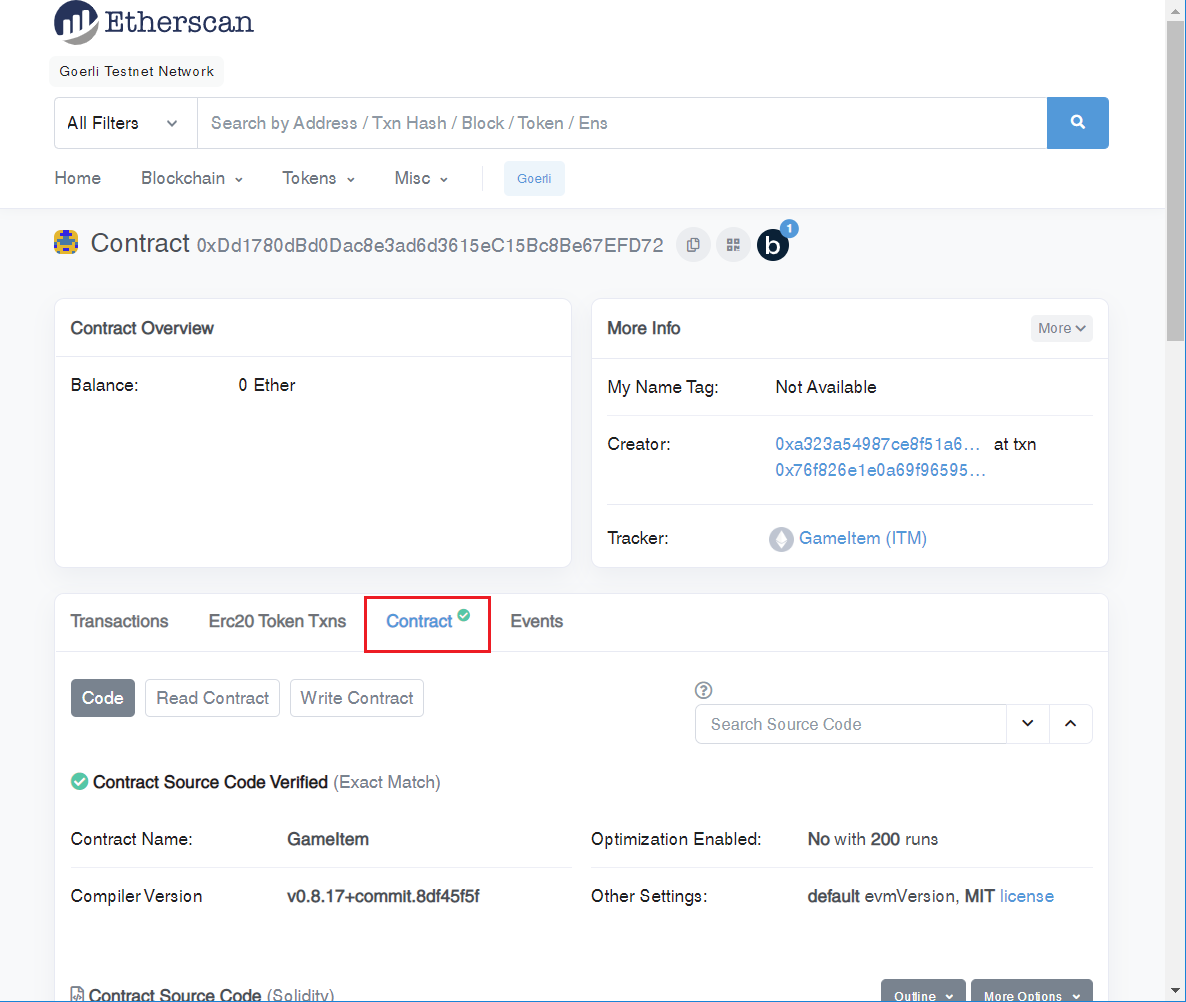
Your smart contract is verified.
If you don't want to use the above method, you can also use the API method to verify the contract.
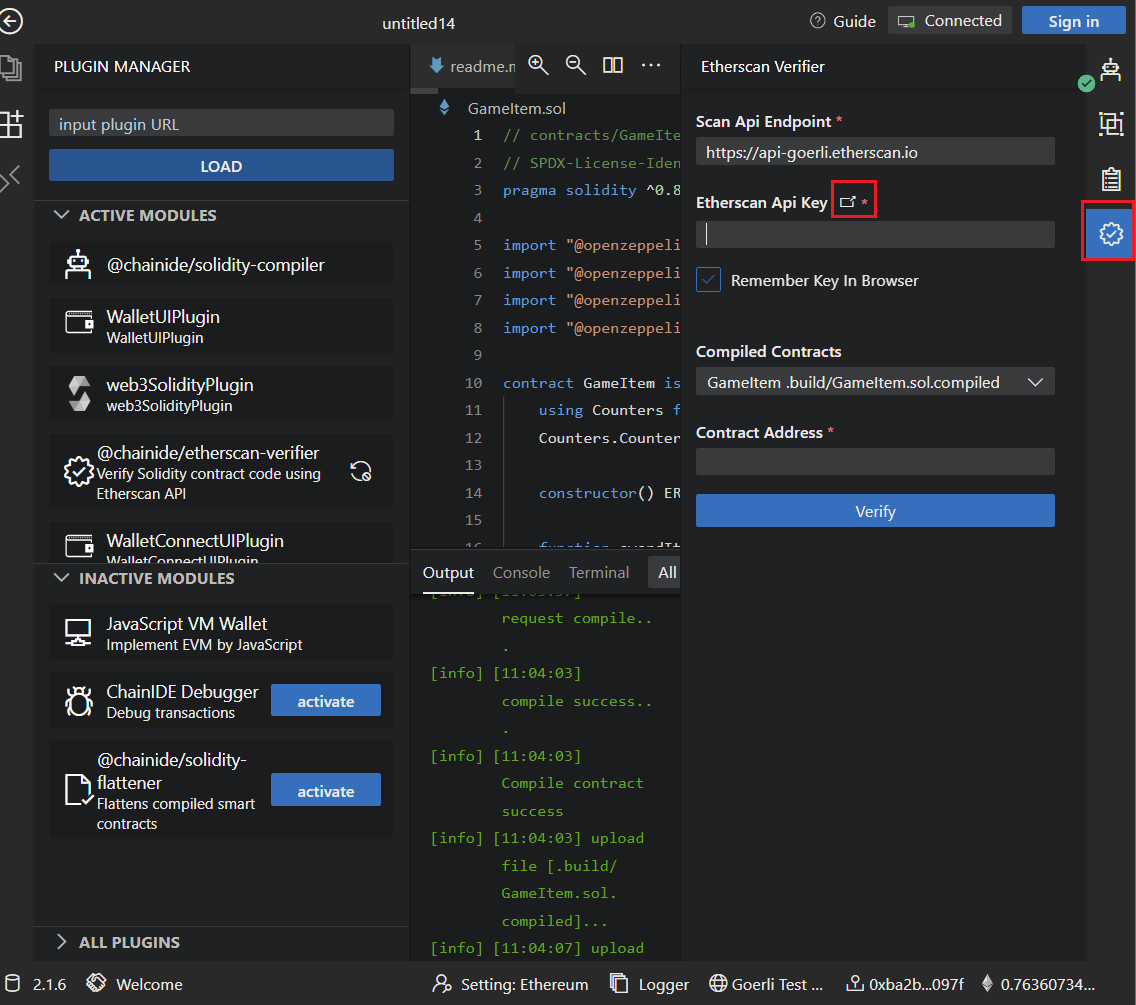
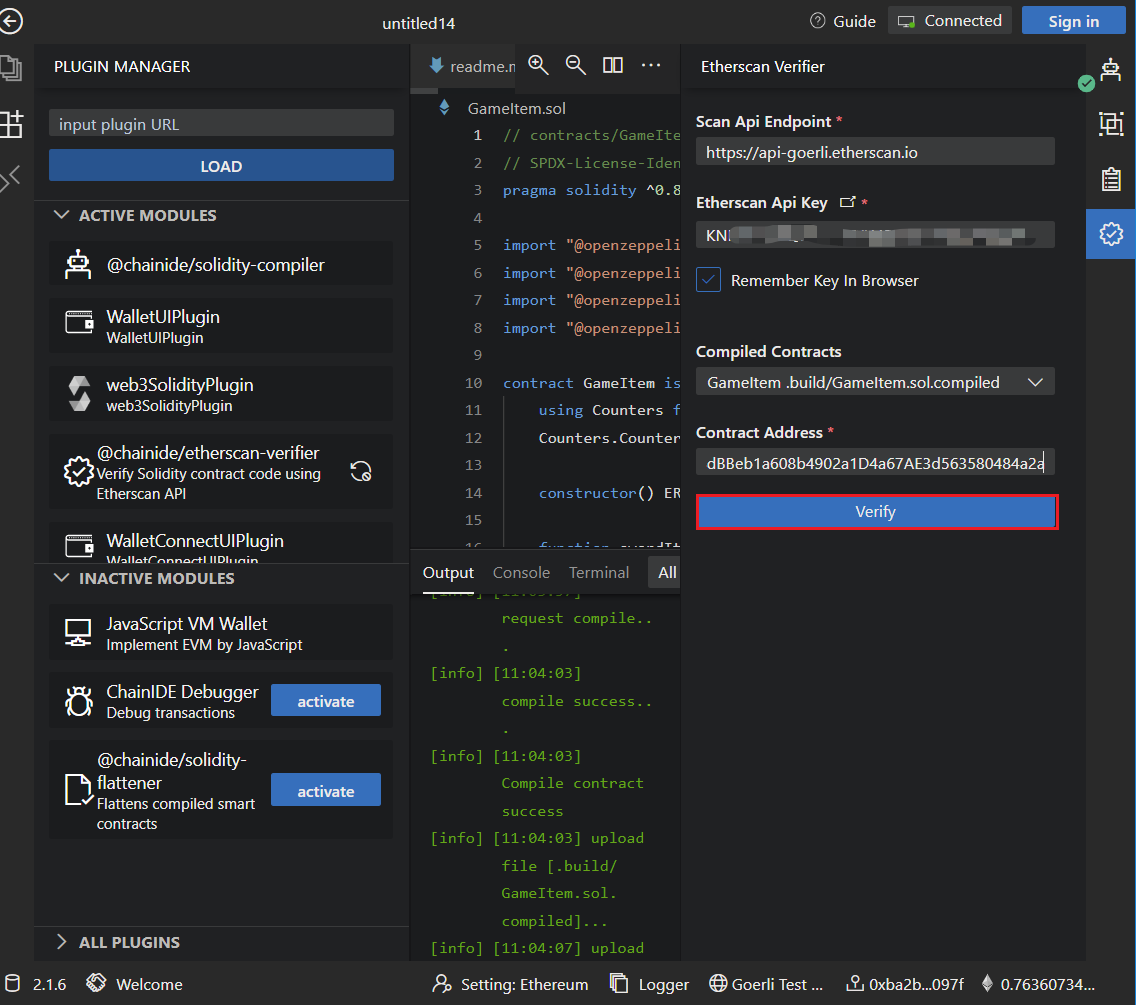
Activate the @chainide/etherscan-verifier plugin from the "PLUGIN MANAGER".
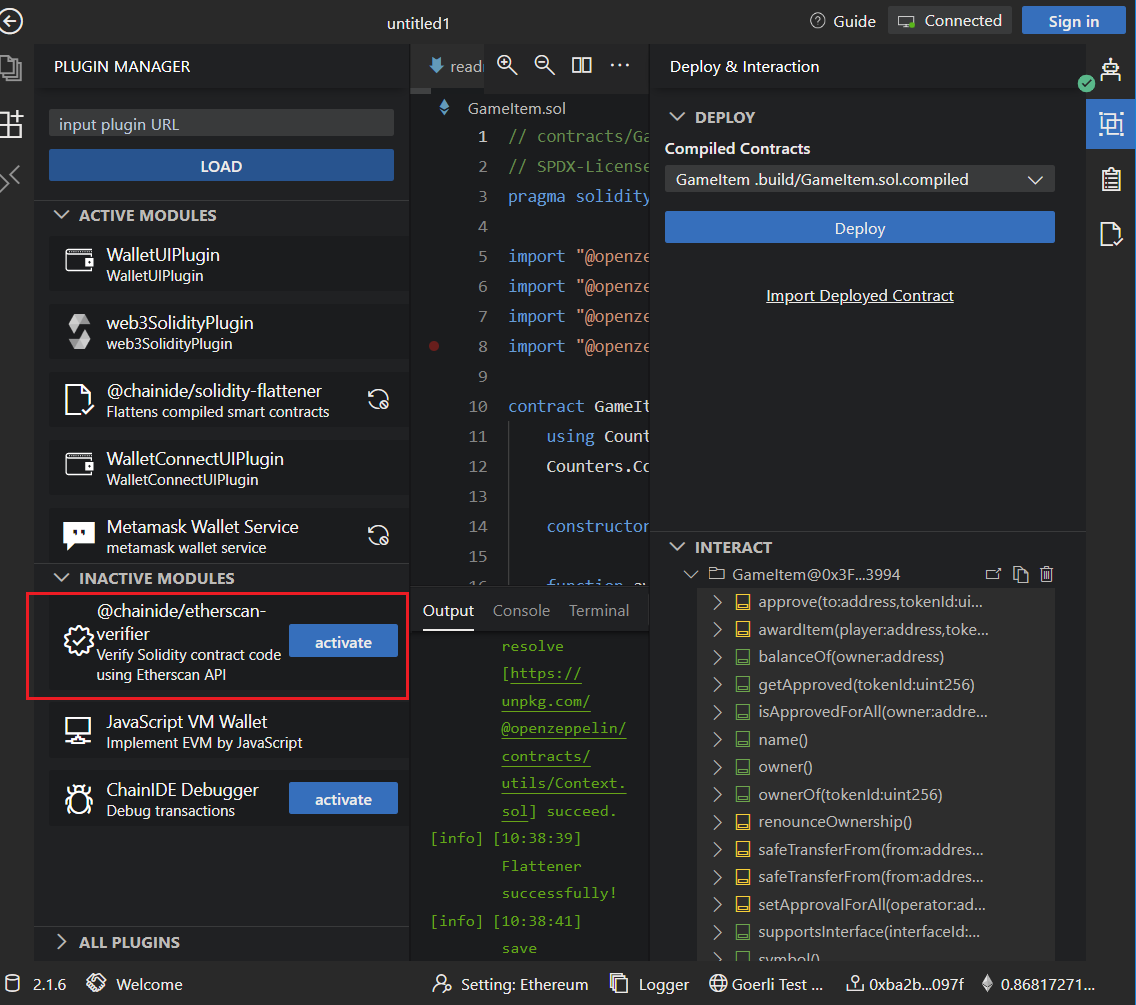
Click the @chainide/etherscan-verifier plugin in the right column, click the jump icon to go to the etherscan official website
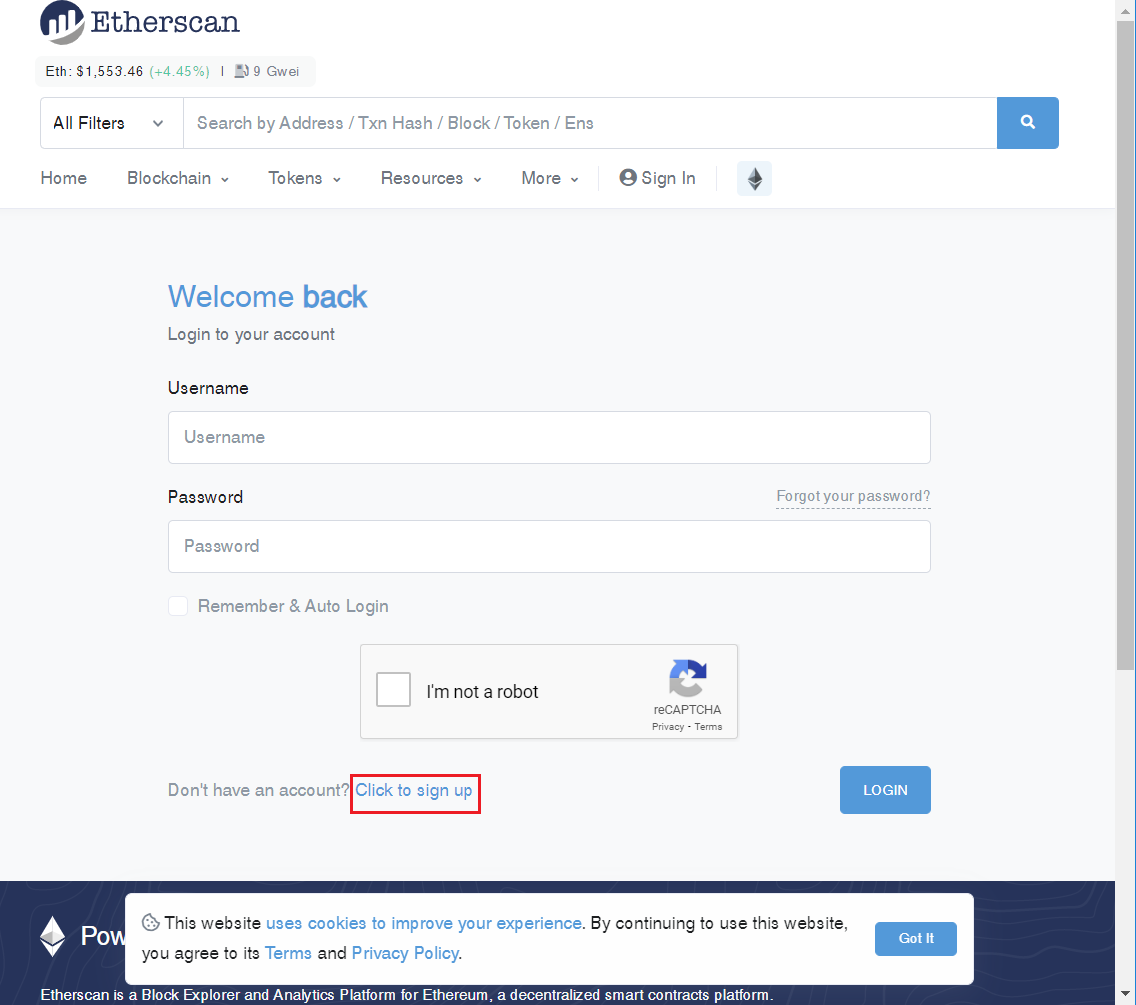
Select Login or Register on the login page
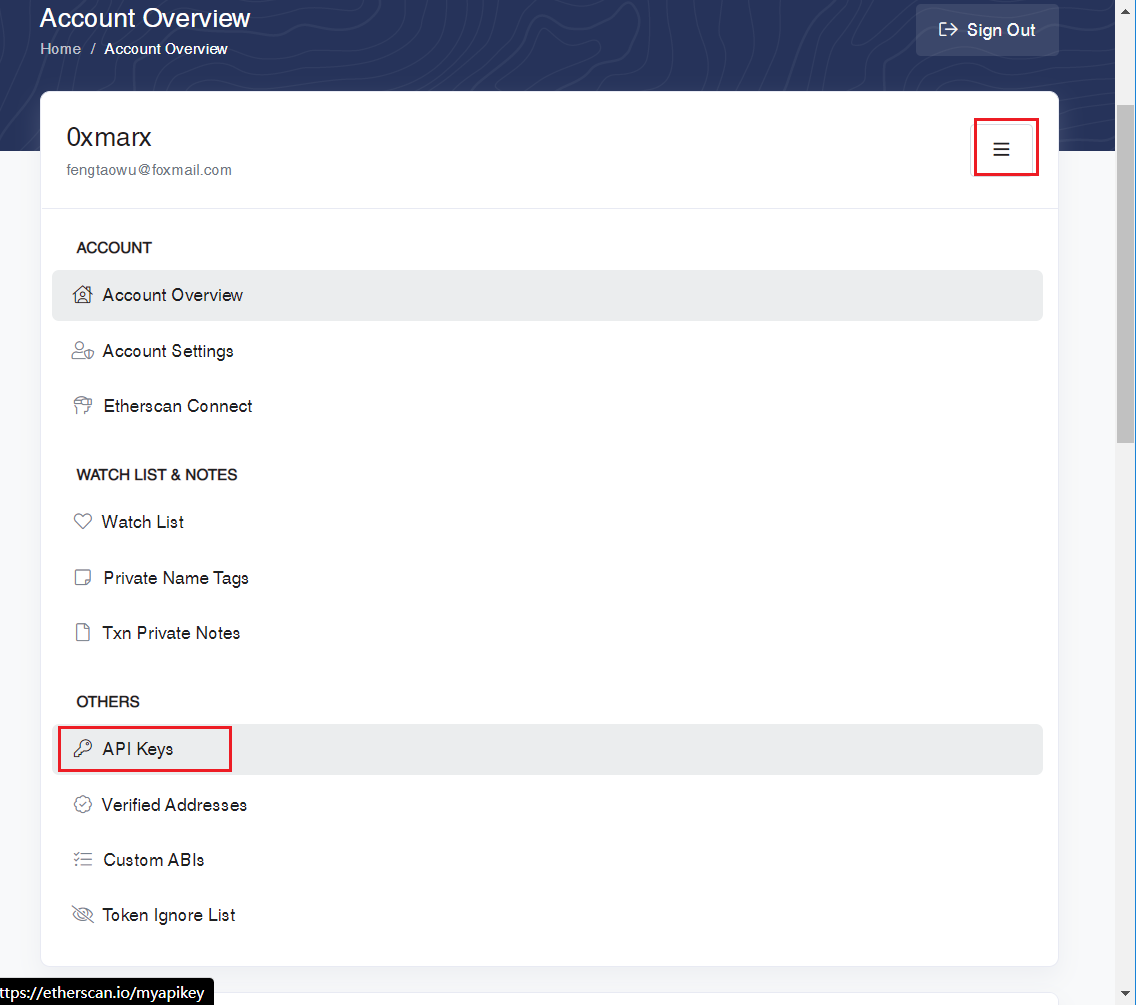
Select API Keys
Click add
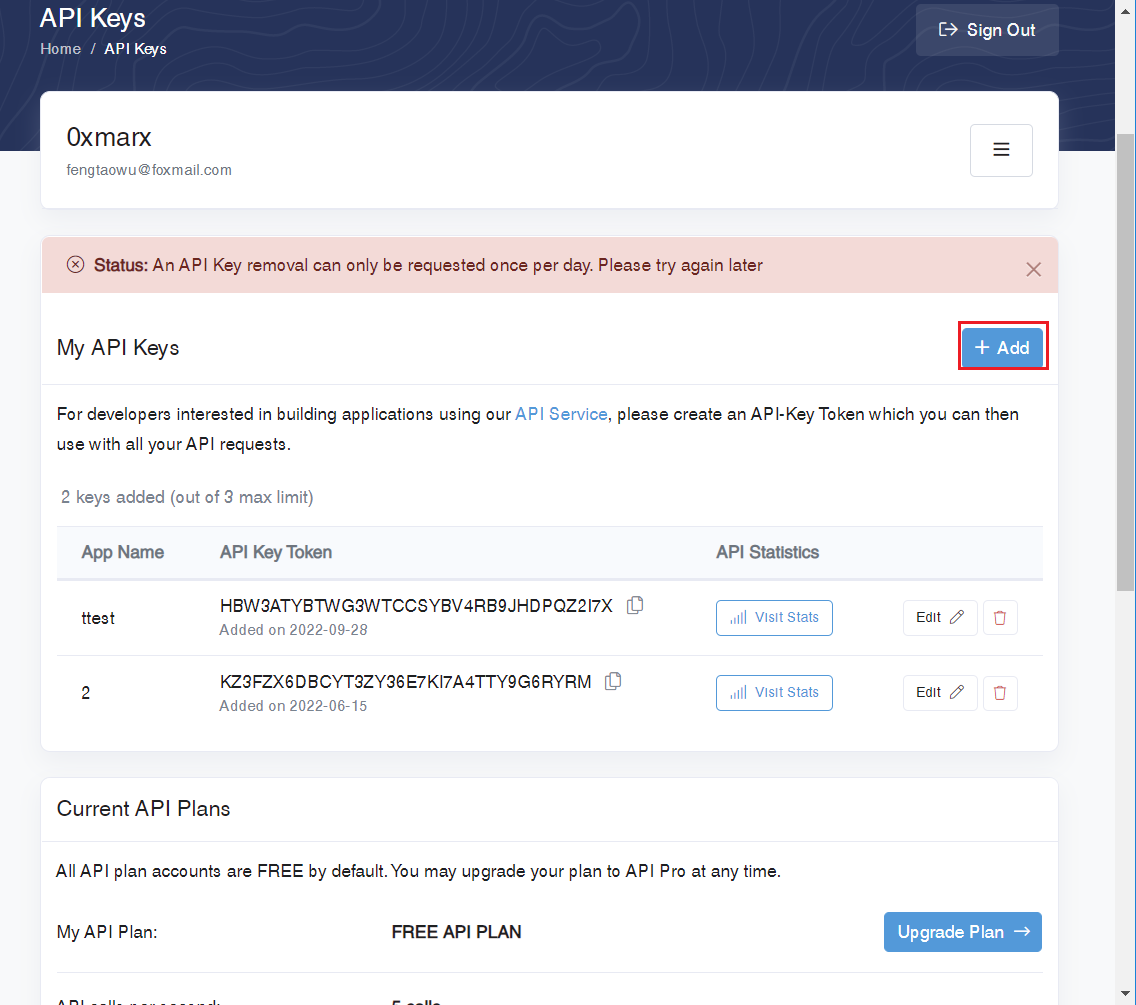
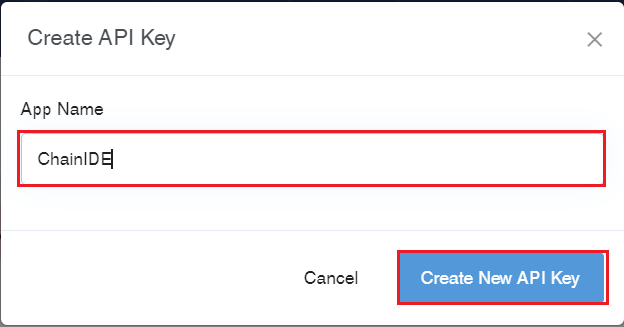
App Name, enter a name you like and click the "Create New API Key" button.
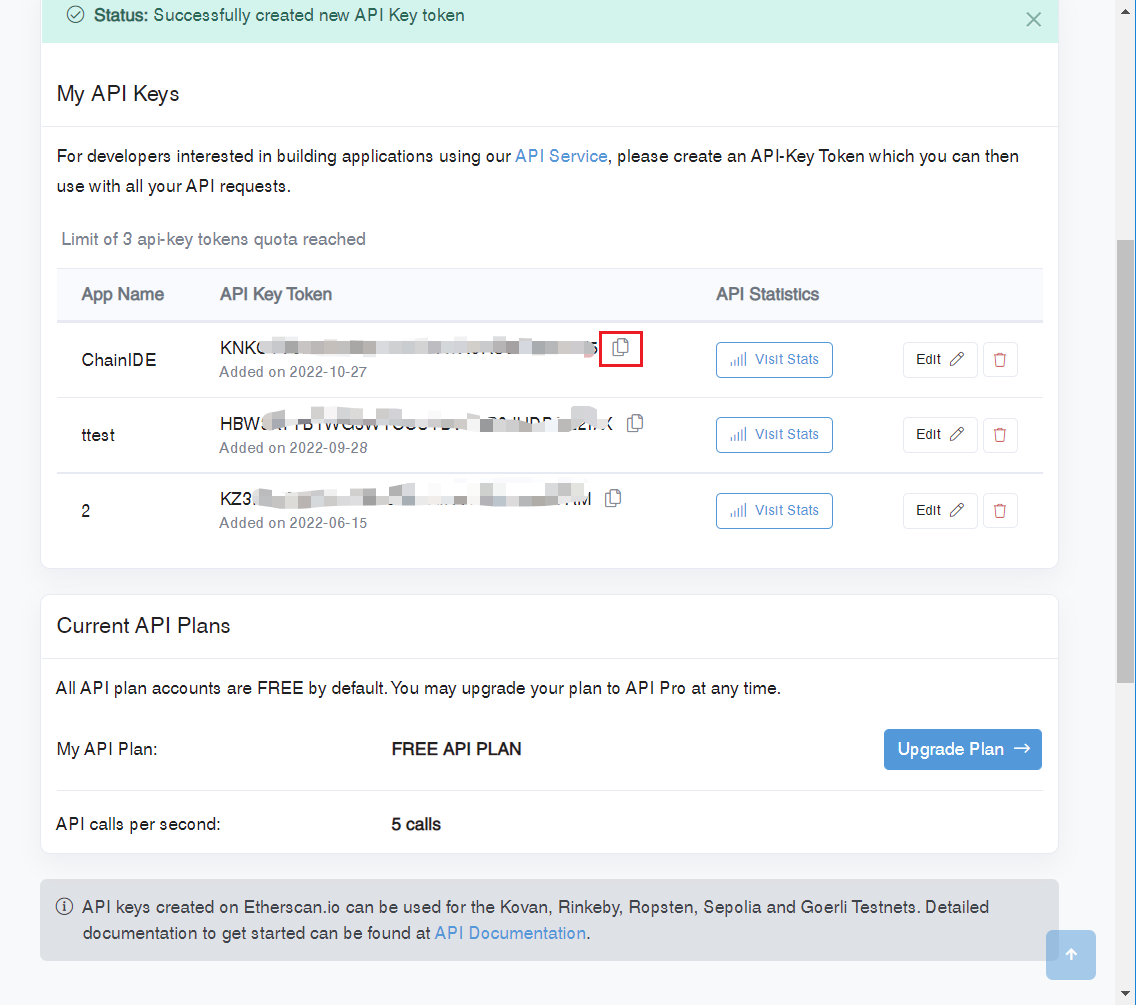
In this way, your API Key Token will be generated (be careful not to show it to others, only for your own use); click the icon to copy
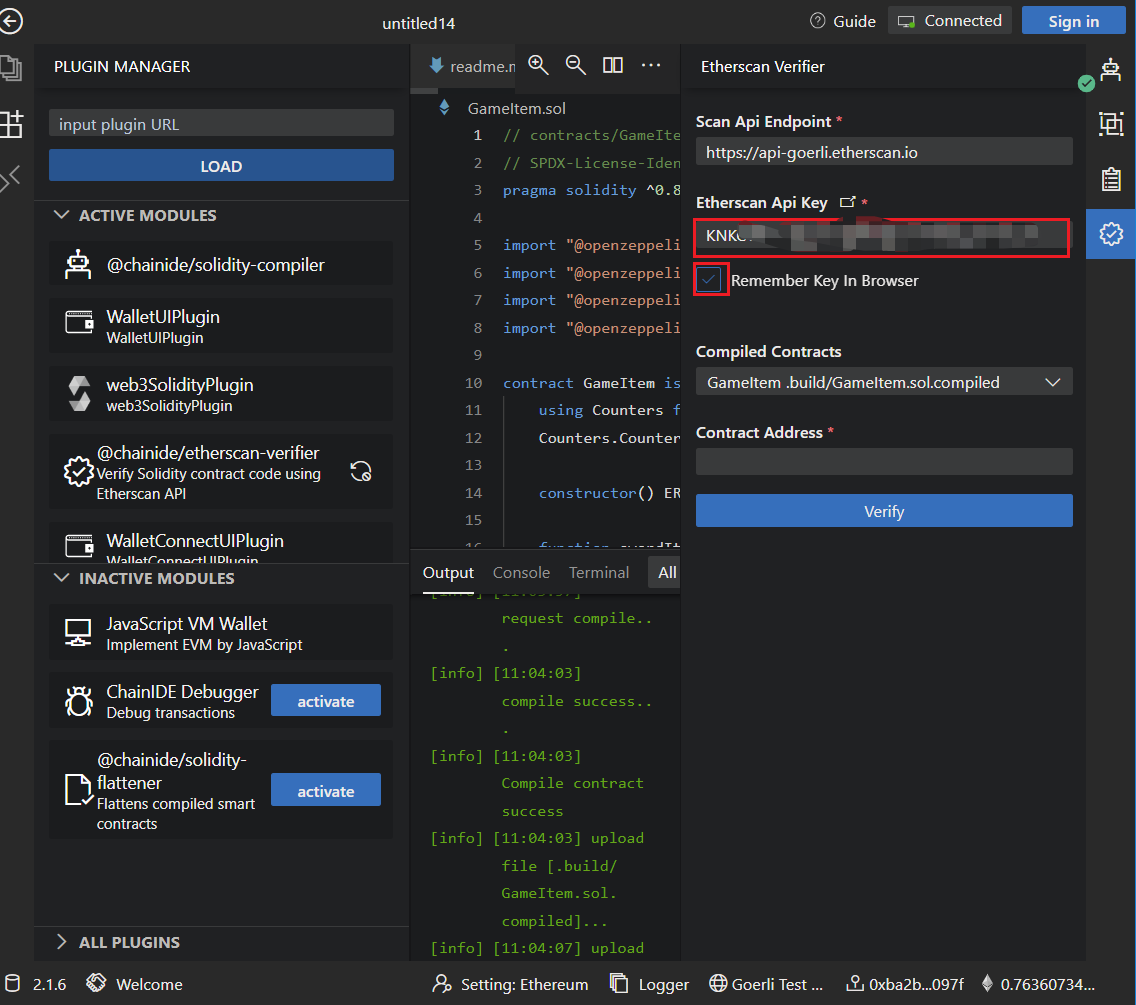
Paste the copied address in the "Etherscan Api Key" field
Copy the contract address you want to verify
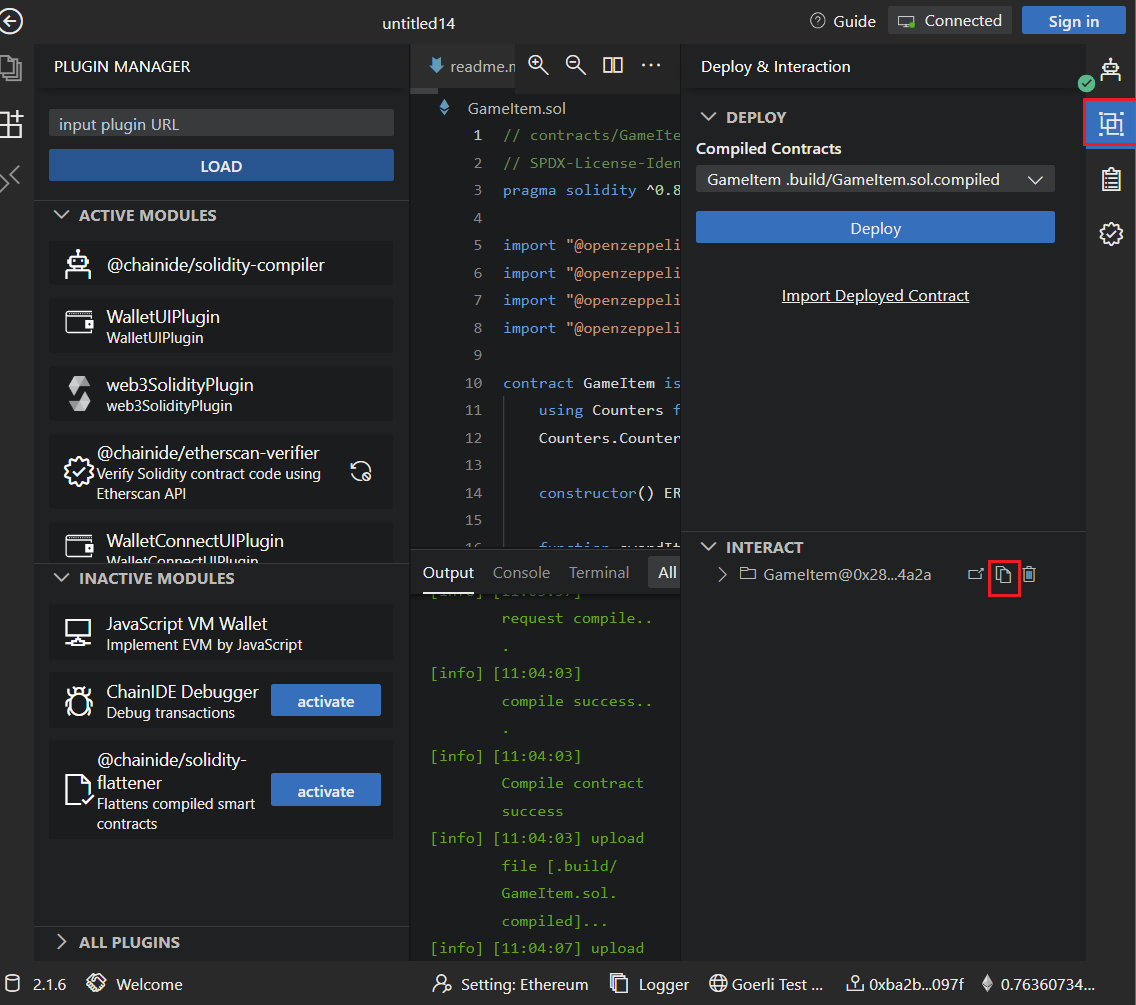
After pasting, select "GameItem" in Compiled Contracts, then click the "Verify" button.
Verification succeeded!
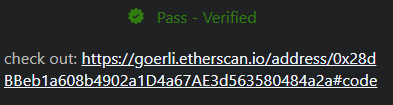
Your smart contract has been verified successfully. Congratulations; you have completed all the content of this tutorial!