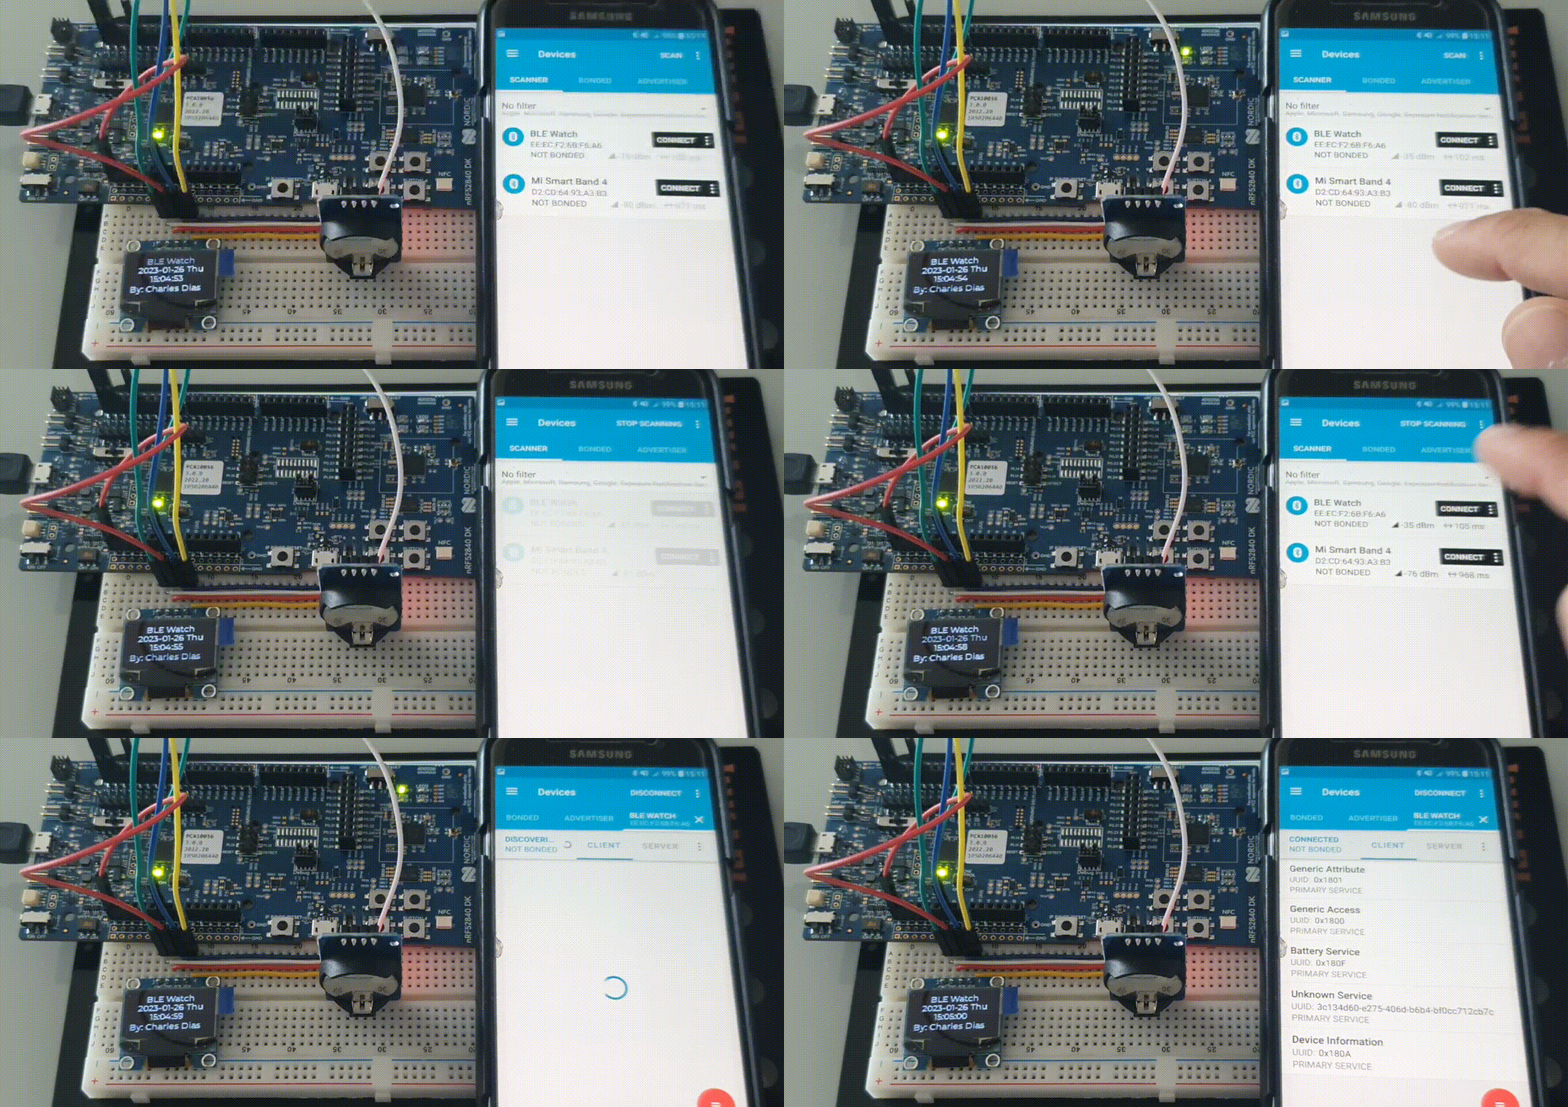
This is a sample project using the Zephyr RTOS and Nordic nRF Connect to create a BLE watch. This device is composed with:
- nRF52840 DK Nordic board.
- OLED monochrome displays SSD1306 128x64 pixels.
- and the DS3231 real-time clock (RTC).
Both display and RTC communicates with the nRF52840 MCU via I2C bus.
Some topics covered:
- Tested on nRF52840 DK board.
- Embedded system with Zephyr RTOS and nRF Connect SDK.
- Bluetooth Low Energy (LE) technology.
- The device works as GAP Peripheral and GATT server.
- Implemented BLE services officially adopted by Bluetooth SIG and custom services too.
- Continuous integration (CI) with GitHub Actions, as SonarCloud integration.
- Use of Docker container.
Exposes the device information.
- Device Information Service: <UUID: 0x180A>
- Characteristic: Model number string <UUID: 0x2A24>
- Data format: < string >
- Properties: Read.
- Characteristic: Manufacturer name string <UUID: 0x2A29>
- Data format: < string >
- Properties: Read.
- Characteristic: Serial number string <UUID: 0x2A25>
- Data format: < string >
- Properties: Read.
- Characteristic: Firmware revision string <UUID: 0x2A26>
- Data format: < string >
- Properties: Read.
- Characteristic: Hardware revision string <UUID: 0x2A27>
- Data format: < string >
- Properties: Read.
- Characteristic: Software revision string <UUID: 0x2A28>
- Data format: < string >
- Properties: Read.
- Characteristic: Model number string <UUID: 0x2A24>
Simulates the battery level voltage.
- Battery Service: <UUID: 0x180F>
- Characteristic: Battery level <UUID: 0x2A19>
- Data format: < UINT8[1 byte]> percentage battery level
- Properties: Notify, Read.
- Characteristic: Battery level <UUID: 0x2A19>
Receives messages to be shown on the display screen.
- Unknown Service: <UUID: 3C134D60-E275-406D-B6B4-BF0CC712CB7C>
- Characteristic: Unknown <UUID: 3C134D61-E275-406D-B6B4-BF0CC712CB7C>
- Data format: < TEXT (UTF-8) > limit up to 31 characters
- Properties: Read, Write.
- Characteristic: Unknown <UUID: 3C134D61-E275-406D-B6B4-BF0CC712CB7C>
.
├── CMakeLists.txt
├── docs
│   ├── Assigned Numbers.pdf
│   ├── DS3231.pdf
│   ├── DTS_v1.0.pdf
│   └── images
├── Kconfig
├── Makefile
├── nrf52840dk_nrf52840.overlay
├── prj.conf
├── README.md
├── sample.yaml
├── sonar-project.properties
├── src
│   ├── app
│   │   ├── inc
│   │   │   ├── device_information_service.h
│   │   │   ├── display_ssd1306.h
│   │   │   ├── gatt_central.h
│   │   │   └── rtc_ds3231.h
│   │   └── src
│   │       ├── device_information_service.c
│   │       ├── display_ssd1306.c
│   │       ├── gatt_central.c
│   │       └── rtc_ds3231.c
│   └── main.c
Navigate to the project folder.
$ cd BLE-WatchThen, run the Docker image. Replace the --device=/dev/bus/usb/001/xxx with the correct value.
$ docker run --rm -it --device=/dev/bus/usb/001/xxx --device=/dev/ttyACM0 --device=/dev/ttyACM1 -v ${PWD}:/workdir/project -w /workdir/project charlesdias/nrfconnect-sdk /bin/bashAfterwards, execute the command below to build the firmware.
$ make buildYou should expect an output similar to the following:
.
.
.

[390/400] Linking C executable zephyr/zephyr_pre0.elf
[394/400] Linking C executable zephyr/zephyr_pre1.elf

[400/400] Linking C executable zephyr/zephyr.elf
Memory region         Used Size  Region Size  %age Used
           FLASH:      353588 B         1 MB     33.72%
             RAM:       55624 B       256 KB     21.22%
IDT_LIST: 0 GB 2 KB 0.00%After the build is complete, run the following command to flash the firmware:
$ make flashThe expected output should be similar to:
.
.
.
[ ######               ]   0.000s | Verifying image - block 1 of 2
[ #################### ]   0.000s | Verifying image - Verify successful
[ #################### ]   2.377s | Verify file - Done verifying

Applying system reset.
Run.
-- runners.nrfjprog: Board with serial number <serial-number-value> flashed successfully.Test the BLE Watch application with the nRF Connect app, which is available for iOS (App Store) and Android (Google Play).
Ztest is a simple testing framework for Zephyr applications. It provides basic structures for writing test cases and test suites.
To run the unit tests for this project, follow these steps:
- Navigate to the project's directory.
$ cd BLE-Watch-
Open the
/dev/ttyACM0using your preferable serial communication program. -
Build the tests with the following command:
$ make tests- After building, flash the tests firmware into the board with:
$ make flashThe output will show the results of the tests on /dev/ttyACM0, indicating which tests passed and which failed.
- Create dedicate task to update the display.
- Implement Bluetooth service to set the date and time.
- Flash the application project running west on Docker container.
- Add Doxygen configuration.


