Sign in to the Azure portal
- Click here to open the Azure portal and maximize the browser window
- In the Email or phone field, enter
- In the Password field, enter
- Click Sign in
- You may encounter a popup entitled Welcome to Microsoft Azure with buttons for Start Tour and Maybe Later - Choose Maybe Later
Create a storage account and Initialize the Azure CLI
-
To launch the Azure Cloud Shell, click the Cloud Shell button on the menu in the top menu bar of the Azure portal.

The button launches an interactive shell that you can use to run all of the steps required to create and manage an Ubuntu Linux VM.
-
Once the shell launches, you will see "Welcome to Azure Cloud Shell". Click on the Bash (Linux) option at the bottom


- In the "You have no storage mounted" tab, click Show Advanced Settings.

- In the Advanced Settings tab, use the existing Resource Group and enter a unique name for the Storage Account and File Share
- Click Create Storage

- Once the storage gets created, your Cloud Shell will initialize and very shortly be ready to use.

> Note: the Resource Group name, the Storage Account, and the File Share you created are displayed in the CLI while it initializes.
>
> You may enlarge the shell by dragging the border or clicking on the **maximize button** on ht etop right of the shell.
-
A server contains a group of databases. You can create an Azure Database for PostgreSQL server using the az postgres server create command.
Type or copy and paste the following into the Azure command line:
az postgres server create --resource-group rg_name --name postgresql --location southcentralus --admin-user pgsqluser --admin-password P@ssword1 --performance-tier Basic --compute-units 50 --version 9.6
-
Resource-group: Provide the RG, that you earlier created.
-
Name: Provide the PostgreSQL server name,that must be unique.
-
Location: Provide the RG location
-
Admin-user: Provide the suitable name
-
Admin-password: Provide the suitable password
-
Performance-tier: Basic
-
Compute-units: 50
-
Version: 9.6
Note: Be sure to remember your user name and password as you will need to use it later for your connection information.
-
Hit Enter
-
Create an Azure PostgreSQL server-level firewall rule with the az postgres server firewall-rule create command. A server-level firewall rule allows an external application, such as psql or PgAdmin to connect to your server through the Azure PostgreSQL service firewall.
az postgres server firewall-rule create --resource-group rg_name --server postgresql --name AllowAllIps --start-ip-address 0.0.0.0 --end-ip-address 255.255.255.255
-
Hit Enter
-
Now let's get the connection information for your new PostGreSQL Azure Database Server. To connect to your server, you need to provide host information and access credentials.
az postgres server show --resource-group rg_name --name postgresql
-
Hit Enter
The result is output to the screen in JSON format as shown in the example below. Make a note of the administratorLogin and fullyQualifiedDomainName.
Note: Your fullyQualifiedDomainName will be .postgres.database.azure.com
  {
  "administratorLogin": "pgsqluser",
  "fullyQualifiedDomainName": "postgresqlrg123456.postgres.database.azure.com",
  "id": "/subscriptions/00000000-0000-0000-0000-000000000000/resourceGroups/myresourcegroup/providers/Microsoft.DBforPostgreSQL/servers/mypgserver-20170401",
  "location": "southcentralus",
  "name": "postgresqlrg123456",
  "resourceGroup": "rg123456",
  "sku": {
    "capacity": 50,
    "family": null,
    "name": "PGSQLS2M50",
    "size": null,
    "tier": "Basic"
  },
  "sslEnforcement": null,
  "storageMb": 51200,
  "tags": null,
  "type": "Microsoft.DBforPostgreSQL/servers",
  "userVisibleState": "Ready",
  "version": "9.6"
  }
-
Type the following psql cmmand in Azure Cloud Shell and hit Enter:
psql --host=postgresql.postgres.database.azure.com --port=5432 --username=pgsqluser@postgresql --dbname=postgres
-
You will be prompted for a password. Type P@ssword1 at the prompt and hit Enter.
Note: the psql prompt will not echo what you type.
-
Once you are connected to the server with psql, create a blank database for your Python app to use. At the prompt, type the following command and hit Enter:
create database bootcamp;
-
The Bootcamp database is now created. To connect to it and confirm it was created, type the following command and hit Enter:
\c bootcamp;
-
Exit psql and return to the Azure Cloud Shell prompt. Type the following command and hit Enter:
\q
Ubuntu server is predeployed with all the necessary requirements as a part of lab and credentials will be shared on mail.
-
We are now ready to install our Bootcamp application that we will use with PostgreSQL. We will need to download a copy from GitHub.
-
To connect to GitHub and pull the code for Bootcamp, type the following command and hit Enter:
git clone https://github.com/vitorfs/bootcamp.git
Note: Feel free to browse to Github and have a look at the Bootcamp repo to learn about what the application does: https://github.com/vitorfs/bootcamp.git
-
In your shell, type the following and hit Enter:
cd bootcamp
-
Now we will install the Django Framework requirements for the Python app. Type the following command and hit Enter:
pip3 install -U -r requirements/local.txt
-
Now install Django
sudo pip3 install django==1.11
-
To list the files in the ../bootcamp directory, use the ls command.
Note: You will need to run some of these commands as root. To do this, type "sudo" then the command you wish to run.
Type the following command and hit Enter:
sudo ls -la
Note: the manage.py script that was installed when we cloned the Git repository.
-
While still in the ../bootcamp directory, type the following command and hit Enter:
vim .env
-
Enter the following lines to create your database connection environment file:
A: You are now in the VIM Editor. Type i to enter INSERT mode.
B: Copy and paste the following into the vim editor
DEBUG=True
SECRET_KEY='mys3cr3tk3y'
DATABASE_URL='postgres://pgsqluser@postgresql:P@ssword1@postgresql.database.windows.net:5432/bootcamp'
ALLOWED_HOSTS = "*"Note: If you look at the credentials closely, you will notice we are using the new Azure Database for PostgreSQL service to connect to this app, and we have pre-populated the connection string.
-
On the Terminal, to come out of the editing mode-
A: Press the ESC key
B: Type :wr and hit Enter. This writes the file .env and saves it
C: Type :q and hit Enter to leav VIM
-
To run migration and serve the app, type the following command and hit Enter:
python3 manage.py migrate
-
Let's bring the server up - Type the following command and hit Enter:
python3 manage.py runserver 0.0.0.0:8000
-
Now, open a new web browser window, enter the following URL, and hit Enter:
http://[publicIpAddress]:8000/
Note: Replace [publicIpAddress] with the IP address of your server (without brackets) from Create an Azure VM running Ubuntu Server-Step 3.
-
With the bootcamp app open in your browser, sign up for the bootcamp.
Note: Enter a username; provide an email address; create a password; then create your account
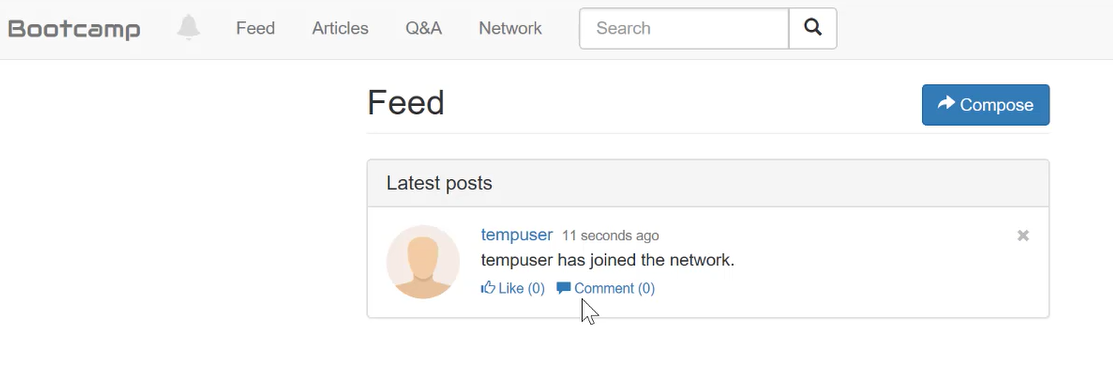
Note: The next screen you would see after successful creation of the account is this:
-
Let's go to the database and query it directly. Return to Azure Cloud Shell where you have the SSH session and hit Ctrl-C to terminate the web server.
-
Next, let's terminate our SSH session to Ubuntu. Type the following command and hit Enter:
exit
-
Now, let's connect to the Azure PostgreSQL database. Type the following and hit Enter:
psql --host=postgresql.postgres.database.azure.com --port=5432 --username=pgsqluser@postgresql --dbname=bootcamp
-
If prompted for a password, type P@ssword1 at the prompt and hit Enter.
Note: the psql shell will not echo what you type.
-
Type in the following command and hit Enter
SELECT * FROM feeds_feed;

You should now see the username you registered in Bootcamp in this table.