Includes ONNX runtime support on Node.js.
Tested for basic AIoT lab sessions.
Supported Devices (you need one of them):
- Arduino MEGA with ESP-01 chip
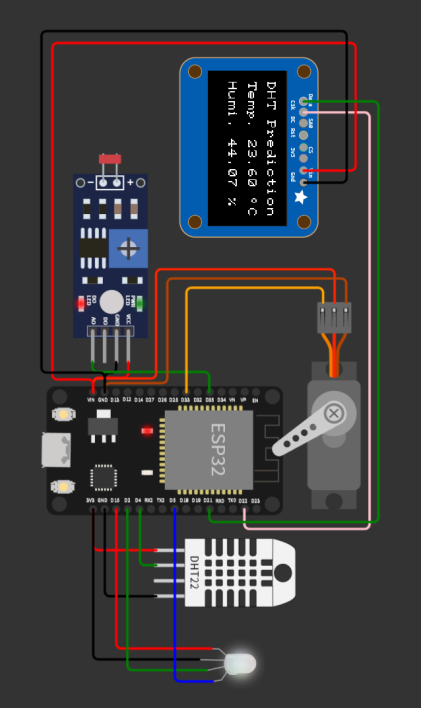
- wokwi.com ESP32 C++
- VitCon IoT-MODLINK
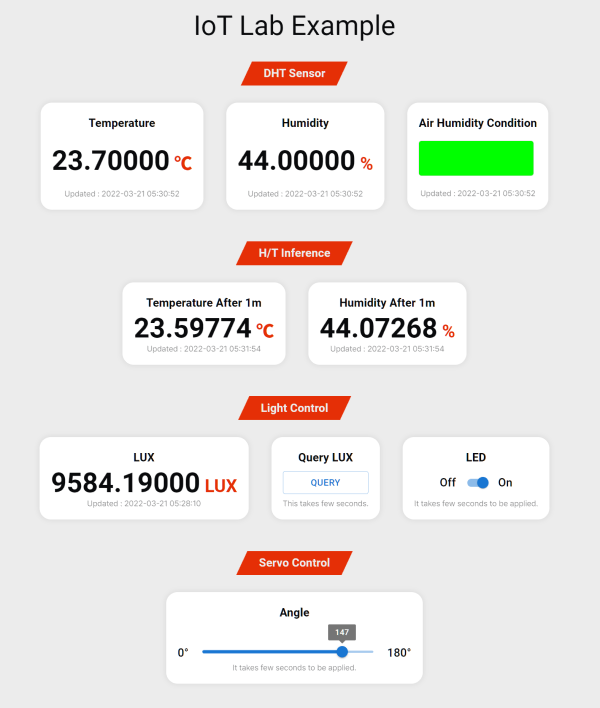
| Web Panel Screenshot | Wokwi Simulator Diagram |
|---|---|
 |
 |
- ESP32 C++ example code
- Arduino Mega C++ example code
- VitCon IoT-MODLINK C++ example code
- IoT web server with customizable control panels
- JSON-based DB (powered by
lowdb) - On-server ML inference (powered by
onnxruntime-node)
- Install node.js v16 or higher on your server.
- Clone the repository on your server.
git clone https://github.com/wldh-g/iot-lab-for-beginners.git - Install the dependencies.
npm install - Run the server.
npm run dev - Run the broker server.
npm run broker-v2 - Install
SimplyAtomic,ArduinoJson,AsyncTimerlibrary from Arduino Library Manager. - Install
VegemiteSandwichlibrary atexample/ArduinoMega-cpp/VegemiteSandwich. - Open
example/ArduinoMega-cpp/sketch.inoand change default values to your own values. - Upload the program.
- Go to
http://your-ip-or-domain:port/panel/example3. - Enjoy!
- Install node.js v16 or higher on your server.
- Clone the repository on your server.
git clone https://github.com/wldh-g/iot-lab-for-beginners.git - Install the dependencies.
npm install - Run the server.
npm run dev - Go to
https://wokwi.com/projects/326257884268593746. - Edit line 14,
your-ip-or-domainto your server's IP address or domain.
If you are using port rather than3000on your server, also edit line 14,3000to your port number. - Run the simulation using the green start button.
- Go to
http://your-ip-or-domain:port/panel/example1. - Enjoy!
Note: If you are a lecturer and if you want to use wokwi.com in your class, first contact the administrator of wokwi.com to get dedicated build servers and gateways. You may have to pay for them.
- Install node.js v16 or higher on your server.
- Clone the repository on your server.
git clone https://github.com/wldh-g/iot-lab-for-beginners.git - Install the dependencies.
npm install - Run the server.
npm run dev - Run the broker server.
npm run broker-v1 - Install
DHT sensor,U8g2,SimplyAtomic,ArduinoJson,AsyncTimerlibrary from Arduino Library Manager. - Install
SoftPWM,Adafruit_Sensor-masterlibrary from here. - Install
Vegemitelibrary atexample/MODLINK-cpp/Vegemite. - Configure VitCon IoT-MODLINK WiFi-LINK with this Android app or this iOS app. Host is
your-ip-or-domainand port is3010. - Open
example/ArduinoMega-cpp/sketch.inoand compile it. - Upload the program.
- Go to
http://your-ip-or-domain:port/panel/example2. - Enjoy!
- If you want to use a pre-trained model, skip to step 5.
- Gather data named
humidityandtemperaturefrom your IoT device (or wokwi simulator) intodb.json. - Run
example/inference/dht_predict.ipynbwith your owndb.json. - Save
humi_predict.onnxandtemp_predict.onnx. - Copy
.onnxfiles andmodel_map.yamlto the root directory of this repository.
For the pre-trained.onnxfiles andmodel_map.yaml, please checkexample/inferencedirectory. - Uncomment "H/T Inference" section of
pages/panel/example.tsx.
i.e. delete two lines({/*and*/}). - Re-run the server.
npm run dev - Go to
http://your-ip-or-domain:port/panel/example1orexample2. - Enjoy!
Note that the pre-trained model in this repository is not accurate. It is just a simple example to show how inference can work.
Made with