Documentation for KubeSphere

Prerequisites
Install the following three dependencies first:
- git
- node.js
- yarn (or npm,
we recommend yarn)
Check if installed successfully.
$ git --version
git version 2.21.0
$ node -v
v10.15.1
$ yarn -v
1.15.2
Fork
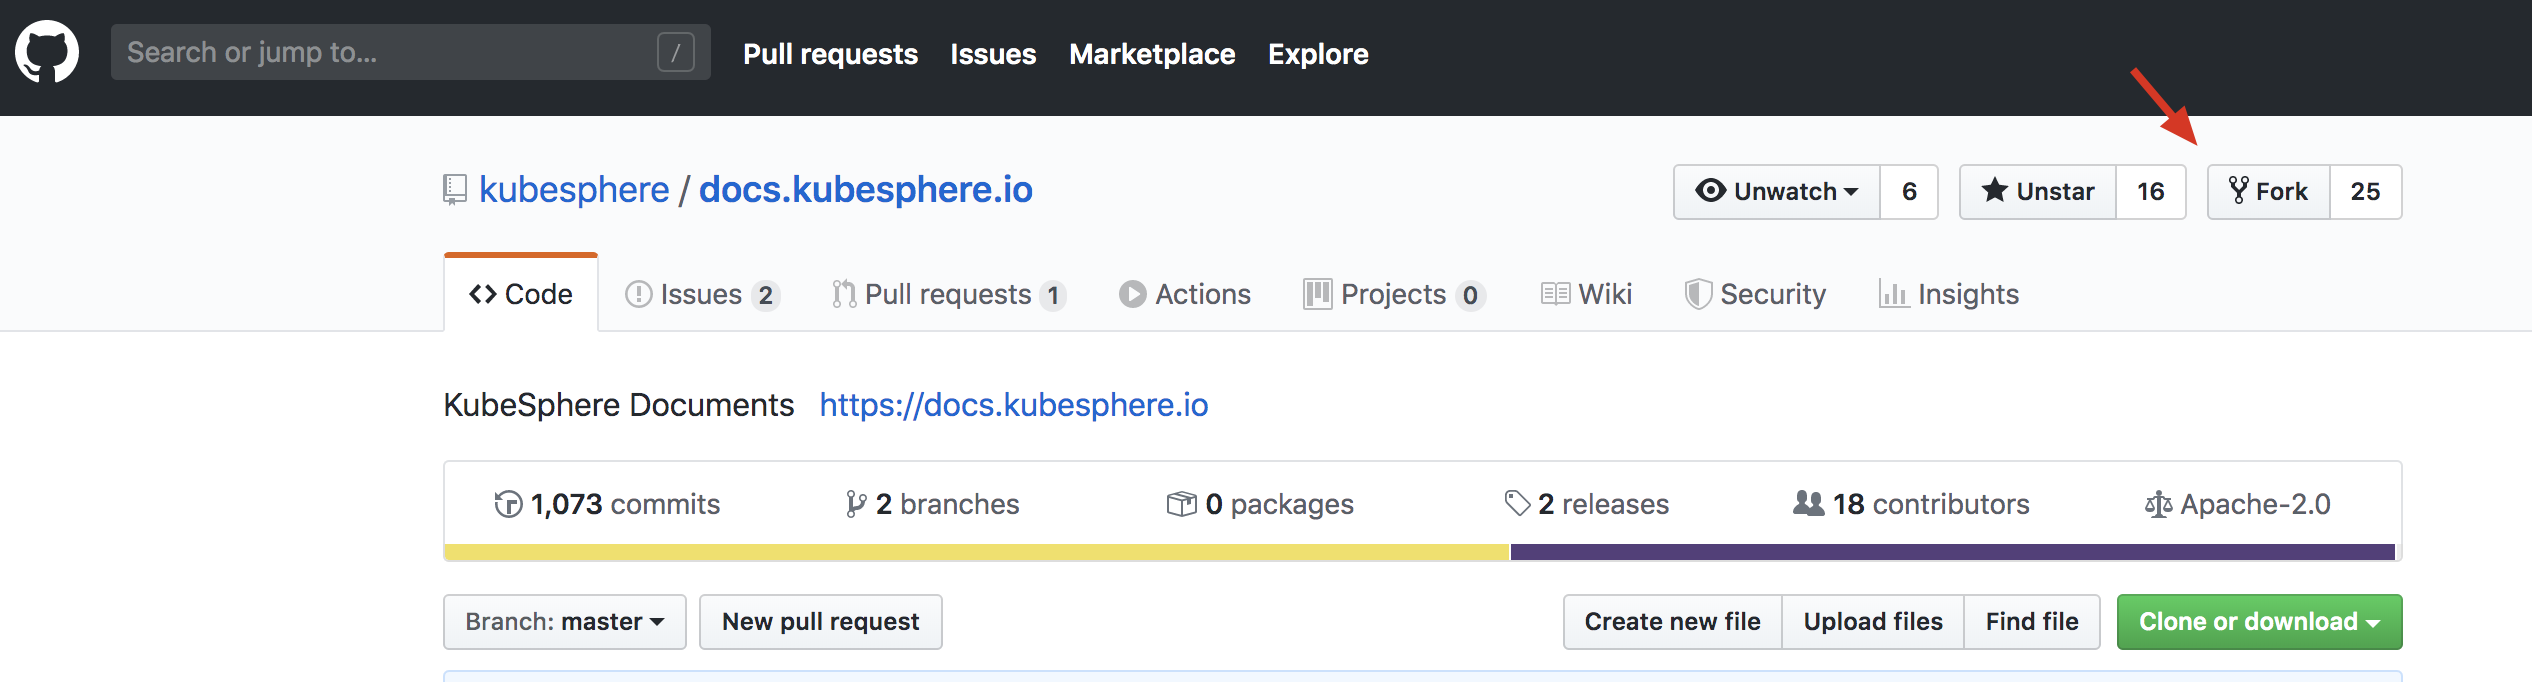
Fork the docs into your account.
Clone to your local
git clone https://github.com/{$YOUR_GITHUB_ACCOUNT}/docs.kubesphere.io.gitCompile it locally
cd docs.kubesphere.io
yarn
yarn develop
Then you can preview the documentation website http://localhost:8000/.
Document tree
All documents are placed in content/ folder, see the document tree below:
├── content                                  // documents directory
│   ├── en                                   // documents language - English version
│   │   └── quick-start                      // document folder
│   │           └── admin-quick-start.md     // document
│   │           └── xxxx.md
│   ├── zh-CN                                // documents language - Chinese version
│   │   └── quick-start                      // document folder
│   │           └── admin-quick-start.md     // document
│   │           └── xxxx.md
│   ├── toc_en.json                          // table of contents, define the page navigation, this json file is for English version of navigation.
│   └── toc_zh-CN.json                       // this json file is for Chinese version of navigation.
├── src                                      // source code
Contribute to documentation
Your contribution to KubeSphere documentation is highly welcome. Please follow the guide below to improve the current docs, add your practical guides, or fix misspelling words.
Modify document
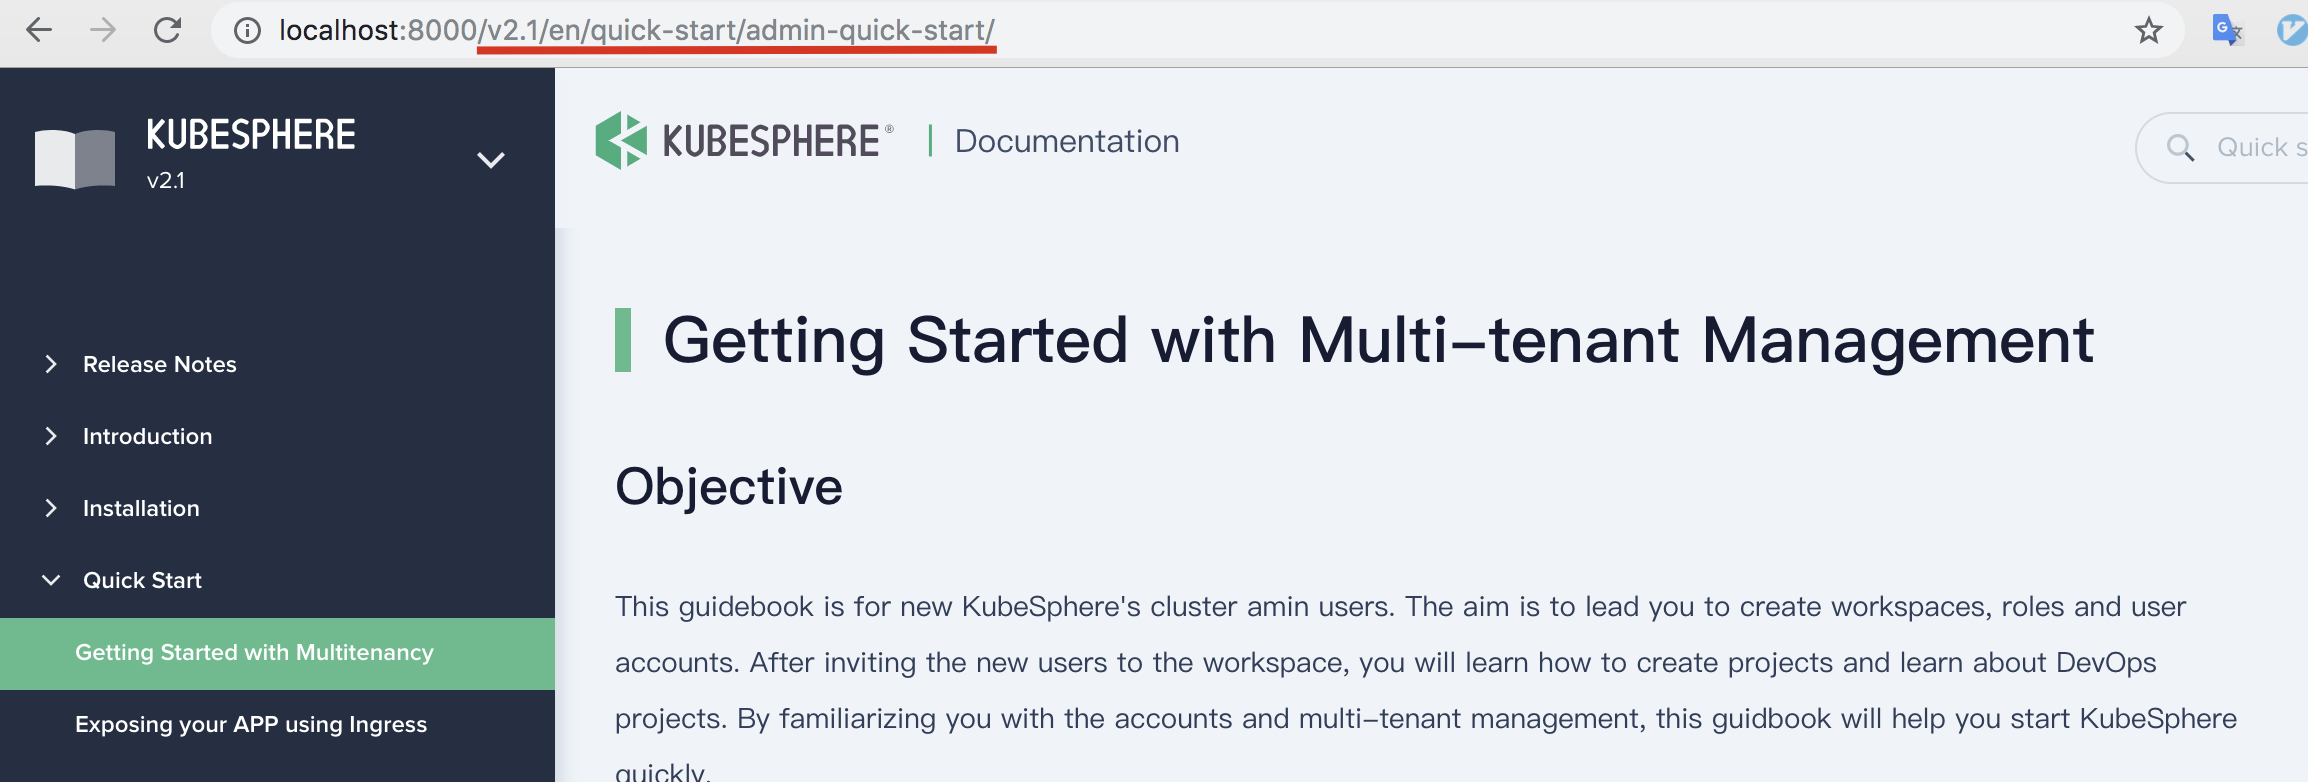
For example, if we want to modify a quick start guide (e.g. admin-quick-start.md) as the following, take a look at the URL of this guide, the path /en/quick-start/admin-quick-start/ (en is omitted usually) means the markdown file location.
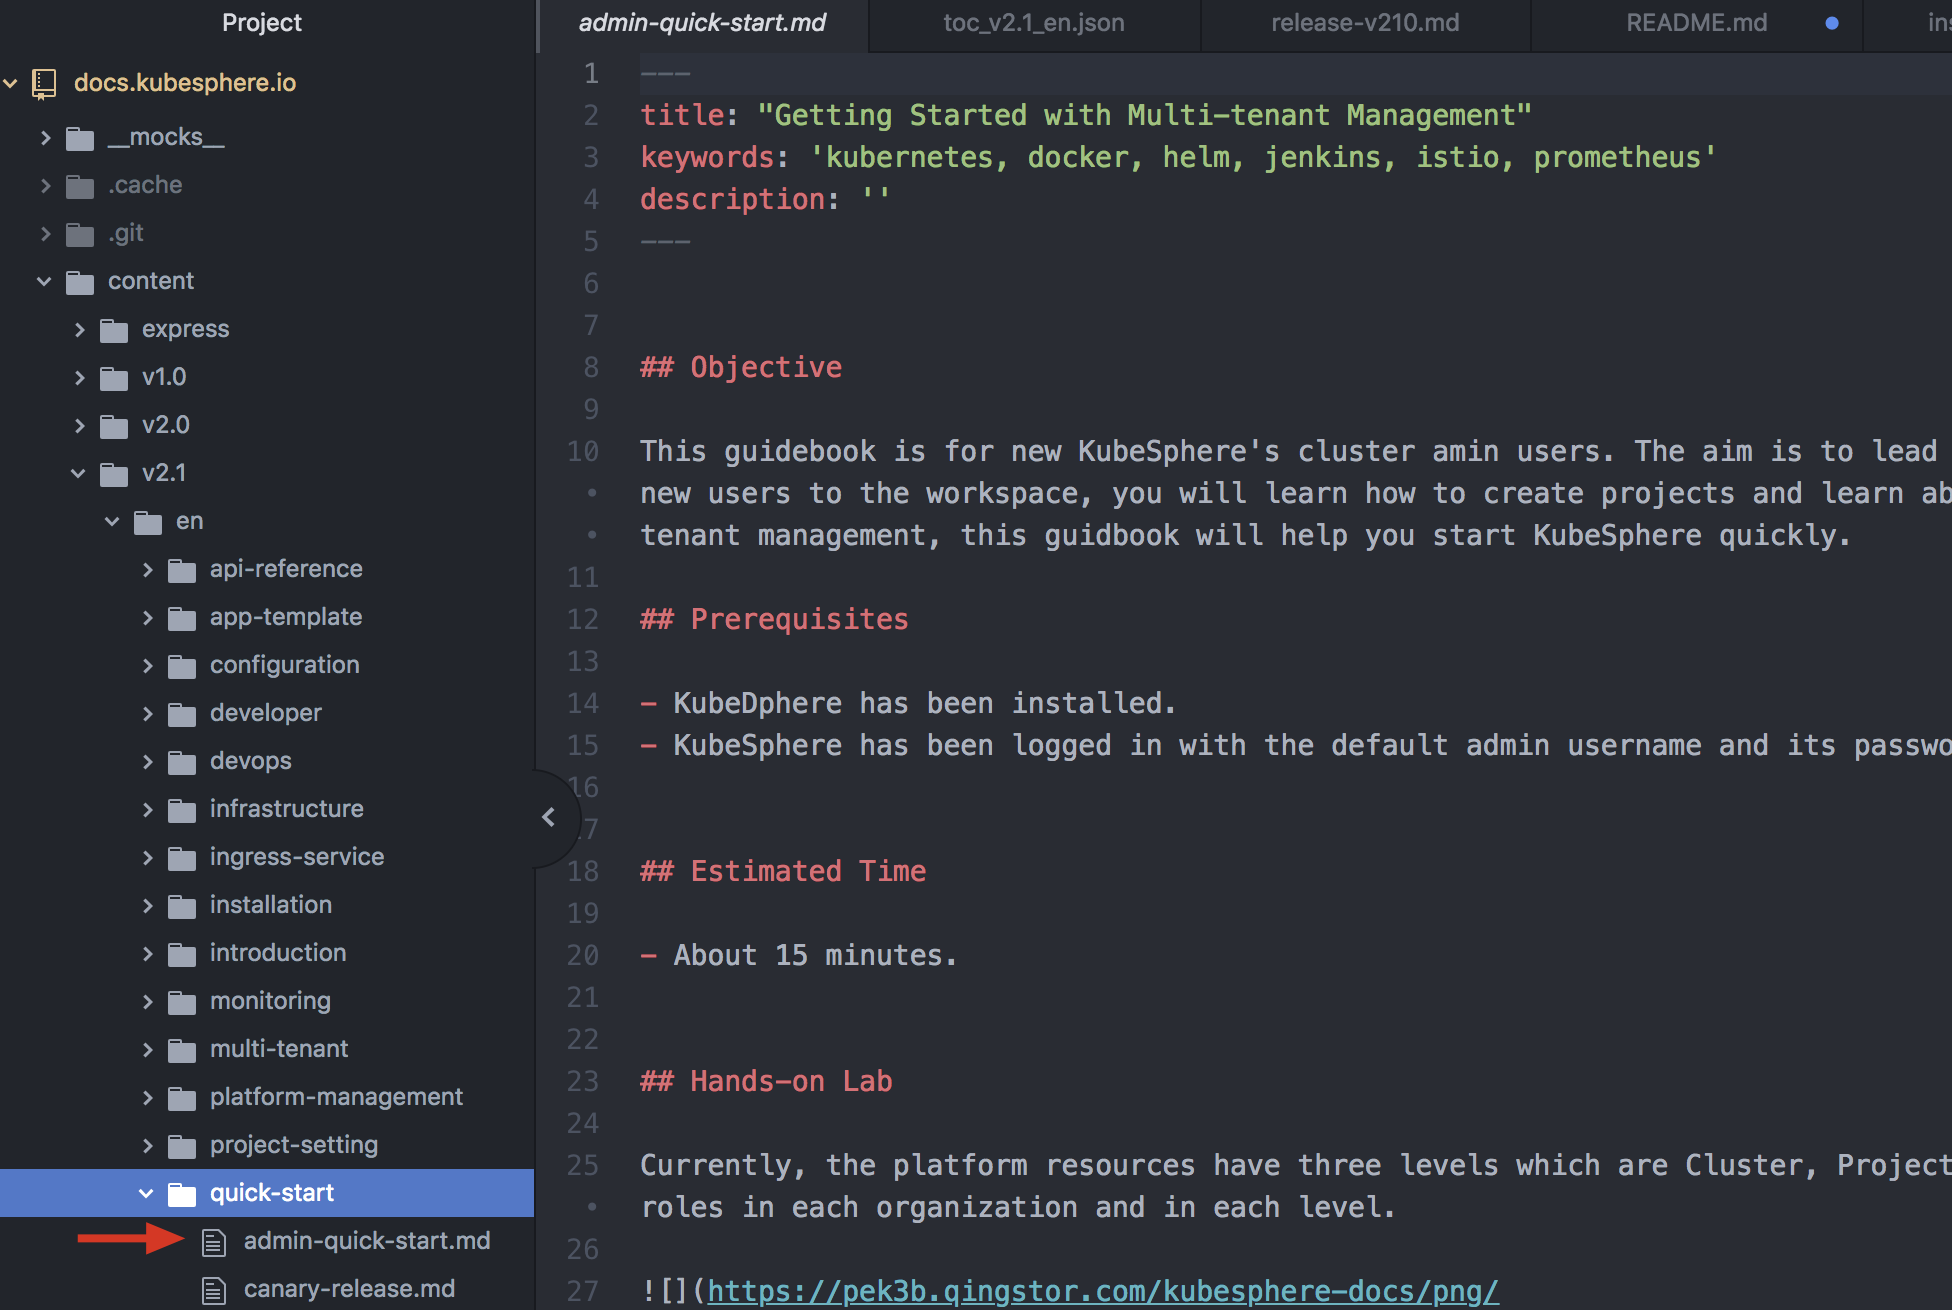
Expand the folder /en/quick-start/admin-quick-start/, edit the file admin-quick-start.md, save it after modified, then use git to commit your changes to remote repo.
Commit your PR
git add . // Add your local changes
git commit -s -m "comment your changes" // Commit with your comment
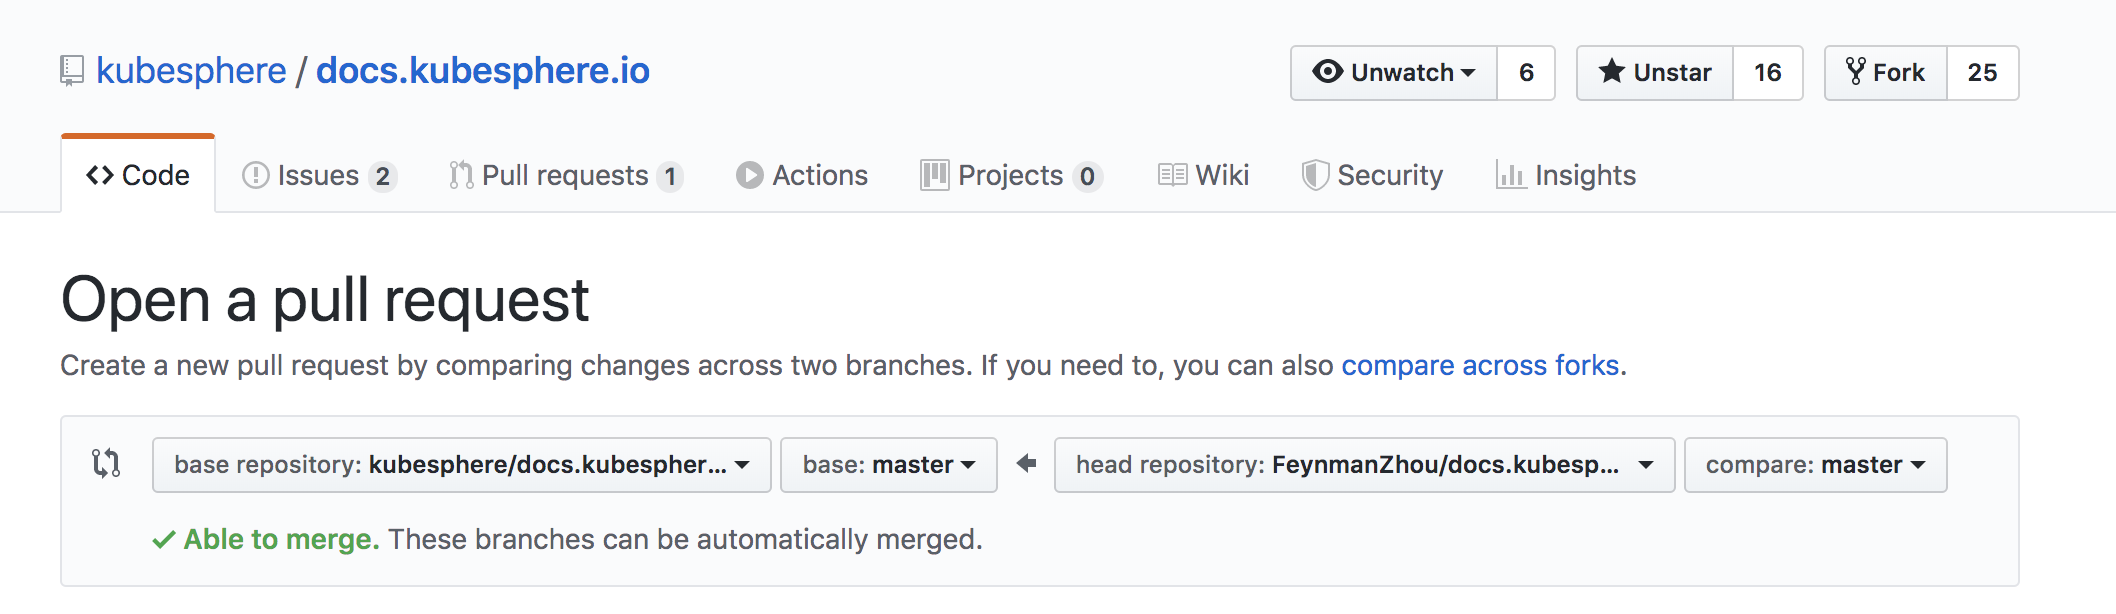
git push origin master // Push to your remote repoAfter the steps above done, open a new Pull Request in GitHub:
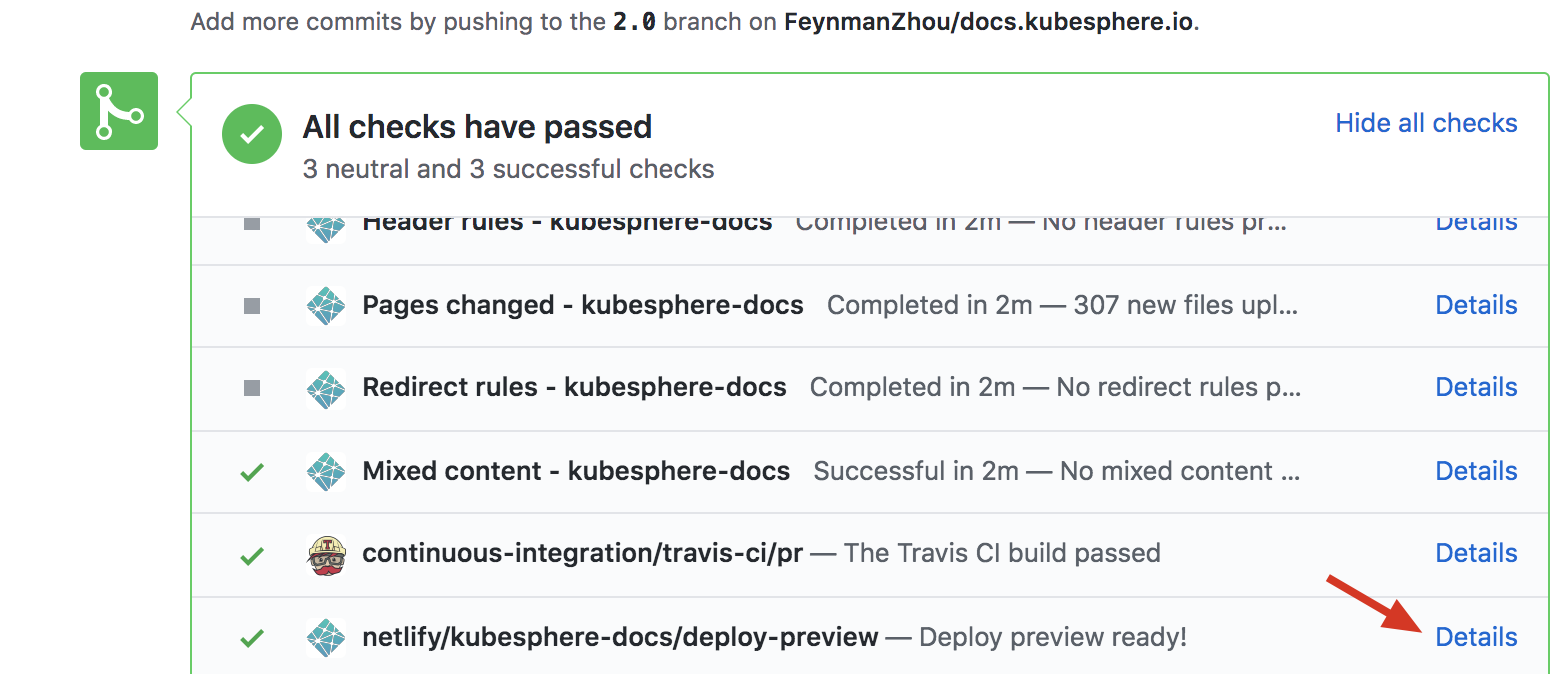
When PR has been created, you should preview your changes and verify it in the Netlify notification as follows, click the Details button near Deploy preview ready! to preview your changes in browser.
Edit navigation
Navigation is corresponding to the directory on the left of the document website. If you'd like to add a new document or modify the title within directory, just modify the content in content/toc_en.json or content/toc_zh-CN.json.
Attention: make sure you can compile it successfully using command
yarn developif you change the navigation json file.
Navigation file example
- chapters: nav items
- title: nav title
- entry: nav entry, path to the document to display
- entries: sub navs
···
"version": "v2.1",
"lang": "en",
"chapters": [
  {
    "title": "Release Notes",
    "icon": "/product.svg",
    "desc": "Introduce the new features, capabilities and updates for the releases",
    "chapters": [
      {
        "title": "Release Notes - 2.1.0",
        "entry": "/en/release/release-v210",
        "tag": "Latest"
      },
      {
        "title": "Release Notes - 2.0.2",
        "entry": "/en/release/release-v202"
      },
      {
        "title": "Release Notes - 2.0.1",
        "entry": "/en/release/release-v201"
      },
      {
        "title": "Release Notes - 2.0.0",
        "entry": "/en/release/release-v200"
      }
    ]
  }