❗️❗️❗️This tutorial and the resources is likely out of date, tread with caution as some things may no longer work❗️❗️❗️
Major changes in the Libdragon API likely mean you need to use the Libdragon CLI in place of the Docker container we build as part of this tutorial. The remaining steps likely work but will need some light modification.
Hi all, hopefully your looking to do homebrew N64 development using the Libdragon library. I've assembled here setup instructions / scripts for Windows (WIP) and Ubuntu. I'm also working on a YouTube series on the basics of working with Libdragon (WIP).
Listed below is the source code for Libdragon apps contained in this repo:
| Name / ROM | Screenshot | Example Covers | Link |
|---|---|---|---|
| hello_world.z64 |  |
basic game loop, initialization | hello_world |
| n64paint.z64 | 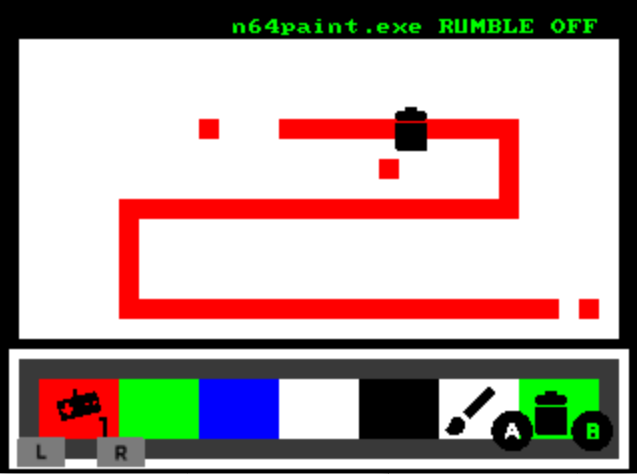 |
sprite loading, input, animation, timers, rumble, multiple controllers | n64paint |
| 2droguelike.z64 | 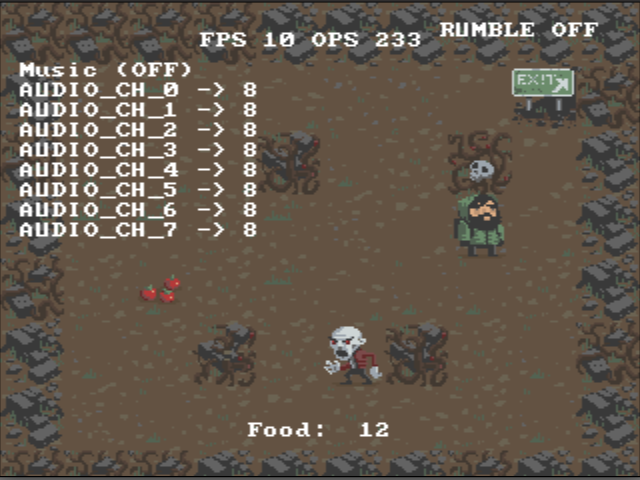 |
sprite loading, input, animation, timers, rumble, procedural generation, audio | 2droguelike |
| twinstick.z64 |  |
dual stick using two controllers, audio | twinstick |
Environment setup is there, although currently its all done manually. Could be scripted and I'm open to pull requests on this repo if someone wants to do that.
The following instructions will help you to setup a Docker container based N64 DevKit allowing you to deploy to actual N64 hardware using the open-source Libdragon library (as well as the official SDK). These instructions are for Windows 10, if your looking to setup a similar environment on Ubuntu please check out my YouTube playlist found here.
We're going to go ahead and do a semi-scripted install of the following:
- Docker-Desktop (and basic Docker knowledge)
- WSL2 (Windows Subsystem for Linux)
- VSCode + ms-vscode-remote.remote-containers plugin and C/C++ tools
- Git
- Flash Cart ED64 Transfer Tool (EverDrive X7)
- (OPTIONAL) CEN64 Emulator
We're going to assume you're using a fresh install of Windows 10. We'll have to restart a few times (two to be precise) throughout so it would be best to bookmark this page so you can return to it after each reboot.
If you want to use CEN64
I suggest you setup CEN64 first by following this tutorial. This setup guide is fairly long without also needing to setup CEN64. Also the process to setup CEN64 is indicative of the technical challenge of the remaining setup guide. The remainder of this guide is fairly technical but I think its doable for most people with a moderate Linux/Windows experience. The CEN64 setup is a good way to 'wet-your-feet'.

We begin by launching a PowerShell admin console, the easiest way to do this is to press WIN + r to launch the run dialogue, type powershell and the press Ctrl+Shift+Enter from the run dialogue. This will cause the UAC (User Account Control) window to pop-up and ask if you wish to run PowerShell as an admin, select yes.
Copy the script below and paste into the terminal, you can paste into PowerShell by right-clicking in the terminal window, or pressing Ctrl+Shift+v. You will be asked to enable script execution, agree to all (A). Proceed through all prompts, agreeing to all installation requests. When finished move onto Step 2.
#install chocolatey
Set-ExecutionPolicy -ExecutionPolicy RemoteSigned -Scope LocalMachine
Set-ExecutionPolicy Bypass -Scope Process -Force; [System.Net.ServicePointManager]::SecurityProtocol = [System.Net.ServicePointManager]::SecurityProtocol -bor 3072; iex ((New-Object System.Net.WebClient).DownloadString('https://chocolatey.org/install.ps1'))

#install vscode
choco install vscode

#install docker-desktop
choco install docker-desktop

#install git-scm so we can do git clone from powershell
choco install git

#enable WSL
Enable-WindowsOptionalFeature -Online -FeatureName $("VirtualMachinePlatform", "Microsoft-Windows-Subsystem-Linux")At this point we are going to need to restart to allow the Docker-Desktop / WSL install to complete. Bookmark this page and restart. This is the first of two required restarts.
After restarting, give Docker-Desktop time to startup. Should be a few minutes. Docker will alert you that your WSL 2 Installation Is Incomplete. Click the link provided in the dialogue window WSL 2 Kernel Update and download the latest WSL Linux kernel update package for x64 machines. Install the update and when completed restart your system one more time to allow WSL2 setup to complete. Move on to Step 3.
After rebooting this time Docker-Desktop should be up and running (it may prompt you to go through a tutorial, skip this for now). This can take several minutes to setup/launch so be patient.
Note: Docker-Desktop for Windows UI has been changing lately, to verify its running find the Docker icon in the taskbar, right click it and select Dashboard. The status is indicated here as to whether its running or not. Previously hovering over the icon would indicate if its running or not.
Now we can install VSCode Remote Container Plugin and the Docker containers needed to build using Libdragon.
Launch a PowerShell session and enter the PowerShell below.
This will likely take upwards of 10 - 20 minutes depending on your internet speed. If the console output stops updating the up or down keys should refresh the console output.
#add remote container plugin for vscode and c/c++ tools
code --install-extension ms-vscode-remote.remote-containers
code --install-extension ms-vscode.cpptools

#setup our n64 development directory
mkdir ~/n64/
cd ~/n64
git clone https://github.com/werkn/n64devkit-everdrive

cd n64devkit-everdrive/N64DevKit

#pull in container image, builds libdragon examples/samples and starts development container
docker-compose up -d
Note: Some users have reported that Docker-Desktop hangs and tries to repeatedly download some portion of the container image. This is rare but can happen. If this happens to you first try restarting Docker-Desktop (Go to the Docker icon in the taskbar and
Right-click->Restart Docker...), failing that, restart your system it should correct itself with one of these two steps. This is a bug with Docker-Desktop that manifests periodically.
At this point if all went well you should see a message saying Creating N64DevKit ... done and you should be back at the PowerShell prompt.
Congratulations! The hard part is pretty much over at this point and the development environment is mostly configured. 👍🎉✨✨🎉🎉Noice.

Move on to Step 4
Launch VSCode and verify that the editor has the Remote Container Plugin installed. It will be an icon that looks like computer on listed along the left-hand side in the same place as the Explorer / Extensions icons. Click it and a little menu should expand that says Remote Explorer along the top and then has a list of containers. You should have a container listed here called n64devkit, right-click this and select Attach to container. This will connect to the Docker container and install the tools need to work remotely in the container. A new VSCode window should be open, if its not already open click the Explorer icon and select Open Folder enter the path /libdragon/ in the dialogue and click Ok.
The folder should open in the Explorer window. From here open the homebrew folder, and inside this folder select 0_hello_world. Open hello_world.c. Now open the built-in terminal by going to View->Terminal or pressing <Ctrl+`>. In the terminal enter the following cd /libdragon/homebrew/0_hello_world/ and press <Enter>. You should now be in the 0_hello_world folder. We're going to build the hello_world.c file into an N64 ROM. To do this simply type make clean to remove the existing build files and next, make.
You should see text output that looks similar to this:
root@4d1d96acf260:/libdragon/homebrew/0_hello_world# make clean
rm -f *.v64 *.z64 *.elf *.o *.bin
root@4d1d96acf260:/libdragon/homebrew/0_hello_world# make
/usr/local/bin/mips64-elf-gcc -std=gnu99 -march=vr4300 -mtune=vr4300 -O2 -Wall -Werror -I/usr/local/mips64-elf/include   -c -o hello_world.o hello_world.c
/usr/local/bin/mips64-elf-ld -o hello_world.elf hello_world.o -L/usr/local/mips64-elf/lib -ldragon -lc -lm -ldragonsys -Tn64.ld
/usr/local/bin/mips64-elf-objcopy hello_world.elf hello_world.bin -O binary
rm -f hello_world.z64
/usr/local/bin/n64tool -l 2M -h /usr/local/mips64-elf/lib/header -o hello_world.z64 -t "Hello world" hello_world.bin
/usr/local/bin/chksum64 hello_world.z64
CHKSUM64 V1.2   Copyright (C) 1997 Andreas Sterbenz (stan@sbox.tu-graz.ac.at)
This program is released under the terms of the GNU public license. NO WARRANTY

The image 'hello_world.z64' is in original (not swapped) format.
Old Checksum:        ED 42 A2 D4  7A 71 CD 91
Calculated Checksum: E8 8B 66 58  52 C6 B4 4B
New checksum successfully written.
root@4d1d96acf260:/libdragon/homebrew/0_hello_world#
Great! We've built an N64 rom now lets get it running on a real N64! Proceed to Step 5. 👍🎉✨✨🎉🎉
Deploy Our ROM to the EverDrive X7
Run the code below in a PowerShell console. This will configure a few things you should be aware of:
- Creates user environment variables:
N64_HOME=~\n64,N64_HOMEBREW_DIR=~\n64\n64devkit-everdrive\N64DevKit\homebrew\N64_TOOLS=~\n64\n64devkit-everdrive\N64DevKit\bin\N64_EVERDRIVE=~\n64\n64devkit-everdrive\N64DevKit\bin\everdrive
#add N64_TOOLS to path so we can call any executable in ~\n64\n64devkit-everdrive\N64DevKit\bin\
$env:N64_HOME=Resolve-Path("~\n64\")
$env:N64_TOOLS=Resolve-Path("~\n64\n64devkit-everdrive\N64DevKit\bin\")
$env:N64_EVERDRIVE=Resolve-Path("~\n64\n64devkit-everdrive\N64DevKit\bin\everdrive")
$env:N64_HOMEBREW_DIR=Resolve-Path("~\n64\n64devkit-everdrive\N64DevKit\homebrew\")
$env:Path += ";$env:N64_TOOLS;$env:N64_EVERDRIVE"

#persist environment variables
[Environment]::SetEnvironmentVariable("N64_HOME", $env:N64_HOME, [System.EnvironmentVariableTarget]::User)
[Environment]::SetEnvironmentVariable("N64_HOMEBREW_DIR", $env:N64_HOMEBREW_DIR, [System.EnvironmentVariableTarget]::User)
[Environment]::SetEnvironmentVariable("N64_TOOLS", $env:N64_TOOLS, [System.EnvironmentVariableTarget]::User)
[Environment]::SetEnvironmentVariable("N64_EVERDRIVE", $env:N64_EVERDRIVE, [System.EnvironmentVariableTarget]::User)
[Environment]::SetEnvironmentVariable("Path", $env:Path, [System.EnvironmentVariableTarget]::User)
Next, we likely need to setup the FTDI drivers for the flash cart (depending on your system there is a chance these are already installed).
These can be downloaded from: https://www.ftdichip.com/old2020/Drivers/D2XX.htm. If you don't care about 32/64 bit versions just download this self-installer.
After the installation completes make sure your EverDrive is connected to your PC and setup (if you haven't set yours up with an OS follow my YouTube guide).
Ensure the N64 is powered on and at the ED64 main menu.
FINALLY from PowerShell to deploy our hello_world.z64 ROM to your EverDrive run the following:
cd $env:N64_HOMEBREW_DIR
cd .\0_hello_world
usb64.exe "-rom=hello_world.z64" -start
You should see a progress indicator and a COM port the EverDrive was found on, in a few moments you should see our hello_world.z64 ROM running on your N64, with black text on a white background saying Hello World!.
That's it, your DONE!

(OPTIONAL)
If you've already installed CEN64 following my guide then you should be able to open a PowerShell window enter the following to run the ROM (to setup CEN64 follow this tutorial):
cd ~\n64\n64devkit-everdrive\N64DevKit\homebrew\0_hello_world
c64 -RomFile hello_world.z64
Congratulations if you made it this far, you can now look into the library we are using for homebrew, Libdragon, docs can be found at that link or internal to our container at path /libdragon. Check back here periodically here as I may add a few tutorials dealing with sprites, audio, and controller input.
Check out a few of my sample applications. Go easy, I'm not a C developer so everything is fairly basic. What is there though should get you up and running with the basics of Libdragon.
As a bonus and to those who look carefully you should also be able to build apps using the OFFICIAL SDK as well. The Docker container supports both.
Happy Building and Best of Luck. Shoot me a line on the N64 Discord Happy to Help :)