docker network create jenkins
docker volume create jenkins-docker-certs
docker volume create jenkins-data
Set up docker dind:
docker container run --name jenkins-docker --rm --detach \
  --privileged --network jenkins --network-alias docker \
  --env DOCKER_TLS_CERTDIR=/certs \
  --volume jenkins-docker-certs:/certs/client \
  --volume jenkins-data:/var/jenkins_home \
  --publish 2376:2376 docker:dind
Setting up Github configuration
While Jenkins is getting installed, configure Github integration.
Configure Webhook Relay routing
We will need to accept public webhooks and route to /github-webhook/ path:
relay forward -b jenkins-demo-plugin http://localhost:8080/github-webhook/
Output should look like this:
relay forward -b jenkins-demo-plugin http://localhost:8080/github-webhook/
Forwarding:
https://my.webhookrelay.com/v1/webhooks/0ce5bbc1-41a6-4c48-83cd-eefe6db24c7c -> http://localhost:8080/github-webhook/
Starting webhook relay agent...
2020-05-13 15:48:50.414	INFO	using standard transport...
2020-05-13 15:48:50.513	INFO	webhook relay ready...	{"host": "my.webhookrelay.com:8080", "buckets": ["9a7f7347-d259-4dbd-82a0-0e3b1d9e527d"]}
By default, agent will start relaying webhooks. For production use either install relay agent as a service or use Docker container.
Configure Jenkins authentication to Github (for repository scanning)
There are several ways authentication can be achieved but the recommended way is via Github App. A doc that describes it can be found here: https://github.com/jenkinsci/github-branch-source-plugin/blob/master/docs/github-app.adoc.
In short:
- Go to https://github.com/ and then to your organization settings
- Fill in name: Jenkins - teamName
- Set Webhook URL to your public input endpoint (https://my.webhookrelay.com/v1/webhooks/.....)
- Add permissions:
- Commit statuses: Read and Write
- Contents: Read-only (to read the Jenkinsfile and the repository content during git fetch). You may need "Read & write" to update the repository such as tagging releases
- Metadata: Read-only
- Pull requests: Read-only
- Webhooks: Read and Write
- Click "Create GitHub App"
- Generate a private key that Jenkins can then use to authenticate (after you click it, you should get a download prompt):
- Once you have it, use this terminal command (just replace the filename with yours) to convert it into a format that Jenkins can use:
openssl pkcs8 -topk8 -inform PEM -outform PEM -in key-in-your-downloads-folder.pem -out converted-github-app.pem -nocrypt
-
IMPORTANT! Install the GitHub app: from the install app section of newly created app, install the app to your organization.
-
From the Jenkins main page click 'Credentials', pick your credentials storage (normally 'global') and click 'Add credentials'. Fill out the form:
- Kind: GitHub app
- ID: i.e. github-app-
- App ID: the github app ID, it can be found in the 'About' section of your GitHub app in the general tab.
- API endpoint (optional, only required for GitHub enterprise this will only show up if a GitHub enterprise server is configured).
- Key: click add, paste the contents of the converted private key
- Advanced: (optional) If you’ve installed your same GitHub app on multiple organizations you need the next step
- Owner: the name of the organisation or user, i.e. jenkinsci for https://github.com/jenkinsci
- Click OK
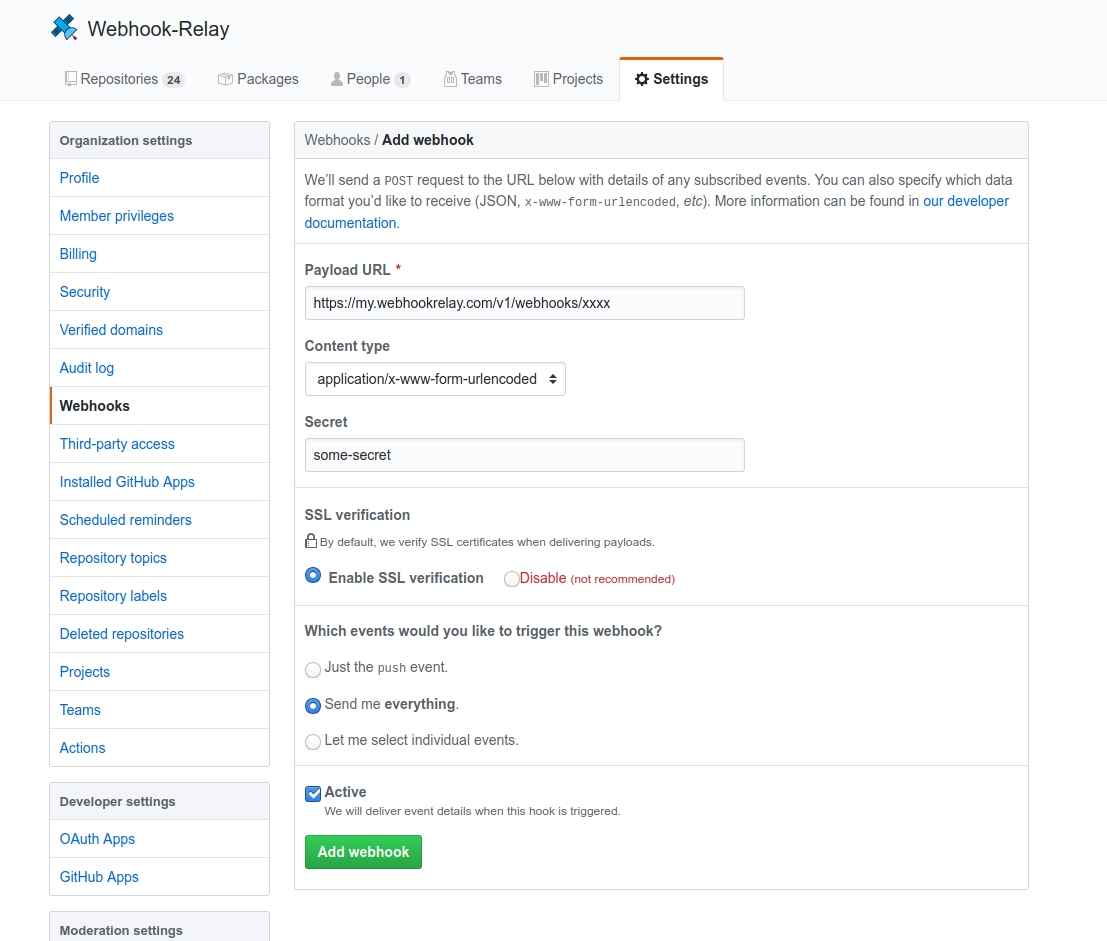
Set organization webhooks
All repository events go through org webhook config:
Add the shared secret to your Jenkins Github configuration as a plain text secret
Configure Jenkins authentication to Github API (for repo checks so you have increased rate limits)
In theory the permissions from the previous step should work. However, with the current Jenkins version it's not listing Github App type creds when configuring GitHub Server section in Jenkins configuration page.
To create your own personal access token, go to your account GitHub settings. Token should be registered with scopes:
- admin:repo_hook - for managing hooks (read, write and delete old ones)
- repo - to see private repos
- repo:status - to manipulate commit statuses
In Jenkins, create credentials as 'Secret Text', provided by Plain Credentials Plugin:
(Optional) Add Jenkins webhooks directly to your org
Open https://github.com/organizations/<your org>/settings/hooks and add Input endpoint URL. Content type should be application/x-www-form-urlencoded, all events and optional secret (you will need this secret in Jenkins as well).
Test Github Org plugin
Follow instructions here on configuring the pipeline https://docs.cloudbees.com/docs/admin-resources/latest/plugins/github-branch-source:
It should scan your repositories and create projects. We will be using this current repository to create a Jenkinsfile and push it:
pipeline {
    agent any
    stages {
        stage('Build') {
            steps {
                echo 'Building..'
            }
        }
        stage('Test') {
            steps {
                echo 'Testing..'
            }
        }
        stage('Deploy') {
            steps {
                echo 'Deploying....'
            }
        }
    }
}
Once repository is pushed with this Jenkinsfile, click 'Scan Organization Now' on your Jenkins instance.
Trying out builds on pull request
Create a new branch:
git checkout -b feature/test_pull_request
Make a change:
echo 'change' > file.txt
Commit and push it:
git add file.txt
git commit -m "change"
git push origin feature/test_pull_request
Now, in your Github repo open a PR:
You should be able to see commit status:


