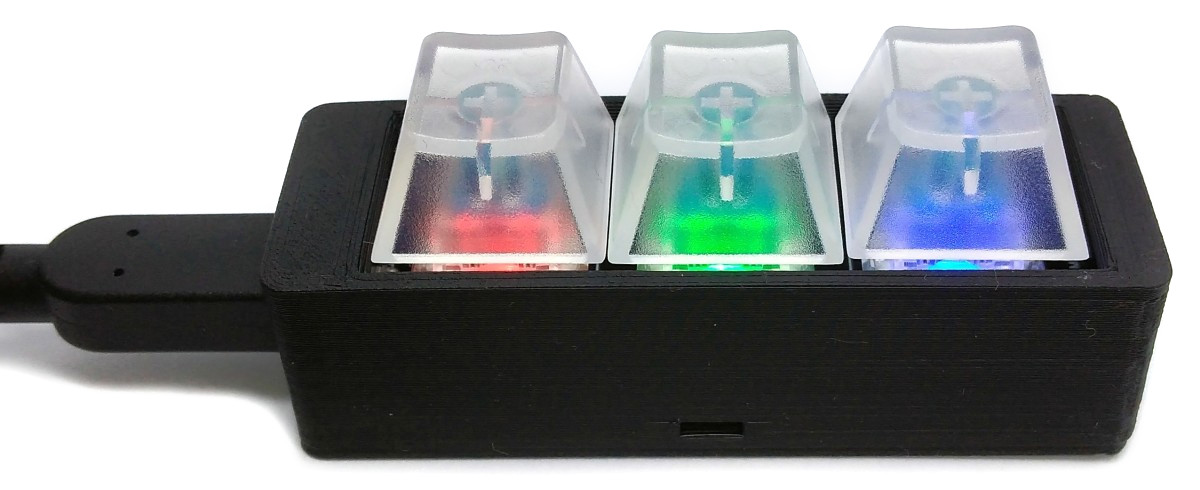
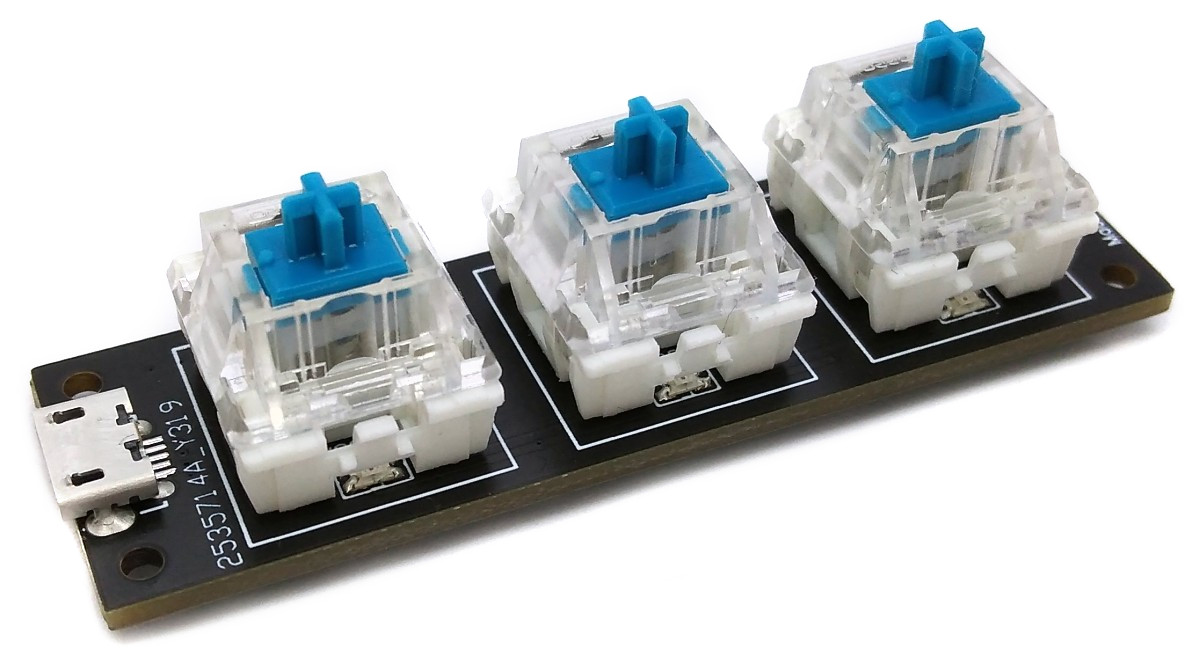
The MacroPad mini is a highly versatile keyboard extension that boasts three programmable keys. These keys can be configured to execute a vast array of actions, including the triggering of specific key combinations and sequences. Additionally, the firmware used to operate the MacroPad can be easily modified to suit the needs of the user.
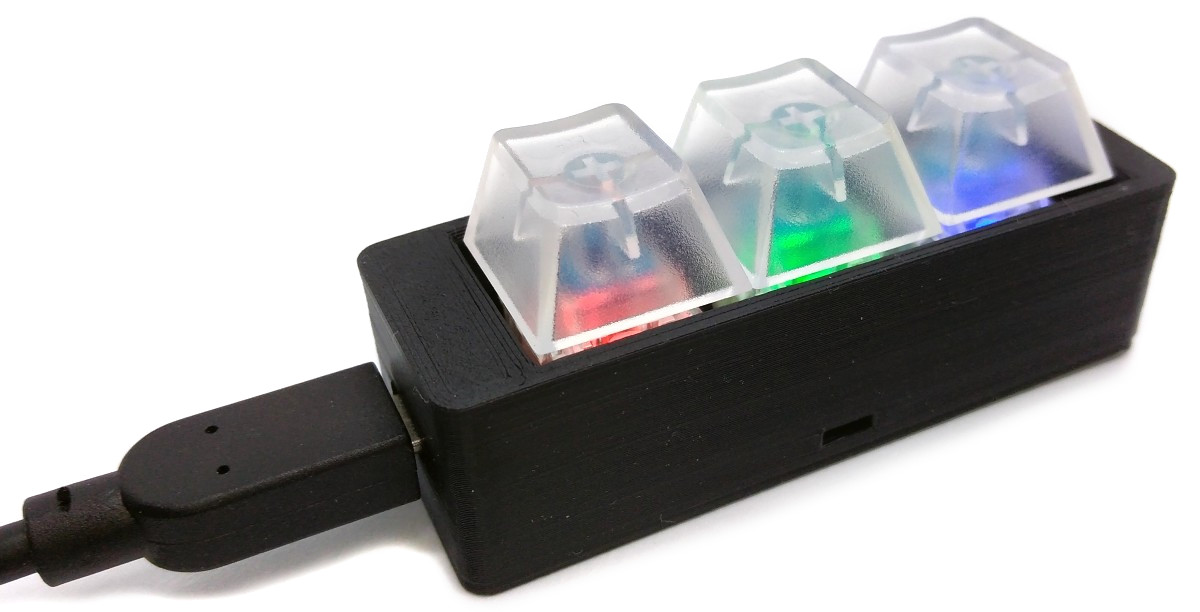
Each button on the MacroPad is also equipped with an addressable LED (NeoPixel), which can be programmed in the same way as the keys. This provides the user with an additional level of customization, allowing them to assign specific colors or patterns to each key, making them easier to identify at a glance.
Connecting the MacroPad to a PC is a breeze, as it simply plugs in via USB. Once connected, the MacroPad is immediately recognized by the PC as an HID multimedia keyboard, meaning that it requires no special drivers to function. This makes the MacroPad an incredibly user-friendly and accessible option for those looking to expand their keyboard capabilities.
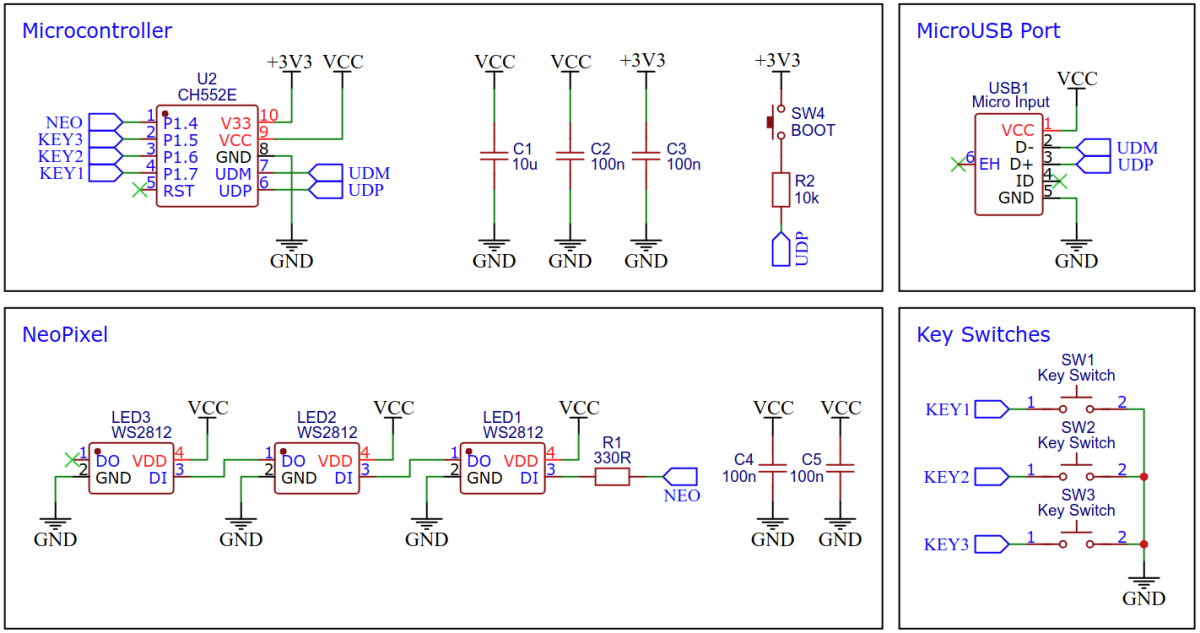
The CH552E is a low-cost, enhanced E8051 core microcontroller compatible with the MCS51 instruction set. It has an integrated USB 2.0 controller with full-speed data transfer (12 Mbit/s) and supports up to 64 byte data packets with integrated FIFO and direct memory access (DMA). The CH552E has a factory built-in bootloader so firmware can be uploaded directly via USB without the need for an additional programming device.
- Take the Gerber files and send them to a PCB manufacturer of your choosing. They will use these files to create the circuit board for your device.
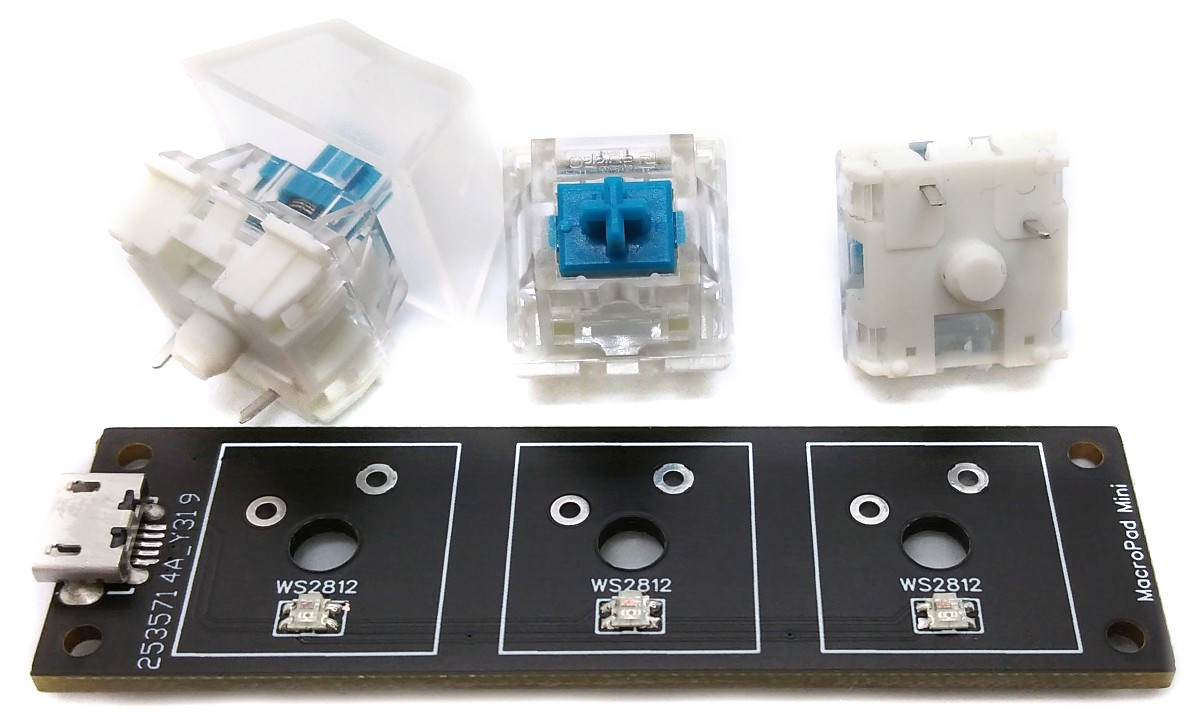
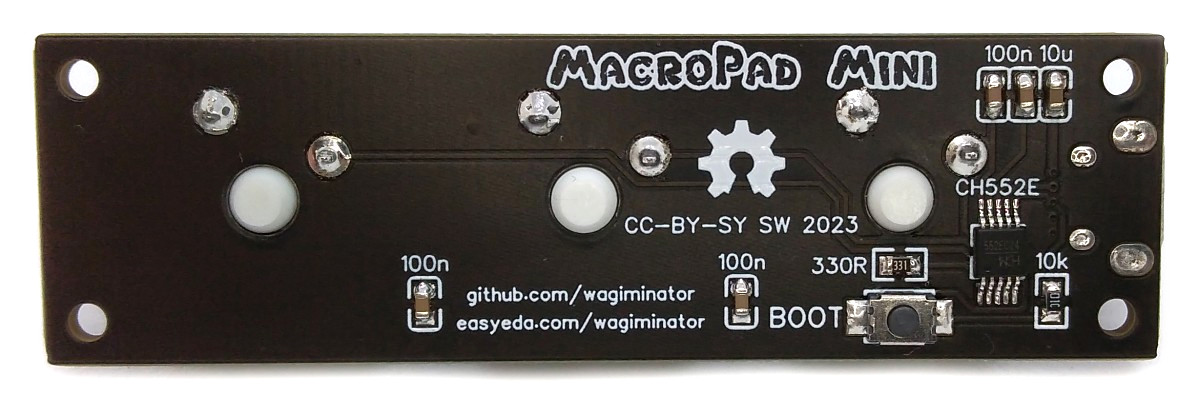
- Once you have the PCB, you can start soldering the components onto it. Use the BOM (bill of materials) and schematic as a guide to make sure everything is connected correctly.
- Upload the firmware by following the instructions in the next section (see below).
- To create the case for your device, use the STL files with your 3D printer. Make sure to use transparent filament for the keycaps.
- After printing, secure the PCB to the bottom of the case using four self-tapping M2x5mm screws.
- Finally, assemble the case. Place the keycaps onto the switches. Your device is now ready to use!
The definition of the macros and their assignment to individual key events is done by adjusting the firmware accordingly, which allows maximum freedom and flexibility. To do this, open the macropad_mini.c file and edit the section with the macro functions. The source code is commented in such a way that it should be possible to make adjustments even with basic programming skills.
On Linux you do not need to install a driver. However, by default Linux will not expose enough permission to upload your code with the USB bootloader. In order to fix this, open a terminal and run the following commands:
echo 'SUBSYSTEM=="usb", ATTR{idVendor}=="4348", ATTR{idProduct}=="55e0", MODE="666"' | sudo tee /etc/udev/rules.d/99-ch55x.rules
sudo service udev restart
For Windows, you need the CH372 driver. Alternatively, you can also use the Zadig Tool to install the correct driver. Here, click "Options" and "List All Devices" to select the USB module, and then install the libusb-win32 driver. To do this, the board must be connected and the CH55x must be in bootloader mode.
A brand new chip starts automatically in bootloader mode as soon as it is connected to the PC via USB. Once firmware has been uploaded, the bootloader must be started manually for new uploads. To do this, the board must first be disconnected from the USB port and all voltage sources. Now press the BOOT button and keep it pressed while reconnecting the board to the USB port of your PC. The chip now starts again in bootloader mode, the BOOT button can be released and new firmware can be uploaded within the next couple of seconds.
Once the MacroPad firmware is installed, the bootloader can also be entered by holding down key 1 while connecting the device to the USB port. In this way, the case does not have to be opened when new firmware is to be installed. All NeoPixels will then light up white as long as the device is in bootloader mode (approx. 10 seconds).
Install the SDCC Compiler. In order for the programming tool to work, Python3 must be installed on your system. To do this, follow these instructions. In addition pyusb must be installed. On Linux (Debian-based), all of this can be done with the following commands:
sudo apt install build-essential sdcc python3 python3-pip
sudo pip install pyusb
- Open a terminal.
- Navigate to the folder with the makefile.
- Connect the board and make sure the CH55x is in bootloader mode.
- Run
make flashto compile and upload the firmware. - If you don't want to compile the firmware yourself, you can also upload the precompiled binary. To do this, just run
python3 ./tools/chprog.py macropad_mini.bin.
Install the Arduino IDE if you haven't already. Install the CH55xduino package by following the instructions on the website.
- Copy the .ino and .c files as well as the /src folder together into one folder and name it like the .ino file.
- Open the .ino file in the Arduino IDE.
- Go to Tools -> Board -> CH55x Boards and select CH552 Board.
- Go to Tools and choose the following board options:
- Clock Source: 16 MHz (internal)
- Upload Method: USB
- USB Settings: USER CODE /w 266B USB RAM
- Connect the board and make sure the CH55x is in bootloader mode.
- Click Upload.

This work is licensed under Creative Commons Attribution-ShareAlike 3.0 Unported License. (http://creativecommons.org/licenses/by-sa/3.0/)