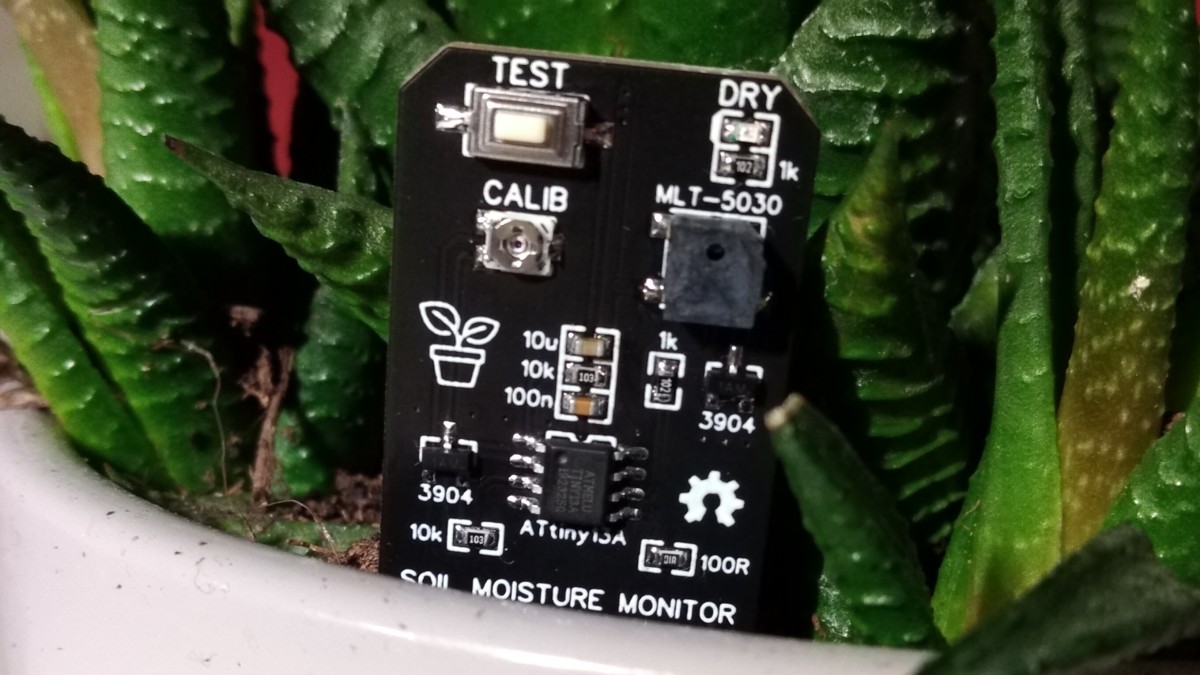
TinyMoisture monitors the soil moisture of your plants and gives an alarm if you forget to water them again.
- Design Files (EasyEDA): https://easyeda.com/wagiminator/attiny13-tinymoisture
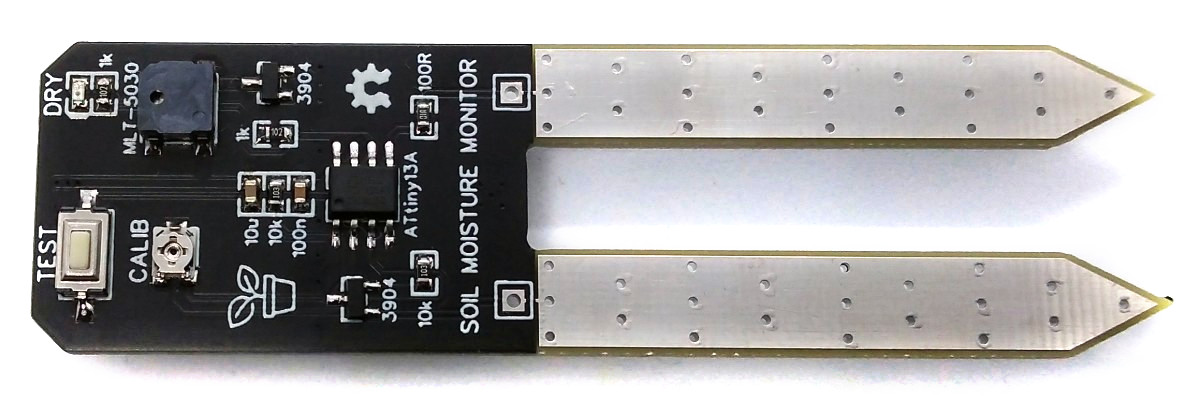
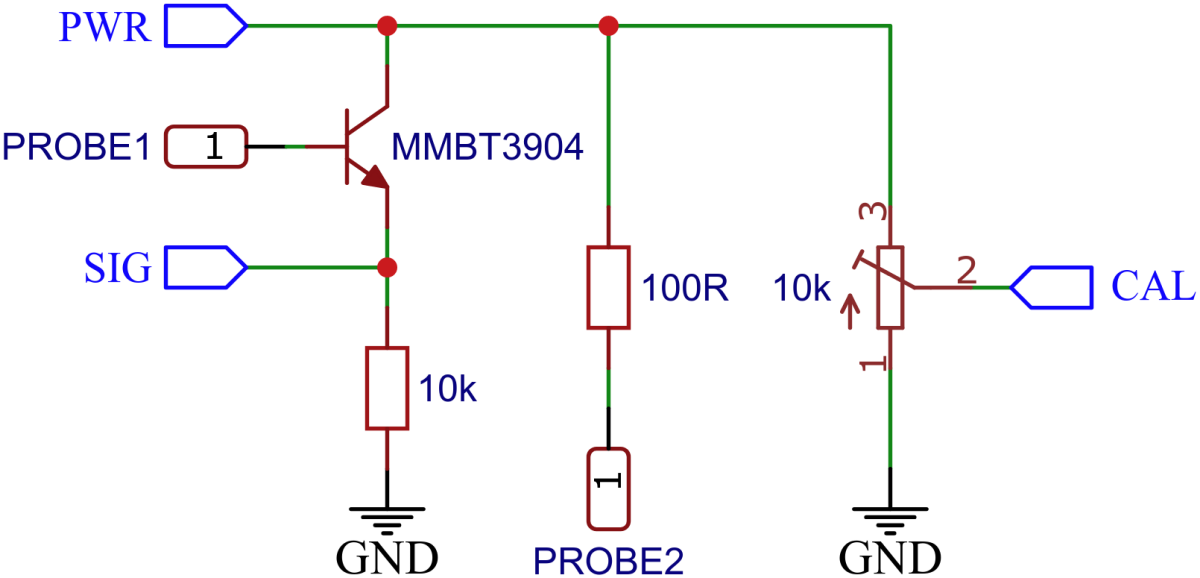
TinyMoisture uses the resistance measurement method to determine the soil moisture. The two probes together with the substrate form a variable resistor. The more humid the soil, the better its conductivity and the lower the electrical resistance. Together with the 10k fixed resistor, a voltage divider is formed. This voltage can be measured by the ADC of the microcontroller. The circuit is based on the SparkFun Soil Moisture Sensor.
The ATtiny13 spends most of its time in sleep mode. Every eight seconds it is woken up by the watchdog timer. It measures the moisture in the soil and compares it with the threshold value selected by the calibration potentiometer. If the soil is too dry, it emits a short acoustic signal via the buzzer and a short optical signal via the LED (ALARM). Then it goes back to sleep mode.
The ATtiny can also be woken up by pressing the TEST button (pin change interrupt). An acoustic and optical signal is then output first so that the user can determine whether the battery is still supplying sufficient power. Then measurements of the soil moisture are carried out until the button is released again. In this way, the correct threshold value can be found and set by turning the poti.
To avoid corrosion of the electrodes as far as possible, a voltage is only applied during the measurement. The ATtiny is clocked with only 128 kHz and all unused peripherals are switched off so that the power consumption is as low as possible.
// Main function
int main(void) {
  // Reset watchdog timer
  resetWatchdog();                        // do this first in case WDT fires

  // Setup pins
  DDRB  = (1<<PE_PIN)|(1<<AL_PIN);        // set output pins
  PORTB = (1<<TB_PIN);                    // set pull-ups

  // Disable unused peripherals and set sleep mode to save power
  ACSR   = (1<<ACD);                      // disable analog comperator
  DIDR0 |= (1<<MS_PIN)|(1<<CA_PIN);       // disable digital intput buffer on ADC pins
  PRR    = (1<<PRTIM0);                   // shut down timer0
  set_sleep_mode(SLEEP_MODE_PWR_DOWN);    // set sleep mode to power down

  // Setup pin change interrupt
  GIMSK = (1<<PCIE);                      // pin change interrupts enable
  PCMSK = (1<<TB_PIN);                    // set pins for pin change interrupt
  sei();                                  // enable global interrupts

  // Loop
  while(1) {
    if (~PINB & (1<<TB_PIN)) beep();      // alarm if test button is pressed

    ADCSRA |=  (1<<ADEN);                 // enable ADC
    PORTB  |=  (1<<PE_PIN);               // power measurement circuit
    _delay_us(125);                       // give it all a little time

    do {
      if (readADC(MS_ADC) < (readADC(CA_ADC)>>1)) beep();  // beep if dry soil
    } while(~PINB & (1<<TB_PIN));         // repeat if test button is hold

    PORTB  &= ~(1<<PE_PIN);               // power off to prevent corrosion
    ADCSRA &= ~(1<<ADEN);                 // disable ADC

    sleep();                              // sleep for a while ...
  }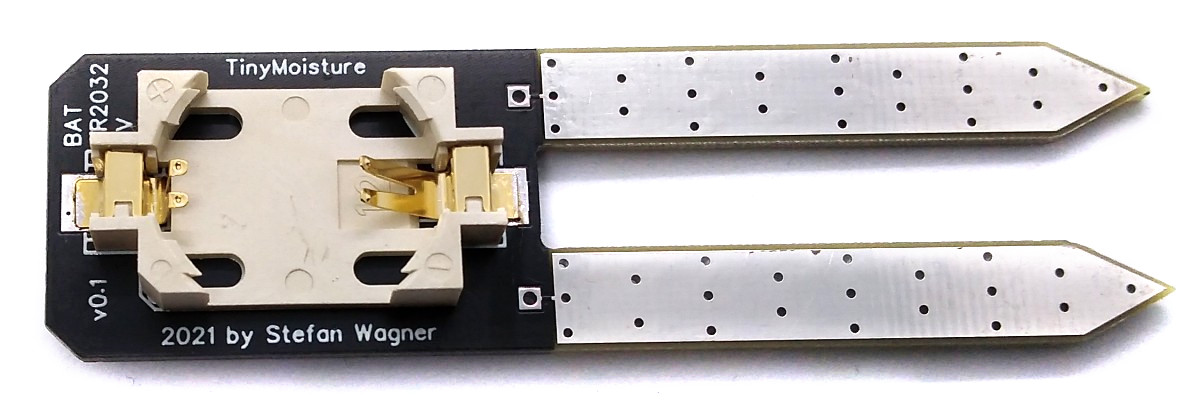
}Since there is no ICSP header on the board, you have to program the ATtiny either before soldering using an SOP adapter, or after soldering using an EEPROM clip. The AVR Programmer Adapter can help with this.
- Make sure you have installed MicroCore.
- Go to Tools -> Board -> MicroCore and select ATtiny13.
- Go to Tools and choose the following board options:
- Clock: 128 kHz internal osc.
- BOD: BOD disabled
- Timing: Micros disabled
- Connect your programmer to your PC and to the ATtiny.
- Go to Tools -> Programmer and select your ISP programmer (e.g. USBasp).
- Go to Tools -> Burn Bootloader to burn the fuses.
- Open TinyMoisture.ino and click Upload.
- Make sure you have installed avrdude.
- Connect your programmer to your PC and to the ATtiny.
- Open a terminal.
- Navigate to the folder with the hex-file.
- Execute the following command (if necessary replace "usbasp" with the programmer you use):
avrdude -c usbasp -p t13 -U lfuse:w:0x3b:m -U hfuse:w:0xff:m -U flash:w:tinymoisture.hex
- Make sure you have installed avr-gcc toolchain and avrdude.
- Connect your programmer to your PC and to the ATtiny.
- Open a terminal.
- Navigate to the folder with the makefile and sketch.
- Run
PROGRMR=usbasp make installto compile, burn the fuses and upload the firmware (change PROGRMR accordingly).
Put the TinyMoisture deep enough into the earth that the two probes are just completely covered by earth. The device measures the soil moisture every eight seconds and gives a short alarm if the soil is too dry.
Pressing the test button always gives at least one short alarm. This can be used to check that the battery has sufficient charge and that the device is working properly. If the ground is too dry, the alarm remains on as long as the test button is held down.
To calibrate the TinyMoisture it should be placed in soil that is just too dry. Press and hold the TEST button. Turn the calibration potentiometer until the alarm is just triggered. Release the TEST button.

This work is licensed under Creative Commons Attribution-ShareAlike 3.0 Unported License. (http://creativecommons.org/licenses/by-sa/3.0/)