Introduction to Robotics laboratory homeworks, taken in the 3rd year (2022-2023) at the Faculty of Mathematics and Computer Science, University of Bucharest. Each homework includes requirements, implementation details, code and image files.
See details
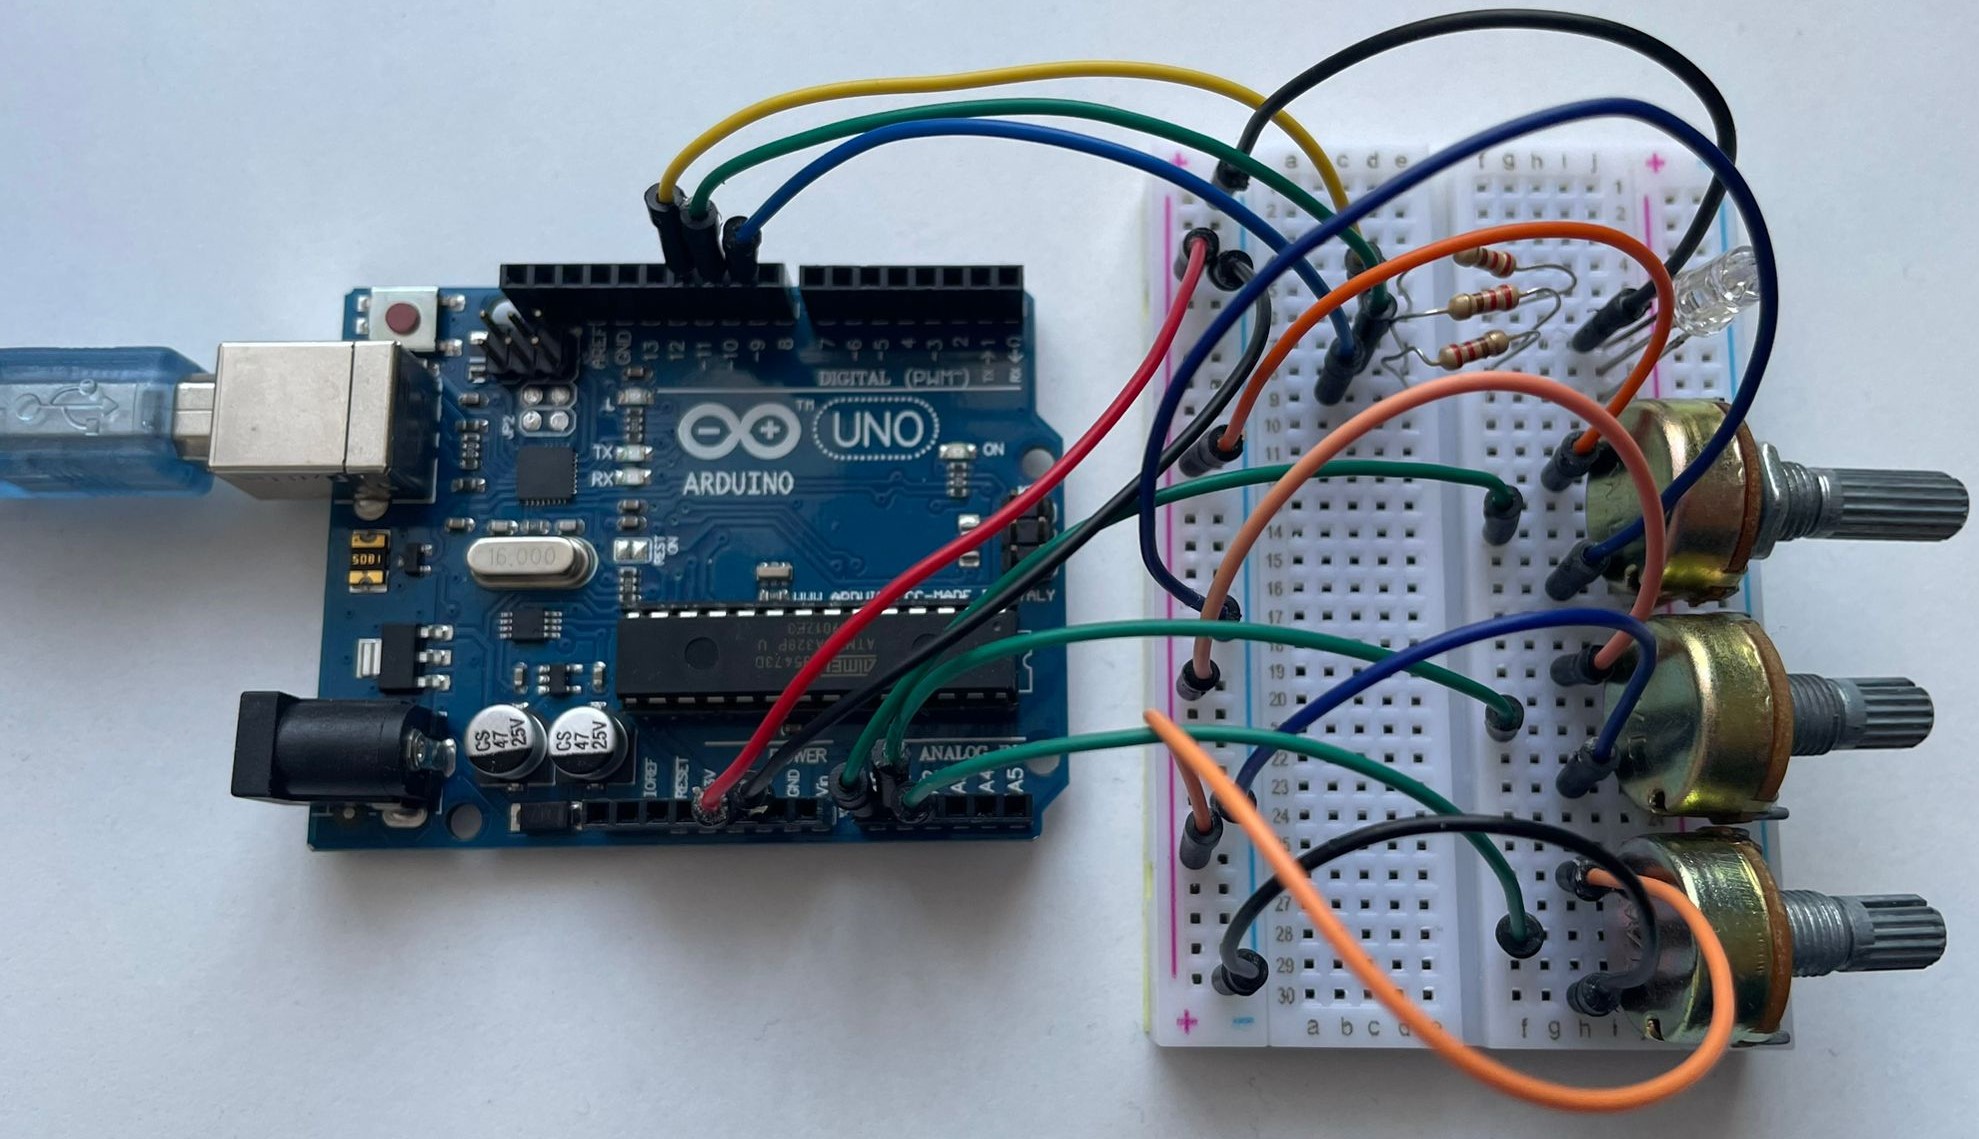
RBG LED (1 minimum), potentiometers (3 minimum), resistors and wires (per logic).
Use a separat potentiometer in controlling each of the color of the RGB led (Red, Green and Blue). The control must be done with digital electronics (aka the value of the potentiometer must be read with Arduino, and a mapped value must be written to each of the pins connected to the led).
See details
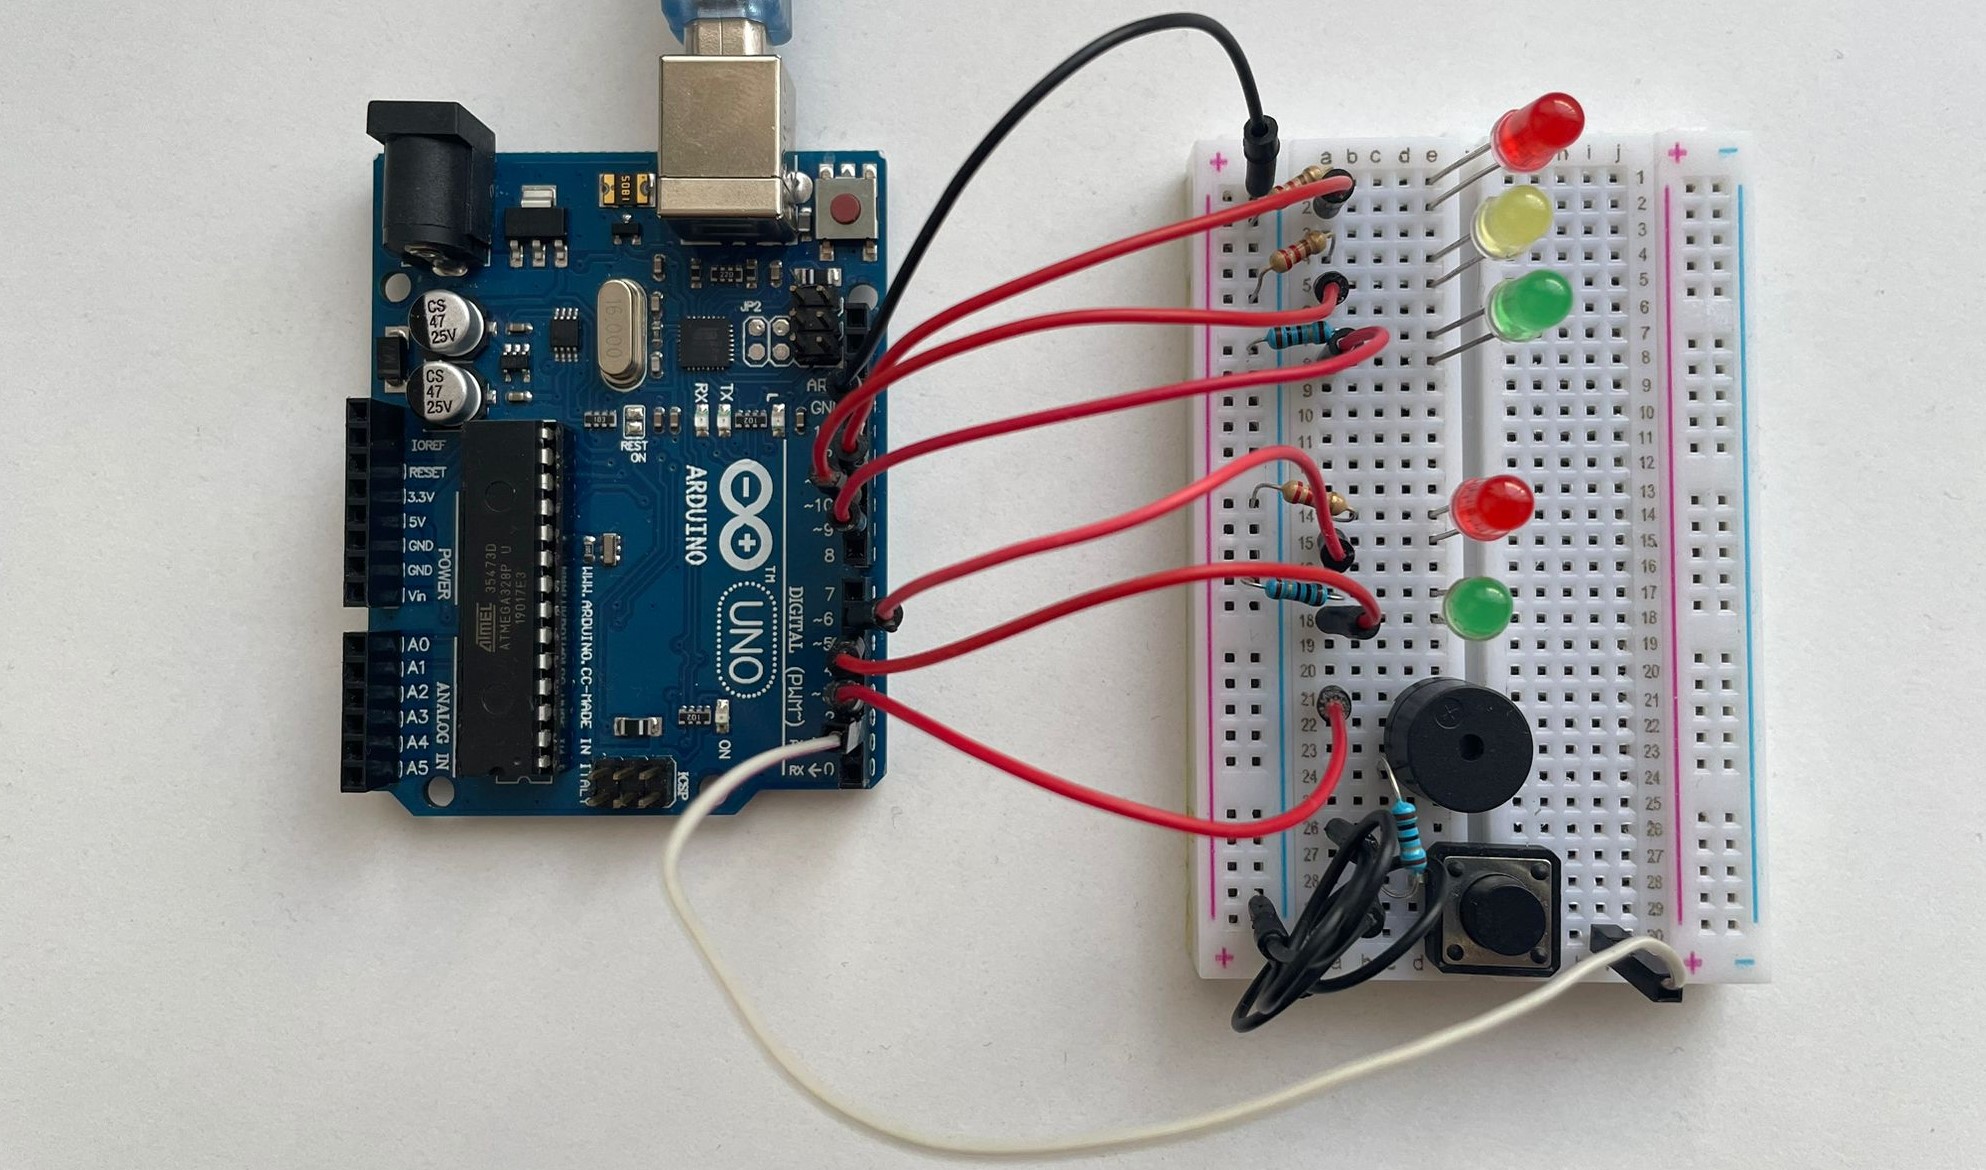
5 LEDs, 1 button, 1 buzzer, resistors and wires (per logic).
Building the traffic lights for a crosswalk. 2 LEDs will be used to represent the traffic lights for people (red and green) and 3 LEDs to represent the traffic lights for cars (red, yellow and green).
The system has the following states:
-
State 1 (default, reinstated after state 4 ends): green light for cars, red light for people, no sounds. Duration: indefinite, changed by pressing the button.
-
State 2 (initiated by counting down 8 seconds after a button press): the light should be yellow for cars, red for people and no sounds. Duration: 3 seconds.
-
State 3 (initiated after state 2 ends): red for cars, green for people and a beeping sound from the buzzer at a constant interval. Duration: 8 seconds.
-
State 4 (initiated after state 3 ends): red for cars, blinking green for people and a beeping sound from the buzzer, at a constant interval, faster than the beeping in state 3. This state should last 4 seconds.
Pressing the button in any state other than state 1 should NOT yield any actions.
See details
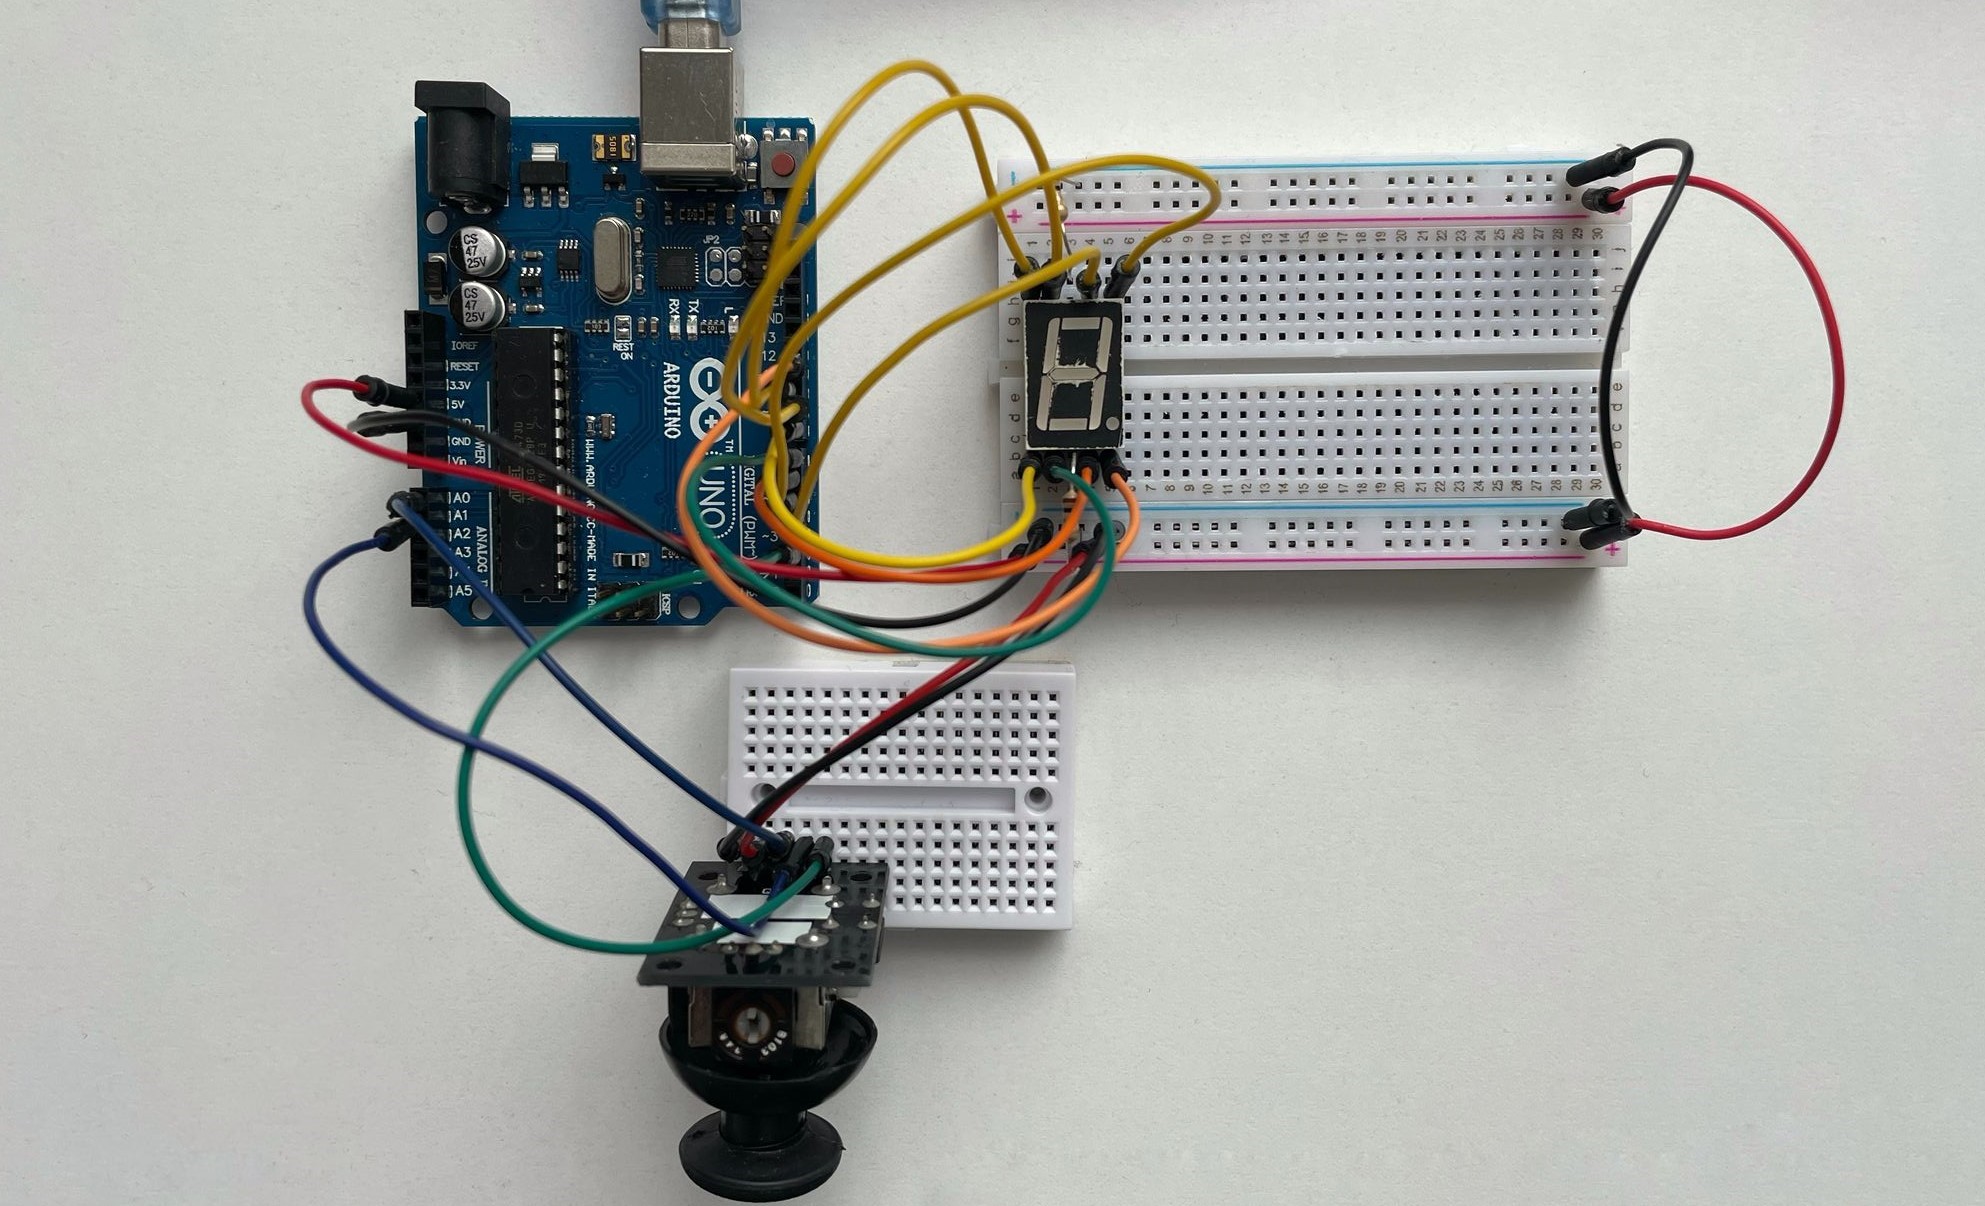
1 7-segment display, 1 joystick, resistors and wires (per logic).
The joystick will be used to control the position ofthe segment and 'draw' on the display. The movement between segments should be natural (meaning they should jump from the current position only to neighbors, but without passing through 'walls').
The system has the following states:
- State 1 (default, but also initiated after a button press in State 2): Current position blinking. Can use the joystick to move from one position to neighbors. Short pressing the button toggles state 2. Long pressing the button in state 1 resets the entire display by turning all the segments OFF and moving the current position to the decimal point.
- State 2 (initiated after a button press in State 1): The current segment stops blinking, adopting the state of the segment before selection (ON or OFF). Toggling the Y axis should change the segment state from ON to OFF or from OFF to ON. Clicking the joystick should save the segment state and exit back to state 1.
Long pressing the button to reset should only be available in state 1.
See details
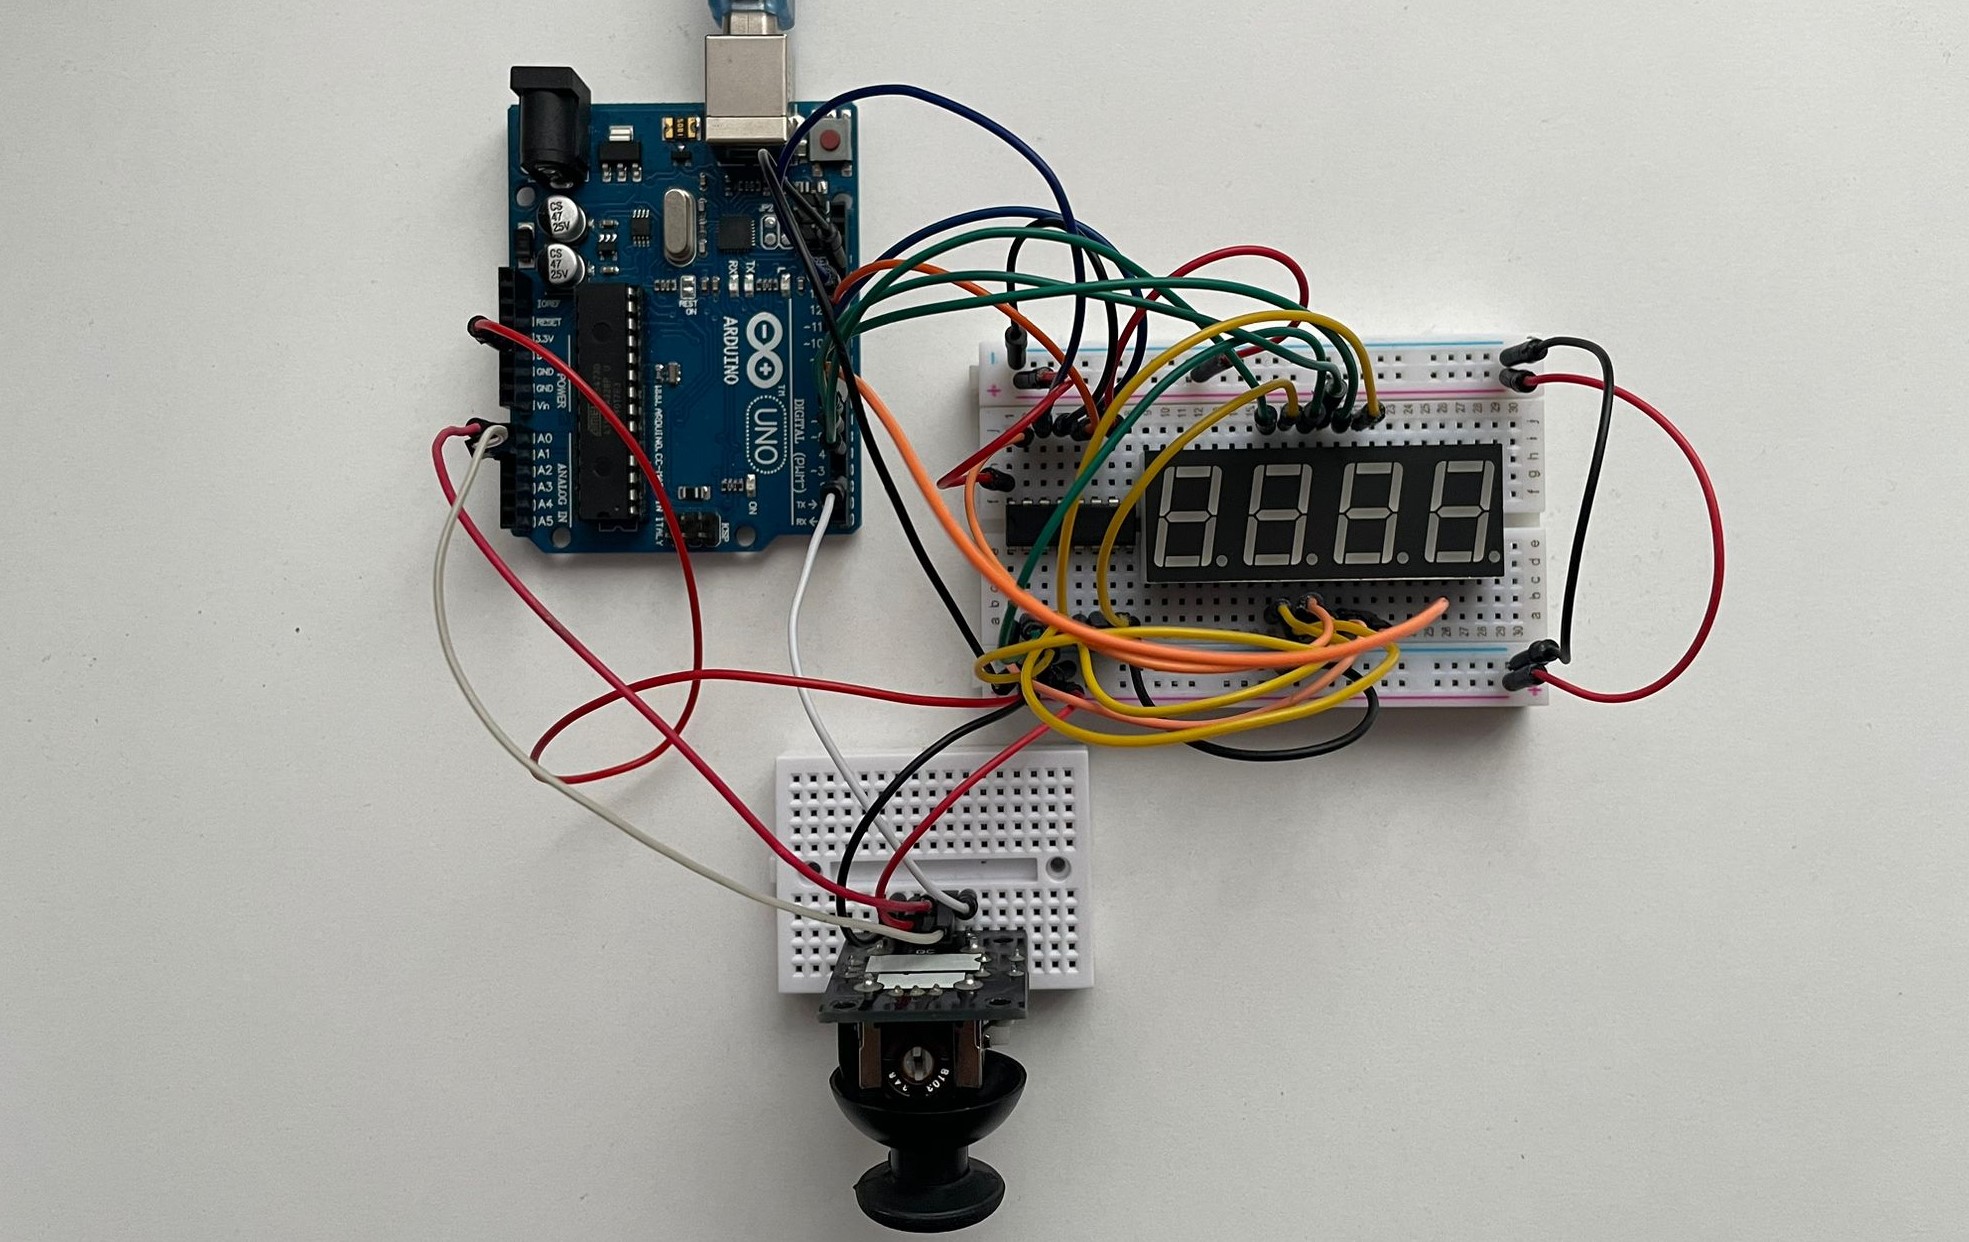
1 joystick, 1 4 digit 7-segment display, a 74hc595 shift register.
The joystick should be used to move through the 4 digit 7-segment displays digits; the button will be pressed in orded to lock in on the current digitthe other axis should be used to increment or decrement the number. Holding button pressed should reset all the digit values and the current position to the first digit in the first state.
The system has the following states:
- State 1: a joystick axis can be used to cycle through the 4 digits; using the other axis does nothing. A blinking decimal point shows the current digit position. When pressing the button, the selected digit is locked in and the second state is entered.
- State 2: in this state, the decimal point stays always on, no longer blinking and the axis can not longer be used to cycle through the 4 digits. Instead, using the other axis, the number on the current digit IN HEX can be incremented or decremented. Pressing the button again return to the previous state. When changing the number, it can be incremented for each joystick movement - it does not increment continuosly if the joystick is kept in one position.
- Reset: toggled by long pressing the buttononly in the first state. When resetting, all the digits go back to 0 and the current position is set to the first (rightmost) digit, in the first state.
See details
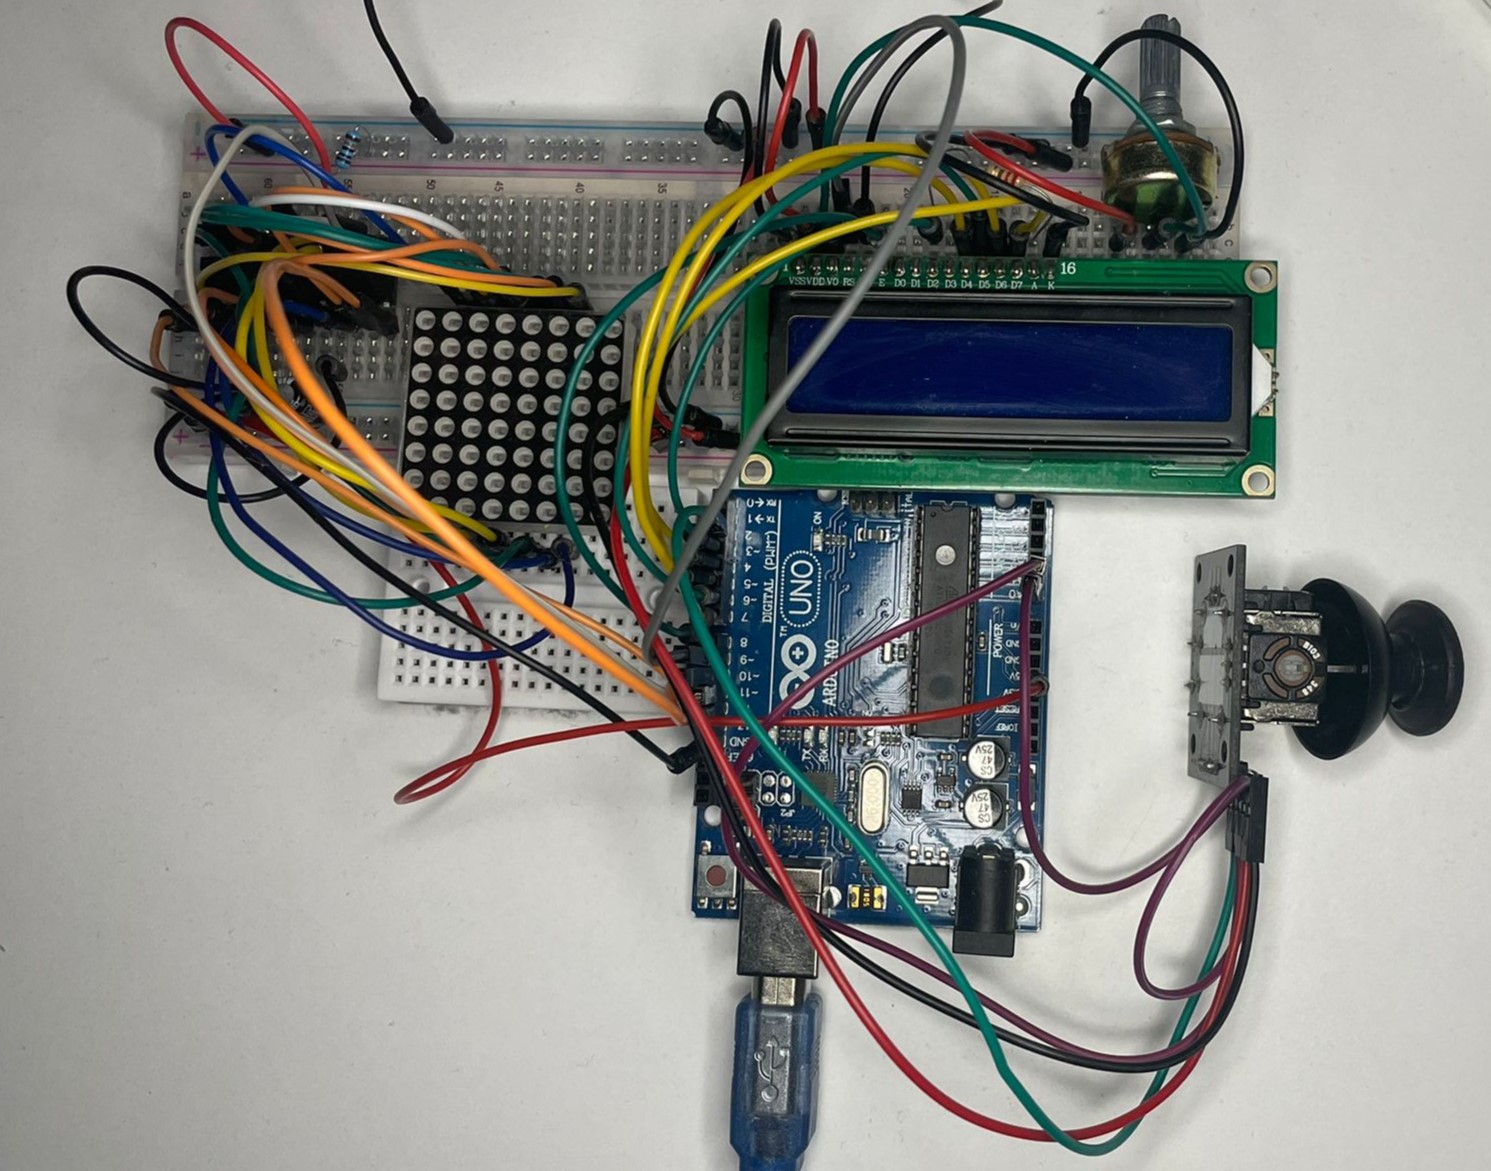
Create a menu for the game, emphasis on it. It should use the joystick to scroll on the LCD. The menu should include the following functionality:
-
When powering up a game, a greeting message should be shown fora few moments.
-
The following categories:
a) Start game
b) Highscore: update it when the game is done. Save the top 5 values in EEPROM with name and score
c) Settings: enter name, difficulty (saved to EEPROM), LCD brightness control (saved to EEPROM), matrix brightness control (saved to EEPROM), sounds on or off (saved to EEPROM), reset leaderboard.
d) About: details about the creator (game name, author, GitHub user)
e) How to play: short and informative description
-
While playing the game: display all the relevant info
-
Upon game ending: message and inform the player if they beat the highscore.
The navigation through the menu and the submenus is made with up/down movements. To enter a submenu, the joystick movement must be to the right, and to exit a submenu, to the left. While scrolling through the menu, a visual representation of the current item is displayed on the matrix.
To start the game, the player has to enter the start game submenu, and then press the button. While playing, the name of the player and the score appear on the LCD. For now, the minigame ends when the score is 10, and it informs the player if they beat a highscore by telling them which place on the leaderboard they are now on.
In the leaderboard submenu, there are the best 5 scores (initially, they are all 0).
In the settings menu, the user can modify the LCD brightness, the matrix brightness, the difficulty, the sounds, they can reset the leaderboard and input their name.