First of all, go to discord developer dashboard and choose the bot you want to host, go to the bot tab, and click on Regenerate token, and then copy the token.
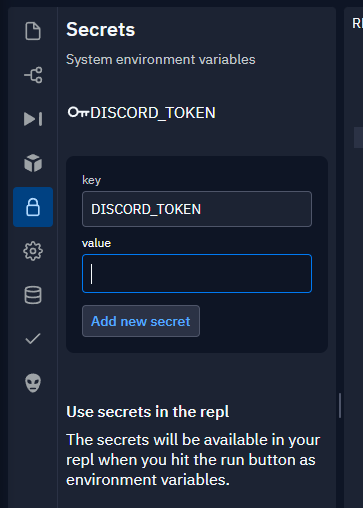
After this, go to the "Lock"-like tab on replit and here, in the key enter DISCORD_TOKEN and in the value field, enter the token you copied from discord developer dashboard.
You can modify any kind of configuration in src/config.ts. DO NOT change any files in the dist directory as they are all generated files and should not be manually edited.
In the template, the bot has 3 basic commands: -
help: Shows the list of commands or details of a specific command.say: Repeats whatever the users tells it to.ping: Checks connectivity with discord servers.
You can edit these commands and/or add more in src/index.ts. After creating the command in src/index.ts, go to src/commands.ts and to the json, add a new entry with the format
{
  ...,
  'command-name': {
    aliases: ['these', 'are', 'optional'],
    description: 'This command does xyz...',
    format: 'command-name <my-args>'
  }
}
Here, command-name is the name of your new command, aliases is an array of the aliases (other ways to invoke this command). The description and format are required fields to display the command properly in the help embed.
NOTE : This is solely to add the command to the help embed, this does not affect the working of commands whatsoever, this only adds the command to help embeds.
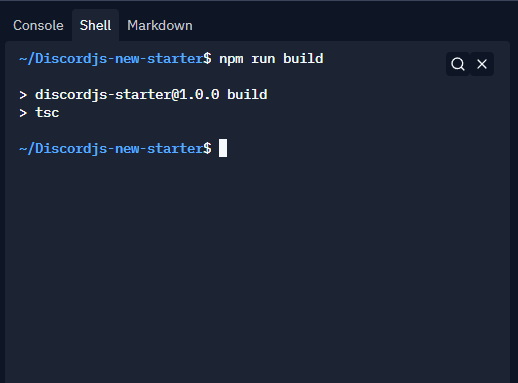
Finally, once you are done writing your bot, first step is to compile it, for this, open the shell on the right hand side and run npm run build. This will compile your code and prepare it for running. After this, just press the run button and your bot is online!
You can also turn on Always On to further improve your hosting experience.