Flutter-Login-Page-UI-Explained
Español
English
1. Español
Este pequeño tutorial es una explicación del video del desarrollador llamado Abdi Hamid, todo el código es propiedad del desarrollador, lo único que estoy haciendo es explicar algunas de las partes para que cualquier persona que esté iniciando en Flutter lo pueda entender. Ante todo gracias a Abdi Hamid por compartir el video y el código en su repositorio.
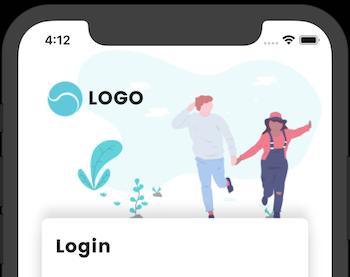
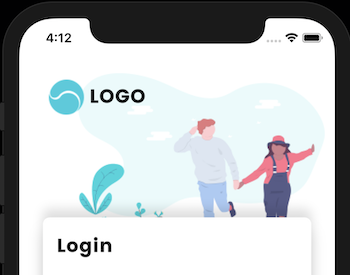
El resultado final con este ejemplo es el siguiente:
En la carpeta lib del proyecto vamos a encontrar cuatro archivos, estos son los que crea Abdi en el video y son los que componene toda el login de la App, estos son:
- main.dart
- CustomIcons.dart
- SocialIcons.dart
- FormCard.dart
En Flutter es muy sencillo ver como se desarrolla toda la composición de la app, simplemente viendo cada Widget y como esta contenido un Widget en otro, esto permite facilmente poder leer y luego interpretar que esta haciendo cada Widget.
Inicamos con el StatefulWidget.
class MyApp extends StatefulWidget {
  @override
  _MyAppState createState() => new _MyAppState();
}

class _MyAppState extends State<MyApp> {
  bool _isSelected = false;

  void _radio() {
    setState(() {
      _isSelected = !_isSelected;
    });
  }
Un widget que tiene un estado mutable. State es información que se puede leer de forma sincrónicamente y puede cambiar durante el tiempo de vida del widget, es responsabilidad del implementador asegurar que el State es notificado cuando se genera un cambio, por medio del State.setState.
El Stateful widget es muy util cuando parte de la interfaz de usuario que estamos creando cambia dinamicamente, esta es la diferencia entre el Stateful Widget y el Stateless Widget.
Podemos ver que en el código anterior se usa el Stateful y luego se define el State que más adelante vamos a usar para notificar en los cambios realizados en el Login, por ejemplo cuando se activa el radioButton para recordar los datos de la persona que se va a loggear, en estas situaciones donde el usuario interactua con la app, que debemos hacer uso del StatefulWidget y notificar por medio del State.setState, si hacemos todo esto pero usando el Stateless, no se va dar el cambio en el radioButton.
En este punto puede surgir la pregunta sobre por que el Stateful y el State se definen de forma separada? Los objetos State son de larga vida, pero el StatefullWidget se desecha y se reconstruyen cada vez que cambia la configuración. Como el State no se pierde en cada rebuild, evita cálculos costosos, y obtiene propiedades del State, getters, setters, etc. cada vez que se reconstruye frame a frame.
Lo importante es que esto es lo que permite que existan animaciones en Flutter. Como el State no se desecha, se puede reconstruir constantemente su Widget en respuesta a los cambios en los datos, y cuando sea necesario, si es necesario.
En la siguiente sección se define el Widget radioButton, su tamaño, ubicación, la forma y el color, en el child se usa un operador ternario para reemplazar el if y hacer el código más organizado, es facíl entender este operador si seguimos la siguiente relación WTF, en la cual W es la pregunta el que?, luego la T es el True, lo que se implementa si la condición es verdadera y luego la F es el false, lo que se implementa si no se cumple, en este caso el isSelected es la pregunta o la parte W, despues del signo de interrogación ?, luego despues de los dos puntos : vamos a encontrar la parte F del operador ternario.
Widget radioButton(bool isSelected) => Container(
        width: 16.0,
        height: 16.0,
        padding: EdgeInsets.all(2.0),
        decoration: BoxDecoration(
            shape: BoxShape.circle,
            border: Border.all(width: 2.0, color: Colors.black)),
        child: isSelected // W
            ? Container( // T
                width: double.infinity,
                height: double.infinity,
                decoration:
                    BoxDecoration(shape: BoxShape.circle, color: Colors.black),
              )
            : Container(), // F
      );
Después de definir el radioButton, vamos a iniciar con uno de los bloque de código más grandes de toda nuestra app donde se define la mayoria de la estructura del proyecto el Widget build, que hace parte de todo el ciclo de vida del Stateful Widget, Este método se llama a menudo (fps + render). Es obligatorio, hacer un @override y debe devolver un Widget.
Podemos ver como inicia con el @override y al final como retorna un Widget, en este caso un Scaffold.
@override
  Widget build(BuildContext context) {
    ScreenUtil.instance = ScreenUtil.getInstance()..init(context);
    ScreenUtil.instance =
        ScreenUtil(width: 750, height: 1334, allowFontScaling: true);
    return new Scaffold
Pero acá hay un package que se esta utilizando y es importante saber que hace, el ScreenUtil. Un plugin para Flutter para adaptar la pantalla y el tamaño de fuente. ¡Deje que su interfaz de usuario muestre un diseño razonable en diferentes tamaños de pantalla!
Para instalar este plugin en Flutter debemos agregar la siguiente línea en el archivo pubsec.yaml y esto instalara las dependencias necesarias para poder utilizarlo.
- flutter_screenutil: ^0.4.2
En el siguiente link podemos encontrar más información al respecto: ScreenUtil
Nuestro build retorna un Scaffold, veamos una breve explicación de este y cada uno de los Widgets que contiene:
Scaffold: Implementa la estructura básica de Material Design. Esta clase proporciona la API para mostrar drawers, Snack Bars y bottom sheets.
Stack: Un widget que coloca a sus children en relación con los bordes de su caja. Esta clase es útil si desea superponer a varios child de una manera sencilla, por ejemplo, con algo de texto y una imagen, superpuesta con un degradado y un botón adjunto en la parte inferior.
Podemos ver como luego del Stack, se definen los children:
Stack(
        fit: StackFit.expand,
        children: <Widget>[
          Column(
            crossAxisAlignment: CrossAxisAlignment.end,
            children: <Widget>[
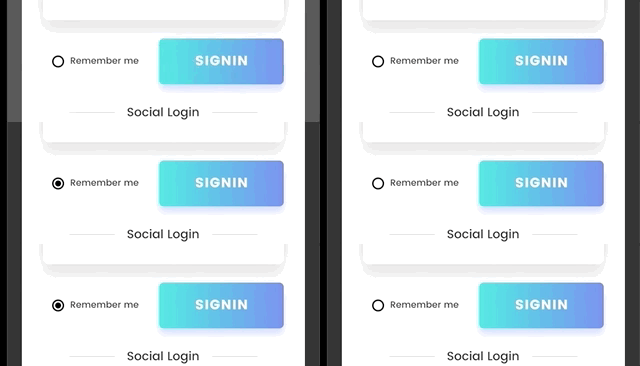
Padding: El padding permite generar un espacio entre la ubicación del contenido y el borde de la caja, es más fácil identificarlos cuando cambiamos el valor de 20 a 50. La imagen izquierda tiene un padding de 20 y la derecha de 50.
Expanded: Un widget que expande un elemento secundario de una Fila, Columna o Flex para que el child llene el espacio disponible.
SingleChildScrollView: Un cuadro en el que se puede desplazar un solo widget.
SizedBox: El SizedBox es una caja con un tamaño especifico, pero en este caso podemos ver que se utiliza el ScreenUtil para generar un espacio en el cual se va a poner la FormCard, que es en la cual esta el Login.
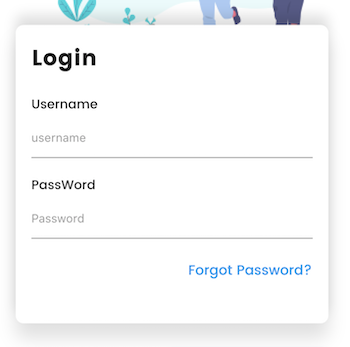
FormCard: Para esta podemos ver que se creo otro código separado, esto es muy comun cuando nuestro código esta muy grande, de esta forma es más organizado y nos facilita encontrar errores. En la siguiente imagen podemos ver la FormCard.
En la FormCard se usa un BoxDecoration, que permite crear esta caja blanca con bordes redondeados y una sombre en la parte superior e inferior que da la sensación de relieve, esto se consigue usando los dos BoxShadow para poder usar esta FormCard en el main.dart debemos importarla, podemos ver en la parte superior del main.dart el siguiente línea de código:
import 'Widgets/FormCard.dart';Despues del FormCard(), se crea un SizedBox para generar un espacio entre la FormCard y el nuevo Widget que en este caso es un Row, que va contener el radioButton, el Text del "Remember me" y el botón de Sing In.
Para el Botón se utiliza un InkWell que es un Widget de área rectangular que responde al touch, luego tenemos un BoxDecoration es una clase que nos da una variedad de formas diferentes sobre como dibujar una caja, tiene un borde, un cuerpo y una sombra, el cuerpo de la caja esta pintada en diferentes layers, el color que llena la caja, luego un gradiente que también llena la caja, cuenta con un boxShadow similar al que vimos anteriomente en el FormCard.
Luego tenemos otro SizedBox para separar el Row anterior del nuevo row que va contener dos líneas horizontales y el Text del Social Login, este Row contiene dos horizontalLine() que se definieron en la parte superior con el siguiente código:
 Widget horizontalLine() => Padding(
        padding: EdgeInsets.symmetric(horizontal: 16.0),
        child: Container(
          width: ScreenUtil.getInstance().setWidth(120),
          height: 1.0,
          color: Colors.black26.withOpacity(.2),
        ),
      );
Luego tenemos otro SizedBox para separar el Row anterior de la sección de botones para hacer el login, en este caso se utiliza otro Row pero hace referencia a otra clase llamada SocialIcon que contiene la definición del Widget, esta clase contiene un BoxDecoration de forma circular, un LinearGradient y como child un RawMaterialButton.
Código del Row:
Row(
                    mainAxisAlignment: MainAxisAlignment.center,
                    children: <Widget>[
                      SocialIcon(
                        colors: [
                          Color(0xFF102397),
                          Color(0xFF187adf),
                          Color(0xFF00eaf8),
                        ],
                        iconData: CustomIcons.facebook,
                        onPressed: () {},
                      ),
                      SocialIcon(
                        colors: [
                          Color(0xFFff4f38),
                          Color(0xFFff355d),
                        ],
                        iconData: CustomIcons.googlePlus,
                        onPressed: () {},
                      ),
                      SocialIcon(
                        colors: [
                          Color(0xFF17ead9),
                          Color(0xFF6078ea),
                        ],
                        iconData: CustomIcons.twitter,
                        onPressed: () {},
                      ),
                      SocialIcon(
                        colors: [
                          Color(0xFF00c6fb),
                          Color(0xFF005bea),
                        ],
                        iconData: CustomIcons.linkedin,
                        onPressed: () {},
                      )
                    ],
                  ),
Código de la clase SocialIcons se definen tres propiedades, colors, iconData, onPressed, luego tenemos un constructor que recibe estos parametros para poder construir los botones, si vemos en el código anterior se utiliza el iconData, pero este pasa un CustomIcons el cual esta definido en otra clase para poder ser utilizado.
class SocialIcon extends StatelessWidget {
 final List<Color> colors;
 final IconData iconData;
 final Function onPressed;
 SocialIcon({this.colors, this.iconData, this.onPressed});
 @override
 Widget build(BuildContext context) {
   return new Padding(
     padding: EdgeInsets.only(left: 14.0),
     child: Container(
       width: 45.0,
       height: 45.0,
       decoration: BoxDecoration(
           shape: BoxShape.circle,
           gradient: LinearGradient(colors: colors, tileMode: TileMode.clamp)),
       child: RawMaterialButton(
         shape: CircleBorder(),
         onPressed: onPressed,
         child: Icon(iconData, color: Colors.white),
       ),
     ),
   );
 }
}
En el Row cuando se utiliza la clase SocialIcon al final se utiliza el iconData que entrega el CustomIcons definido en otra clase, su código es el siguiente:
class CustomIcons {
  static const IconData twitter = IconData(0xe900, fontFamily: "CustomIcons");
  static const IconData facebook = IconData(0xe901, fontFamily: "CustomIcons");
  static const IconData googlePlus =
      IconData(0xe902, fontFamily: "CustomIcons");
  static const IconData linkedin = IconData(0xe903, fontFamily: "CustomIcons");
}
Podemos ver como se van creando diferentes clases que contienen Widgets que en este ejemplo son repetitivos, como es el caso de los botones del login en la parte inferior, es común cuando encontramos en nuestro diseño un Widget que se va a utilizar varias veces, separarlo en una nueva clase y luego simplemente lo llamamos, entregando los valores necesarios, así evitamos saturar nuestro código principal, generar un orden de trabajo, ahorramos tiempo y facilitamos el desarrollo en general.
Creditos
Código Abdi Hamid Diseño Nithinraj Shetty
Flutter-Login-Page-UI-Explained
1. English
This little tutorial is an explanation of the video of the developer called Abdi Hamid, all the code is property of the developer, the only thing I'm doing is explaining some of the parts so that anyone who is starting in Flutter can understand it. First of all thanks to [Abdi Hamid] (https://github.com/devefy) for sharing the video and the code in his repository.
The final result with this example is the following:
In the lib folder of the project we will find four files, these are the ones created by Abdi in the video and they are the ones that make up the entire login of the App, these are:
- main.dart
- CustomIcons.dart
- SocialIcons.dart
- FormCard.dart
In Flutter it is very easy to see how the whole composition of the app develops, simply by watching each Widget and how this content is a Widget in another, this allows you to easily read and then interpret what each Widget is doing.
We start with the StatefulWidget.
class MyApp extends StatefulWidget {
  @override
  _MyAppState createState() => new _MyAppState();
}

class _MyAppState extends State<MyApp> {
  bool _isSelected = false;

  void _radio() {
    setState(() {
      _isSelected = !_isSelected;
    });
  }
A widget that has a mutable state. State is information that can be read synchronously and can change during the lifetime of the widget; it is the responsibility of the implementer to ensure that the State is notified when a change is generated, through the State.setState.
The Stateful widget is very useful when part of the user interface we are creating changes dynamically, this is the difference between the Stateful Widget and the Stateless Widget.
We can see that in the previous code the Stateful is used and then the State is defined that later we will use to notify in the changes made in the Login, for example when the radioButton is activated to remember the data of the person who is going to logge, in these situations where the user interacts with the app, we must use the StatefulWidget and notify through the State.setState, if we do all this but using the Stateless, the change in the radioButton will not be given.
At this point the question may arise why the Stateful and the State are defined separately? State objects are long-lived, but the StatefullWidget is discarded and rebuilt each time you change the configuration. As the State is not lost in every rebuild, it avoids costly calculations, and obtains properties from the State, getters, setters, etc. every time it is rebuilt frame by frame.
The important thing is that this is what allows animations in Flutter. Since the State is not thrown away, you can constantly rebuild your Widget in response to changes in the data, and when necessary, if necessary.
In the following section we define the RadioButton Widget, its size, location, shape and color, in the child a ternary operator is used to replace the if and make the code more organized, it is easy to understand this operator if we follow the following relationship WTF, in which W is the question what ?, then the T is the True, which is implemented if the condition is true and then the F is the false, which is implemented if it is not fulfilled, in this case the isSelected is the question or part W, after the question mark?, then after the two points: we will find part F of the ternary operator.
Widget radioButton(bool isSelected) => Container(
        width: 16.0,
        height: 16.0,
        padding: EdgeInsets.all(2.0),
        decoration: BoxDecoration(
            shape: BoxShape.circle,
            border: Border.all(width: 2.0, color: Colors.black)),
        child: isSelected // W
            ? Container( // T
                width: double.infinity,
                height: double.infinity,
                decoration:
                    BoxDecoration(shape: BoxShape.circle, color: Colors.black),
              )
            : Container(), // F
      );
After defining the radioButton, we will start with one of the largest code blocks of our entire app where the majority of the project structure is defined as the Widget build, which is part of the entire life cycle of the Stateful Widget, This method is often called (fps + render). It is mandatory, do an @override and you must return a Widget.
We can see how it starts with the @override and in the end how a Widget returns, in this case a Scaffold.
@override
  Widget build(BuildContext context) {
    ScreenUtil.instance = ScreenUtil.getInstance()..init(context);
    ScreenUtil.instance =
        ScreenUtil(width: 750, height: 1334, allowFontScaling: true);
    return new Scaffold
But here is a package that is being used and it is important to know what it does, the ScreenUtil. A plugin for Flutter to adapt the screen and the font size. Let your user interface show reasonable design in different screen sizes!
To install this plugin in Flutter we must add the following line in the file pubsec.yaml and this will install the necessary dependencies to be able to use it.
- flutter_screenutil: ^0.4.2
In the following link we can find more information about it: ScreenUtil
Our build returns a Scaffold, let's see a brief explanation of this and each of the Widgets it contains:
Scaffold: Implements the basic structure of Material Design. This class provides the API to show drawers, Snack Bars and bottom sheets.
Stack: A widget that places your children in relation to the edges of your box. This class is useful if you want to superimpose several child in a simple way, for example, with some text and an image, superimposed with a gradient and an attached button at the bottom.
We can see how after the Stack, the children are defined:
Stack(
        fit: StackFit.expand,
        children: <Widget>[
          Column(
            crossAxisAlignment: CrossAxisAlignment.end,
            children: <Widget>[
Padding: Padding allows to generate a space between the location of the content and the edge of the box, it is easier to identify them when we change the value from 20 to 50. The left image has a padding of 20 and the right of 50.
Expanded: A widget that expands a secondary element of a Row, Column or Flex so that the child fills the available space.
SingleChildScrollView: A box in which you can move a single widget.
SizedBox: The SizedBox is a box with a specific size, but in this case we can see that the ScreenUtil is used to generate a space in which the FormCard will be placed, which is where the Login is.
FormCard: For this we can see that another separate code was created, this is very common when our code is very large, in this way it is more organized and facilitates us to find errors. In the following image we can see the FormCard.
On the FormCard a BoxDecoration is used, which allows you to create this white box with rounded edges and a hat on the top and bottom that gives the feeling of relief, this is achieved using the two ** BoxShadow ** to be able to use this FormCard in the main.dart we must import it, we can see in the upper part of the main.dart the following line of code:
import 'Widgets/FormCard.dart';After the FormCard (), a SizedBox is created to generate a space between the FormCard and the new Widget which in this case is a Row, which will contain the radioButton, the Text of the "Remember me" and the Sing In button.
For the Button an InkWell is used that is a rectangular area Widget that responds to touch, then we have a BoxDecoration is a class that gives us a variety of different ways on how to draw a box, it has a border, a body and a shadow, the body of the box is painted in different layers, the color that fills the box, then a gradient that also fills the box, has a boxShadow similar to the one we saw earlier on the FormCard.
Then we have another SizedBox to separate the previous Row from the new row that will contain two horizontal lines and the Text of the Social Login, this Row contains two horizontalLine () that were defined at the top with the following code:
 Widget horizontalLine() => Padding(
        padding: EdgeInsets.symmetric(horizontal: 16.0),
        child: Container(
          width: ScreenUtil.getInstance().setWidth(120),
          height: 1.0,
          color: Colors.black26.withOpacity(.2),
        ),
      );
Then we have another SizedBox to separate the previous Row from the section of buttons to do the login, in this case another Row is used but it refers to another class called SocialIcon that contains the definition of the Widget, this class contains a BoxDecoration of circular form, a LinearGradient and as a child a RawMaterialButton.
Código del Row:
Row(
                    mainAxisAlignment: MainAxisAlignment.center,
                    children: <Widget>[
                      SocialIcon(
                        colors: [
                          Color(0xFF102397),
                          Color(0xFF187adf),
                          Color(0xFF00eaf8),
                        ],
                        iconData: CustomIcons.facebook,
                        onPressed: () {},
                      ),
                      SocialIcon(
                        colors: [
                          Color(0xFFff4f38),
                          Color(0xFFff355d),
                        ],
                        iconData: CustomIcons.googlePlus,
                        onPressed: () {},
                      ),
                      SocialIcon(
                        colors: [
                          Color(0xFF17ead9),
                          Color(0xFF6078ea),
                        ],
                        iconData: CustomIcons.twitter,
                        onPressed: () {},
                      ),
                      SocialIcon(
                        colors: [
                          Color(0xFF00c6fb),
                          Color(0xFF005bea),
                        ],
                        iconData: CustomIcons.linkedin,
                        onPressed: () {},
                      )
                    ],
                  ),
Class code SocialIcons three properties are defined, colors, iconData, onPressed, then we have a constructor that receives these parameters in order to build the buttons, if we see in the previous code the iconData is used, but this passes a CustomIcons which is defined in another class to be used.
class SocialIcon extends StatelessWidget {
 final List<Color> colors;
 final IconData iconData;
 final Function onPressed;
 SocialIcon({this.colors, this.iconData, this.onPressed});
 @override
 Widget build(BuildContext context) {
   return new Padding(
     padding: EdgeInsets.only(left: 14.0),
     child: Container(
       width: 45.0,
       height: 45.0,
       decoration: BoxDecoration(
           shape: BoxShape.circle,
           gradient: LinearGradient(colors: colors, tileMode: TileMode.clamp)),
       child: RawMaterialButton(
         shape: CircleBorder(),
         onPressed: onPressed,
         child: Icon(iconData, color: Colors.white),
       ),
     ),
   );
 }
}
In the Row when the SocialIcon class is used at the end the iconData that delivers the CustomIcons defined in another class is used, its code is as follows:
class CustomIcons {
  static const IconData twitter = IconData(0xe900, fontFamily: "CustomIcons");
  static const IconData facebook = IconData(0xe901, fontFamily: "CustomIcons");
  static const IconData googlePlus =
      IconData(0xe902, fontFamily: "CustomIcons");
  static const IconData linkedin = IconData(0xe903, fontFamily: "CustomIcons");
}
We can see how different classes are being created that contain Widgets that in this example are repetitive, as is the case with the login buttons at the bottom, it is common when we find in our design a Widget that will be used several times, separate it in a new class and then we just call it, delivering the necessary values, so we avoid saturating our main code, generate a work order, save time and facilitate development in general.
Creditos
Código Abdi Hamid Diseño Nithinraj Shetty


