This is the course project of Parallel Computing, Spring 2018 at SCU. It uses OpenCL to accelerate the scan conversion of ultrasound frames.
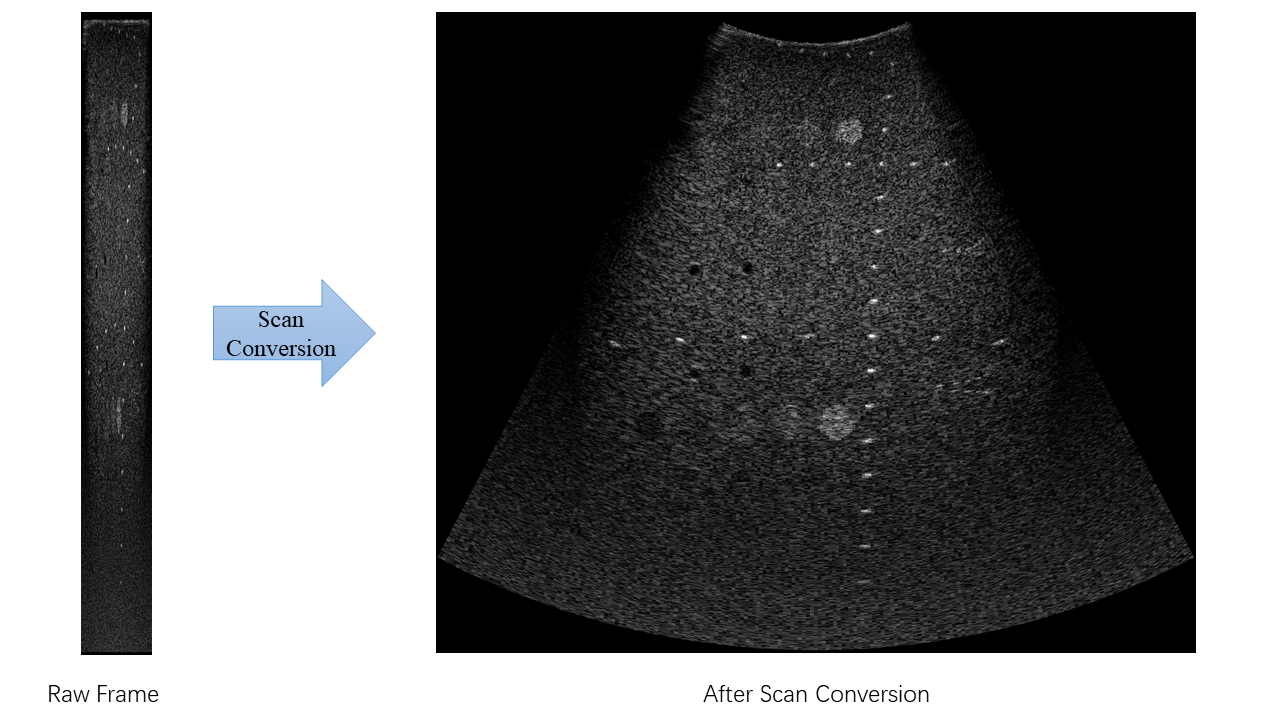
Scan conversion is necessary to convert from the polar coordinates associated with the ultrasound data to the Cartesian coordinates used by standard video monitors, as is shown below.
Table of Contents
-
Cross platform:
-
Windows
-
Linux
-
macOS (not tested)
-
-
OpenCL acceleration (Optional)
-
Multiple interpolation algorithms:
-
Nearest
-
Bilinear
-
Cubic for row and linear for column
-
Catmul-Rom Spline
-
Bicubic
-
-
OpenCL 2.0 (optional)
-
CMake (for building)
-
A C compiler supporting the
timespec_getfunction of C11 -
Python 3 with the following packages (for benchmarking):
-
matplotlib
-
numpy
-
scikit-image
-
git clone this repository, and cd to the directory to run build commands.
The following options are defined in config.h.in, and can be turned on/off with cmake -D OPTION=ON|OFF. CMake will generate config.h according to command line options, which will be included by the source files as a configuration file.
| Options | Default | Description |
|---|---|---|
NDEBUG |
ON | Disable DBG_PRINT and assert |
TIMING |
ON | Enable timing |
USE_OPENCL |
ON | Use OpenCL |
By default, the Release version will be built. To build the Debug version, pass -D CMAKE_BUILD_TYPE=Debug to CMake when generating a build system.
On Windows, when generating a Visual Studio solution, the build type is not controlled by CMake. Instead, it is set in build options of MSBuild or Visual Studio. For command line users, please use CMake in build tool mode as is shown below.
To build with the default configurations, run the following commands:
mkdir -p build/linux/release
cd build/linux/release
cmake ../../..
make
The executable scanconv will be generated under "build/linux/release".
For example, to build the Debug version, run the following commands:
mkdir build\windows\debug
cd build\windows\debug
cmake -D CMAKE_BUILD_TYPE=Debug ..\..\..
cmake --build . --config Debug
The executable scanconv will be generated under "build\windows\debug\Debug".
Synopsis:
./scanconv <dat_file>
For example:
$ ./scanconv image.dat
$
Then raw.png and interpolated.png will be generated under the working directory. raw.png is the raw image decoded from image.dat, and interpolated.png is the interpolated version.
cd to the building output directory, and
-
run
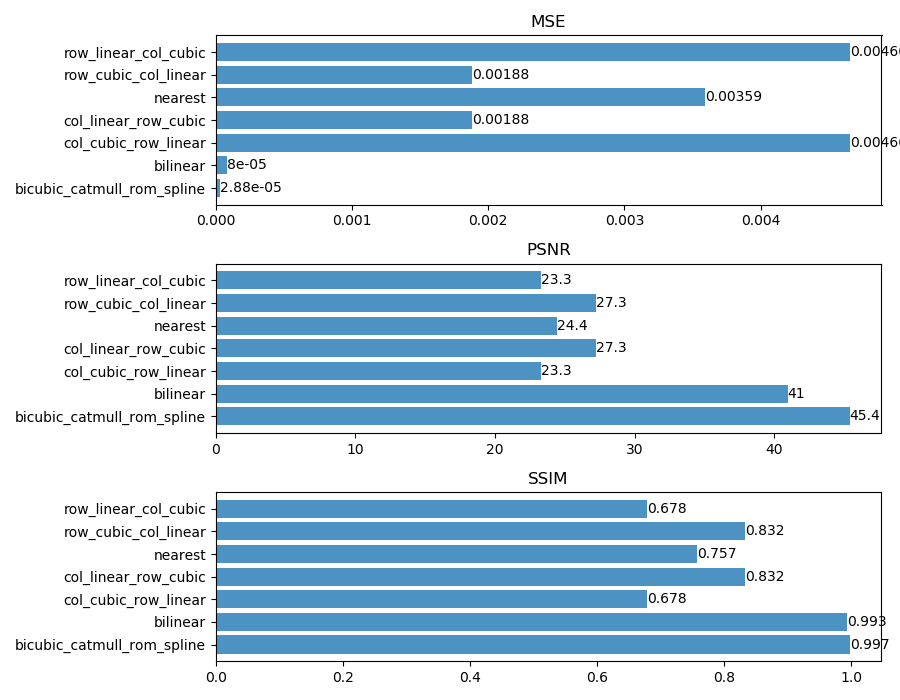
python3 evaluate_cpu.pyto evaluate different interpolation methods (CPU version, compared to bicubic); -
run
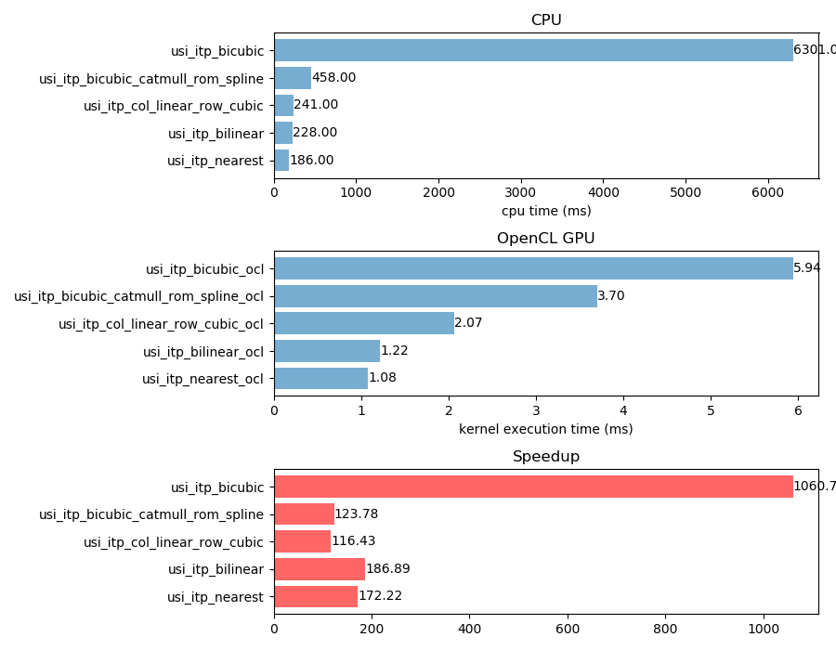
python3 profile.pyto see the speedup of OpenCL over CPU.
- stb_image_write.h: image writing to disk (png)
Licensed under the MIT License.


