This repository contains integration guide and example source code for running a Node.js app with Turso on Linode.
First, create a database on Turso:
turso db create linode-exampleThen create the schema and insert some data for this example application:
turso db shell linode-example
CREATE TABLE leaderboard (id INT PRIMARY KEY, player TEXT, score INT, matches INT);

INSERT INTO leaderboard VALUES (1, 'Alice', 100, 10);
INSERT INTO leaderboard VALUES (2, 'Bob', 50, 10);
INSERT INTO leaderboard VALUES (3, 'Carol', 1, 1);First, deploy a Linode Node.js app via the Linode Marketplace.
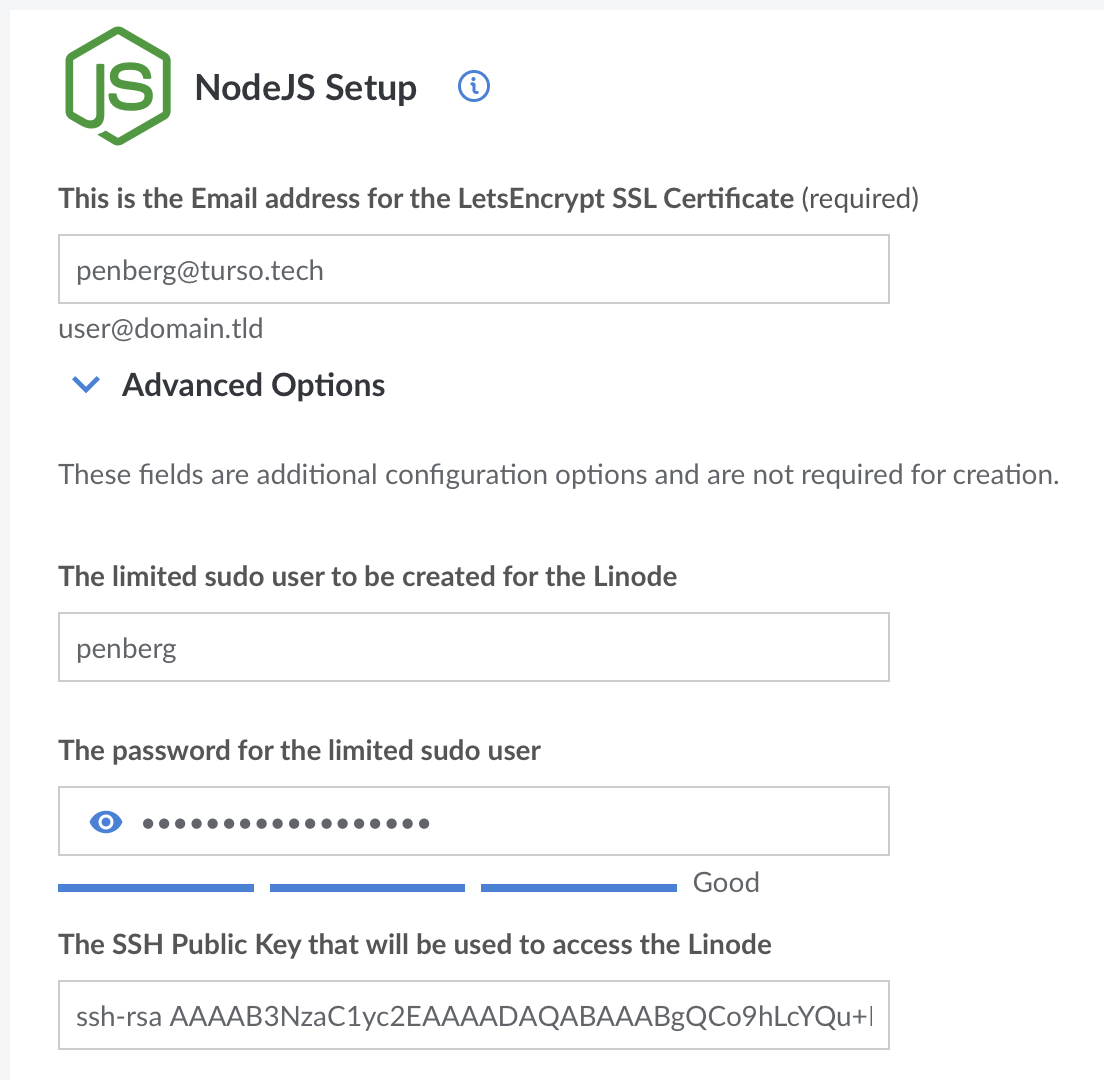
You will see a setup screen that looks like this:
You need to configure the following:
- Email address for SSL certificate
- Limited
sudousername and password - Your public SSH key (in
~/.ssh/id_rsa.pubtypically) - Region
- Plan
- Root password
For other settings, just leave to whatever defaults they are.
When the Linode is up and running, you can now use ssh to access the machine.
You can find the username and IP address in SSH Access section of your Linode dashboard.
First, upload source code to the machine:
scp -r linode <user>@<host>:.
Then, configure database access control settings:
export TURSO_URL=$(turso db show linode-example --url)
export TURSO_AUTH_TOKEN=$(turso db tokens create linode-example)

echo "TURSO_URL = $TURSO_URL" > .env
echo "TURSO_AUTH_TOKEN = $TURSO_AUTH_TOKEN" >> .env
and upload the .env file to the server:
scp .env <user>@<host>:linode
Then connect to the server:
ssh -A <user>@<host>
Stop the hello world application running there:
sudo pm2 stop hello
[PM2] Applying action stopProcessId on app [hello](ids: [ 0 ])
[PM2] [hello](0) ✓
┌────┬──────────┬─────────────┬─────────┬─────────┬──────────┬────────┬──────┬───────────┬──────────┬──────────┬──────────┬──────────┐
│ id │ name     │ namespace   │ version │ mode    │ pid      │ uptime │ ↺    │ status    │ cpu      │ mem      │ user     │ watching │
├────┼──────────┼─────────────┼─────────┼─────────┼──────────┼────────┼──────┼───────────┼──────────┼──────────┼──────────┼──────────┤
│ 0  │ hello    │ default     │ N/A     │ fork    │ 0        │ 0      │ 0    │ stopped   │ 0%       │ 0b       │ root     │ disabled │
└────┴──────────┴─────────────┴─────────┴─────────┴──────────┴────────┴──────┴───────────┴──────────┴──────────┴──────────┴──────────┘
Setup and start our application:
cd linode
npm i
node index.js
and now you can access the endpoint with the reverse DNS name that you will find under the network tab.
For example, if your IP address is 172.232.134.53, then the reverse IP address is 172-232-134-53.ip.linodeusercontent.com.
curl -s https://<reverse DNS address> | jq
[
  {
    "rank": 1,
    "player": "Alice",
    "score": 100
  },
  {
    "rank": 2,
    "player": "Bob",
    "score": 50
  },
  {
    "rank": 3,
    "player": "Carol",
    "score": 1
  }
]

