Plug two N64 controllers to an Arduino and turn your Arduino in a USB HID joystick! Play your favourite games on the pc with the best controller ever!
I've had some trouble setting up MickMad's original project, so I decided to fix it. Somehow my Arduino swapped the buttons with the joystick, so I had to fix the order. I use mupen64plus (github), so I generated the config file so that both controllers work with it directly.
We will use Linux or OSX to program the Arduino's main processor and also the atmega16u2 (the programmer). The atmega16u2 chip allows us to use the Arduino as a USB HID device.
git clone github.com/twinone/n64-arduino n64-arduino
osx:
brew install dfu-programmer
aptitude:
apt-get install dfu-programmer
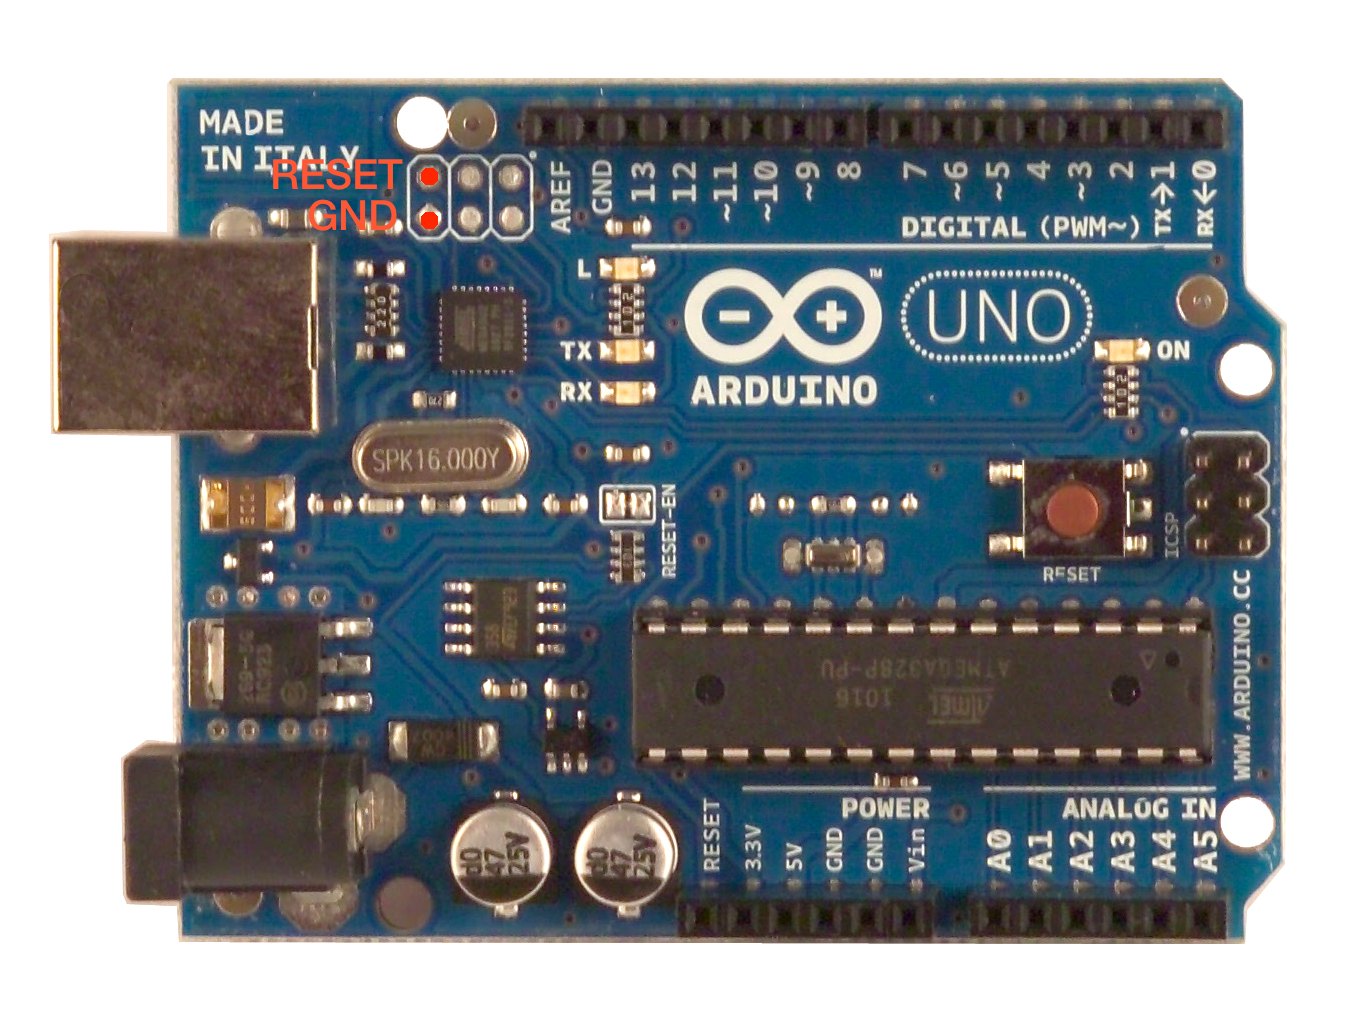
- Make sure you use an Arduino Uno R3 (or other board with an atmega16u2 for the programmer).
- Open the sketch in the Arduino IDE and upload it to your Arduino.
- Connect your Arduino to your computer via USB.
- Short the two pins marked in this picture together with a jumper wire (don't worry, you won't burn anything):
- Unshort them again.
- Make sure your Arduino isn't listed in the Arduino IDE's serial port list.
I've attached a very simple script that does the flashing, mainly because I was too lazy to write the 3 commands all the time while I was debugging.
./flash.sh joystick.hex
This will render the programmer useless. If you want to upload a new sketch to your Arduino, you'll have to use ./flash.sh uno.hex again, which contains the programmer's original firmware.
Here's the pinout for your N64 Controller's plug:

- Connect the Controller's
VCCto the Arduino's3v3 pin(3.3v) - Connect the Controller's
DATAto the Arduino'sdigital pin 2(pin 3 for the second controller) - Connect the Controller's
GNDto the Arduino'sGNDpin
- Reconnect your arduino to your computer
- Copy the config file to where it belongs:
mkdir -p ~/.config/mupen64plus/
cp mupen64plus.cnf ~/.config/mupen64plus/
(If you already have a config file, just copy the controller parts)
- Play!
This project is an extension of MickMad's awesome project
More awesome people this project is built upon Darran original Arduino Joystick
Andrew Brown's instructable