SmartGW is a VPN Gateway/Proxy that allows you to reroute certain internet domains requests to go through a VPN tunnel while keeping other internet domains goes through your ISP gateway.
Example:
- Your request to netflix.com (from all devices in your network) --> Traffic to netflix.com will go through the VPN tunnel.
- Your request to youtube.com (from all devices in your network) --> Traffic to youtube.com will go through your ISP gateway.
This can help you to:
- Access Geo-restricted content.
- Access any blocked domains.
- Use it with all your devices (Laptop, Mobiles, SmartTV...etc).
- Utilize your full ISP network speed to access any site that you don't want it to go through the VPN tunnel.
- More browsing privacy?.
- Can work with all your devices in your local network (PC, Laptop, Mobiles, SmartTV...etc).
- No need to change any settings in your devices, install SmartGW and configure the DNS in your internet router.
- Simple GUI to check SmartGW status and to add/remove any domain.
- Can be configured as http proxy to redirect all data to go through the VPN tunnel.
- Automatically connect to least busy, low latency VPN servers in a given country.
- Auto retry and auto-failover to next best VPN server if the connection dies.
The setup is straightforward, you just need a Linux server in your network with a VPN subscription (below instructions support NordVPN for now).
- You must have a VPN subscription from NordVPN (The method below can work with any VPN provider, but you need to modify the installation script).
- A Linux server with a static IP in your local network.
- Install Linux (the instructions below tested with a fresh installation of Ubuntu Server 18.04).
- Set a static IP in your server.
- Run SmartGW installer
bash -c "$(curl -sSL http://bit.ly/Install-SmartGW)"- Open your browser and type your SmartGW ip (port 8081) (http://Your-Server-IP:8081/) & define which network interface to use.
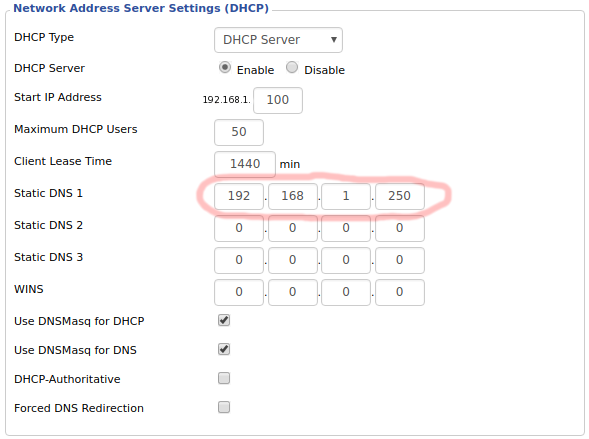
- Define SmartGW IP address as the only DNS entry in the router.
Log into your router’s configuration page and find the DHCP/DNS settings.
Note: make sure you adjust this setting under your LAN settings and not the WAN.
- Enjoy!.


 .
.