THIS README IS A WIP AND IS CURRENTLY MISSING A FEW DETAILS
Hey! This integration started when I purchased a new home. It's a Bryant unit. Sure enough, I bought a house with one of the 5% of units that isn't compatible with Nest thermostats. I started my research and found the Infinitive project. I had wanted to dig deeper into python so an HA integration seemed like the perfect opportunity.
- Buy a Raspberry Pi (Don’t forget to get a micro SD card for it) - I'm running mine on a Pi Zero with no issues. Here's the Pi Zero I purchased
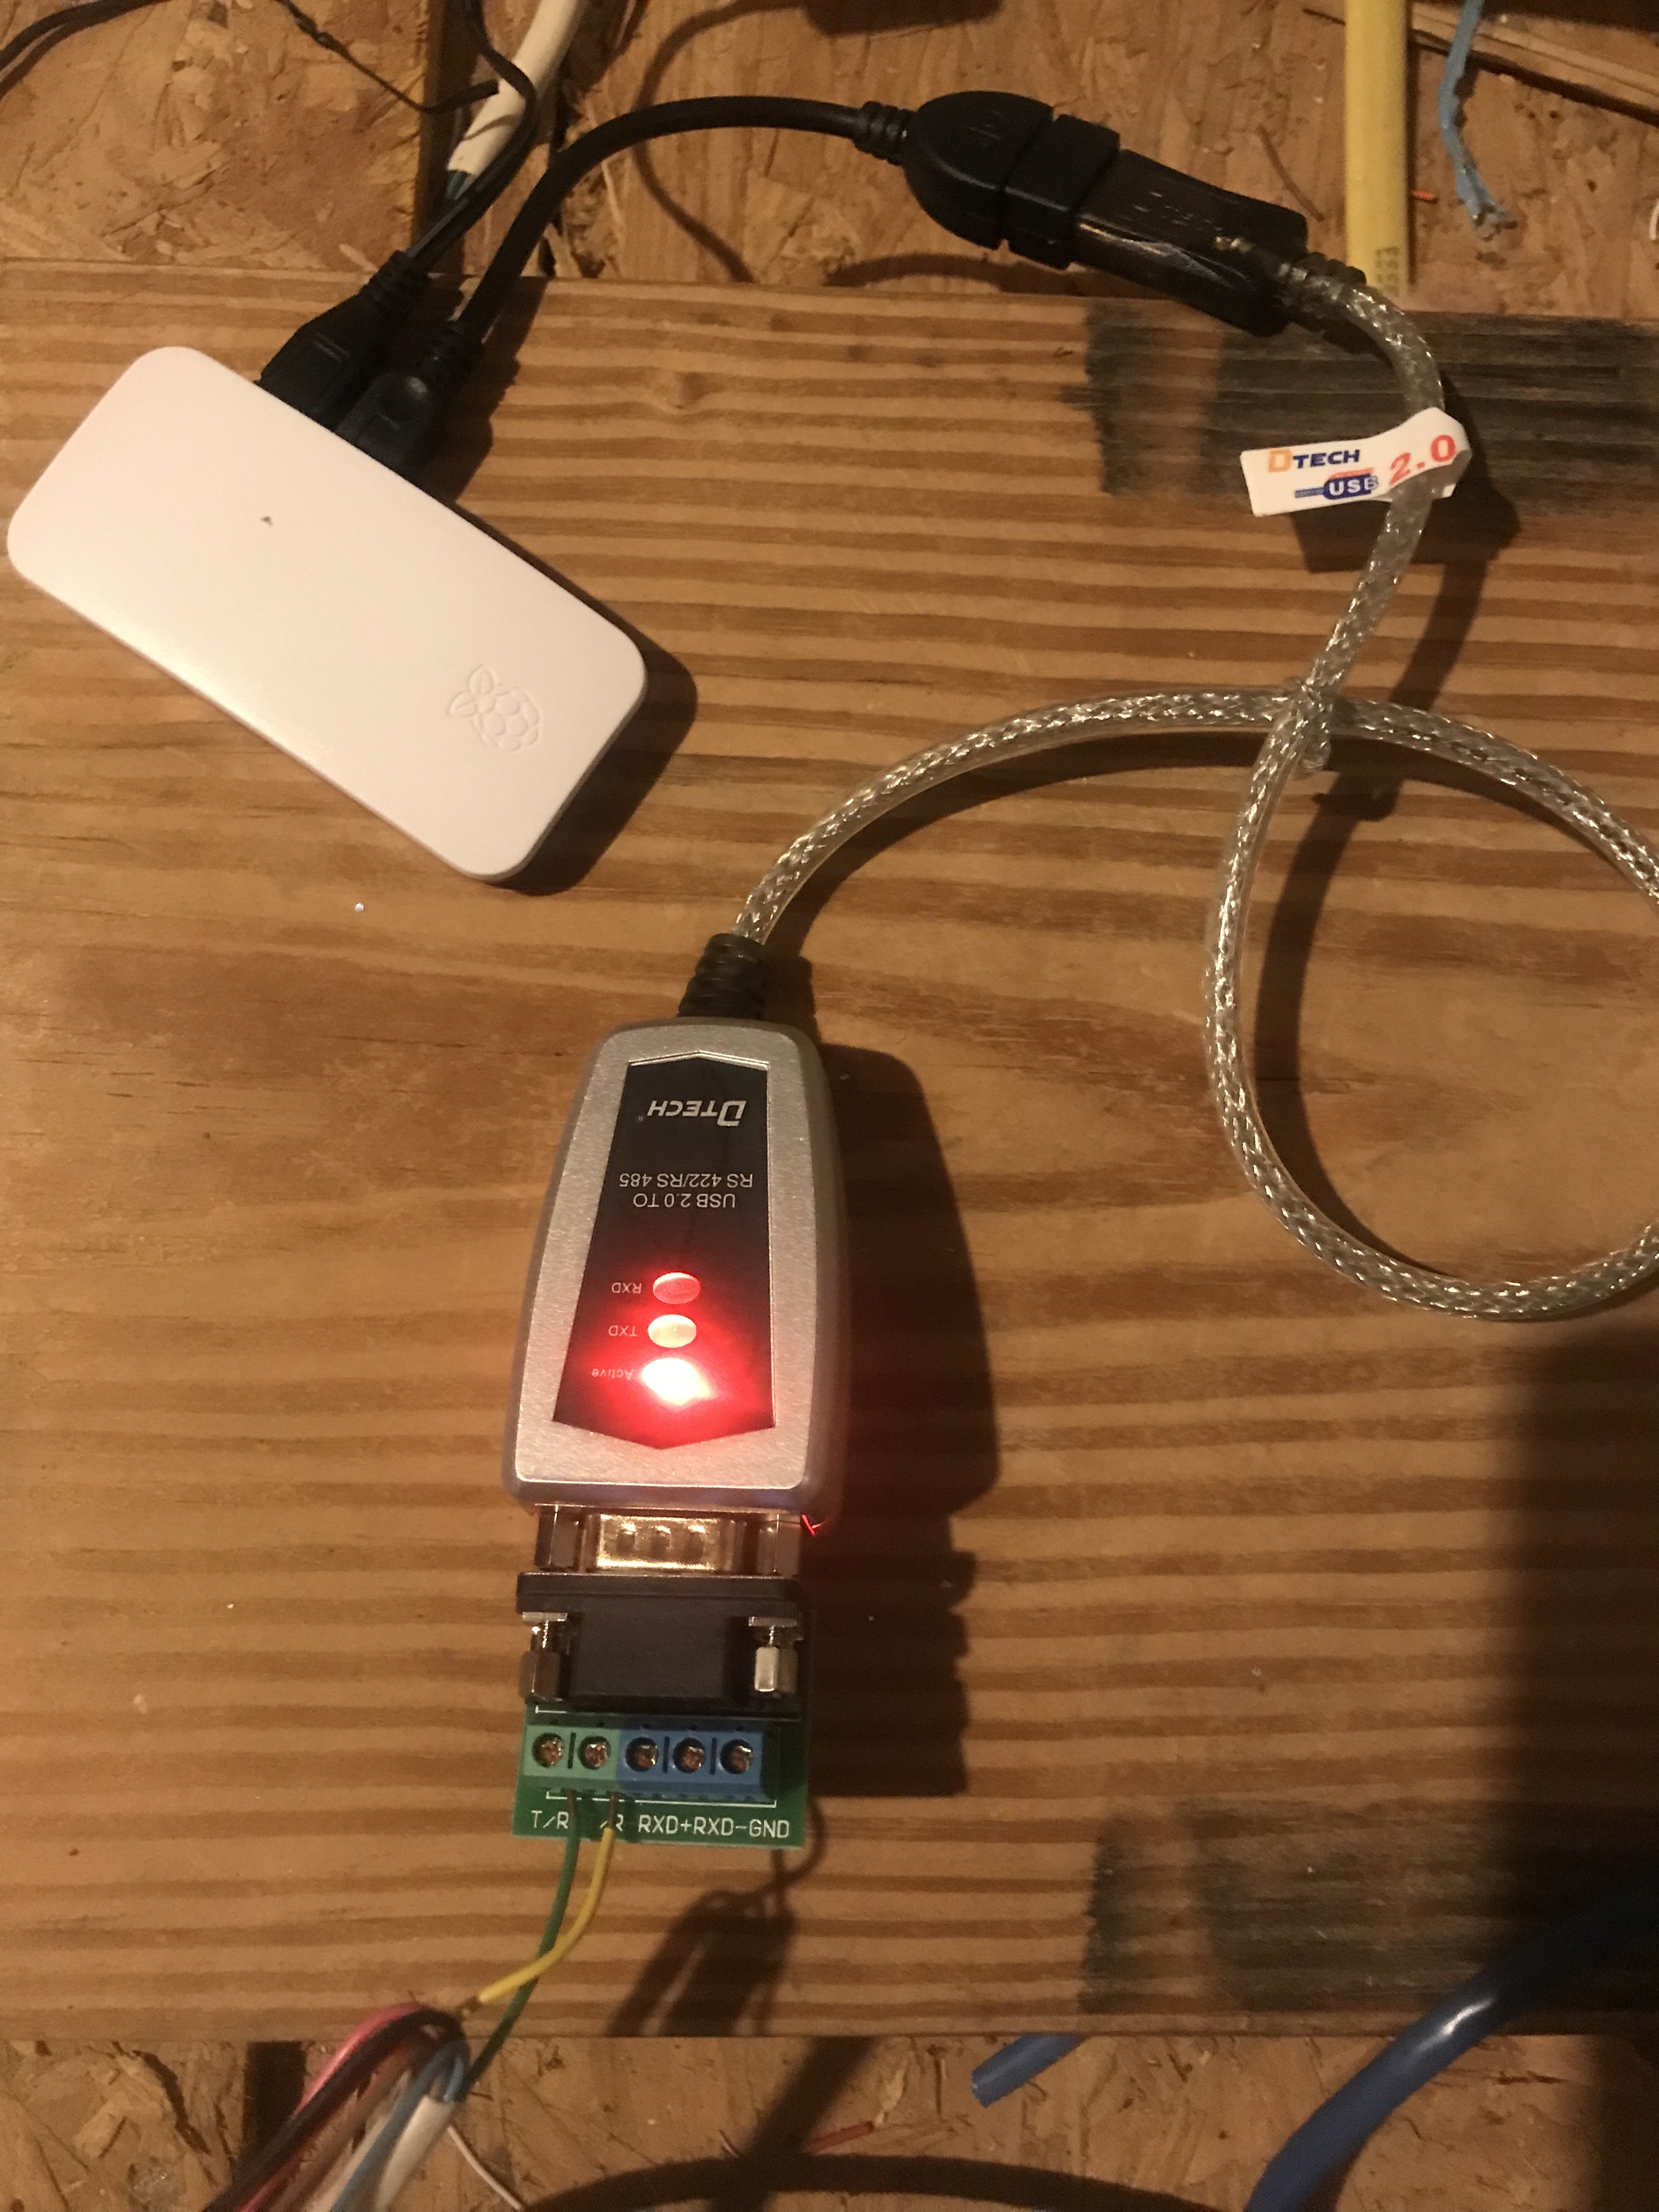
- Buy a RS-485 USB adapter 11 for the Raspberry Pi Here's the RS-485 USB adapter I purchased
- Buy some wire - I think 14/2 romex wire is what I used. You should be able to pick it up at your local hardware store. You need enough to reach from your A/C unit system board to the location of your RS-485 adapter.
- Flash the latest Lite version of Raspbian to your SD card - Try Belana Etcher if you need an application that can write the Raspbian image to the SD card.
- Setup Raspbian install to have a fixed IP on my network
- Once the Pi is on your network, running the folowing:
apt-get install golang-go
export GOPATH = /root/go
go get github.com/Will1604/infinitive
go build github.com/Will1604/infinitive
- Place this file at /etc/systemd/system/infinitive.service: Note: if your RS-485 adapter does not show up as /dev/ttyUSB0 please adjust the file below to reflect the proper device name
[Unit]
Description=Infinitive Service
After=network.target
StartLimitIntervalSec=0
[Service]
Type=simple
Restart=always
RestartSec=1
User=root
ExecStart=/root/go/bin/infinitive -httpport=8080 -serial=/dev/ttyUSB0
[Install]
WantedBy=multi-user.target
- After the infinitive.service file has been created run the following:
systemctl enable infinitive
systemctl start infinitive
- Run
systemctl status infinitiveto ensure that the service is running. - If all went well you should be able to browse to http://[rasbperry_pi_IP]:8080 and be presented with the Infinitive web interface
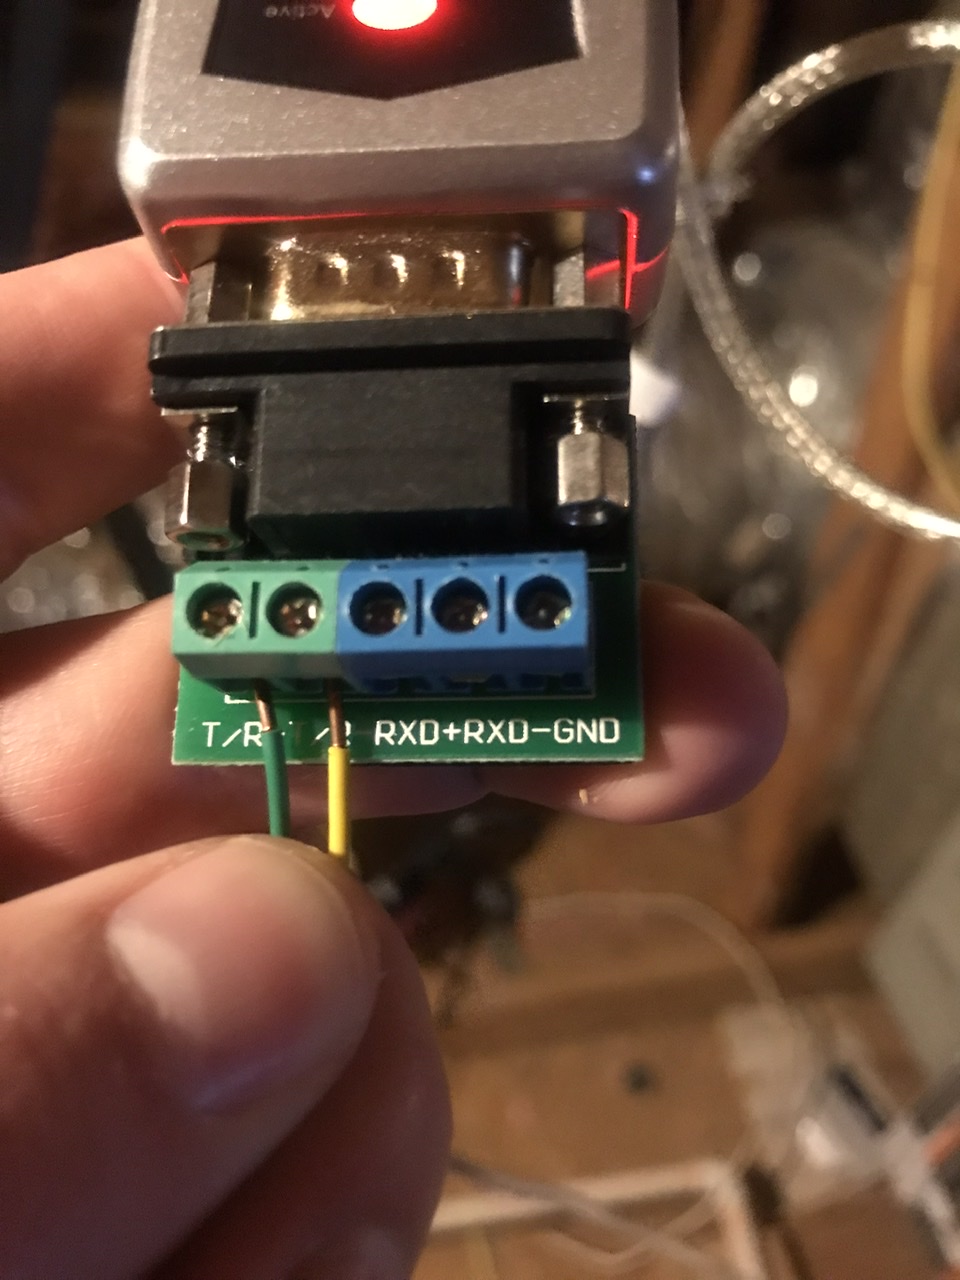
- Using the thermostat wire, I connected one end to the RS-485 adapter as shown in the pictures below
-
Green wire connects to the A port
-
Yellow wire connect to the B port
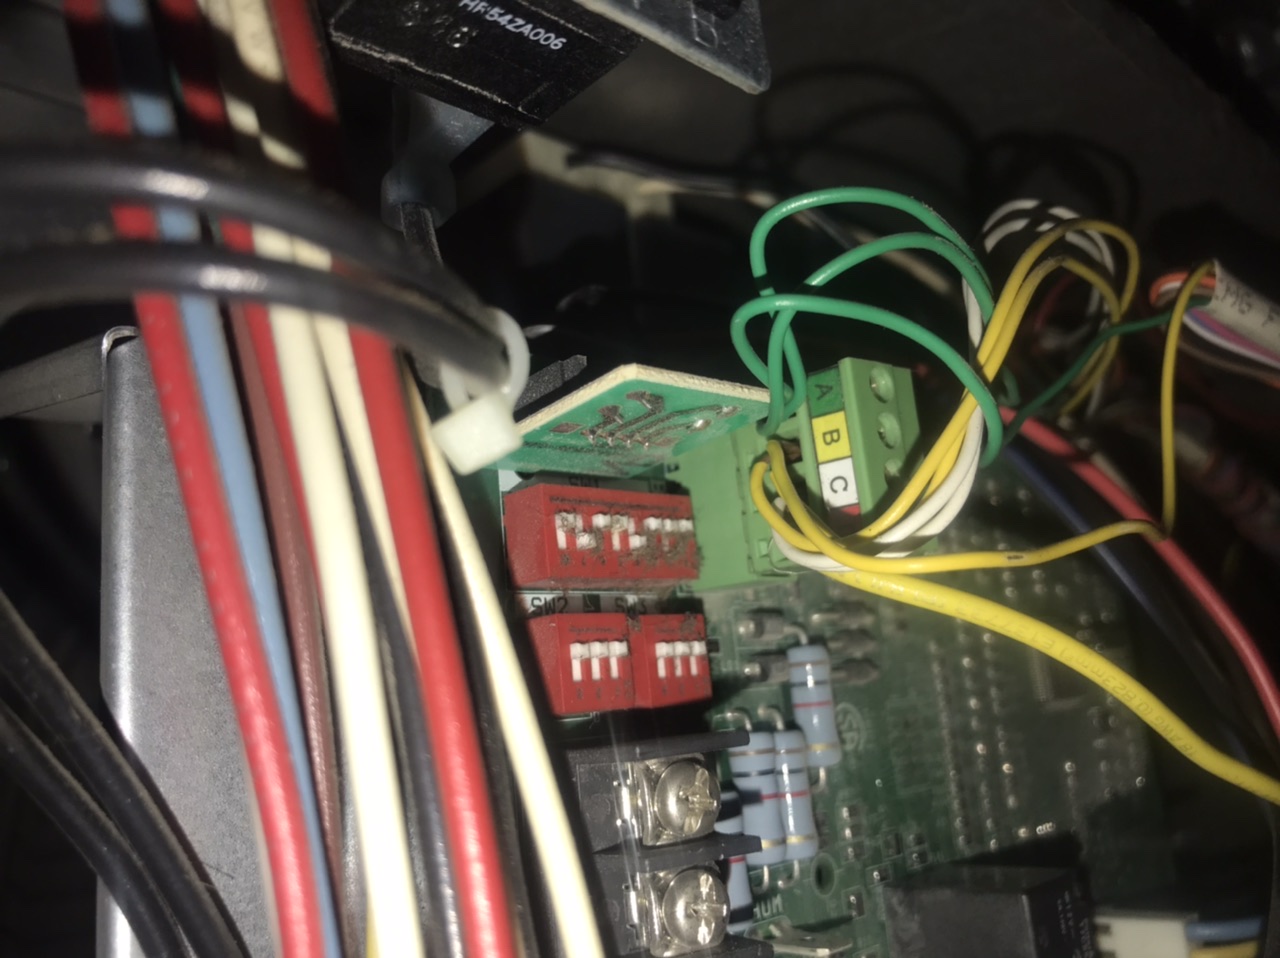
I connected the other end of the thermostat wire to the logic board in my attic unit. You will need to remove the cover from the unit and match up the green and yellow, killing power to the unit while you do it. mww012 explains this in more detail above.
-
Download this Infinitive repo - Either run
git clone https://https://github.com/mww012/ha_customcomponents.gitfrom yourcustom_componentsdirectory or download the repo and copy it to that directory -
Add this to your configuration.yaml and restart:
climate:
- platform: infinitive
host: [Raspberry Pi IP]
port: 8080
- Restart Home Assistant
- Your HVAC unit should show up in Home Assistant with entity_id climate.infinitive_thermostat