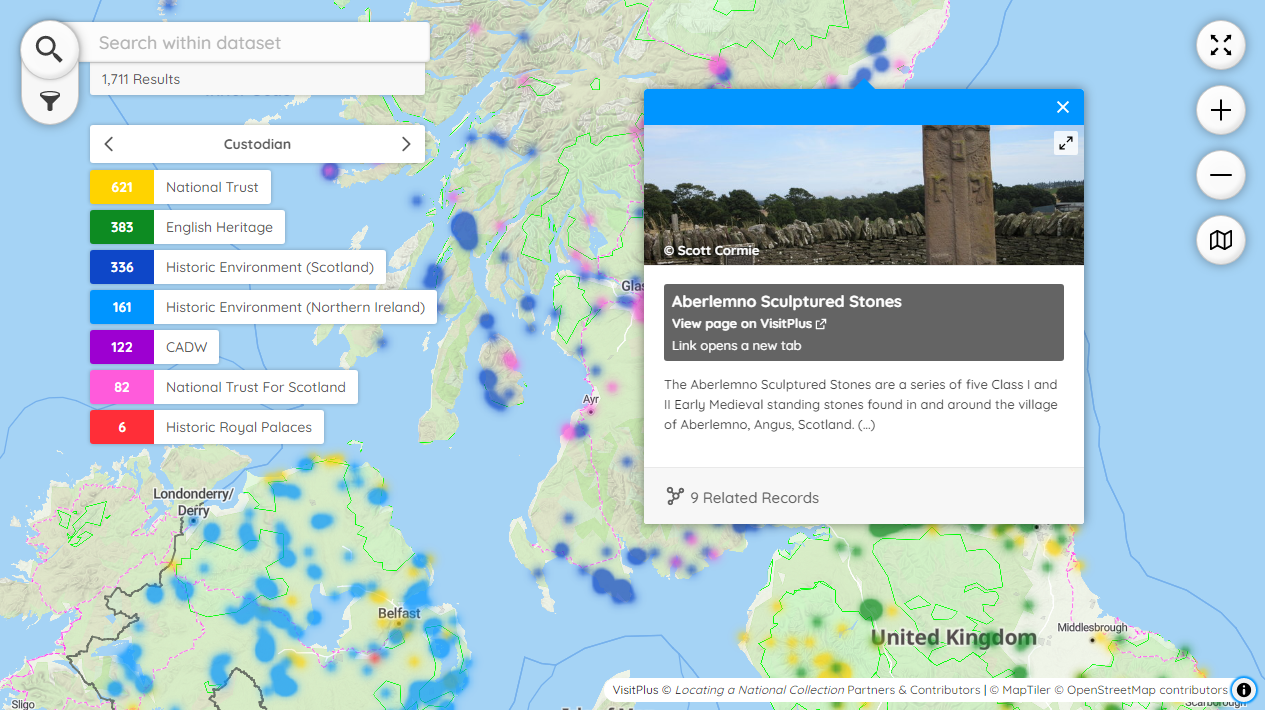
Peripleo is a browser-based tool for the mapping of things related to place. Originally an initiative of the Pelagios Network, it was developed early in 2022 as part of the British Library's Locating a National Collection project (LaNC) for the discovery and spatial visualisation of collection data. LaNC was a Foundation project within the AHRC-funded Towards a National Collection Programme.
 Example of Peripleo in action: LaNC VisitPlus dataset.
Maps made using Peripleo can be embedded in other web sites, wikis, and blogs using IFrames. See here for some tips on how to do this.
- Dataset(s) formatted as Linked Places Format (LPF) or GeoJSON. These are not complicated formats, and are described here. If your data is in a spreadsheet or delimited text (for example CSV), you will need to convert it using a tool such as Locolligo.
- Somewhere to host and serve a simple HTML file, together with any datasets not hosted elsewhere. This guide continues with instructions for hosting your map on GitHub Pages: you might instead copy the files from the
docsfolder to another server and go straight to the Configuration Guide.
- If you do not already have a GitHub account, go to https://github.com/signup and create one.
- Sign in to GitHub.
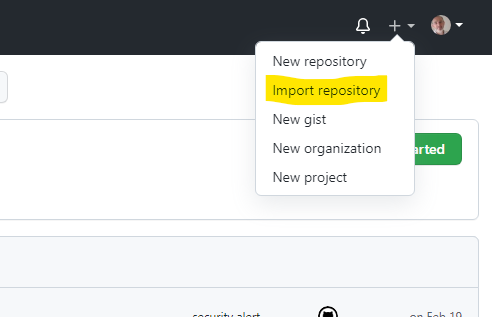
- Click on
Import Repository.
- Type
https://github.com/britishlibrary/peripleoas your 'old repository's clone URL'. - Type a name for your new repository (perhaps related to the specifics of the map you are going to create), and decide whether to make it Public or Private.
- Click on
Begin Import, and wait for the process to complete. - Open your new repository either by clicking on the link shown when import completes, or by following the link to 'Your repositories' revealed by clicking on your name-badge icon, top-right.
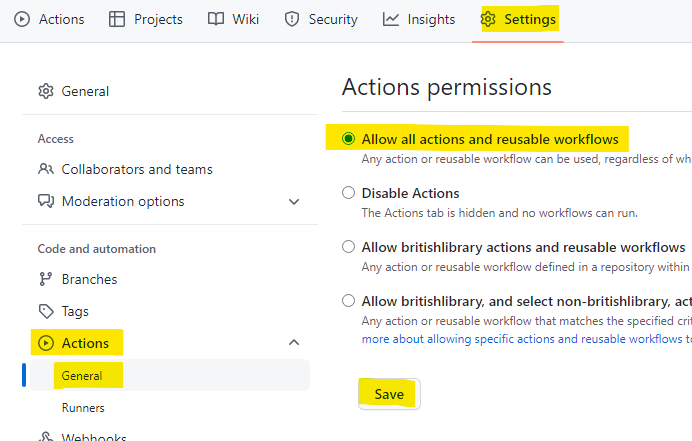
- Click on
Settings,ActionsandGeneral.
- In the 'Actions permissions' section, select
Allow all actions and reusable workflowsand click onSave. - Click on
Pages. - In the 'Source' section, click on 'None' and select
Main; next to that, select folder/docsin the drop-down list. - Click on
Save. - The system will then give you the URL on which your site is published. Please note that now and at every time you edit your site it may take a few minutes for it to be (re-)built and deployed before the changes are evident. You can see progress by clicking on
Actions. - You can now check that Peripleo is running correctly with the default example configuration.
- If you are familiar with the procedure for editing files on GitHub, skip the rest of this page and move on to the Configuration Guide.
If you need to create a dataset, you could use Locolligo, following the instructions given here.
- Navigate to your repository and click on
Code, then select thedocsfolder. - Now select the
datafolder. - Click on
Add File,Upload Files. - Follow the instructions for uploading (or drag-n-dropping) your datafile, and it will then be in the correct folder so that when you come to the configuration step all you will need to change in the
peripleo.config.jsonis the filename.
- Navigate to your repository and click on
Code, then select thedocsfolder. - Click on a filename to see its contents, and then on the pencil icon to begin editing.
- When you have finished editing each file, you need to type a very brief description of the changes you have made, and then click on
Commit changes. - After a minute or so, you can check your modifications by going to your publication URL.
- Now move on to the Configuration Guide.
You can use Peripleo to display image annotations created with the Recogito geo-annotation platform. Check our Recogito guide for details.


