Note: if you decide to do those changes to your air purifier, you take all the responsibility for doing so with all it's consequences such as loosing warranty for your device or even destroying it!
- ESP8266 WiFi controller (for example Wemos D1 mini)
- 3 x PC817-B Sharp optocouplers
- 4 x 270 ohms resistors
- 1 x 10 uF electrolytic capacitor
- some dupont jumper wiring cables
- some soldering skills
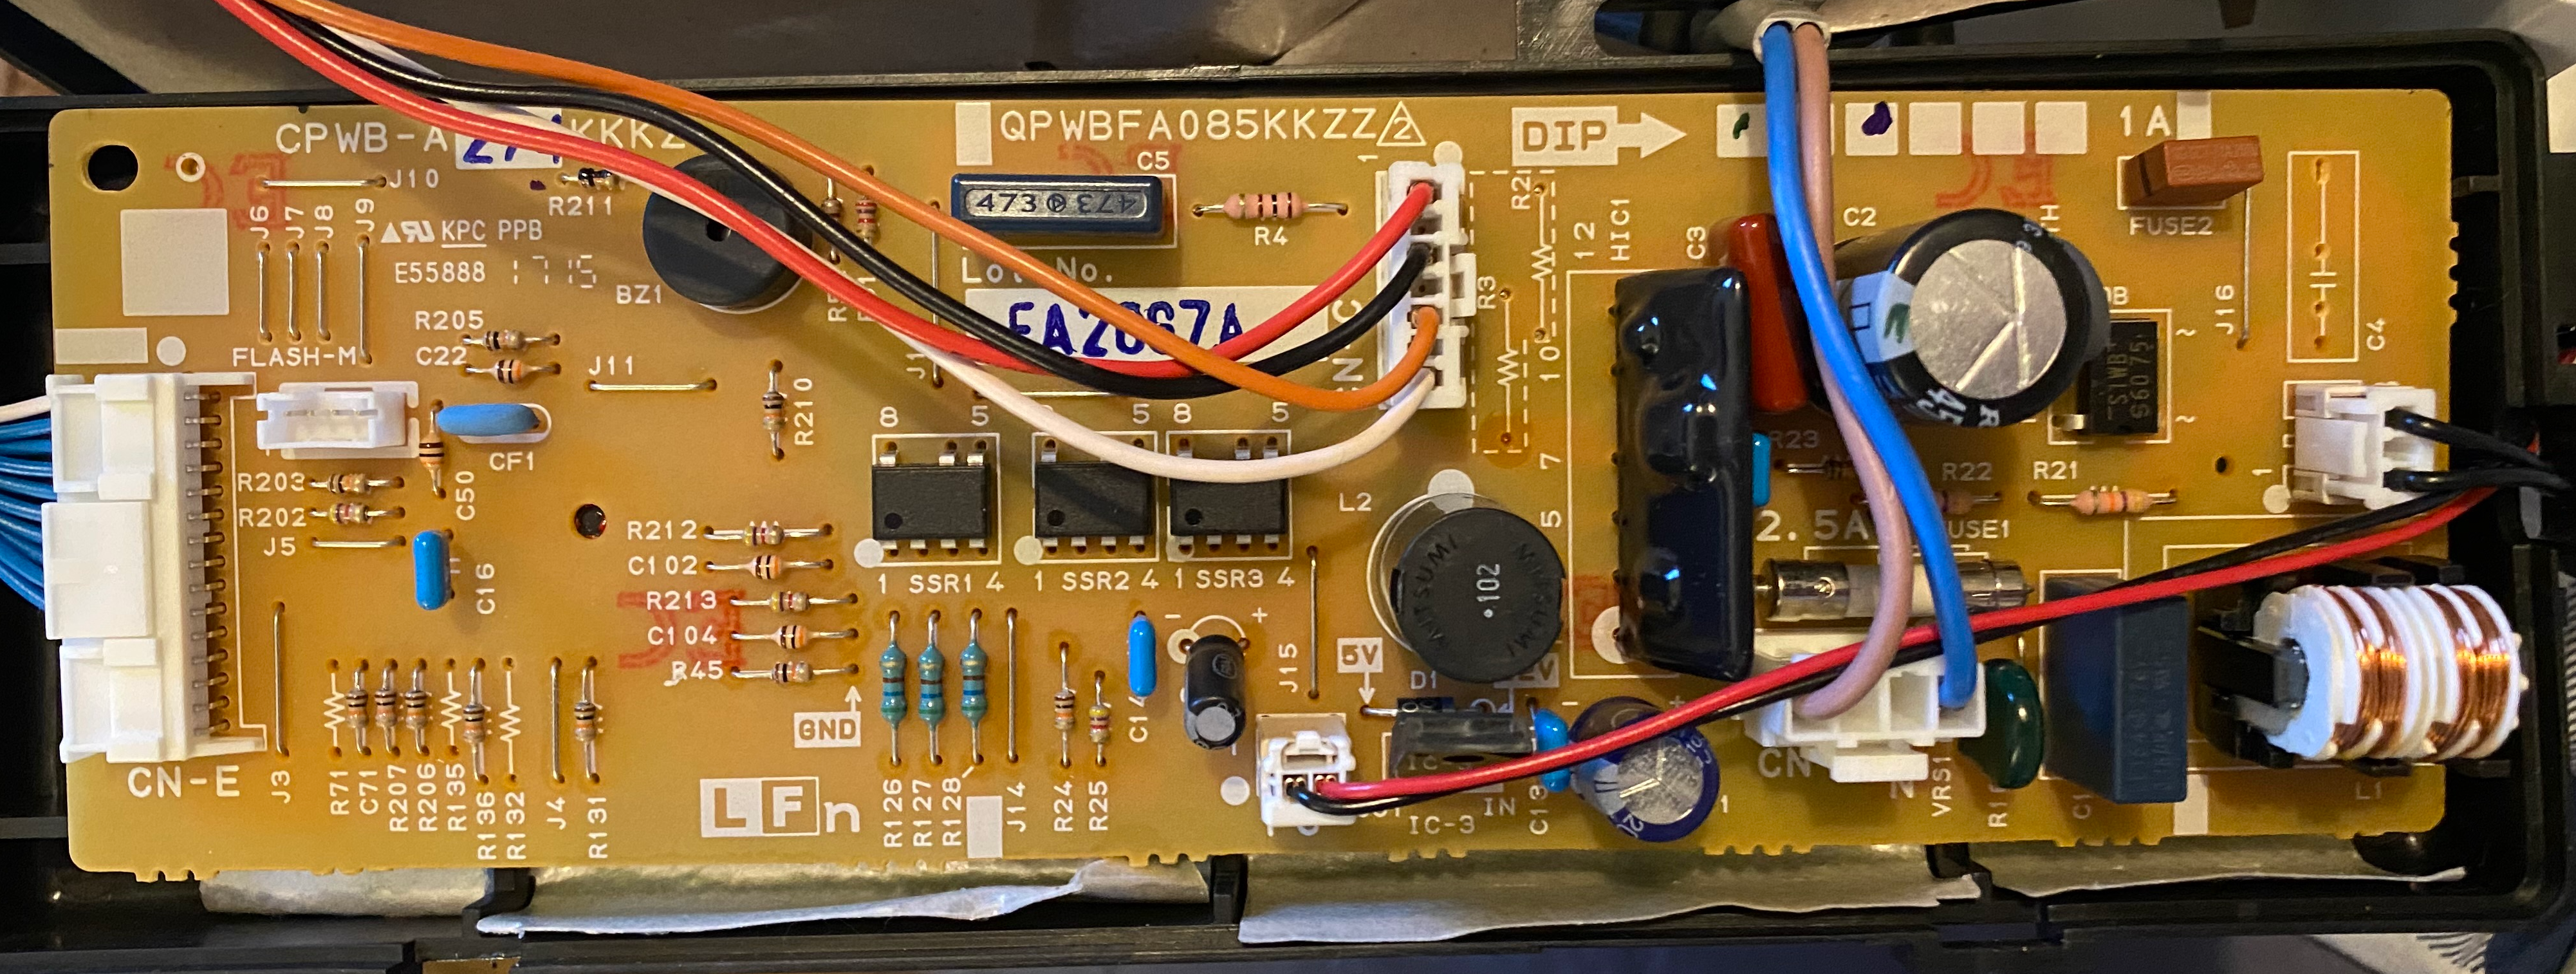
To integrate the ESP8266 with Sharp FU-Y30 air purifier you need to access both of it's PCBs. One is the mainboard and it is at the bottom of the device closed in the black plastic box.
Second board (on the upper side of the device) contains only some buttons and LEDs, but you will need to solder some wires there as well.
Both boards are labelled as QPWBFA085KKZZ with additional CPWB-A274KKKZ number.
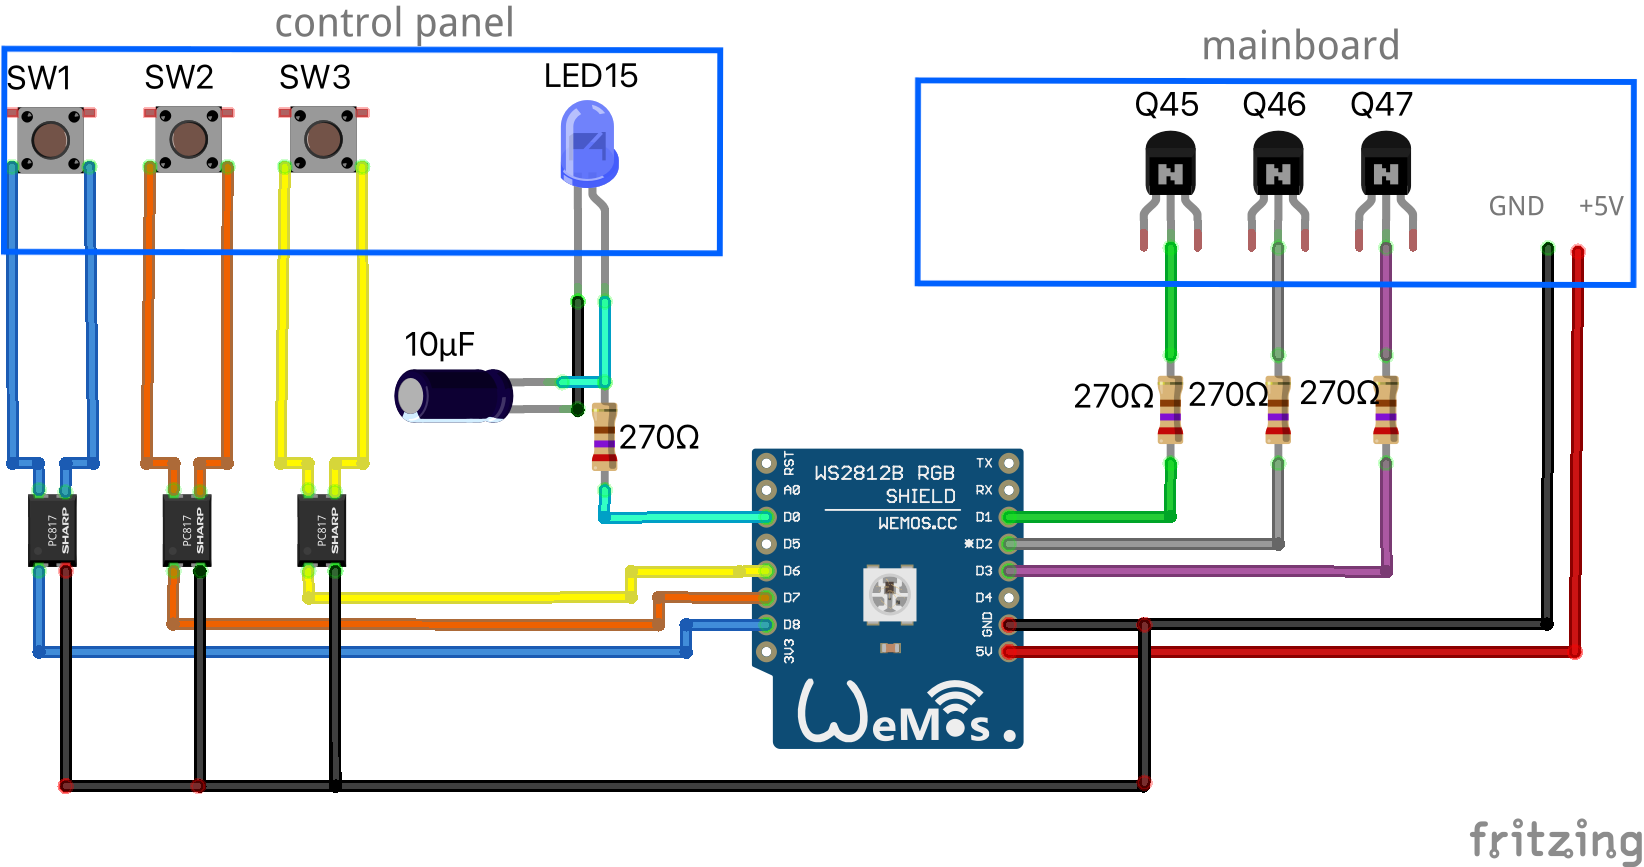
You need to connect your ESP to the points marked as circles on the Sharp's PCBs:
- D1 pin to the Q45 transistor's base through 270 ohms resistor (this is where we read the HIGH mode device state from)
- D2 pin to the Q46 transistor's base through 270 ohms resistor (this is where we read the MEDIUM mode device state from)
- D3 pin to the Q47 transistor's base through 270 ohms resistor (this is where we read the LOW mode device state from)
- D0 pin to the LED15+ pin through 270 ohms resistor (you should also connect capacitor between the LED's pins)
- D6 to the SW3 (mode button) through optocoupler connected also to ESP's GND
- D7 to the SW2 (ion on/off button) through optocoupler connected also to ESP's GND
- D8 to the SW1 (power button) through optocoupler connected also to ESP's GND
- GND pin to GND marked on the device mainboard
- 5V pin to 5V marked on the device mainboard
Note the places you need to connect on the Sharp's PCBs:
When you connect to the Q45, Q46 and Q47, you need to solder your wires to base (B) pins of those transistors.
Be sure to properly connect the optocouplers with switch buttons on the control panels (note the polarity).
I recommend to use platformio to compile the project. After you deploy it to your ESP8266 device, the new Access Point should appear in your WiFi neighborhood (it's name should start with "ESP"). Just connect to this AP (no password required), and then go to http://192.168.4.1/ to configure the WiFi settings for your device. You will also be able to enter the MQTT server of your choice (you can use some of public MQTT servers with no problem).
Once you deploy your code to the ESP8266 and configure it as your WiFi client, you will be able to perform OTA updates. Just uncomment the espota upload protocol and change the ESP8266 IP address in the platformio.ini file.
See the demo of how you can control you purifier using mosquito command line client:
This firmware is able to integrate with Home Assistant out of the box if you have enabled the MQTT extension.
You can also control the purifier via telnet on port 23 using the remote debug feature. Just connect to the ESP's IP on port 23 to see the status of the device and control it via command line.


